参考
我是照着这个学习, 并且自己又总结了一下,
原作者:
添加链接描述
准备数据
准备 buckt_data.txt 在 /root/soft 目录下面
1,name12,name23,name34,name45,name56,name67,name78,name89,name9
insert语句两种插入方式:
insert into 表名 values(),(),(),() — 这种查询方式太麻烦了,得手动插入,
insert into 表名 select 语句 — 这种方式是直接把查询出来的数据作为数据源存到表里面.
开始创建临时表
向分桶表导入数据时,必须运行MapReduce程序,才能实现分桶操作!
load的方式,只是执行put操作,无法满足分桶表导入数据!而你需要执行MapReduce的程序在能导数据,给所有的数据一次进行hash算法.
所以导入分桶表,必须执行insert into ,因为insert into 执行MapReduce程序.
sql:
create table test(id int comment 'ID',name string comment '名字')comment '测试分桶中间表'ROW FORMAT DELIMITED FIELDS TERMINATED BY ',';
往临时表里面导入数据
sql :
load data local inpath '/root/soft/buckt_data.txt' into table test;
创建分桶表
sql:
create table test_bucket(id int comment 'ID',name string comment '名字')comment '测试分桶'clustered by (id) into 4 bucketsROW FORMAT DELIMITED FIELDS TERMINATED BY ',';
说明:
clustered by 是用什么分桶,根据id分桶,默认是通过hash算法,hash值相同的分区在一起.
into 4 buckets 是要4个结果文件,
SORTED BY (id desc) 是按照id降序排序.
将临时表里面的数据导入到分桶表里面
sql:
set hive.enforce.bucketing=true; --默认是不会帮你分桶的-- 需要打开强制分桶开关insert into test_bucketselect *from test;
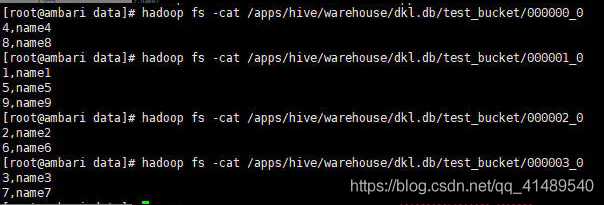
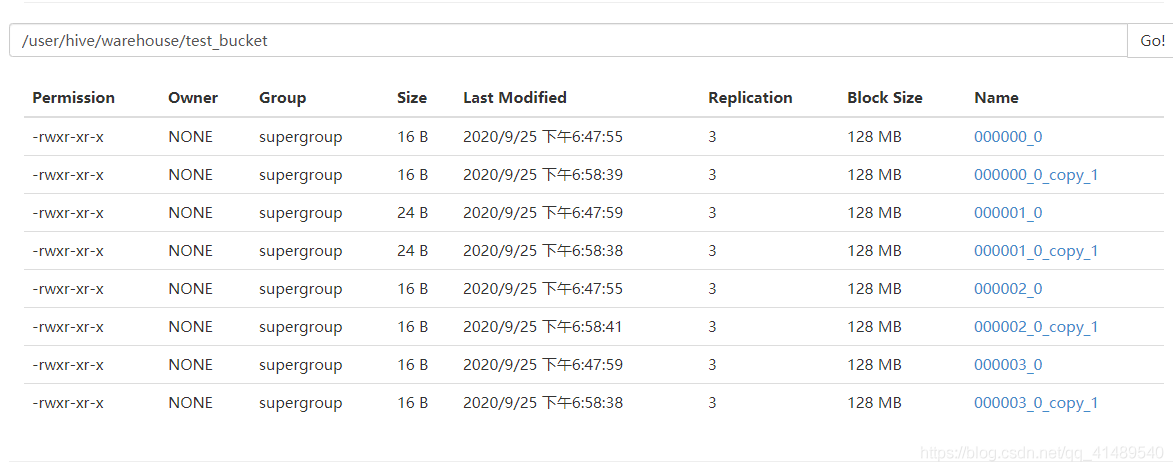
查看hdfs里面的数据
默认是hash分区器,当然可以自己自定义分区器
里面的内容

这个图是引用原作者的...
再次插入
sql:
insert into test_bucket select * from test;

这样会再产生新的四个文件

