此处仅讨论单体多模块的父子工程的打包配置, 可以推及springcloud多模块的打包, 一样一样的…
关于maven基础, 可以参考此笔记中的两篇文档:
https://www.yuque.com/fvy7xd/xinzhang/uy0tm7
https://www.yuque.com/fvy7xd/xinzhang/ll0ppb
classpath
参考: https://blog.csdn.net/wppwpp1/article/details/106628669
https://blog.csdn.net/qq_35772435/article/details/105251885
顾名思义, classpath指的是项目编译后的class文件的路径
因为编译后的文件路径与源程序是对应的, 因此classpath 等价于 main/java + main/resources + 第三方jar包的根目录。
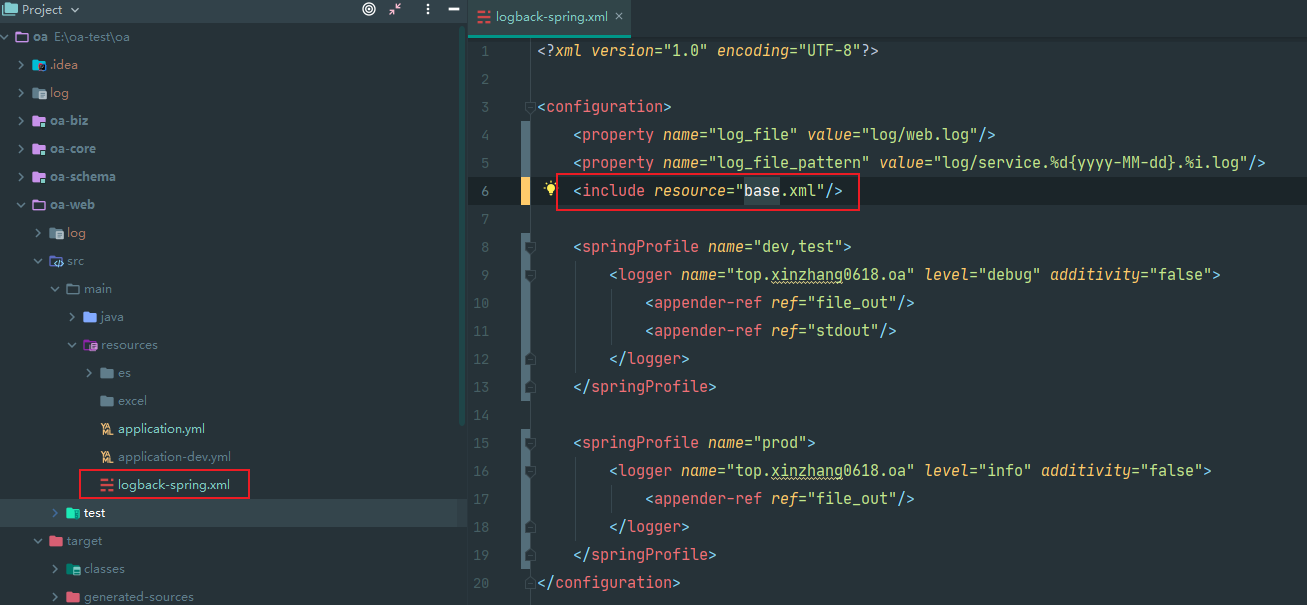
引用classpath路径下的文件,只需在文件名前加classpath, 比如指定log配置文件
server:port: 60001logging:config: classpath:logback-spring.xml
lib和classes同属classpath,两者的访问优先级为: lib>classes。
- classpath 和 classpath* 区别:
- classpath:只会到你的class路径中查找找文件;
- classpath*:不仅包含class路径,还包括jar文件中(class路径)进行查找。
打jar包
父工程pom配置
- 依赖版本管理以及插件版本管理
- jdk编译版本以及编译格式
项目版本 ```xml <?xml version=”1.0” encoding=”UTF-8”?> <project xmlns=”http://maven.apache.org/POM/4.0.0“
xmlns:xsi="http://www.w3.org/2001/XMLSchema-instance"xsi:schemaLocation="http://maven.apache.org/POM/4.0.0 http://maven.apache.org/xsd/maven-4.0.0.xsd">
4.0.0 top.xinzhang0618 oa pom 1.0.0-SNAPSHOT oa-core oa-schema oa-web oa-biz 1.8 1.8 1.8 UTF-8 1.0.0-SNAPSHOT
<dependencyManagement><dependencies><dependency><groupId>top.xinzhang0618</groupId><artifactId>oa-biz</artifactId><version>${project.version}</version></dependency><dependency><groupId>top.xinzhang0618</groupId><artifactId>oa-core</artifactId><version>${project.version}</version></dependency><dependency><groupId>top.xinzhang0618</groupId><artifactId>oa-schema</artifactId><version>${project.version}</version></dependency><dependency><groupId>top.xinzhang0618</groupId><artifactId>oa-web</artifactId><version>${project.version}</version></dependency><!--springboot, 此处import引入依赖版本管理--><dependency><groupId>org.springframework.boot</groupId><artifactId>spring-boot-dependencies</artifactId><version>2.1.3.RELEASE</version><type>pom</type><scope>import</scope></dependency><!--fastjson--><dependency><groupId>com.alibaba</groupId><artifactId>fastjson</artifactId><version>1.2.33</version></dependency><!--jwt--><dependency><groupId>com.auth0</groupId><artifactId>java-jwt</artifactId><version>3.10.3</version></dependency><!--mybatisPlus--><dependency><groupId>com.baomidou</groupId><artifactId>mybatis-plus-boot-starter</artifactId><version>3.3.2</version></dependency><!--mysql--><dependency><groupId>mysql</groupId><artifactId>mysql-connector-java</artifactId><version>6.0.6</version></dependency><!--druid--><dependency><groupId>com.alibaba</groupId><artifactId>druid-spring-boot-starter</artifactId><version>1.1.23</version></dependency><!--oss--><dependency><groupId>com.aliyun.oss</groupId><artifactId>aliyun-sdk-oss</artifactId><version>3.10.2</version></dependency><!--httpclient--><dependency><groupId>org.apache.httpcomponents</groupId><artifactId>httpclient</artifactId><version>4.5.12</version></dependency><!-- transmittable-thread-local --><dependency><groupId>com.alibaba</groupId><artifactId>transmittable-thread-local</artifactId><version>2.11.5</version></dependency></dependencies></dependencyManagement><build><pluginManagement><plugins><plugin><groupId>org.apache.maven.plugins</groupId><artifactId>maven-jar-plugin</artifactId><version>3.1.1</version></plugin><plugin><groupId>org.apache.maven.plugins</groupId><artifactId>maven-resources-plugin</artifactId><version>3.1.0</version></plugin><plugin><groupId>org.apache.maven.plugins</groupId><artifactId>maven-dependency-plugin</artifactId><version>3.1.1</version></plugin><plugin><groupId>org.apache.maven.plugins</groupId><artifactId>maven-compiler-plugin</artifactId><version>3.8.0</version></plugin><plugin><groupId>org.springframework.boot</groupId><artifactId>spring-boot-maven-plugin</artifactId><version>2.1.3.RELEASE</version></plugin></plugins></pluginManagement></build>
<a name="1Ttu0"></a>### web(springboot模块)打包配置- springboot打包插件参考: [https://blog.csdn.net/taiyangdao/article/details/75303181](https://blog.csdn.net/taiyangdao/article/details/75303181)<br />注意需加上repackage的插件目标, repackage会将web依赖的模块都打进xxx-web.jar里- 资源过滤通过filter过滤后的资源文件, 会视为系统的配置文件, 其中的${}变量, 编译时会被赋值; 而不想要excel等文件的${}被赋值, 在filter中需排除这类文件```xml<?xml version="1.0" encoding="UTF-8"?><project xmlns="http://maven.apache.org/POM/4.0.0"xmlns:xsi="http://www.w3.org/2001/XMLSchema-instance"xsi:schemaLocation="http://maven.apache.org/POM/4.0.0 http://maven.apache.org/xsd/maven-4.0.0.xsd"><parent><artifactId>oa</artifactId><groupId>top.xinzhang0618</groupId><version>1.0.0-SNAPSHOT</version></parent><modelVersion>4.0.0</modelVersion><artifactId>oa-web</artifactId><dependencies><dependency><groupId>top.xinzhang0618</groupId><artifactId>oa-biz</artifactId></dependency><dependency><groupId>top.xinzhang0618</groupId><artifactId>oa-core</artifactId></dependency><dependency><groupId>top.xinzhang0618</groupId><artifactId>oa-schema</artifactId></dependency><!--springbootWeb--><dependency><groupId>org.springframework.boot</groupId><artifactId>spring-boot-starter-web</artifactId></dependency><!--springbootTest--><dependency><groupId>org.springframework.boot</groupId><artifactId>spring-boot-starter-test</artifactId><scope>test</scope></dependency></dependencies><build><resources><resource><directory>src/main/resources</directory><includes><include>excel/**</include><include>es/**</include></includes><filtering>false</filtering></resource><resource><directory>src/main/resources</directory><filtering>true</filtering></resource></resources><plugins><plugin><groupId>org.springframework.boot</groupId><artifactId>spring-boot-maven-plugin</artifactId><executions><execution><goals><goal>repackage</goal></goals></execution></executions></plugin></plugins></build></project>
其他补充
- 打完jar后启动命令: java -jar -Dspring.profiles.active=dev oa-web-1.0.0-SNAPSHOT.jar
- 依赖模块无需配置打包插件等
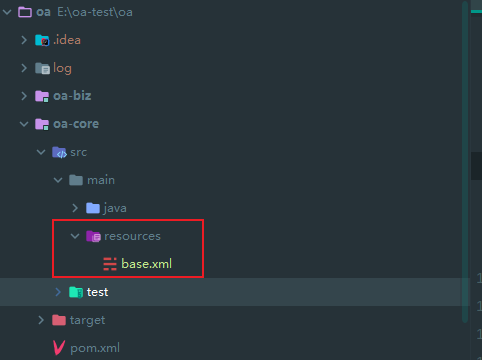
- 其他模块若有资源文件, 一样需要放到resources文件夹下供web模块引用, 比如base.xml的引用, 见下
打包结果分析
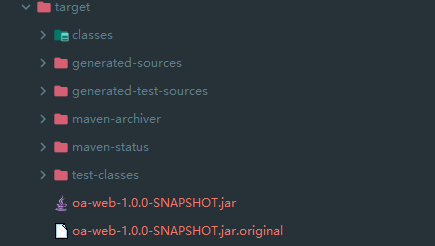
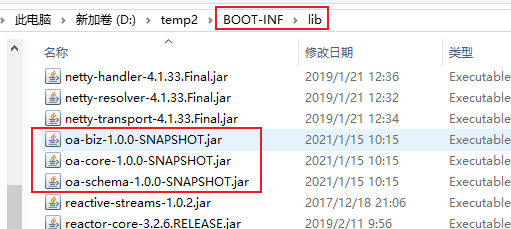
我们解压oa-web-1.0.0-SNAPSHOT.jar,所有的jar包在BOOT-INF/lib下, 其中也能找到依赖的模块的jar包, 打完包后jar大小为36.7M
配置分离
打zip包
参考: https://blog.csdn.net/qq_38279833/article/details/105513529
父工程加个输出目录的配置, 注意basedir是web工程的根目录, ${basedir}/../target是父工程下的target目录
<properties><dist.path>${basedir}/../target</dist.path><java.version>1.8</java.version><maven.compiler.source>1.8</maven.compiler.source><maven.compiler.target>1.8</maven.compiler.target><project.build.sourceEncoding>UTF-8</project.build.sourceEncoding><project.version>1.0.0-SNAPSHOT</project.version></properties>
web工程变更如下:
- 更改资源文件的输出路径
- springboot打包插件打包方式为zip包, 并指定jar输出目录
增加dependency插件, 将web工程依赖的包复制进指定jar目录 ```xml <?xml version=”1.0” encoding=”UTF-8”?> <project xmlns=”http://maven.apache.org/POM/4.0.0“
xmlns:xsi="http://www.w3.org/2001/XMLSchema-instance"xsi:schemaLocation="http://maven.apache.org/POM/4.0.0 http://maven.apache.org/xsd/maven-4.0.0.xsd">
<artifactId>oa</artifactId><groupId>top.xinzhang0618</groupId><version>1.0.0-SNAPSHOT</version>
4.0.0 oa-web top.xinzhang0618 oa-biz top.xinzhang0618 oa-core top.xinzhang0618 oa-schema org.springframework.boot spring-boot-starter-web org.springframework.boot spring-boot-starter-test test src/main/resources ${dist.path} false excel/ es/ src/main/resources ${dist.path} true org.springframework.boot spring-boot-maven-plugin ZIP non-exists non-exists ${dist.path}/lib repackage org.apache.maven.plugins maven-dependency-plugin copy package copy-dependencies ${dist.path}/lib
3. 其他工程不需要变更, 依旧不需要打包插件3. 项目启动需要指定lib目录, 启动命令为: java -jar -Dspring.profiles.active=dev -Dloader.path=. ./lib/oa-web-1.0.0-SNAPSHOT.jar注意, 项目打包后, idea无法通过debug按钮直接启动, 因为需要指定lib目录, 简单做法, 先Clean清除打的包, 再debug启动(执行的是build)打包结果如下, lib目录下的oa-web-1.0.0-SNAPSHOT.jar不包含其他模块的依赖, 打完包后target文件夹46.5M, 比打jar包大了10M.........<br />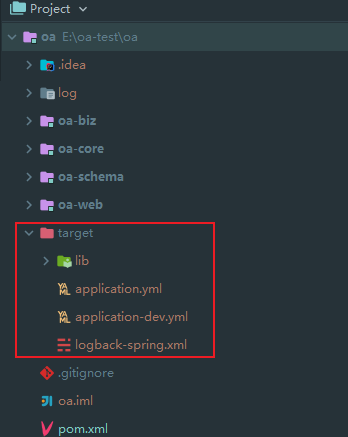---<a name="YNoXP"></a>### Nacos官方文档: [https://nacos.io/zh-cn/docs/quick-start-spring-boot.html](https://nacos.io/zh-cn/docs/quick-start-spring-boot.html)<br />主要的使用官方文档上都有, 这里简略写一点1. 安装及启动nacos1. 加依赖```xml<!--nacos--><dependency><groupId>com.alibaba.boot</groupId><artifactId>nacos-config-spring-boot-starter</artifactId><version>0.2.7</version></dependency>
代码配置(启动类加@NacosPropertySource注解, 配置文件加上nacos配置) ```java @SpringBootApplication(scanBasePackages = “top.xinzhang0618.oa”) @NacosPropertySource(dataId = “oa-test.yml”, autoRefreshed = true,type = ConfigType.YAML) public class WebApplication {
public static void main(String[] args) {
SpringApplication.run(WebApplication.class, args);
}
}
```yamlspring:application:name: oanacos:config:server-addr: http://39.106.55.179:40000namespace: c3545dbe-b516-49a4-9f86-da97dd019ce7
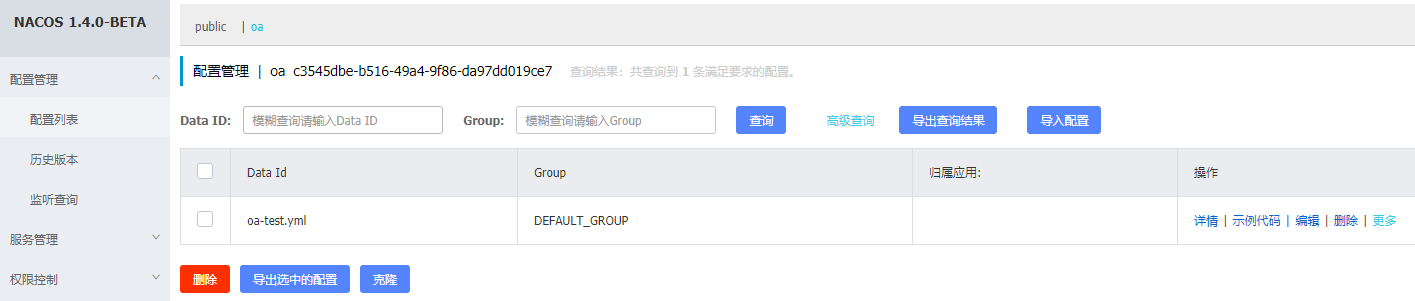
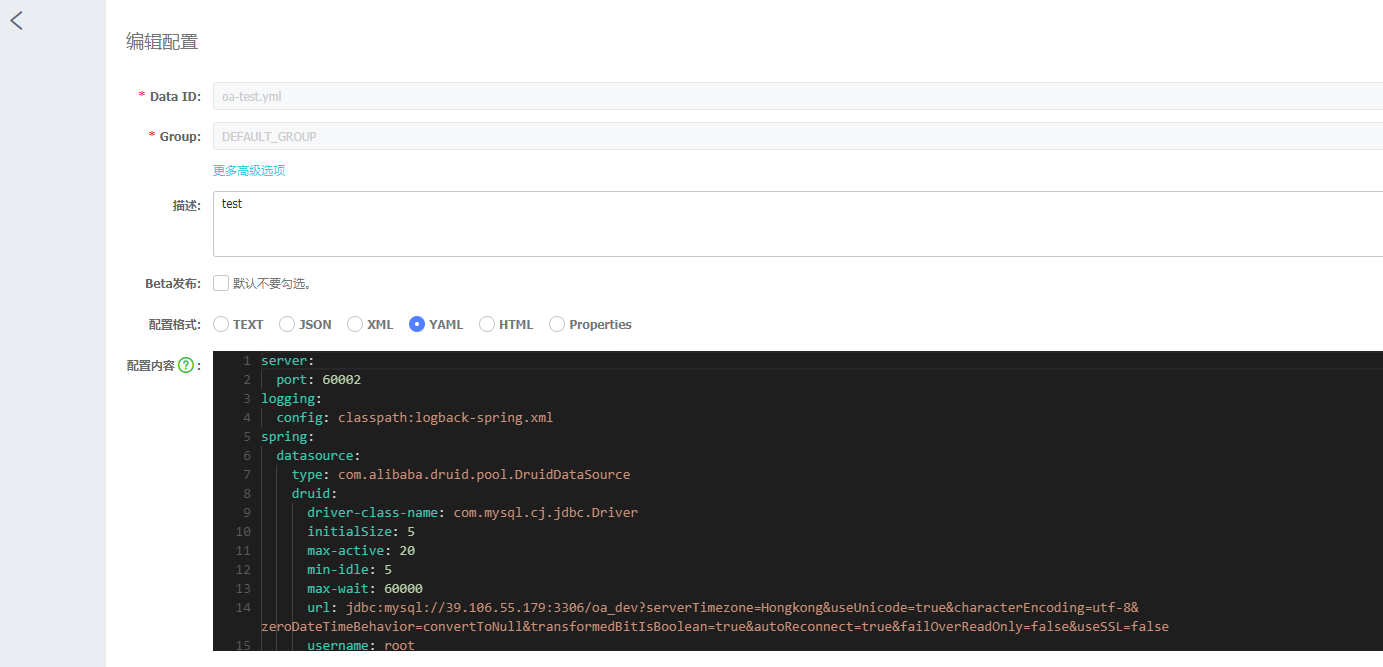
- 在配置中心添加相关配置
支持配置的动态刷新, 使用示例
@NacosValue(value = "${useLocalCache:false}", autoRefreshed = true)private boolean useLocalCache;
配置绑定变量
这里拿打jar包的配置做如下变更
通过maven的profile实现配置绑定变量, 以在不同的环境使用不同的轻量化的配置文件
父工程添加profile
<profiles><profile><id>oa-prod</id><build><filters><filter>${basedir}/../profiles/oa-prod.properties</filter></filters></build></profile></profiles>
web工程建立application-prod.yml, 参数使用变量 ```yaml spring: datasource: druid: url: jdbc:mysql://${database.host}:${database.port}/oa_dev?serverTimezone=Hongkong&useUnicode=true&characterEncoding=utf-8&zeroDateTimeBehavior=convertToNull&transformedBitIsBoolean=true&autoReconnect=true&failOverReadOnly=false&useSSL=false username: ${database.user} password: ${database.password} redis: host: ${redis.host} port: ${redis.port} database: ${redis.database} password: ${redis.password}
3. 在工程目录下建profiles/oa-prod.properties配置文件```yaml#databasedatabase.host=39.106.55.179database.port=3306database.user=rootdatabase.password=xxx#redisredis.host=39.106.55.179redis.port=6379redis.password=xxxredis.database=1
如上配置完成后, 在主目录下, 打包命令如下:
$mvn clean package -Dmaven.test.skip=true -P oa-prod -f pom.xml
其中mvn参数: (参数不懂的 mvn -h 获取帮助)
-D 表示定义的系统属性, maven或者java的
-P 表示指定的profile
-f 表示指定的pom文件
将打出的oa-web-1.0.0-SNAPSHOT.jar包解压后能看到相应的prod.yml配置文件中的变量已经被赋值了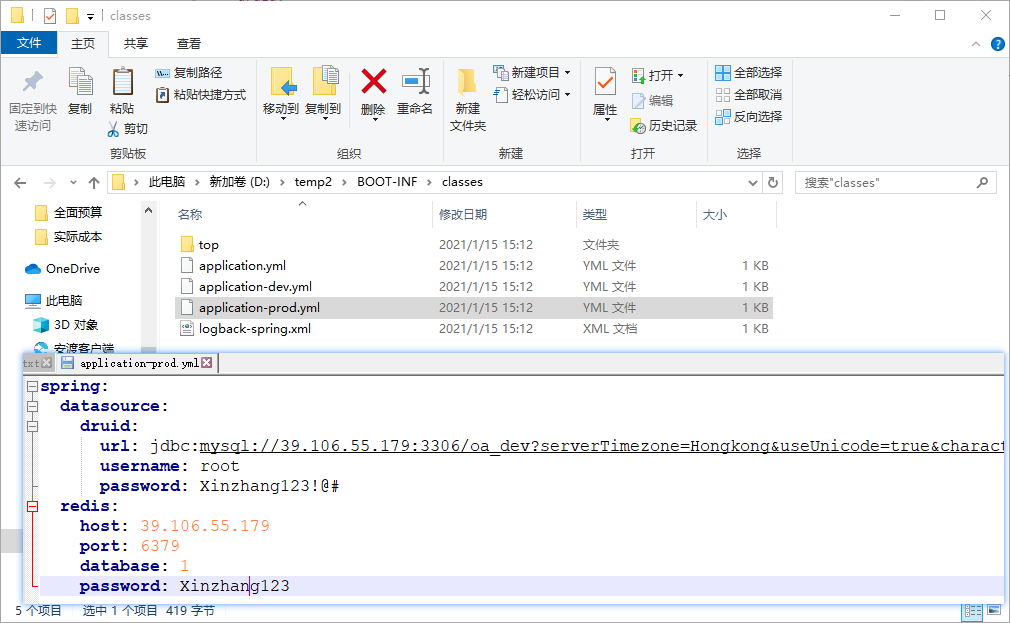
最后, 启动命令不变: $java -jar -Dspring.profiles.active=prod oa-web-1.0.0-SNAPSHOT.jar
抽取公共pom文件
如下, 可以像springcloudDependences一样, 抽取公共依赖, install和deploy到仓库后, 其他模块就可以import使用
xz-demo-dependencies-1.0.0-SNAPSHOT.pom
<?xml version="1.0" encoding="utf-8"?><project xmlns="http://maven.apache.org/POM/4.0.0" xmlns:xsi="http://www.w3.org/2001/XMLSchema-instance"xsi:schemaLocation="http://maven.apache.org/POM/4.0.0 http://maven.apache.org/xsd/maven-4.0.0.xsd"><modelVersion>4.0.0</modelVersion><groupId>com.pingan.lcloud</groupId><artifactId>xz-demo-dependencies</artifactId><version>1.0.0-SNAPSHOT</version><packaging>pom</packaging><properties><fastjson.version>1.2.33</fastjson.version><lombok.version>1.18.22</lombok.version><commons-lang3.version>3.12.0</commons-lang3.version><hutool-all.version>5.7.21</hutool-all.version></properties><dependencyManagement><dependencies><!--fastjson--><dependency><groupId>com.alibaba</groupId><artifactId>fastjson</artifactId></dependency><!--lombok--><dependency><groupId>org.projectlombok</groupId><artifactId>lombok</artifactId></dependency><!--commons-lang3--><dependency><groupId>org.apache.commons</groupId><artifactId>commons-lang3</artifactId></dependency><!--hutool-all--><dependency><groupId>cn.hutool</groupId><artifactId>hutool-all</artifactId></dependency><dependency><groupId>org.springframework.cloud</groupId><artifactId>spring-cloud-dependencies</artifactId><version>Greenwich.SR3</version><type>pom</type><scope>import</scope></dependency><dependency><groupId>org.springframework.boot</groupId><artifactId>spring-boot-dependencies</artifactId><version>2.1.3.RELEASE</version><type>pom</type><scope>import</scope></dependency></dependencies></dependencyManagement><build><pluginManagement><plugins><plugin><groupId>org.springframework.boot</groupId><artifactId>spring-boot-maven-plugin</artifactId><configuration><!--devTools--><fork>true</fork></configuration><executions><execution><goals><goal>repackage</goal></goals></execution></executions></plugin></plugins></pluginManagement></build></project>
安装到仓库
mvn -f xz-demo-dependencies-1.0.0-SNAPSHOT.pom installmvn -f xz-demo-dependencies-1.0.0-SNAPSHOT.pom deploy
其他模块使用
<dependencyManagement><dependencies><dependency><groupId>com.pingan.lcloud</groupId><artifactId>xz-demo-dependencies</artifactId><version>1.0.0-SNAPSHOT</version><type>pom</type><scope>import</scope></dependency></dependencies></dependencyManagement>

若有收获,就点个赞吧
0 人点赞
