- 在虚拟机上安装运行百度Apollo 6.0xiaozhou.的博客-CSDN博客百度apollo安装
|
- 在vmware上跑apollo 6.0 (无GPU) - 知乎 (zhihu.com)
| | —- | |
- apollo 6.0 【开发版】从安装到启动,保姆级全教程樱桃小栗子的博客-CSDN博客apollo教程
| |
- Apollo 6.0 安装完全指南 | 朝花夕拾 (shipengx.com)
| |
- 可能是知乎上已知最详细的Apollo6.0安装教程 - 知乎 (zhihu.com)
- 【apollo6.0安装全教程】✨光光光光✨的博客-CSDN博客apollo 安装
- apollo6.0发行版安装到启动(内含超多踩坑细节,2022-3-8日亲测可用)樱桃小栗子的博客-CSDN博客apollo启动
- Ubuntu 18.04安装Apollo 6.0:从零开始到启动Demo(超多细节)shao918516的博客-CSDN博客ubuntu安装apollo
|
在虚拟机vmware上安装运行Apollo 6.0 (无GPU),电脑没有GPU的话,视觉方面的弄不了(车道线识别、交通信号灯识别)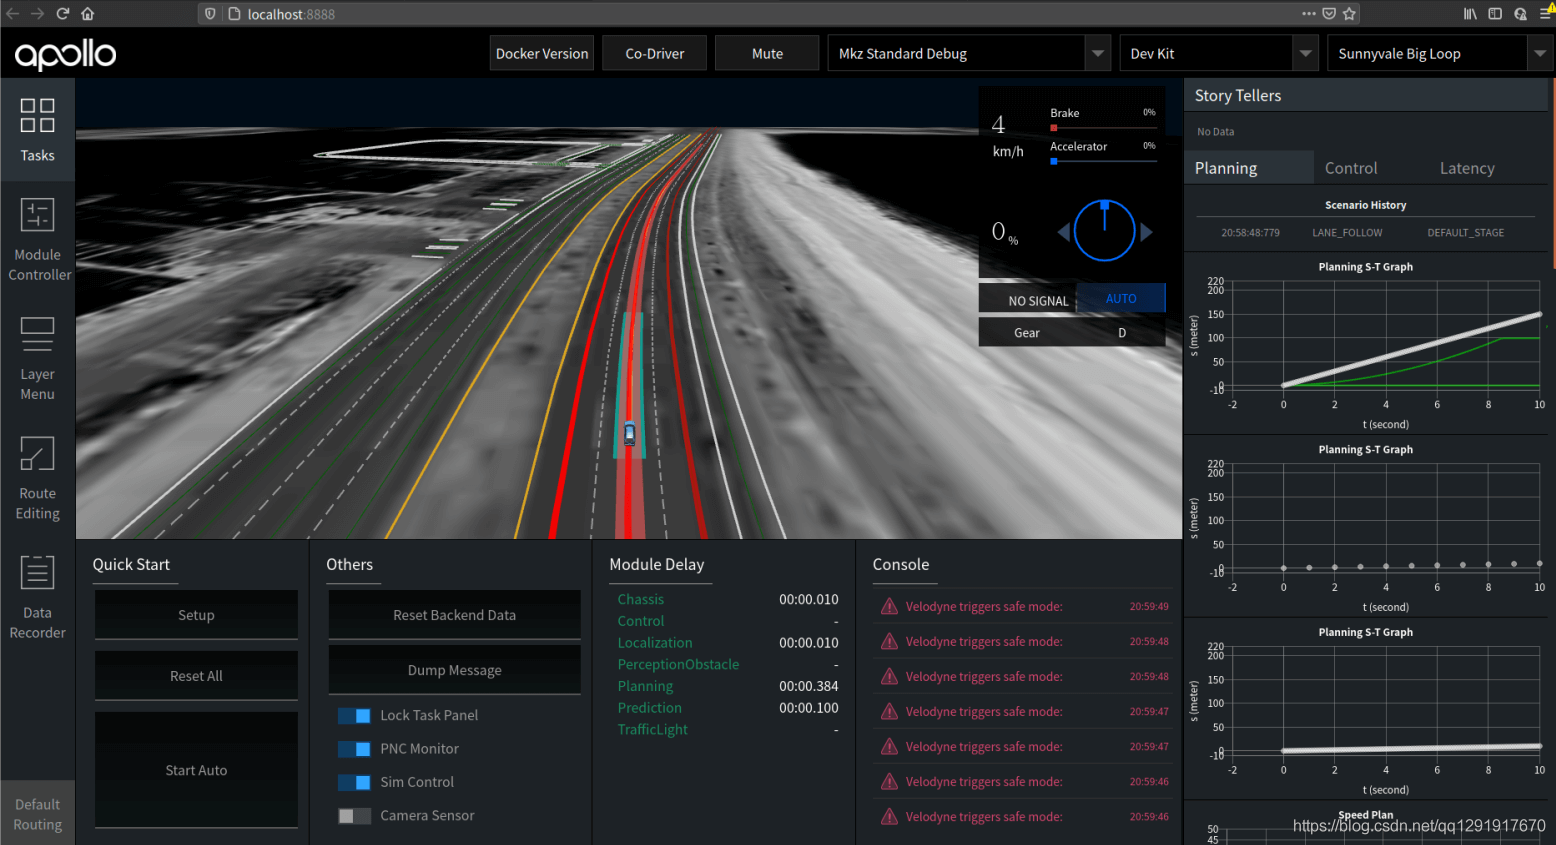
主要是参考官网的教程, 但是我自己目前是在vmware上跑而且GPU不能直连,所以安装教程里的GPU部分都跳过。
1. 先装好Ubuntu 18.04和Docker
Ubunut系统中安装Docker,因为apollo需要运行在Docker所创建的容器中。
虚拟机不支持GPU那就先别装nvidia相关的(否则出错,还需要卸载nvdia相关的)
sudo apt-get updatesudo apt-get upgrade
使用bash来装 docker(install_docker.sh脚本在setup_host文件夹下)
There is also a dedicated bash script Apollo provides to ease Docker installation, which works both for X86_64 and AArch64 platforms.

https://github.com/ApolloAuto/apollo/blob/master/docker/setup_host/install_docker.sh
运行保存的sh文件
chmod a+x install_docker.sh #给install_docker.sh可执行权限./install_docker.shsudo systemctl restart docker
把你的用户名加入到docker 中,这样使用docker时无需再输入sudo.
https://docs.docker.com/engine/install/linux-postinstall/
sudo groupadd dockersudo usermod -aG docker *** (你的用户名)Log out
2. 下载Apollo 源
git clone https://github.com/ApolloAuto/apollo.gitcd apollogit checkout mastergit clone --branch v2.5.0 github.com/ApolloAuto/apollo.git #下载指定版本
3. 启动阿波罗开发容器Docker
在Apollo路径下(此时的命令窗口会显示前缀 *@你的计算机名:~/apollo$)
bash docker/scripts/dev_start.sh #下载Apollo依赖环境的image文件
若从国内下载image, 使用
bash docker/scripts/dev_start.sh-C # -C表示从国内服务器下载,速度快些

(有些人可能前面无意中安装了NVIDIA相关的报错:[ERROR] Failed to start docker container “apollo_dev” based on image: apolloauto/apollo:dev-x86_64-20180906_2002。Error: Could not load UVM kernel module. Is nvidia-modprobe installed?,可以采用sudo apt purge nvidia* 卸载所有NVIDIA。然后重新bash docker/scripts/dev_start.sh)
bash docker/scripts/dev_into.sh #进入Docker环境,这时命令窗口显示前缀的方式会发生改变: ***@in_dev_docker:/apollo$bash apollo.sh clean #需重新编译时,才会用到该命令./apollo.sh build #编译apollo (apollo的编译是在容器内进行的)
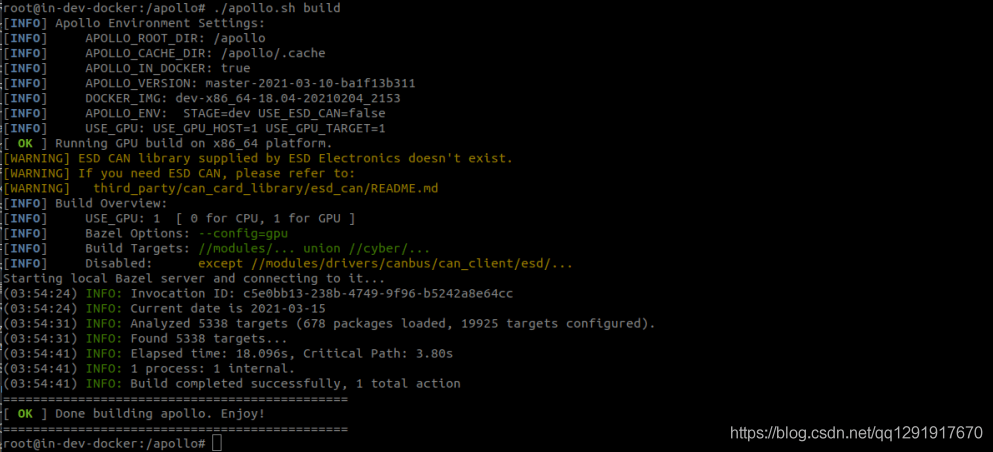
4. 构建Apollo
./apollo.sh clean./apollo.sh build_opt# This will build the full system and requires nVidia GPU with nVidia drivers# loaded. If no GPU is availabe, please run "./apollo.sh build_opt" instead../apollo.sh build_opt_gpu
不是Nvidia GPU也是可以的,不建议使用 bash apollo.sh build_cpu来编译。
Note: Please run ./apollo.sh build_fe before ./apollo.sh build_opt if you made any modifications to the Dreamview frontend.
5. 启动仿真环境Dreamview
bash ./scripts/bootstrap.sh
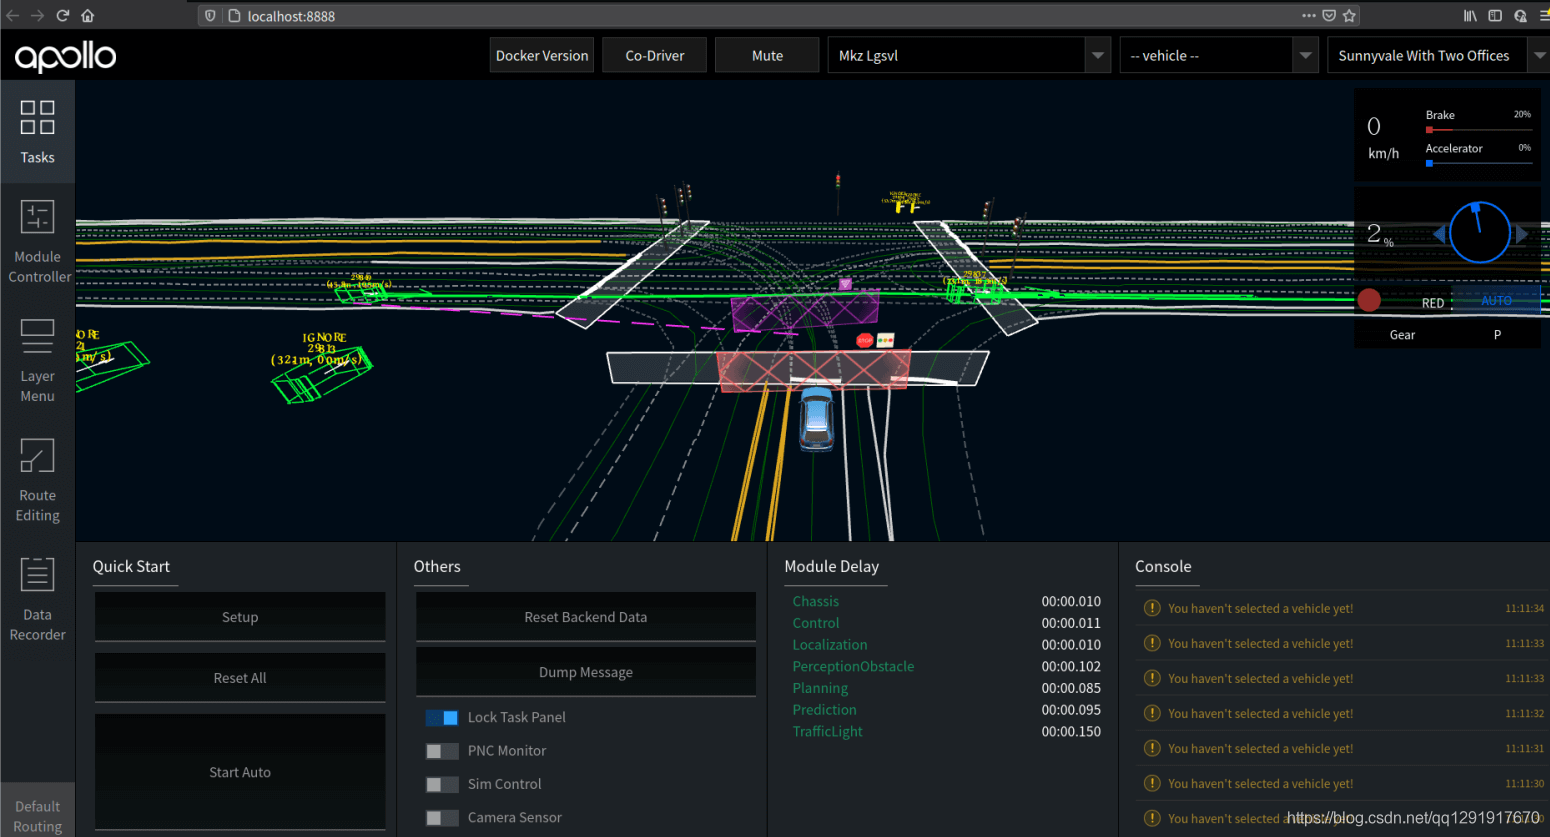
打开浏览器 输入http://localhost:8888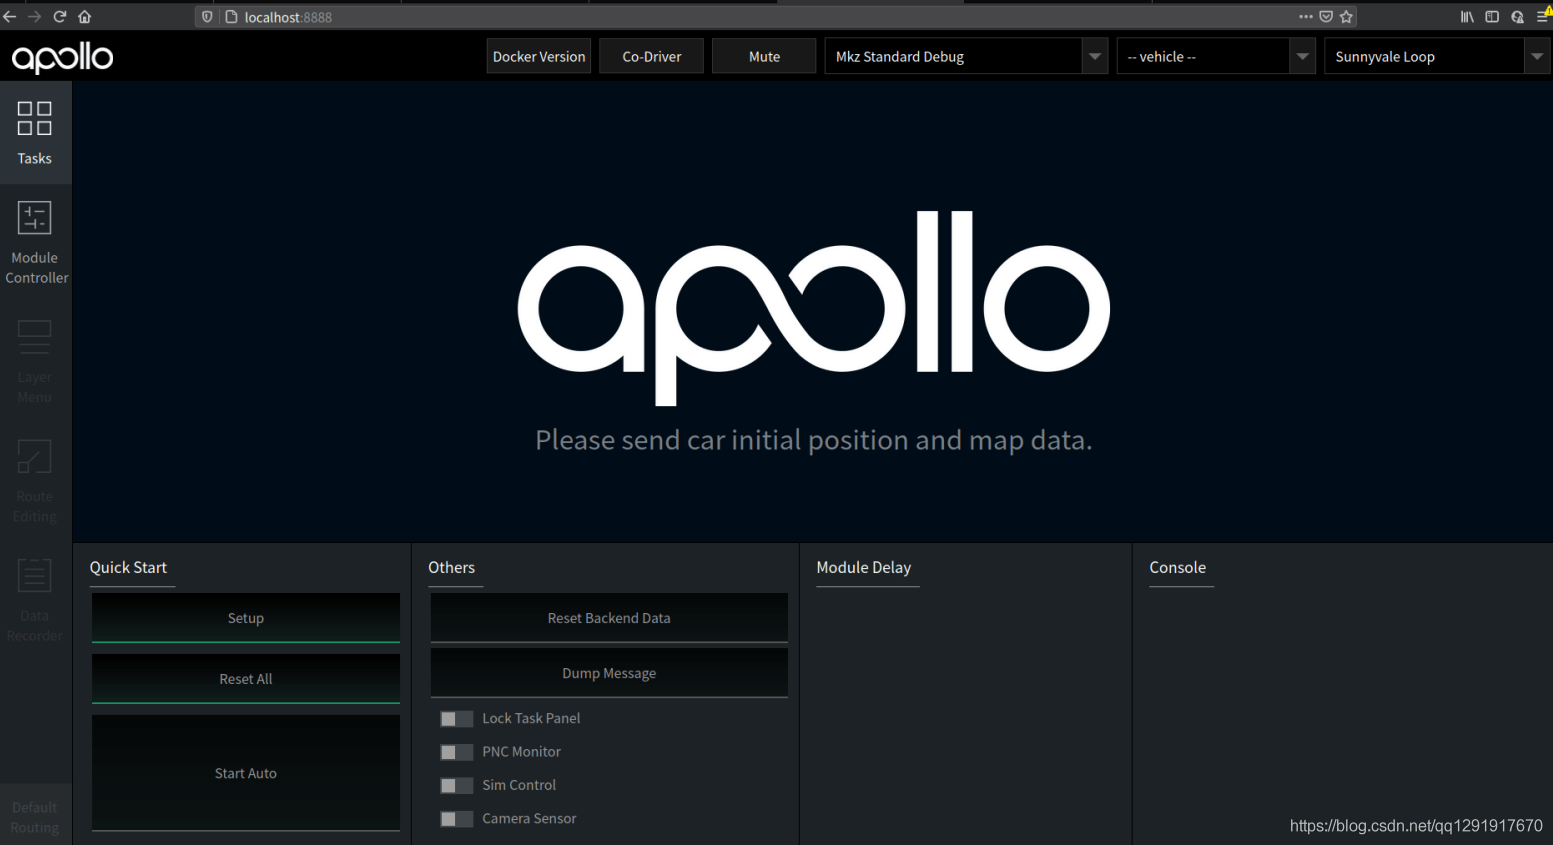
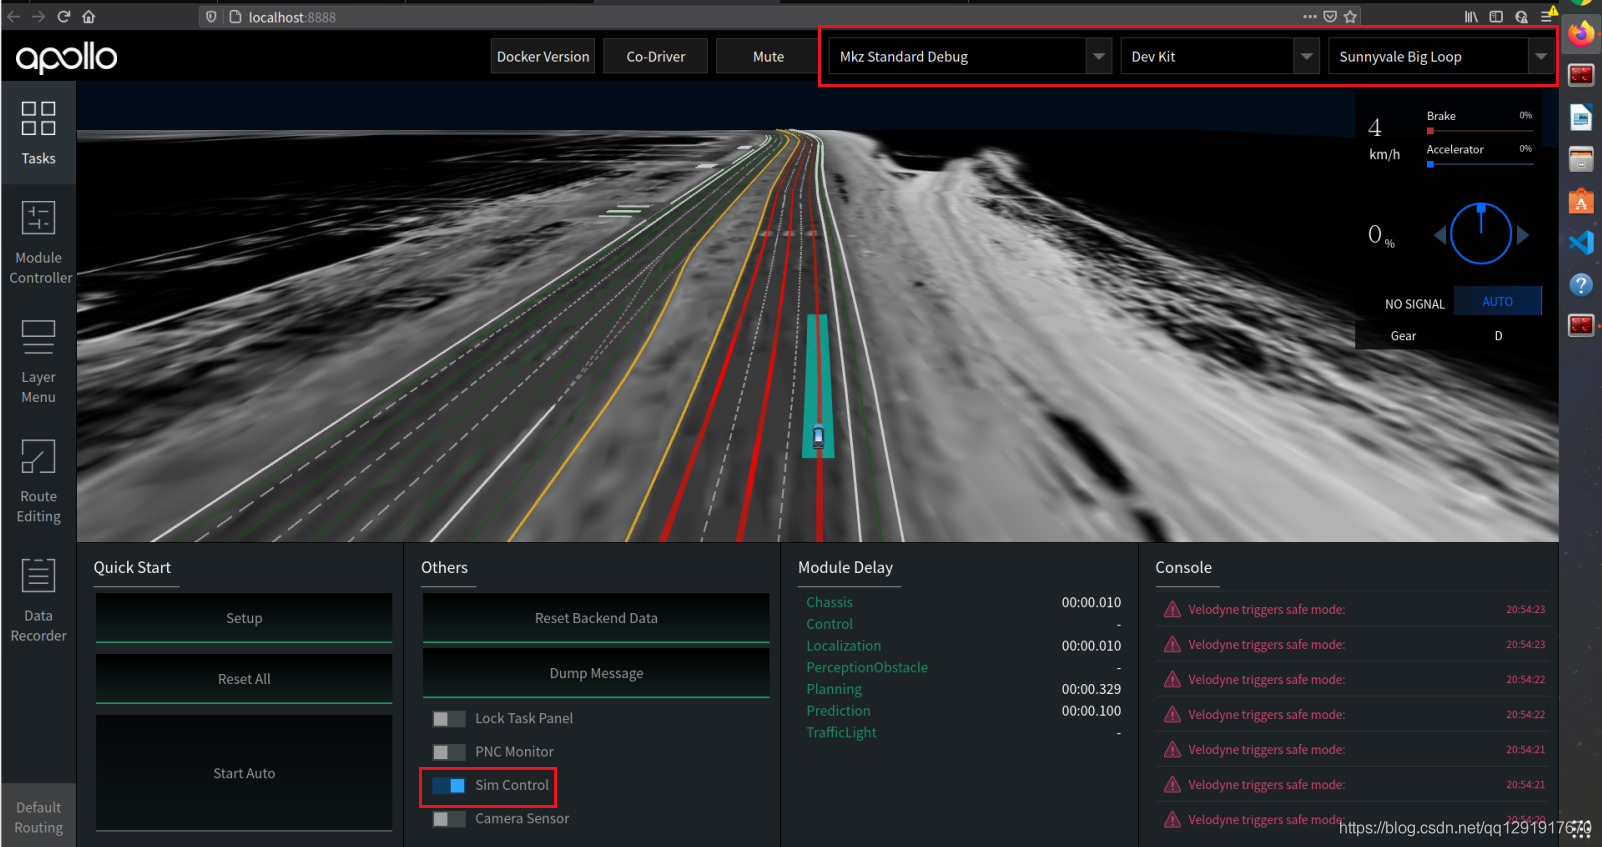
选择驾驶模式和地图:From the dropdown box of Mode Setup, select “Mkz Standard Debug” mode. From the dropdown box of Map, select “Sunnyvale with Two Offices”.
- Module Controller—>打开Planning和Routing;
- Tasks—>打开SimControl
- 右上侧选择“Sunnyvale Big Loop”地图
重放demo记录:
# You need to download the demo record using the following commandscd docs/demo_guide/python3 record_helper.py demo_3.5.record# You can now replay this demo "record" in a loop with the '-l' flagcyber_recorder play -f demo_3.5.record -l
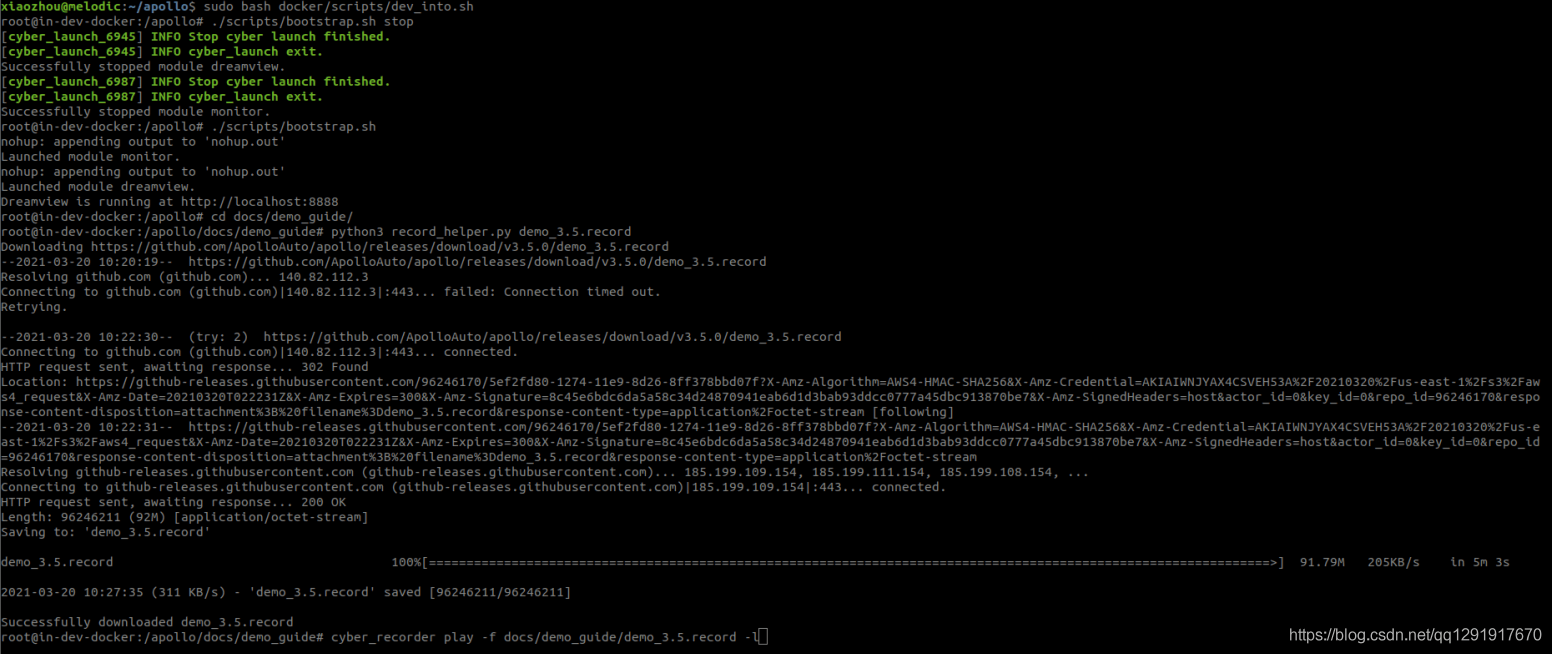
https://github.com/ApolloAuto/apollo/issues/6764
(这个可能遇到cyber_record 命令无法找到, 需要到apollo/cyber目录下运行 . setup.bash, 然后>>echo $PATH 路径应包含/ apollo / bazel-bin / cyber / tools / cyber_recorder / 再回到docs/demo_guide/下去) 就可以看到运行的了:
6. 结束deamview
root@in-dev-docker:/apollo# ./scripts/bootstrap.sh stop
退出docker Ctrl-D
下一次重新进入:
cd apollobash docker/scripts/dev_start.shbash docker/scripts/dev_into.sh./scripts/bootstrap.sh
附录:
Docker相关的命令:$ docker container ls --all (列出所有container, 即使当前不在运行的)$ docker ps (查看正在运行的容器)$ exit (退出当前的docker环境)$ docker rmi <image id> (删除某个image, 比如 docker rmi 4ab4c602aa5e)导出镜像到本地文件 (这样你可以把下载到的image备份,而不必重新安装时,每次都要下载。)$ docker save apolloauto/apollo > apollo.tar从本地文件导入文件到镜像库$ sudo docker load --input apollo.tarGit相关指令:$ git pull (更新软件)$ git checkout (可指定版本)$ git branch -a 查看所有的分支$ git checkout -b *** 建立一个新的本地分支*** (比如v2.5.0)$ git status 查看当前状态Ubuntu 18.04 相关:$ sudo dpkg-reconfigure tzdata (时间同步)

若有收获,就点个赞吧
0 人点赞
