Ingest 节点
ingest 节点可以看作是数据前置处理转换的节点,支持 pipeline 管道 设置,可以使用 ingest 对数据进行过滤、转换等操作,类似于 logstash 中 filter 的作用,功能相当强大。
我把 Ingest 节点的功能抽象为:大数据处理环节的 “ETL”——抽取、转换、加载。
Ingest节点基本概念
在实际文档索引发生之前,使用Ingest节点预处理文档。Ingest节点拦截批量和索引请求,它应用转换,然后将文档传递回索引或Bulk API。
强调一下: Ingest节点处理时机——在数据被索引之前,通过预定义好的处理管道对数据进行预处理。
默认情况下,所有节点都启用Ingest,因此任何节点都可以处理Ingest任务。我们也可以创建专用的Ingest节点。
要禁用节点的Ingest功能,需要在elasticsearch.yml 设置如下:
node.ingest:false
Ingest 节点能解决什么问题?
上面的 Ingest 节点介绍太官方,看不大懂怎么办?来个实战场景例子吧。
思考问题 1:线上写入数据改字段需求
如何在数据写入阶段修改字段名(不是修改字段值)?
思考问题 2:线上业务数据添加特定字段需求
如何在批量写入数据的时候,每条 document 插入实时时间戳?
这时,脑海里开始对已有的知识点进行搜索。
针对思考问题 1:字段值的修改无非:update, update_by_query?但是字段名呢?貌似没有相关接口或实现。
针对思考问题 2:插入的时候,业务层面处理,读取当前时间并写入貌似可以,有没有不动业务层面的字段的方法呢?
答案是有的,这就是 Ingest 节点的妙处。
Ingest 实践
写入数据改字段需求
PUT _ingest/pipeline/rename_hostname{"description" : "这是测试的管道内容","processors": [{"field": "hostname","target_field": "host","ignore_missing": true}}]}
PUT serverPOST server/values/?pipeline=rename_hostname{"hostname": "myserver"}
如上,借助 Ingest 节点的 rename_hostname 管道的预处理功能,实现了字段名称的变更:由 hostname 改成 host。
添加特定字段需求
通过indexed_at管道的set处理器与ms-test的索引层面关联操作,
ms-test索引每插入一篇document,都会自动添加一个字段index_at=最新时间戳。
PUT _ingest/pipeline/indexed_at{"description": "Adds indexed_at timestamp to documents","processors": [{"set": {"field": "_source.indexed_at","value": "{{_ingest.timestamp}}"}}]}PUT ms-test{"settings": {"index.default_pipeline": "indexed_at"}}POST ms-test/_doc/1{"title":"just testing"}
这里就涉及几个知识点:
1、预处理 pre-process
要在数据索引化 (indexing) 之前预处理文档。
2、管道 pipeline
每个预处理过程可以指定包含一个或多个处理器的管道。
管道的实际组成:
{"description" : "...","processors" : [ ... ]}
description:管道功能描述。
processors:注意是数组,可以指定 1 个或多个处理器。
3、处理器 processors
每个处理器以某种特定方式转换文档。
例如,管道可能有一个从文档中删除字段的处理器,然后是另一个重命名字段的处理器。
为管道设置版本号
这里需要注意,根据官方文档的介绍,此版本号没有实际作用,仅仅方便使用者根据其业务环境进行外部的版本管理
PUT _ingest/pipeline/test_pipeline{"description" : "这是测试的管道内容","version": 100,"processors" : [{"set" : {"field": "des","value": "这是管道默认数据"}}]}
查询管道
查询索引中的管道
通过GET请求我们可以查询出,当前管道的配置信息
GET _ingest/pipeline/test_pipeline返回{"test_pipeline" : {"description" : "这是测试的管道内容","version" : 100,"processors" : [{"set" : {"field" : "des","value" : "这是管道默认数据"}}]}}
查询管道版本
GET _ingest/pipeline/test_pipeline?filter_path=*.version返回{"test_pipeline" : {"version" : 100}}
删除管道
DELETE _ingest/pipeline/test_pipeline
删除所有管道
和文档操作类似,你可以使用*符号匹配所有的管道进行清除。
DELETE _ingest/pipeline/*
使用管道
现在我们存在一个这样的索引
"test_field2": {"aliases": {},"mappings": {"properties": {"channel": {"type": "nested"},"des": {"type": "text"},"name": {"type": "keyword"}}},"settings": {"index": {"creation_date": "1574774756443","number_of_shards": "1","number_of_replicas": "1","uuid": "RCF17AZOR1GPs84LKw88lA","version": {"created": "7020099"},"provided_name": "test_field2"}}}
现在我们尝试向索引中插入数据。
使用已经存在管道
PUT test_field2/_doc/1?pipeline=test_pipeline{"name": "内容1","desc": "描述1","channel": [{"name": "one","num": 33},{"name": "two","num": 44}]}
然后查询ID为1的数据会得到下面内容
{"_index" : "test_field2","_type" : "_doc","_id" : "1","_version" : 1,"_seq_no" : 0,"_primary_term" : 1,"found" : true,"_source" : {"des" : "这是管道默认数据","name" : "内容1","channel" : [{"num" : 33,"name" : "one"},{"num" : 44,"name" : "two"}],"desc" : "描述1"}}
会发现其des内容并非我们插入的数据,而是管道设置的参数。
从上面的内容可以发现,管道其实很像是我们平时使用的拦截器操作,会拦截一些操作然后对其进行修改。
请求数据的时候定义管道
除了上面的使用方式,我们也可以在请求数据的时候使用管道
PUT test_field2/_doc/5{"pipeline": {"description": "这是自定义的管道内容","processors": [{"set": {"field": "des","value": "这是管道默认数据"}}]},"docs": [{"_source": {"name": "内容1","desc": "描述1","channel": [{"name": "one","num": 33},{"name": "two","num": 44}]}}]}
此时我们尝试查询数据会发现数据使用的是自定义的管道参数
{"_index" : "test_field2","_type" : "_doc","_id" : "5","_version" : 1,"_seq_no" : 2,"_primary_term" : 1,"found" : true,"_source" : {"pipeline" : {"description" : "这是自定义的管道内容","processors" : [{"set" : {"field" : "des","value" : "这是管道默认数据"}}]},"docs" : [{"_source" : {"name" : "内容1","desc" : "描述1","channel" : [{"name" : "one","num" : 33},{"name" : "two","num" : 44}]}}]}}
模拟管道
当然官方也提供了_simulate 方法让你模拟数据在经过了管道的处理后所得到的结果
POST _ingest/pipeline/_simulate
{
  "pipeline" :
  {
    "description": "_description",
    "processors": [
      {
        "set" : {
          "field" : "field2",
          "value" : "_value"
        }
      }
    ]
  },
  "docs": [
    {
      "_index": "index",
      "_id": "id",
      "_source": {
        "foo": "bar"
      }
    },
    {
      "_index": "index",
      "_id": "id",
      "_source": {
        "foo": "rab"
      }
    }
  ]
}

返回结果

{
   "docs": [
      {
         "doc": {
            "_id": "id",
            "_index": "index",
            "_type": "_doc",
            "_source": {
               "field2": "_value",
               "foo": "bar"
            },
            "_ingest": {
               "timestamp": "2017-05-04T22:30:03.187Z"
            }
         }
      },
      {
         "doc": {
            "_id": "id",
            "_index": "index",
            "_type": "_doc",
            "_source": {
               "field2": "_value",
               "foo": "rab"
            },
            "_ingest": {
               "timestamp": "2017-05-04T22:30:03.188Z"
            }
         }
      }
   ]
}
查看管道对文件的影响
POST _ingest/pipeline/_simulate?verbose
{
  "pipeline" :
  {
    "description": "_description",
    "processors": [
      {
        "set" : {
          "field" : "field2",
          "value" : "_value2"
        }
      },
      {
        "set" : {
          "field" : "field3",
          "value" : "_value3"
        }
      }
    ]
  },
  "docs": [
    {
      "_index": "index",
      "_id": "id",
      "_source": {
        "foo": "bar"
      }
    },
    {
      "_index": "index",
      "_id": "id",
      "_source": {
        "foo": "rab"
      }
    }
  ]
}


返回内容

{
   "docs": [
      {
         "processor_results": [
            {
               "doc": {
                  "_id": "id",
                  "_index": "index",
                  "_type": "_doc",
                  "_source": {
                     "field2": "_value2",
                     "foo": "bar"
                  },
                  "_ingest": {
                     "timestamp": "2017-05-04T22:46:09.674Z"
                  }
               }
            },
            {
               "doc": {
                  "_id": "id",
                  "_index": "index",
                  "_type": "_doc",
                  "_source": {
                     "field3": "_value3",
                     "field2": "_value2",
                     "foo": "bar"
                  },
                  "_ingest": {
                     "timestamp": "2017-05-04T22:46:09.675Z"
                  }
               }
            }
         ]
      },
      {
         "processor_results": [
            {
               "doc": {
                  "_id": "id",
                  "_index": "index",
                  "_type": "_doc",
                  "_source": {
                     "field2": "_value2",
                     "foo": "rab"
                  },
                  "_ingest": {
                     "timestamp": "2017-05-04T22:46:09.676Z"
                  }
               }
            },
            {
               "doc": {
                  "_id": "id",
                  "_index": "index",
                  "_type": "_doc",
                  "_source": {
                     "field3": "_value3",
                     "field2": "_value2",
                     "foo": "rab"
                  },
                  "_ingest": {
                     "timestamp": "2017-05-04T22:46:09.677Z"
                  }
               }
            }
         ]
      }
   ]
}
Ingest API
Ingest API 共分为 4 种操作,分别对应:
PUT(新增)
GET(获取)
DELETE(删除)
Simulate (仿真模拟)
模拟管道 AP Simulate 针对请求正文中提供的文档集执行特定管道。
除此之外,高阶操作包括:
1、支持复杂条件的 Nested 类型的操作;
2、限定条件的管道操作;
3、限定条件的正则操作等。
详细内容,参见官网即可。
常见的处理器有如下 28 种,举例:Í
append处理器:添加1个或1组字段值; convert处理器:支持类型转换。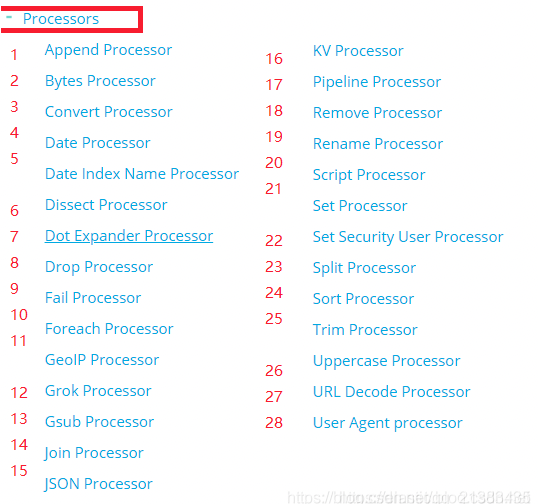
选型小结
1、两种方式各有利弊,建议小数据规模,建议使用 Ingest 节点。原因:架构模型简单,不需要额外的硬件设备支撑。
2、数据规模大之后,除了建议独立 Ingest 节点,同时建议架构中使用 Logstash 结合消息队列如 Kafka 的架构选型。
3、将 Logstash 和 Ingest 节点结合,也是架构选型参考方案之一。

若有收获,就点个赞吧
0 人点赞
