1. Spring Boot
- 自动配置
Spring Boot的自动配置是一个运行时的过程,考虑了众多因素,Spring配置应该用哪个,不该用哪个.该过程是SpringBoot自动完成的 - 起步依赖
起步依赖本质上是一个Maven项目对象模型,定义了对其他库的传递依赖,简单来说,就是将具备某种功能的坐标打包到一起,并提供一些默认的功能 - 辅助功能
提供了一些大型项目中常见的非功能性特征,如嵌入式服务器 安全 指标 健康检测 外部配置等
Spring Boot 并不是对Spring 功能上的增强 而是提供了一种快速使用Spring的方式
2. 起步依赖原来分析
在Spring-boot-starter-parent中定义了各种技术的版本信息,组合了一套最优搭配的技术版本
在各种starter中,定义了完成该功能需要的坐标合集,其中大部分版本信息来自于父工程
我们的工程继承parent,引入starter后,通过依赖传递,就可以简单方便获取需要的jar包,并不会存在版本冲突等问题
3. SpringBoot配置
SpringBoot是基于约定的,所有很多配置都有默认值,但如果想替换默认值,必须使用application.properties或者application.yml 或 application.yaml/yam 进行配置
- properties 以键值对方式
server.port=8080
- xml
<server><port>8080</port></server>
- yml/yaml
server:port: 8080
如果项目中存在多个application配置文件 会根据文件类型按顺序加载 先加载的无法被覆盖
properties > yml > yaml
3.1. YAML
YAML文件是以数据为核心,比传统的xml方式更加简洁
https://toyaml.com/index.html 在线转换
- 大小写敏感
- 数据值前边必须有空格,作为分隔符
- 使用缩进表示层级关系
- 缩进时不允许使用Tab键,只允许使用空格(各个系统Tab对应的 空格数目可能不同,导致层次混乱)
- 缩进的空格数目不重要,只要相同层级的元素左侧对齐即可
表示注释,从这个字符一直到行尾,都会被解析忽略
3.2. 数据格式
- 对象(map):键值对的集合
person:name: zhangsan#行内写法person: {name: zhangsan}
- 数组:一组按次序排列的值
address:- beijing- shanghai#行内写法address: [beijing,shanghai]
- 纯量: 单个的 不可再分的值
msg1: 'hello \n world' # 单引忽略转义字符msg2: "hello \n world" # 双引识别转义字符
字符串不用加单引号或者双引号,双引号是用来转义
- 参数引用
name: lisiperson:name: ${name} #引用上边定义的name值
3.3. 读取配置文件内容
- @Vlaue
@Value("${name}")private String name;@Value("${test.hello:test}") //防止忘记配置 可以提供默认值 在变量名后加上:private String testHello;
- Environment 是一类 可以注入 使用内置的getProperty获取指定键的值 ```java @Autowired private Environment environment;
@RequestMapping(“/hello2”) public void hello2() { //通过getProperty 方法获取指定键的值 System.out.println(environment.getProperty(“address[0]”)); }
3.@ConfigurationProperties 在自定义类映射为指定键的成员属性 需要gei和set方法```java@Component@ConfigurationProperties(prefix = "person") //prefix为键public class Person {//需要提供get和set方法private String name;private int age;}
@Autowiredprivate Person person; //注入ConfigurationProperties的类才可以使用
配置文件中根据@ConfigurationProperties 注解 标识的类 提示对应的成员属性 坐标
<dependency><groupId>org.springframework.boot</groupId><artifactId>spring-boot-configuration-processor</artifactId></dependency>

3.4. profile
profile功能是来进行动态配置切换 可以帮助我们快速的切换 开发 测试 生产 环境配置
3.4.1. 配置文件切换
3.4.1.1. properties多文件配置
通过application配置
spring.profiles.active=dev #dev为application-dev -后面的名称
不同的application以-进行区分 如:application-dev application-test
在spring.profiles.active= 横杠后的名称 调用指定的环境配置

3.4.1.2. yml单文件配置
以三个横杠区分不同的环境 —-
---server:port: 8081spring:config:activate:on-profile: dev---server:port: 8082spring:config:activate:on-profile: pro---server:port: 8083spring:config:activate:on-profile: test #配置名称为test环境---spring:profiles:active: pro #使用pro环境
3.4.2. profile激活方式
- 在虚拟机中配置 以-Dsrping.profiles:active=对应的环境名称
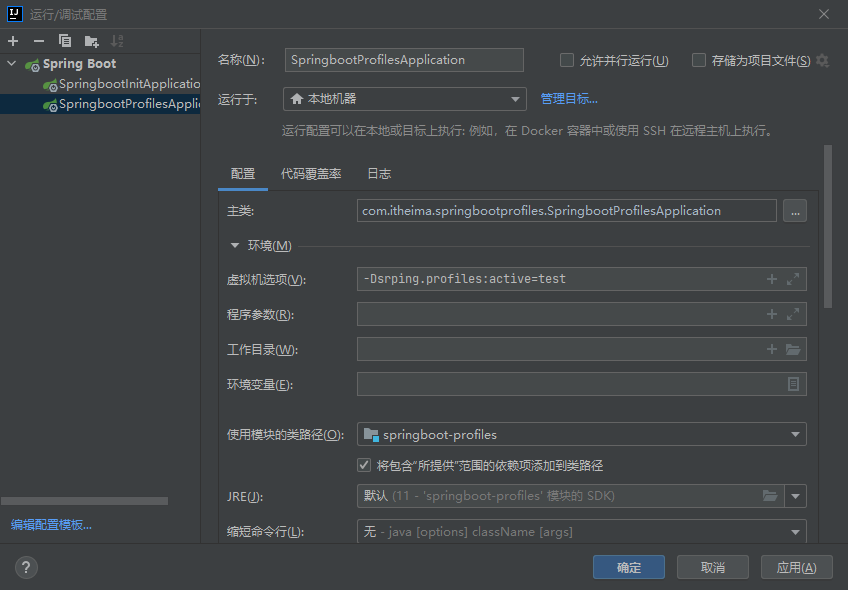
- 通过jar包运行
java -jar springboot.jar --spring.profiles.active=pro
3.5. 内部配置加载顺序
- file:./config/ 当前项目下的/config目录下
- file:./ 当前项目的根目录
- classpath:/config/ classpath的/config目录
- classpath:/ : classpath的根目录 resource为此处
优先使用先加载配置中的属性
3.6. 外部配置加载顺序
- 通过—spring.config.location= 来指定外部配置文件的路径
java -jar springboot.jar --sporing.config.location=配置路径
- 在jar包的同级文件下放置配置文件 会优先于jar中的配置文件
java -jar springboot.jar
- 在jar包的同级文件下创建config文件夹放置配置文件 会优先于jar中的配置文件
4. SpringBoot整合其他框架
4.1. Junit
//如果test类跟springboot启动类的包路径一致 则不需要指定classes@SpringBootTest(classes = SpringbootProfilesApplication.class)class SpringbootProfilesApplicationTests {@Autowiredprivate UserService userService;@Testvoid contextLoads() {userService.add();}}
4.2. Redis
创建maven时选择redis
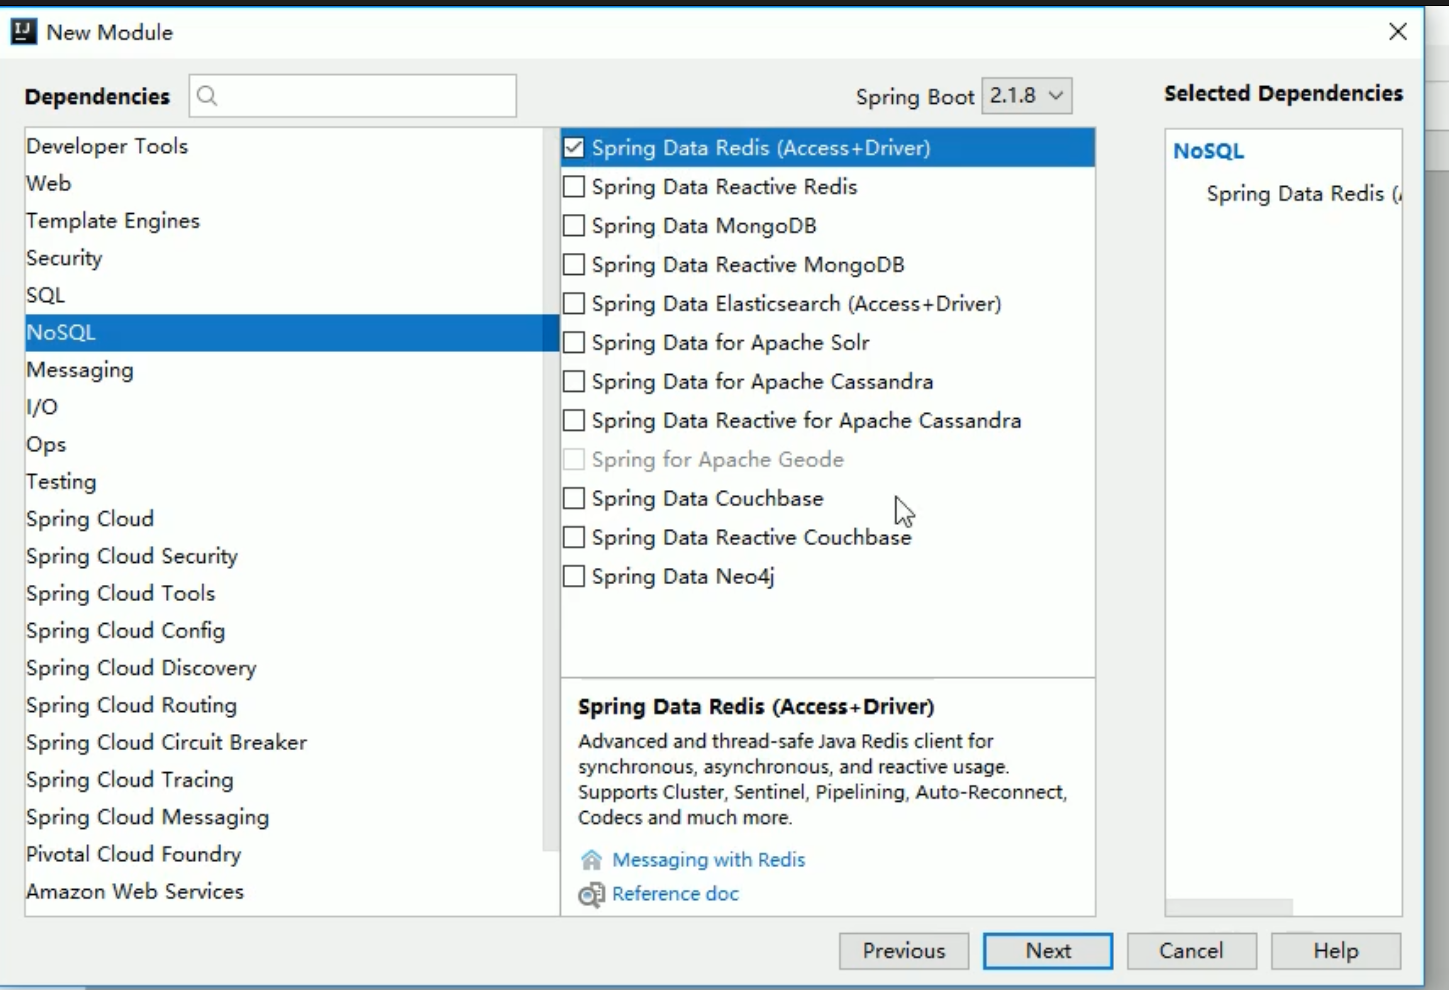
<dependency><groupId>org.springframework.boot</groupId><artifactId>spring-boot-starter-data-redis</artifactId></dependency>
test类
@Autowiredprivate RedisTemplate redisTemplate;@Testpublic void testSet(){redisTemplate.boundValueOps("name").set("zhangsang");}@Testpublic void testGet(){Object name = redisTemplate.boundValueOps("name").get();System.out.println(name);}
application配置默认是为本机地址和6379端口
spring:redis:host: 127.0.0.1 #redisipport: 6379 #端口
4.3. MyBatis
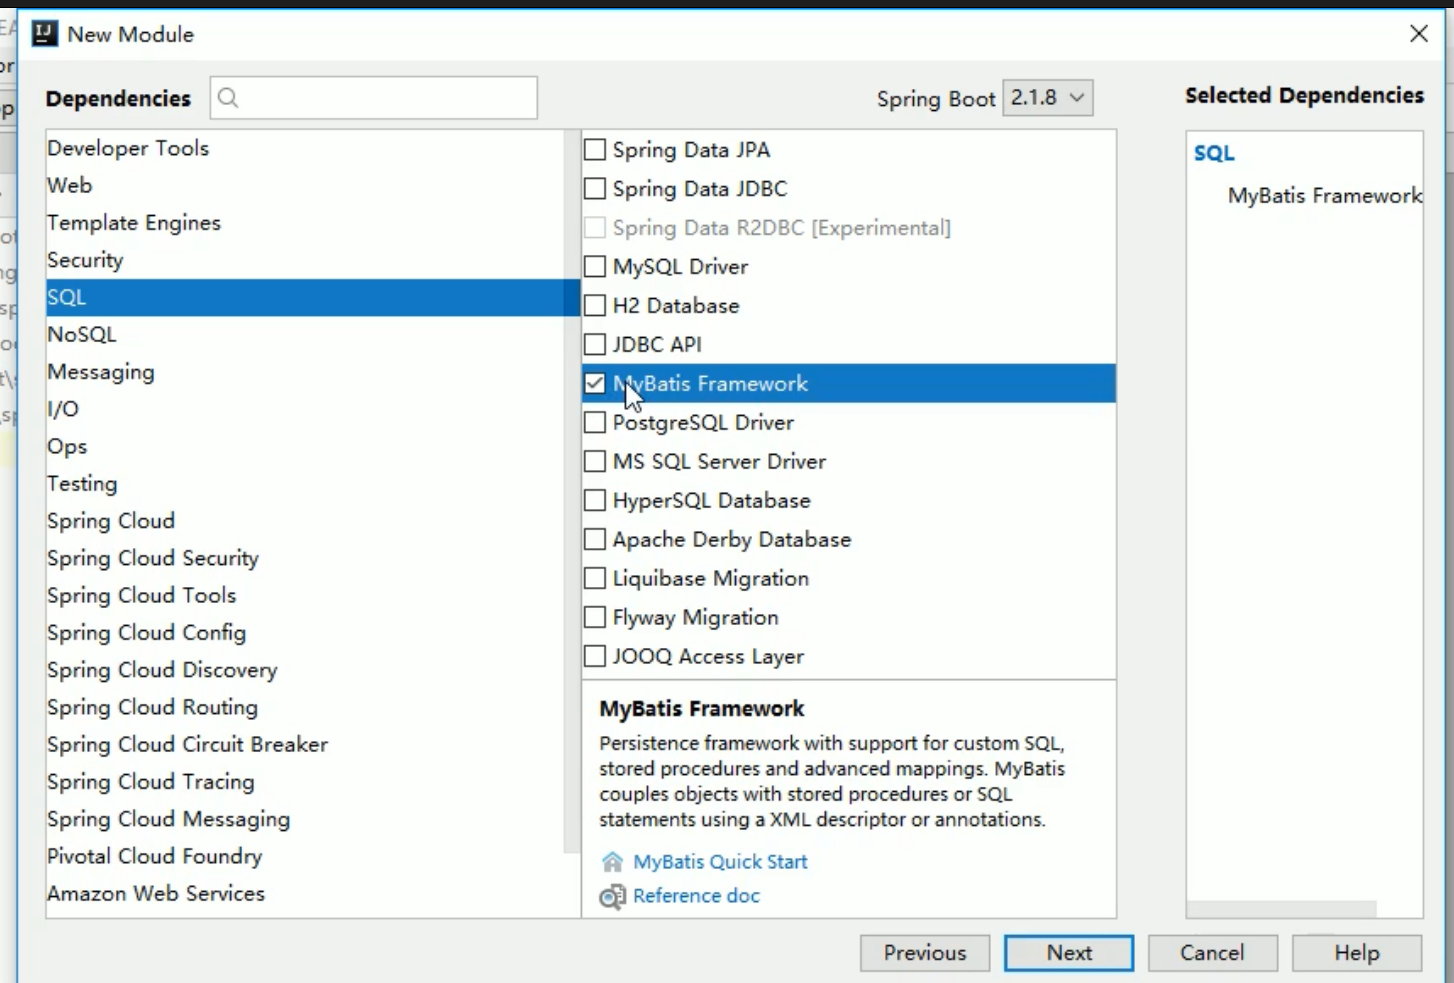
创建项目时勾选
<dependency><groupId>org.mybatis.spring.boot</groupId><artifactId>mybatis-spring-boot-starter</artifactId><version>2.2.0</version></dependency><dependency><groupId>mysql</groupId><artifactId>mysql-connector-java</artifactId></dependency>
配置类
spring:datasource:driver-class-name: com.mysql.cj.jdbc.Driver #注意驱动地址username: rootpassword: 123456url: jdbc:mysql:///springboot?serverTimezone=UTC #如果是本地可以忽略ip和端口 必须设置时区否则会报错
- 注解版mapper
@Repository@Mapperpublic interface UserMapper {@Select("select * from t_user")List<User> findAll();}
test
@Autowiredprivate UserMapper userMapper;@Testpublic void testFindAll(){List<User> all = userMapper.findAll();System.out.println(all);}
- xml版mapper
@Repository@Mapperpublic interface UserMapper {List<User> findAll();}
xml
<?xml version="1.0" encoding="UTF-8"?><!DOCTYPE mapperPUBLIC "-//mybatis.org//DTD Mapper 3.0//EN""http://mybatis.org/dtd/mybatis-3-mapper.dtd"><mapper namespace="com.itheima.springbootprofiles.mapper.UserMapper"><select id="findAll" resultType="user">select * from t_user</select></mapper>
配置文件
spring:datasource:driver-class-name: com.mysql.cj.jdbc.Driverusername: rootpassword: 123456url: jdbc:mysql:///springboot?serverTimezone=UTCmybatis:mapper-locations: classpath:mapper/*Mapper.xml #mapper的映射文件路径type-aliases-package: com.itheima.springbootprofiles.domain #配置别名
test
@Autowiredprivate UserMapper userMapper;@Testpublic void testFindAll(){List<User> all = userMapper.findAll();System.out.println(all);}

若有收获,就点个赞吧
0 人点赞
