本文作者: @山果(shanguo)
1.问题的探究
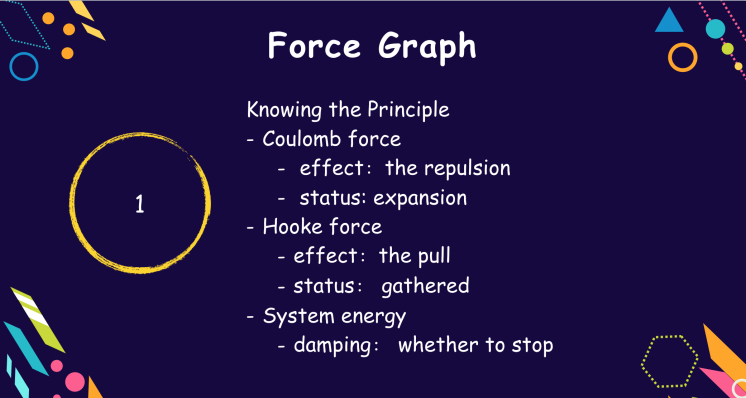
首先我们要清楚一个问题:为什么需要力导布局算法?力导布局算法是什么?如何实现一个力导布局算法。当你这样思考的时候,其实已经使用了Why,What,How的经典分析方法去思考这个问题
- Why
当我们利用最简单的随机布局生成图的时候,点与点的关系,点与边的关系都是随机的,没有规律,因此在业务场景里也很难达到分析的效果。我们希望业务属性相同的点分成一组,点与点有边链接的能聚拢在一起,这个时候力导布局算法就应运而生。
- What
力让节点产生加速度(F/m=a),加速度让节点运动(Vt=Vpre+a*t),运动了就会让节点的位置postion发生改变,Postion就是节点X与Y的集合。这就是力导布局的含义“受力导向,布局发生改变”。
- How
我们将图的节点看作是真空中的点电荷,他们成百上千聚集成一簇,彼此肯定会受到库伦力的斥力而散开,链接的边看作是弹簧,它们又会受到弹力的拉回。最终经过多次收敛,达到系统稳定。
2.了解基本的科学公式
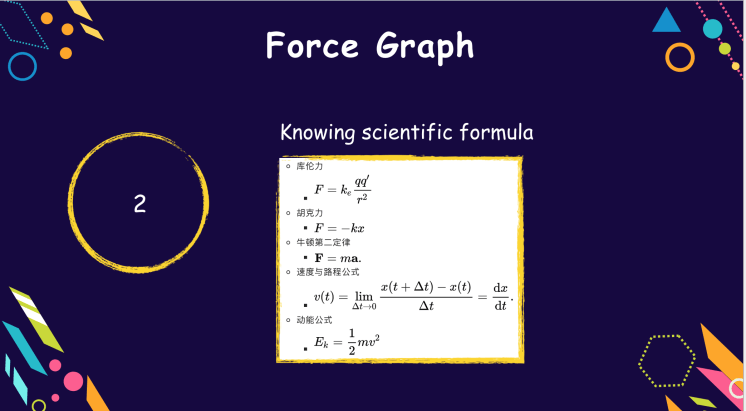
上述提到的物理公式都是高中学过的,大家可以回味一下,特别是库伦力,它的公式结构和万有引力的公式结构很像。一个是宏观,一个是微观,似乎我们的世界存在着一些不可描述的秘密。
- 库伦力定律:是一个实验定律,它不是由数学公式推导得来的,在真空中两个静止点电荷之间的相互作用力与距离平方成反比,与电量乘积成正比,作用力的方向在它们的连线上,同号电荷相斥,异号电荷相吸
- 胡克定律:固体材料受力后,应力与应变(单位变形量)成线性关系,见例子是弹簧
- 牛顿第二运动定律,让节点受力产生加速度
- 速度与运动公式,让节点收到加速度产生新的速度和位移
动能公式和阻尼系数,让节点从向外扩张的时候能量一点点消耗,直到系统稳定
3.了解基础数学:二维向量
向量是计算机里的一个神器,很多复杂的问题都能通过向量来解决,这是因为向量独特的数学属性方向 direction
- 大小 magnitude
以下三个量大家也可以了解下
纯量:scalar: 能量,温度,等都是纯量
向量:vector: 方向:跑过来还是撞过去
张量:tensor: 客观存在的物理量,scalar和vector都是它的一种形态
3.1 物理含义
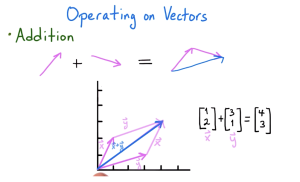
通过上面向量的学习我们知道 一切有大小有方向的量都可以用向量来表示
- 速度
- 加速度
- 力
这些都是有大小有方向,也是向量在物理学中的含义。比如两个力作用于同一个物体,通过力的合成,平行四边形法则等,我们知道,实际上就是 F1向量 加上 F2向量。
力的合成就是向量的加法运算
3.2 向量的运算
我们力导布局算法里用到的运算主要是加法,减法,系数乘。
强烈推荐大家看Youtbe上的视频,复习这块的知识,大概20min就可以学完
https://www.youtube.com/watch?v=Kti2mNKDOTw&index=6&list=PLA9470D64579500CE
对应的代码如下
class Vector {constructor(x, y) {this.x = x;this.y = y;}getvec() {return this;}add(v2) {return new Vector(this.x + v2.x, this.y + v2.y);}subtract(v2) {return new Vector(this.x - v2.x, this.y - v2.y);}magnitude() {return Math.sqrt(this.x * this.x + this.y * this.y);}normalise() {return this.divide(this.magnitude());}divide(n) {return new Vector(this.x / n || 0, this.y / n || 0);}scalarMultip(n) {/*** 向量有3个容易混淆概念* scalar Multip 系数积* dot Product 内积/点积* cross product 外积/有向积*/return new Vector(this.x * n, this.y * n);}}export default Vector;
4.定义数据结构
- 向量定义过了,用于存储速度,加速度,力
- Spring 是弹簧,主要是存储边的源节点,目标节点 与 边的长度
- Node 定义节点
- Edge 定义边
Point 是通过节点抽象出来的物理质点,用于分析受力与运动状态
import Vector from './Vector';class Point {constructor(position, id = -1, group = -1, mass = 1.0) {this.p = position; //点的位置,用[x,y]向量来表示this.m = mass; // 点的质量,默认为1.0this.v = new Vector(0, 0); // 速度,初始值为向量零 [0,0]this.a = new Vector(0, 0); // 加速度,初始值为向量零 [0,0]this.id = id; // 点的唯一IDthis.group = group; // 点的分组}updateAcc(force) {/*** 加速度也是一个向量,根据力的平行四边形法则进行力的合成,用向量运算就是加运算*/this.a = this.a.add(force.divide(this.m)); // a = a + F/m}}export default Point;
5.设计启动方式
const graph = new ForceLayout({...someOptions});graph.setData(data);graph.start();
ForceLayout 类用来通过初始化配置来生成力导布局
- setData方法用于清洗数据
- start用户图的启动
6.设计ForceLayout
```javascript class ForceLayout { constructor(options) { / 配置参数处理与变量定义 / this.props = {…someOptions}; this.updateOptions(options); } setData(data) { / 数据处理/ this.addNodes(data[‘nodes’]); this.addEdges(data[‘edges’]); } start() { /* 初始化节点 / this.init(); const step = () => {
}; window.requestAnimationFrame(step); } init() {this.tick(this.props.tickInterval);this.render();
this.nodes.forEach(); this.edges.forEach(); } tick(interval) { /* 布局算法 /this.canvas = document.createElement('canvas');
this.updateHookesLaw(); this.attractToCentre(); this.updateVelocity(interval); this.updatePosition(interval); } render() { this.nodePoints.forEach((val, key, map) => {this.updateCoulombsLaw();
}); this.edgeSprings.forEach((val, key, map) => {drawNode(key, val);
}); } } export default ForceLayout;drawEdge(key, val);
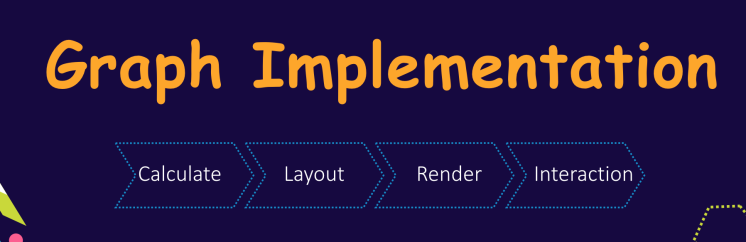
整体的ForceLayout类 全流程入上图所展示,我们把它拆解为3个过程- calculate- setData() 数据清洗和数据存储,将nodes和edges分别存储- layout- tick() 通过库伦公式和胡可公式,产生作用力,更新节点速度从而更新节点位置- render- render() 通过canvasAPI绘制点和边<a name="e944a0f2"></a>#### 6.1.设置初始配置```javascriptconstructor(options) {this.props = {approach: 'canvas', //render approach, svg or canvascontainerId: null,parentId: null,width: 800, // Rendered DOM widthheight: 600, // Rendered DOM heightstiffness: 200.0, // spring stiffness 弹簧劲度系数repulsion: 200.0, // repulsion 斥力,这里指代 库伦常量Ke/** https://www.khanacademy.org/science/ap-physics-1/ap-electric-charge-electric-force-and-voltage/coulombs-law-and-electric-force-ap/a/coulombs-law-and-electric-force-ap-physics-1 */damping: 0.8, // volocity damping factor 速度的减震因子,其实就是阻尼系数minEnergyThreshold: 0.1, // 最小能量阈值,当粒子运动,有阻尼系数的存在,最终会将初始的能量消耗殆尽maxSpeed: 1000, // 最大的速度 ?[0,1000]的加速度defSpringLen: 20, //默认的弹簧长度coulombDisScale: 0.005, // default Coulombs ConstanttickInterval: 0.02, // default time, used in velocity, acceleration and position's updatinggroupFactor: 4,};this.updateOptions(options);/** 存放器:节点与边 */this.nodes = [];this.edges = [];this.nodeSet = {};this.edgeSet = {};this.nodePoints = new Map();this.edgeSprings = new Map();/** canvas画布对象 **/this.canvas = null;this.ctx = null;/** 计数器 */this.iterations = 0;this.nextEdgeId = 0; //边属性计数自增this.color = n => {return Color[n % Color.length];}; // color schema}
6.2 数据存储
setData(data) {// clean all datathis.nodes = [];this.edges = [];this.nodeSet = {};this.edgeSet = {};this.nodePoints = new Map();this.edgeSprings = new Map();if (typeof data === 'string' || data instanceof String) {data = JSON.parse(data);}if ('nodes' in data || 'edges' in data) {this.addNodes(data['nodes']);this.addEdges(data['edges']);}}
6.3 初始化Point的位置
init() {/** 初始化点和边的信息 */let startX = this.props.width * 0.5,startY = this.props.height * 0.5,initSize = 20;this.nodes.forEach((node, index) => {const x = startX + initSize * (Math.random() - 0.5); // [-0.5*20,0.5*20] ===[-10,10] 随机相差10const y = startY + initSize * (Math.random() - 0.5);const vec = new Vector(x, y);this.nodePoints.set(node.id, new Point(vec, node.id, node.data.group));});this.edges.forEach((edge, index) => {const source = this.nodePoints.get(edge.source.id);const target = this.nodePoints.get(edge.target.id);// cosnt length = this.props.defSpringLen * Number.parseInt(edge.data); //根据边的data来实现收敛const length = source.p.subtract(target.p).magnitude(); //相邻两点的向量this.edgeSprings.set(edge.id, new Spring(source, target, length));});}
这个时候遇到了第一个难以理解的点,为什么edge的length 是这样计算的?
const length = source.p.subtract(target.p).magnitude(); //相邻两点的向量
还得记向量的运算吗?
边的源节点 减去 目标节点 其实就是一条边向量,大小就是边的长度,方向是从目标指向源节点。
6.4 分析Point的受的库伦力情况
节点Point通过初始化,实际上随机分布在20*20大小的一块正方向区域里,彼此因为库伦力所以会产生很强的斥力。我们要做的就是把这个库伦力计算出来,又因为每个Point都会互相产生斥力,所以力的相互作用要全量计算到每一个Point上,就需要一个双循环
updateCoulombsLaw() {const len = this.nodes.length;for (let i = 0; i < len; i++) {for (let j = i + 1; j < len; j++) {if (i === j) continue;const iNode = this.nodes[i];const jNode = this.nodes[j];const v = this.nodePoints.get(iNode.id).p.subtract(this.nodePoints.get(jNode.id).p);const dis = (v.magnitude() + 0.1) * this.props.coulombDisScale;const direction = v.normalise(); // 向量的方向:基向量const factor = iNode.data.group === jNode.data.group ? 1 : this.props.groupFactor;this.nodePoints.get(iNode.id).updateAcc(//得到库伦力direction.scalarMultip(this.props.repulsion * factor).divide(Math.pow(dis, 2)));this.nodePoints.get(jNode.id).updateAcc(direction.scalarMultip(this.props.repulsion * factor).divide(-Math.pow(dis, 2)));}}}
这里v,其实还是从jNode指向iNode的向量。大小是jNode到iNode的边长。剩下的就是通过Vector对象的向量运算,套用库仑定律公式,就可以得到库伦力,另一个节点受力情况则大小相等,方向相反。
值得思考的是四个点
- this.props.repulsion 取值如何取?它是库伦斥力,通常看作Ke,但是Ke在微观世界是常量。
- this.props.groupFactor 能否解决将节点分组清晰的问题?节点的分组用grid布局会不会更好?
- 两个Point间的距离dis 为什么要乘上this.props.columbDisScale 这个库伦缩放比例怎么取值?
- updateAcc 函数是什么含义?其实这个更新加速度的函数接受的参数是Force力,通过F/m=a得到加速度。这个时候多个Point互相作用的受力分析就会被转化为多个不同大小不同方向的加速度的合成,依旧遵照向量加法运算
updateAcc(force) {/*** 加速度也是一个向量,根据力的平行四边形法则进行力的合成,用向量运算就是加运算*/this.a = this.a.add(force.divide(this.m)); // a = a + F/m}
6.5 分析Point受到的胡克拉力
依旧是套用胡克定律,通过向量的积数乘运算
updateHookesLaw() {this.edges.forEach((edge, index) => {const spring = this.edgeSprings.get(edge.id);const v = spring.target.p.subtract(spring.source.p);const displacement = spring.length - v.magnitude();const direction = v.normalise();spring.source.updateAcc(direction.scalarMultip(-this.props.stiffness * displacement));spring.target.updateAcc(direction.scalarMultip(this.props.stiffness * displacement));});}
6.6 更新Point的速度
这里依旧套用物理公式,根据加速度求的当前Point速度。这里有一个注意点
this.props.damping 为什么需要这个阻尼系数,因为能量守恒原则,不加阻尼系数,系统就不会停止稳定
updateVelocity(interval) {this.nodes.forEach((node, index) => {const point = this.nodePoints.get(node.id);point.v = point.v.add(point.a.scalarMultip(interval)) //根据加速度求速度公式 V_curr= a*@t + V_pre.scalarMultip(this.props.damping);if (point.v.magnitude() > this.props.maxSpeed) {point.v = point.v.normalise().scalarMultip(this.props.maxSpeed);}point.a = new Vector(0, 0);});}
6.7更新Point的位置
根据路程公式 S_now = S_pre + v*t .这里的注意点是 interval。这里实际上是看我们多久需要计算一次节点的位置,故为Interval。它肯定要比屏幕的刷新帧率要快。最小值可以为 1000ms/60次 = 16.67ms/次
updatePosition(interval) {this.nodes.forEach((node, index) => {const point = this.nodePoints.get(node.id);point.p = point.p.add(point.v.scalarMultip(interval)); //路程公式 s = v * t});}
7. 动画的启动与停止判断
通过requestnimationFrame函数,我们保证在动画流畅进行。this.tick函数我们已经分析完了。这里主要看整个绘制过程的动画停止条件,之前也有提过,要么能量损耗到最小阈值停止,要么渲染事件已经长达一分钟,就可以让它停止了
start() {/** 初始化节点 */this.init();const step = () => {this.tick(this.props.tickInterval); //更新受力情况和位置this.render(); //渲染if (energy < this.props.minEnergyThreshold ||this.iterations === 1000000 // 1000000次/(1000/60) = 60000s = 1min) {window.cancelAnimationFrame(step);} else {window.requestAnimationFrame(step);}};window.requestAnimationFrame(step);}
8.绘制节点和边
这里有两个需要注意的点
clearRect在每次绘制的时候都需要调用,canvas好比一个画板。每次绘制相当于在一张纸上绘制,如果不clearRect就会让多张花纸重叠,效果很炸裂,大家可以体验下
DrawEdge和DrawNode函数其实应该暴露给用户自定义。现在是内置的,这里需要完善。
render() {/**逐帧渲染,需要先清除画布,如果不清楚,就会看到多张画布重叠,效果炸裂 */this.ctx.clearRect(0, 0, this.canvas.width, this.canvas.height);const drawNode = (key, val) => {let fillStyle = this.color(val.group),strokeStyle = 'rgb(255,255,255)',r = 5,lineWidth = 1;this.ctx.strokeStyle = strokeStyle;this.ctx.fillStyle = fillStyle;this.ctx.lineWidth = lineWidth;this.ctx.beginPath();this.ctx.arc(val.p.x, val.p.y, r, 0, 2 * Math.PI);this.ctx.stroke();this.ctx.fill();return;};const drawEdge = (key, val) => {let source = val.source,target = val.target,strokeStyle = 'rgb(100,100,100)',strokeWidth = Math.sqrt(val.length) * 0.1;this.ctx.strokeStyle = strokeStyle;this.ctx.lineWidth = strokeWidth;this.ctx.beginPath();this.ctx.moveTo(source.p.x, source.p.y);this.ctx.lineTo(target.p.x, target.p.y);this.ctx.stroke();return;};this.nodePoints.forEach((val, key, map) => {drawNode(key, val);});this.edgeSprings.forEach((val, key, map) => {drawEdge(key, val);});}
9.biu~效果图如下
10. 感谢与感想
这里感谢 @黯晓(anxiao.jt) 同学很早之前分享的《用 ES2015 实现一个简单的力导向可视化图库》提供了很多参考与说明。文章代码写的非常清晰,我这里也算是把细节和理论知识完善下,希望能帮助到初学习关系可视化的同学,如果你也对关系可视化感兴趣,请联系我们,希望我们能一起学习进度
- 感想:说是从零到一制作关系网络,实际上这个还只是demo级别的,当我亲自实现一遍的时候,你会发现
Interaction才是我们最需要重点关注的,很多优秀的框架都实现了calculate/layout/render。但是只有交互才是最能体现其业务价值的地方,因为不同的业务场景有不同的交互方式,不同的交互方式肯能倒逼着我们改进我们的前面三步。因此这一块任重而道远。这是入门,也是挑战的开始!

若有收获,就点个赞吧
0 人点赞
