目的:解决消息的延迟接收。
使用场景:超过未支付的处理。
解决方案:第三方插件:rabbitmq_delayed_message_exchange,RabbitMQ没有自带这个功能,(阿里的收费RocketMQ可以自定义延迟时间)
下面是测试过程:
环境准备
- 方案一:
直接拉取带有插件的MQ,参考 github:https://github.com/heidiks/rabbitmq-delayed-message-exchange
docker run -di \-p 5672:5672 \-p 15672:15672 \--name tian_rabbitmq \heidiks/rabbitmq-delayed-message-exchange:latest
默认用户名和密码:guest@guest
- 方案二:
手动安装插件
1、下载插件:rabbitmq_delayed_message_exchange,注意版本对应

2、将其放置到RabbitMQ安装目录下的plugins目录下,并使用如下命令启动这个插件:
rabbitmq-plugins enable rabbitmq_delayed_message_exchange
3、重启一下RabbitMQ,让其生效。
Springboot集成测试
准备
1、引入依赖
<dependency><groupId>org.springframework.boot</groupId><artifactId>spring-boot-starter-amqp</artifactId></dependency>
2、配置属性
server:port: 8881spring:rabbitmq:host: localhostport: 5672username: guestpassword: guest
发送端

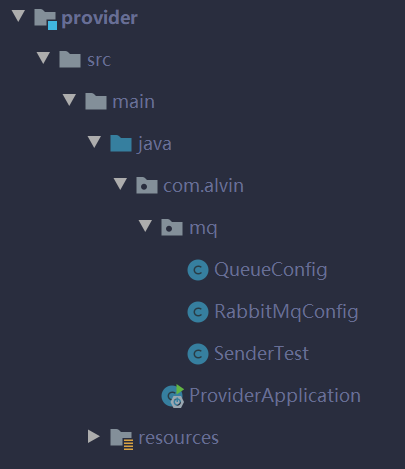
- 自定义ConnectionFactory和RabbitTemplate ```shell package com.mq.rabbitmq;
import org.springframework.amqp.rabbit.connection.CachingConnectionFactory; import org.springframework.amqp.rabbit.connection.ConnectionFactory; import org.springframework.amqp.rabbit.core.RabbitTemplate; import org.springframework.boot.context.properties.ConfigurationProperties; import org.springframework.context.annotation.Bean; import org.springframework.context.annotation.Configuration;
@Configuration @ConfigurationProperties(prefix = “spring.rabbitmq”) public class RabbitMqConfig { private String host; private int port; private String userName; private String password;
@Beanpublic ConnectionFactory connectionFactory() {CachingConnectionFactory cachingConnectionFactory = new CachingConnectionFactory(host,port);cachingConnectionFactory.setUsername(userName);cachingConnectionFactory.setPassword(password);cachingConnectionFactory.setVirtualHost("/");cachingConnectionFactory.setPublisherConfirms(true);return cachingConnectionFactory;}@Beanpublic RabbitTemplate rabbitTemplate() {RabbitTemplate rabbitTemplate = new RabbitTemplate(connectionFactory());return rabbitTemplate;}public String getHost() {return host;}public void setHost(String host) {this.host = host;}public int getPort() {return port;}public void setPort(int port) {this.port = port;}public String getUserName() {return userName;}public void setUserName(String userName) {this.userName = userName;}public String getPassword() {return password;}public void setPassword(String password) {this.password = password;}
}
- Exchange和Queue配置```shellimport org.springframework.amqp.core.*;import org.springframework.context.annotation.Bean;import org.springframework.context.annotation.Configuration;import java.util.HashMap;import java.util.Map;@Configurationpublic class QueueConfig {@Beanpublic CustomExchange delayExchange() {Map<String, Object> args = new HashMap<>();args.put("x-delayed-type", "direct");return new CustomExchange("test_exchange", "x-delayed-message",true, false,args);}@Beanpublic Queue queue() {Queue queue = new Queue("test_queue_1", true);return queue;}@Beanpublic Binding binding() {return BindingBuilder.bind(queue()).to(delayExchange()).with("test_queue_1").noargs();}}
- 消息发送方法 ```shell
import org.springframework.amqp.AmqpException; import org.springframework.amqp.core.Message; import org.springframework.amqp.core.MessagePostProcessor; import org.springframework.amqp.rabbit.core.RabbitTemplate; import org.springframework.beans.factory.annotation.Autowired; import org.springframework.stereotype.Service;
import java.text.SimpleDateFormat; import java.util.Date;
@Service public class MessageServiceImpl {
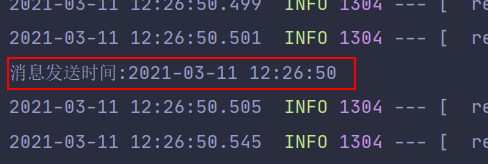
@Autowiredprivate RabbitTemplate rabbitTemplate;public void sendMsg(String queueName,String msg) {SimpleDateFormat sdf = new SimpleDateFormat("yyyy-MM-dd HH:mm:ss");System.out.println("消息发送时间:"+sdf.format(new Date()));rabbitTemplate.convertAndSend("test_exchange", queueName, msg, new MessagePostProcessor() {@Overridepublic Message postProcessMessage(Message message) throws AmqpException {message.getMessageProperties().setHeader("x-delay",3000);return message;}});}
}
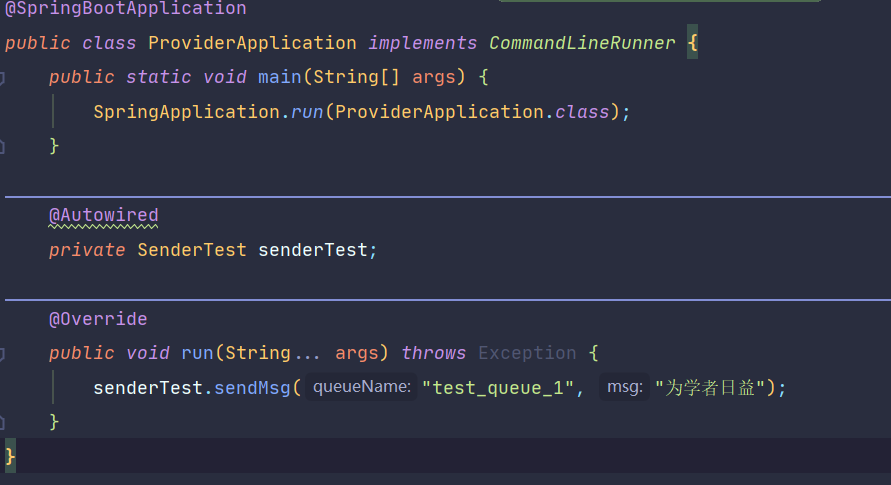
- 调用<a name="5YFYA"></a>### 接收端正常接收(不需要和发送端一样自定义template)```shellpackage com.mq.rabbitmq;import org.springframework.amqp.rabbit.annotation.RabbitHandler;import org.springframework.amqp.rabbit.annotation.RabbitListener;import org.springframework.stereotype.Component;import java.text.SimpleDateFormat;import java.util.Date;@Componentpublic class MessageReceiver {@RabbitListener(queues = "test_queue_1")public void receive(String msg) {SimpleDateFormat sdf = new SimpleDateFormat("yyyy-MM-dd HH:mm:ss");System.out.println("消息接收时间:"+sdf.format(new Date()));System.out.println("接收到的消息:"+msg);}}


