实现过程主要包含三个部分:
1.怎么初始化避障模块?
2.怎么获取避障距离数据?
3.怎么实现避障控制
1.如何初始化
(1)主函数中调用过这个函数:
void Rover::init_ardupilot(){…………init_proximity();//避障函数初始化}
在/APMrover2/sensors里有:
void Rover::init_proximity(void){#if PROXIMITY_ENABLED == ENABLEDg2.proximity.init();//测距传感器初始化g2.proximity.set_rangefinder(&rangefinder);//设置近距传感器#endif}
(2)避障初始化函数执行顺序
首先看 g2.proximity.init()函数;
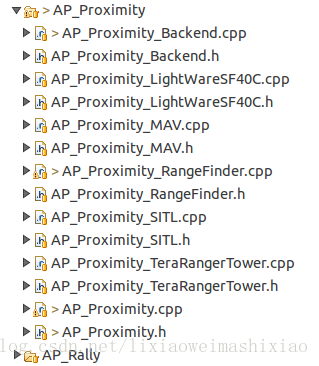
void AP_Proximity::init(void){if (num_instances != 0) //没有传感器就直接返回return;for (uint8_t i=0; i<PROXIMITY_MAX_INSTANCES; i++){detect_instance(i); //传感器识别if (drivers[i] != nullptr) //我们为这个实例加载了一个驱动程序,所以它必须存在(尽管它可能不健康){// we loaded a driver for this instance, so it must be present (although it may not be healthy)num_instances = i+1;}//初始化状态标志-----initialise statusstate[i].status = Proximity_NotConnected;}}------------------------------------------------------------下面代码是识别我们用的哪种传感器 detect_instance(i);------------------------------------------------------------void AP_Proximity::detect_instance(uint8_t instance){uint8_t type = _type[instance];if (type == Proximity_Type_SF40C) //激光测距模块{if (AP_Proximity_LightWareSF40C::detect(serial_manager)){state[instance].instance = instance;//使用哪种传感器就创建哪种对象:drivers[instance] = new AP_Proximity_LightWareSF40C(*this, state[instance], serial_manager);return;}}if (type == Proximity_Type_MAV){state[instance].instance = instance;drivers[instance] = new AP_Proximity_MAV(*this, state[instance]);return;}if (type == Proximity_Type_TRTOWER){if (AP_Proximity_TeraRangerTower::detect(serial_manager)){state[instance].instance = instance;drivers[instance] = new AP_Proximity_TeraRangerTower(*this, state[instance], serial_manager);return;}}if (type == Proximity_Type_RangeFinder) //测距仪器{state[instance].instance = instance;drivers[instance] = new AP_Proximity_RangeFinder(*this, state[instance]);return;}#if CONFIG_HAL_BOARD == HAL_BOARD_SITLif (type == Proximity_Type_SITL){state[instance].instance = instance;drivers[instance] = new AP_Proximity_SITL(*this, state[instance]); //创建实例return;}#endif}
这是APM支持的驱动类型:
在const AP_Param::GroupInfo AP_Proximity::var_info[]中有我们用到的参数**
2.更新避障数据
SCHEDTASK(update_proximity, 100, 50), //更新近距离传感器,避障使用
//更新数据的函数:
void Rover::update_proximity(void){#if PROXIMITY_ENABLED == ENABLEDg2.proximity.update();#endif}
在update()中有这一行:drivers[i]->update(); //更新数据
//这里由于 virtual void update() = 0;是纯虚函数,我们以AP_Proximity_RangeFinder为例分析void AP_Proximity_RangeFinder::update(void){//如果没有测距仪目标立即退出const RangeFinder *rngfnd = frontend.get_rangefinder();if (rngfnd == nullptr){set_status(AP_Proximity::Proximity_NoData);return;}//查看所有测距仪for (uint8_t i=0; i<rngfnd->num_sensors(); i++){if (rngfnd->has_data(i)){//检查水平测距仪if (rngfnd->get_orientation(i) <= ROTATION_YAW_315){uint8_t sector = (uint8_t)rngfnd->get_orientation(i); //获取方向_angle[sector] = sector * 45; //获取角度_distance[sector] = rngfnd->distance_cm(i) / 100.0f; //获取距离_distance_min = rngfnd->min_distance_cm(i) / 100.0f; //最小距离_distance_max = rngfnd->max_distance_cm(i) / 100.0f; //最大距离_distance_valid[sector] = (_distance[sector] >= _distance_min) && (_distance[sector] <= _distance_max); //是否在限制的范围_last_update_ms = AP_HAL::millis(); //获取上次时间update_boundary_for_sector(sector);//这里是更新扇区的介绍,重要函数}//检查向上测距仪----------check upward facing range finderif (rngfnd->get_orientation(i) == ROTATION_PITCH_90){_distance_upward = rngfnd->distance_cm(i) / 100.0f;_last_upward_update_ms = AP_HAL::millis();}}}//检查超时并设置健康状态--------- check for timeout and set health statusif ((_last_update_ms == 0) || (AP_HAL::millis() - _last_update_ms > PROXIMITY_RANGEFIDER_TIMEOUT_MS)){set_status(AP_Proximity::Proximity_NoData);} else{set_status(AP_Proximity::Proximity_Good);}}
获取到的这些值应该传到避障控制函数中,
怎么传过去的,要看这个函数:update_boundary_for_sector(sector)//更新边界区域
这个函数最终会计算得到避障边界点数据:_boundary_point[]
3.避障控制实现
下面这个函数是控制航行器速度的:
_avoid->adjust_velocity(_pos_control.get_pos_xy_kP(),_loiter_accel_cmss, desired_vel);
具体实现:
void AC_Avoid::adjust_velocity(float kP, float accel_cmss, Vector2f &desired_vel){//没有使能立即退出---exit immediately if disabledif (_enabled == AC_AVOID_DISABLED){return;}//限制加速度------limit accelerationfloat accel_cmss_limited = MIN(accel_cmss, AC_AVOID_ACCEL_CMSS_MAX);if ((_enabled & AC_AVOID_STOP_AT_FENCE) > 0) //这个是围栏设置,可以先不看{adjust_velocity_circle_fence(kP, accel_cmss_limited, desired_vel);adjust_velocity_polygon_fence(kP, accel_cmss_limited, desired_vel);}if ((_enabled & AC_AVOID_USE_PROXIMITY_SENSOR) > 0 && _proximity_enabled) //采用近距传感器,重点看这里{adjust_velocity_proximity(kP, accel_cmss_limited, desired_vel); //根据近距离传感器调节速度}}
在这个函数adjust_velocity_proximity(kP, accel_cmss_limited, desired_vel) 中有如下代码:
……………………………………………………//从近距传感器获取边界-----------get boundary from proximity sensoruint16_t num_points;const Vector2f *boundary = _proximity.get_boundary_points(num_points);//计算边界点adjust_velocity_polygon(kP, accel_cmss, desired_vel, boundary, num_points, false, _margin); //通过避障点计算所需要的目标速度。

