了解Feign
上个模块我们讲解和分析了RIbbon 的功能和作用,提供了分布式架构之前调用的负载均衡策略,使我们分布式架构必须要考虑的,使用了Spring自带的RestTemplate。而RestTemplate使用的是HttpClient发送请求。本节我们将介绍另一个重要的REST客户端Feign
1.Feign介绍
Feign是GitHub 上的一个开源项目,目的之简化Web Service 客户端的开发,以Java接口注解的方式调用Http请求,而不用像Spring自带的RestTemplate直接调用。Feign通过处理注解,将请求模板化,当实际调用的时候,传入参数,根据参数再应用到请求上,进而转化成真正的请求,这种请求相对而言比较直观。
Spring Cloud 将Feign 整合到了Netflix项目中,当与Eureka、Ribbon整合时,Feign 就具备了负载均衡的能力,在Spring Cloud 的高度整合下,使用该框架调用Spring Cloud集群服务,会大大降低开发工作量。
2. Feign 的职责
通过下面这张图,我看下一下Feign在Spring Cloud 集群之间起到的作用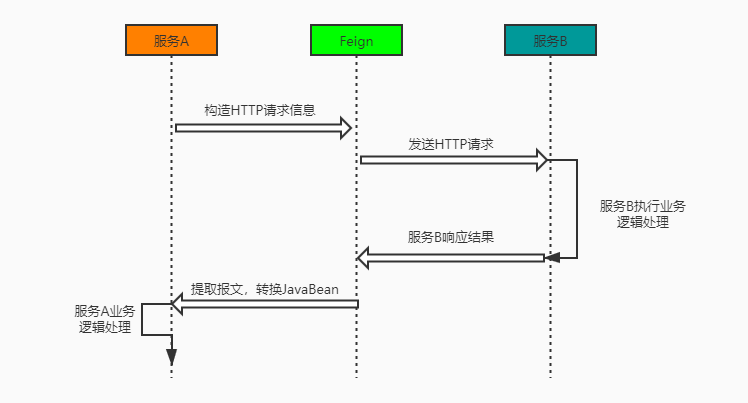
由此我们看,Feign 主要提供了Spring Cloud 集群之间的HTTP调用功能
Feign 入门
本节代码地址
GitHub: https://github.com/xuyisu/fw-sping-cloud/tree/master/fw-cloud-feign/fw-cloud-feign-client
GitHub: https://github.com/xuyisu/fw-sping-cloud/tree/master/fw-cloud-client/fw-cloud-client-eureka
1.新建项目
在项目根目录下新建mudule fw-cloud-feign-client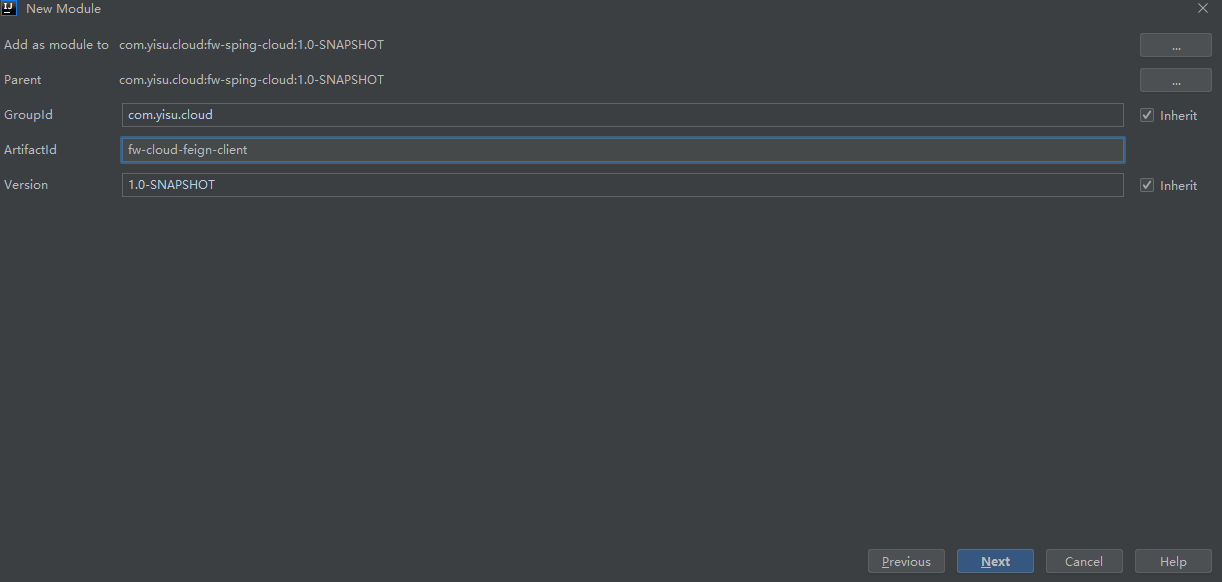
1.1 maven 配置
Spring Cloud 已经为我们封装好了Feign 的包,使用的时候直接加入依赖即可。pom.xml依赖如下
<dependencies><dependency><groupId>org.springframework.boot</groupId><artifactId>spring-boot-starter-web</artifactId></dependency><dependency><groupId>org.springframework.cloud</groupId><artifactId>spring-cloud-starter-netflix-eureka-client</artifactId></dependency><dependency><groupId>org.springframework.cloud</groupId><artifactId>spring-cloud-starter-openfeign</artifactId></dependency><dependency><groupId>org.springframework.boot</groupId><artifactId>spring-boot-starter-actuator</artifactId></dependency>
1.2 新建启动类
@EnableDiscoveryClient@SpringBootApplication@EnableFeignClientspublic class FwFeignApplication {public static void main(String[] args) {SpringApplication.run(FwFeignApplication.class, args);}}
在启动类上加入@EnableFeignClients注解,如果Feign的定义跟启动类不在一个包名下,还需要制定路径,如@EnableFeignClients(basePackages = "con.fwcloud.xxx.xxx")
1.3 项目配置
server:port: 8771spring:application:name: fw-feigneureka:client:service-url:defaultZone: http://localhost:8761/eureka/
1.4 定义Feign 请求的接口
这里我们配合前面Eureka的例子,做一次远程调用
@FeignClient(value = "fw-register-eureka-client")public interface EurekaFeignService {//feign中你可以有多个@RequestParam,但只能有不超过一个@RequestBody@GetMapping("/hello")String hello();}
@FeignClient(value = "fw-register-eureka-client")里面配置的value 就是服务的名称
这里有几点需要注意
- 如果你在项目里面设置了同意的请求路径(server.servlet.context-path),需要将
@FeignClient注解调整@FeignClient(value = "fw-register-eureka-client",path = "xxx") - Feign 里面定义的接口,有多个@RequestParam,但只能有不超过一个
@RequestBody - 在定义接口的时候,如果返回的是用户自定义的实体,建议抽取出来,在Controller中实现接口,将抽取出来的接口单独打包,需要调用的项目依赖此包即可,每个项目不用重新定义一遍
1.5 定义控制层
@RestController@Slf4jpublic class EurekaFeignController {@Resourceprivate EurekaFeignService eurekaFeignService;@GetMapping("/feignInfo")public String feignInfo() {String message = eurekaFeignService.hello();log.info(message);return message;}}
1.6启动项目
由于需要配合的项目是fw-cloud-client-eureka,因此我们仍然按照之前的方式启动项目,Idea设置为允许并行启动。启动两个端点分别为8763、8764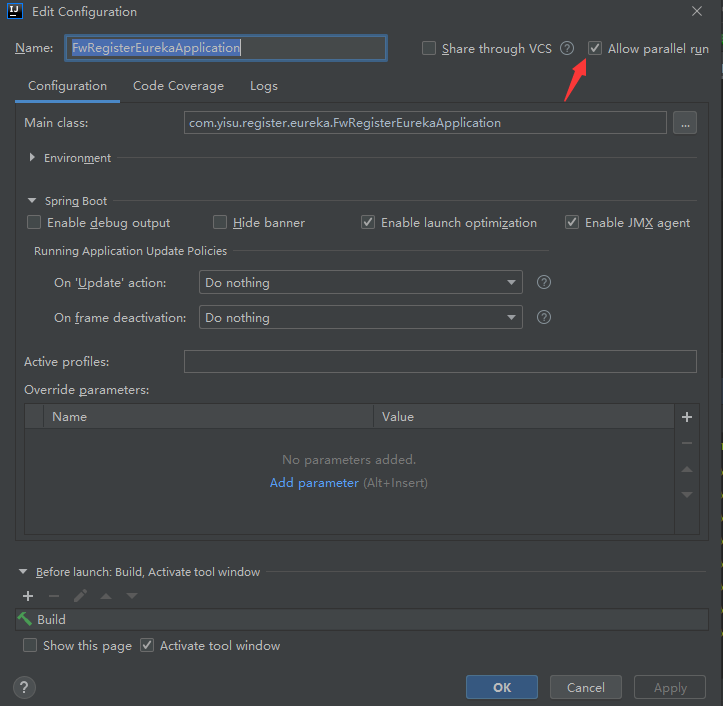
接着启动fw-cloud-feign-client项目,并在postman 中测试接口http://localhost:8771/feignInfo
获取到的结果也是轮询的显示8763、8764端口
到此Ribbon 的入门使用已经完成
Feign自定义操作
1.自定义日志
本节代码地址
GitHub: https://github.com/xuyisu/fw-sping-cloud/tree/master/fw-cloud-feign/fw-cloud-feign-client
我们在开发时候一般出现问题,需要将出错信息、异常信息以及正常的输入输出打印出来,以供我们更好的排查和解决问题,比如想看到接口的性能,就需要看Feign 的日志,那么如何让Feign 的日志展示出来呢?
1.1 添加日志的配置信息
新建FeignConfig类,并设置日志级别的输出信息
public class FeignConfig {/*** 输出的日志级别* @return*/@BeanLogger.Level feignLoggerLevel(){return Logger.Level.FULL;}}
通过源码可 日志等级有
- NONE: 不输出日志
- BASIC: 只输出请求方法的URL 和响应状态码以及接口的请求时间
- HEADERS :将 BASIC信息和请求头信息输出
- FULL :输出完 的请求信息
对应的源码如下所示代码路径:feign.Loggerpublic static enum Level {NONE,BASIC,HEADERS,FULL;private Level() {}}
1.2 @FeignClient的配置修改
之后将配置信息添加到Feign 的接口配置上面@FeignClient(value = "fw-register-eureka-client",configuration = FeignConfig.class)public interface EurekaFeignService {//feign中你可以有多个@RequestParam,但只能有不超过一个@RequestBody@GetMapping("/hello")String hello();}
1.3 需要在application.yml中设置日志级别
com.yisu是设置包路径,在这个路径里面的debug信息都会被捕获到logging:level:com.yisu: debug
1.4 重启应用并调用服务接口
Postman调用localhost:8771/feignInfo
可以在console控制台中看到如下DEBUG日志:2019-12-28 15:14:55.857 DEBUG 6996 --- [nio-8771-exec-1] c.yisu.feign.service.EurekaFeignService : [EurekaFeignService#hello] <--- HTTP/1.1 200 (682ms)2019-12-28 15:14:55.857 DEBUG 6996 --- [nio-8771-exec-1] c.yisu.feign.service.EurekaFeignService : [EurekaFeignService#hello] content-length: 102019-12-28 15:14:55.857 DEBUG 6996 --- [nio-8771-exec-1] c.yisu.feign.service.EurekaFeignService : [EurekaFeignService#hello] content-type: text/plain;charset=UTF-82019-12-28 15:14:55.857 DEBUG 6996 --- [nio-8771-exec-1] c.yisu.feign.service.EurekaFeignService : [EurekaFeignService#hello] date: Sat, 28 Dec 2019 07:14:55 GMT2019-12-28 15:14:55.857 DEBUG 6996 --- [nio-8771-exec-1] c.yisu.feign.service.EurekaFeignService : [EurekaFeignService#hello]2019-12-28 15:14:55.862 DEBUG 6996 --- [nio-8771-exec-1] c.yisu.feign.service.EurekaFeignService : [EurekaFeignService#hello] hello:87632019-12-28 15:14:55.862 DEBUG 6996 --- [nio-8771-exec-1] c.yisu.feign.service.EurekaFeignService : [EurekaFeignService#hello] <--- END HTTP (10-byte body)2019-12-28 15:14:55.879 INFO 6996 --- [nio-8771-exec-1] c.y.f.controller.EurekaFeignController : hello:87632019-12-28 15:14:56.670 INFO 6996 --- [erListUpdater-0] c.netflix.config.ChainedDynamicProperty : Flipping property: fw-r
2.Basic 认证配置
本节代码地址
GitHub: https://github.com/xuyisu/fw-sping-cloud/tree/master/fw-cloud-feign/fw-cloud-feign-client
一般我们在调用服务间的接口时,接口上都会设置需要的权限信息,而一般的权限认证有通过token校验的、也有通过用户名密码校验的等方式。比如我们在Feign 请求中我们可以配置Basic 认证,如下
/*** 设置Spring Security Basic认证的用户名密码* @return*/@Beanpublic BasicAuthRequestInterceptor basicAuthRequestInterceptor(){return new BasicAuthRequestInterceptor("user","123456");}
那Spring Security Basic认证又是什么呢?Spring Security 是Spring官方提供的安全框架,是一种比较重的权限校验框架,当然还有一种比较轻量型的框架shiro。关于Spring Security 的使用,我们后面会专门开一个模块来讲解。
接着上面说,如果我不是Basic认证又该怎么办?
那当然是自定义我们的拦截器了,请请求之前做认证操作,然后往请求头中设置认证之后的信息,下面通过实现RequestInterceptor接口可以自定义自己的认证。
2.1 自定义认证配置
/*** @author xuyisu* @description 自定义认证方式* @date 2019/12/28*/@NoArgsConstructorpublic class FeignAuthRequestInterceptor implements RequestInterceptor {@Overridepublic void apply(RequestTemplate requestTemplate) {//编写自己的业务逻辑}}
然后在FeignConfig配置中添加Bean
/*** 自定义认证逻辑* @return*/@Beanpublic FeignAuthRequestInterceptor basicAuthRequestInterceptor(){return new FeignAuthRequestInterceptor();}
3. Feign 的超时配置
本节代码地址
GitHub: https://github.com/xuyisu/fw-sping-cloud/tree/master/fw-cloud-feign/fw-cloud-feign-client
服务的请求见,肯定需要设置服务请求之间的超时时间,不可能一直在哪里等待,那feign 的超时时间如何配置?
| 类型 | 备注 | 默认值 |
|---|---|---|
| connectTimeout | 连接超时时间 | 默认 2000毫秒 |
| readTimeout | 读取超时时间 | 默认 5000毫秒 |
代码路径com.netflix.client.config.DefaultClientConfigImpl
3.1 方式一
添加代码配置,但是这个不能注册到全局,需要在FeignClient上指定
/*** 设置连接超时时间和响应超时时间,默认值是10000和60000* @return*/@Beanpublic Request.Options options(){return new Request.Options(5000,1000);}
3.1 方式二
添加application.yml的配置
需要注意的是
connectTimeout和readTimeout必须同时配置,要不然不会生效,这种方式可以全局配置,至于为什么请看后面。
feign:client:config:default:connectTimeout: 10000readTimeout: 10000service-name:connectTimeout: 10000readTimeout: 10000或者ribbon:ReadTimeout: 60000ConnectTimeout: 60000service-name:ribbon:ReadTimeout: 30000ConnectTimeout: 30000
以上配置default是全局的配置,service-name是配置具体服务的
3.3 配置生效的原因
当然有人会说,我直接配置Ribbon 不也是可以的吗?毕竟Feign 集成了Ribbon,但是在Feign 的实现中,Feign的配置如果不是默认的是优先Ribbon 生效的。
public class LoadBalancerFeignClient implements Client {IClientConfig getClientConfig(Options options, String clientName) {Object requestConfig;//只要配置不是默认的就会走Feign里面配置的if (options == DEFAULT_OPTIONS) {requestConfig = this.clientFactory.getClientConfig(clientName);} else {requestConfig = new LoadBalancerFeignClient.FeignOptionsClientConfig(options);}return (IClientConfig)requestConfig;}
为什么connectTimeout和readTimeout必须同时配置?
class FeignClientFactoryBean implements FactoryBean<Object>, InitializingBean,ApplicationContextAware {protected void configureUsingProperties(FeignClientProperties.FeignClientConfiguration config, Feign.Builder builder) {if (config == null) {return;}if (config.getLoggerLevel() != null) {builder.logLevel(config.getLoggerLevel());}//此处,必须俩值都不为null才会替换新optionsif (config.getConnectTimeout() != null && config.getReadTimeout() != null) {builder.options(new Request.Options(config.getConnectTimeout(), config.getReadTimeout()));}
5. 配置重试
本节代码地址
GitHub: https://github.com/xuyisu/fw-sping-cloud/tree/master/fw-cloud-feign/fw-cloud-feign-client
5.1 方式一(代码配置)
在config添加重试的Bean,Feign 模式是不重试的,如果通过Retryer.Default()开启的话,默认是5次重试,可以自定义修改重试次数
@Beanpublic Retryer feignRetryer() {// return new Retryer.Default();//100毫秒到1000毫秒间重试4次 自定义return new Retryer.Default(100, 1000, 4);}
5.1.1 重试配置源码
可以看到默认的配置是100毫秒到1秒之间,重试5次
public Default() {this(100L, TimeUnit.SECONDS.toMillis(1L), 5);}
5.1.2 调整配置
修改application.yml的配置,设施超时时间
feign:client:config:default:connectTimeout: 10000readTimeout: 10000
在fw-cloud-client-eureka中TestController添加随机的睡眠时间
@GetMapping("/hello")public String hello() throws InterruptedException {int millis = new Random().nextInt(3000);System.out.println("client线程休眠时间:"+millis);Thread.sleep(millis);return "hello:"+serverPort;}
5.1.3 测试效果
重启应用,Postman 调用接口localhost:8771/feignInfo,可以看到重试了4次

5.2 方式二 (文件配置)
5.1.1 配置修改
#重试ribbon:#配置首台服务器重试1次MaxAutoRetries: 1#配置其他服务器重试两次MaxAutoRetriesNextServer: 2#链接超时时间ConnectTimeout: 500#请求处理时间ReadTimeout: 500#每个操作都开启重试机制OkToRetryOnAllOperations: true#配置断路器超时时间,默认是1000(1秒)feign:hystrix:enabled: truehystrix:command:default:execution:isolation:thread:timeoutInMilliseconds: 2100
5.2.2 编码调整
跟方式一一样
在fw-cloud-client-eureka中TestController添加随机的睡眠时间
@GetMapping("/hello")public String hello() throws InterruptedException {int millis = new Random().nextInt(3000);System.out.println("client线程休眠时间:"+millis);Thread.sleep(millis);return "hello:"+serverPort;}
5.2.3配置介绍
| 配置 | 说明 |
|---|---|
| hystrix.command.default.execution.isolation.thread.timeoutInMilliseconds | 断路器的超时时间需要大于ribbon的超时时间,不然不会触发重试。 |
| fw-register-eureka-client.ribbon.ConnectTimeout | 请求连接的超时时间 |
| fw-register-eureka-client.ribbon.ribbon.ReadTimeout | 请求处理的超时时间 |
| fw-register-eureka-client.ribbon.ribbon.OkToRetryOnAllOperations | 是否对所有操作请求都进行重试 |
| fw-register-eureka-client.ribbon.ribbon.MaxAutoRetriesNextServer | 重试负载均衡其他的实例最大重试次数,不包括首次server |
| fw-register-eureka-client.ribbon.ribbon.MaxAutoRetries | 同一台实例最大重试次数,不包括首次调用 |
5.2.4 测试效果
重启应用,Postman 调用接口localhost:8771/feignInfo,可以看到重试了5次,默认的次数,当然如果测试不到5次,说明重试成功了。
4. 配置feign请求和响应的压缩
本节代码地址
GitHub: https://github.com/xuyisu/fw-sping-cloud/tree/master/fw-cloud-feign/fw-cloud-feign-client
Spring Cloud feign支持对请求和响应进行gzip压缩,以减少通信过程中的性能损耗
4.1 添加配置信息
- mime-types:配置压缩的类型
- min-request-size:最小压缩值的标准
#GZIP 压缩配置feign:compression:request:enabled: truemime-types: text/xml,application/xml,application/jsonmin-request-size: 2048response:enabled: true
4.2 重启项目测试
Postman 输入localhost:8771/feignInfo
如果返回的是乱码,可以用ResponseEntity<byte[]>处理二进制数据6. Feign 客户端组件替换
本节代码地址
GitHub: https://github.com/xuyisu/fw-sping-cloud/tree/master/fw-cloud-feign/fw-cloud-feign-okhttp
Feign 中默认使用的是HttpClient 来进行接口调用,我们现在使用OkHttp替换掉HttpClient
6.1 什么是 okhttp ?
okhttp 是由 square 公司开源的一个 http 客户端。是一款高效的HTTP客户端,支持连接同一地址的链接共享同一个socket,通过连接池来减小响应延迟
okhttp 的设计初衷就是简单和高效,这也是我们选择它的重要原因之一。它的优势如下:
- 支持 HTTP/2 协议。
- 允许连接到同一个主机地址的所有请求,提高请求效率。
- 共享Socket,减少对服务器的请求次数。
- 通过连接池,减少了请求延迟。
- 缓存响应数据来减少重复的网络请求。
- 减少了对数据流量的消耗。
- 自动处理GZip压缩。
6.2新建项目
新建项目fw-cloud-feign-okhttp用于将HttpClient替换OkHttp,代码里的内容和fw-cloud-feign内容一样,拷贝过来即可。6.3 maven 配置
将fw-cloud-feign中的pom 文件拷贝过来,并添加一下配置<dependency><groupId>io.github.openfeign</groupId><artifactId>feign-okhttp</artifactId><version>${okhttp.version}</version></dependency>
6.4 新建OkHttp的配置
这里就不需要HttpClient的之前的config配置了。下面的配置主要是一个demo性质的,实际项目中可以修改为读取application.yml 或application.properties里面的内容。
OkHttpLogInterceptor 是为了记录连接的url日志/*** @author xuyisu* @description FeignOkHttpConfig* @date 2019/12/28*/@Configuration@ConditionalOnClass(Feign.class)@AutoConfigureBefore(FeignAutoConfiguration.class)public class FeignOkHttpConfig {@Beanpublic okhttp3.OkHttpClient okHttpClient(){return new okhttp3.OkHttpClient.Builder().readTimeout(60, TimeUnit.SECONDS) //设置读取超时时间.connectTimeout(60, TimeUnit.SECONDS) //设置连接超时时间.writeTimeout(120, TimeUnit.SECONDS) //设置写入超时时间.connectionPool(new ConnectionPool()).addInterceptor(new OkHttpLogInterceptor()).build();}}
/*** @author xuyisu* @description Url 日志* @date 2019/12/28*/@Slf4jpublic class OkHttpLogInterceptor implements Interceptor {@Overridepublic Response intercept(Chain chain) throws IOException {log.info("OkHttpUrl : " + chain.request().url());return chain.proceed(chain.request());}}
6.5 重启项目
Postman 输入localhost:8771/feignInfo可以看到和之前的结果一样,但是日志有区别了。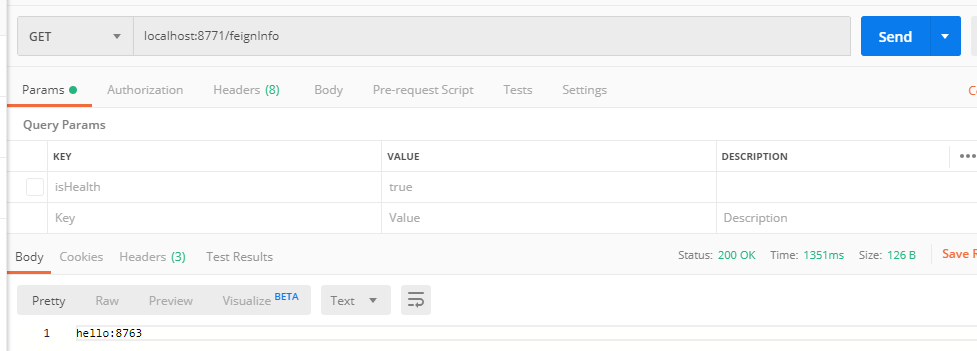
2019-12-28 19:22:06.331 INFO 36500 --- [nio-8771-exec-1] c.y.feign.config.OkHttpLogInterceptor : OkHttpUrl : http://desktop-375c7dm:8764/hello2019-12-28 19:22:07.226 INFO 36500 --- [erListUpdater-0] c.netflix.config.ChainedDynamicProperty : Flipping property: fw-register-eureka-client.ribbon.ActiveConnectionsLimit to use NEXT property: niws.loadbalancer.availabilityFilteringRule.activeConnectionsLimit = 21474836472019-12-28 19:22:07.360 INFO 36500 --- [nio-8771-exec-1] c.y.feign.config.OkHttpLogInterceptor : OkHttpUrl : http://desktop-375c7dm:8763/hello2019-12-28 19:22:07.854 INFO 36500 --- [nio-8771-exec-1] c.y.f.controller.EurekaFeignController : hello:8763
7. Feign 文件上传
之前我们应该都实现过文件上传的功能,那么通过服务调用的方式实现文件上传需要注意什么呢?方式肯定是有区别本节代码地址
GitHub: https://github.com/xuyisu/fw-sping-cloud/tree/master/fw-cloud-feign/fw-cloud-feign-okhttp
GitHub: https://github.com/xuyisu/fw-sping-cloud/tree/master/fw-cloud-upload
7.1 新建上传项目
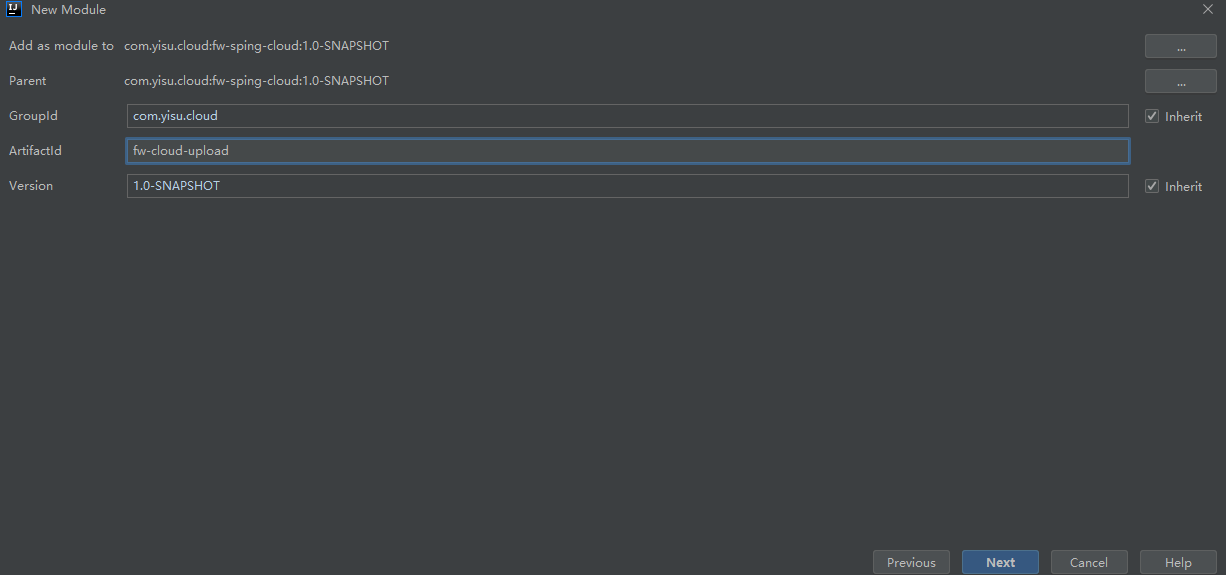
7.2 maven 配置
此服务我们后续希望可以通过Eureka 注册中心实现服务之间的调用,因此加上spring-cloud-starter-netflix-eureka-client包
<dependencies><dependency><groupId>org.springframework.boot</groupId><artifactId>spring-boot-starter-web</artifactId></dependency><dependency><groupId>org.springframework.cloud</groupId><artifactId>spring-cloud-starter-netflix-eureka-client</artifactId></dependency></dependencies>
7.3 新建启动类
/*** @description 上传服务启动类* @author xuyisu* @date 2019/12/29*/@EnableDiscoveryClient@SpringBootApplicationpublic class FwUploadApplication {public static void main(String[] args) {SpringApplication.run(FwUploadApplication.class, args);}}
7.4 新建控制层
下面我们需要提供一个统一的上传接口,默认的上传路径是D:/fw/file/,如果你是Windows或者Mac,需要替换路径。
/*** @author xuyisu* @description 上传* @date 2019/12/28*/@RestController@Slf4jpublic class UploadController {@PostMapping(value = "/uploadFile")public String uploadFile(MultipartFile file) throws Exception {log.info("upload file name : {}", file.getName());//上传文件file.transferTo(new File("D:/fw/file/" + file.getOriginalFilename()));return file.getOriginalFilename();}}
7.5 添加项目配置文件
server:port: 8871spring:application:name: fw-cloud-uploadeureka:client:service-url:defaultZone: http://localhost:8761/eureka
7.7 启动上传服务
利用Postman 测试,输入localhost:8771/uploadFile,需要注意下面几个标红框的部分,否则不能测试文件上传。
7.8 调整Feign项目配置
这里需要在Feign 中调用上传服务,跟刚才的直接调用上传服务是有区别的,需要设置一些配置文件,有哪些配置,请继续往下看。首先我们需要修改maven依赖,添加Feign 上传需要的依赖包。
需要注意的事,有些低版本的包不适合高版本的Spring Cloud ,需要调试最合适你的版本
<!-- Feign文件上传依赖--><dependency><groupId>io.github.openfeign.form</groupId><artifactId>feign-form</artifactId><version>${form.version}</version></dependency><dependency><groupId>io.github.openfeign.form</groupId><artifactId>feign-form-spring</artifactId><version>${form.version}</version></dependency>
7.9 设置Feign上传需要的配置
/*** @author xuyisu* @description 上传配置* @date 2019/12/28*/@Configurationpublic class FeignMultipartSupportConfiguration {/*** Feign Spring 表单编码器* @return 表单编码器*/@Bean@Primary@Scope("prototype")public Encoder multipartEncoder(){return new SpringFormEncoder();}}
7.10 新建Feign调用接口并引入配置文件
上一步的配置上传编码配置主要是为了在当前Feign接口中配置configuration = FeignMultipartSupportConfiguration.class,否则调用上传服务会失败。注意区分@RequestPart和RequestParam,不要将 @RequestPart(value = "file") 写成@RequestParam(value = "file")
@RequestPart与@RequestParam的区别
- @RequestPart这个注解用在multipart/form-data表单提交请求的方法上。
- @RequestPart支持的请求方法的方式MultipartFile,属于Spring的MultipartResolver类。这个请求是通过http协议传输的。
- @RequestParam也同样支持multipart/form-data请求。
- 他们最大的不同是,当请求方法的请求参数类型不再是String类型的时候。
- @RequestParam适用于name-valueString类型的请求域, @RequestPart适用于复杂的请求域(像JSON,XML
/*** @author xuyisu* @description* @date 2019/12/28*/@FeignClient(value = "fw-cloud-upload", configuration = FeignMultipartSupportConfiguration.class)public interface FileUploadFeignService {/**** 1.produces,consumes必填* 2.注意区分@RequestPart和RequestParam,不要将* : @RequestPart(value = "file") 写成@RequestParam(value = "file")*/@RequestMapping(value = "/uploadFile", method = RequestMethod.POST, produces = MediaType.APPLICATION_JSON_UTF8_VALUE, consumes = MediaType.MULTIPART_FORM_DATA_VALUE)String uploadFile(@RequestPart(value = "file") MultipartFile file);}
7.11 在控制成添加请求方法
@PostMapping(value = "/upload")public String upload(MultipartFile file){return fileUploadFeignService.uploadFile(file);}
7.12 重启fw-cloud-feign-client项目
利用Postman 测试localhost:8771/upload
我们在D:/fw/file/验证下是不是文件已上传成功
8. Feign 原生配置
在Spring Cloud 中通过使用已经封装好的Fiegn 可以很方便的调用其它服务接口,这是因为Spring Cloud 在底层做了很多工作,像集成Eureka、Ribbon、Hystrix、Sring MVC 注解等,假设你的项目不是Spring Cloud的,想用Feign 怎么办?请看本章的介绍。
原生的Feign 是不支持Spring MVC 注解的,使用的是@RequestLine注解
本节代码地址
8.1 新建项目
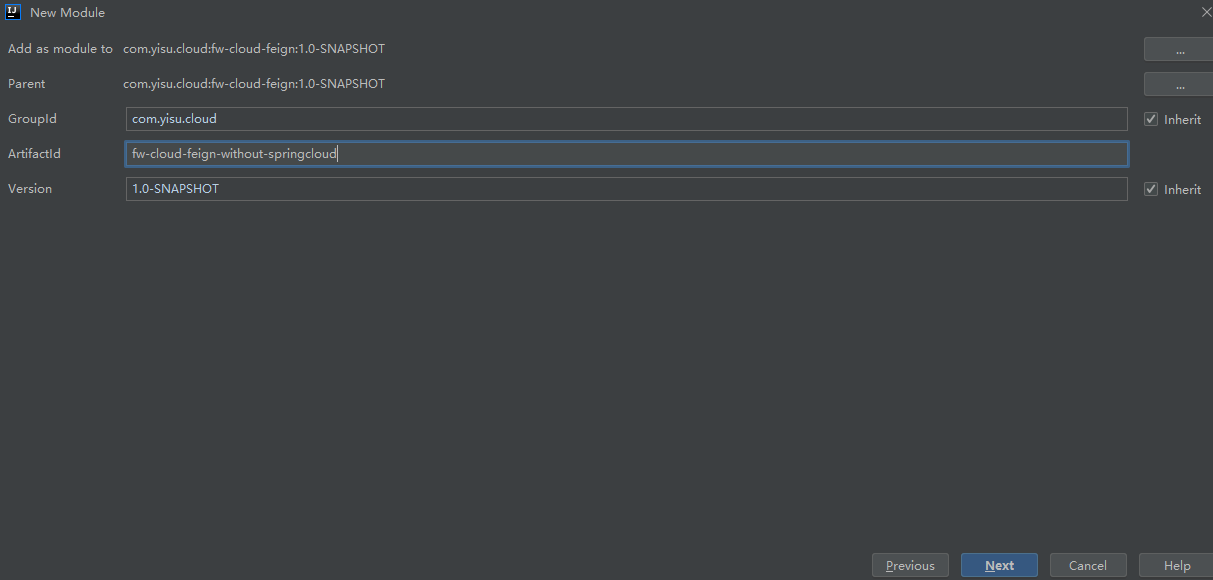
在这个项目里我们主要测试GET、PPST 请求,当然其他请求方式PUT、DELETE等也是支持的。
8.2 maven 配置
这里我们不引用Spring Cloud 提供的Feign包,只使用Feign自己的包,Feign的GitHub地址:https://github.com/OpenFeign/feign,有需要的可以拉源码看看。feign-gson的作用是什么,feign-gson包含了一个编码器和一个解码器,这个可以被用于JSON格式的AP,添加 GsonEncoder 以及 GsonDecoder 到你的 Feign.Builder 中I。
除了Gson 还有一下可以使用
- Jackson:添加
JacksonEncoder以及JacksonDecoder到你的Feign.Builder中 - Sax:
SaxDecoder用于解析XML,并兼容普通JVM和Android - JAXB: 添加
JAXBEncoder以及JAXBDecoder到你的Feign.Builder中<dependencies><dependency><groupId>org.springframework.boot</groupId><artifactId>spring-boot-starter-web</artifactId></dependency><dependency><groupId>io.github.openfeign</groupId><artifactId>feign-core</artifactId><version>${feign-core.version}</version></dependency><dependency><groupId>io.github.openfeign</groupId><artifactId>feign-gson</artifactId><version>${feign-core.version}</version></dependency></dependencies>
8.3 新建启动类
@SpringBootApplicationpublic class FwWithSpringCloudApplication {public static void main(String[] args) {SpringApplication.run(FwWithSpringCloudApplication.class, args);}}
8.4 新建应用配置
server:port: 8864
8.5 新建实体类
/*** @author xuyisu* @description 用户* @date 2019/12/11*/@Data@AllArgsConstructor@NoArgsConstructorpublic class User implements Serializable {/*** 主键*/private long id;/*** 用户名*/private String username;/*** 真实姓名*/private String realname;/*** 邮箱*/private String email;/*** 备注*/private String remark;}
8.6 新建Feign请求接口
需要注意,原生的Feign 使用的是@RequestLine("GET /hello")形式的接口,里面是请求方式和接口名称,中间用空格间隔开。/*** @description 测试不在SpringCloud项目里使用Feign* @author xuyisu* @date 2019/12/29*/public interface HelloClient {@RequestLine("GET /hello")String hello();@RequestLine("GET /{id:\\d+}")User getUserById(@Param("id") Long id);@RequestLine("POST /getUsers")List<User> getUsers();}
8.7 新建控制层
用于对外测试Feign 接口,注意这里因为没用Spring Cloud 提供的Eureka注册中心,需要我们提供自己的服务地址。/*** @author xuyisu* @description 测试不在SpringCloud项目里使用Feign* @date 2019/12/29*/@RestControllerpublic class TestController {/*** 测试请求* @return*/@GetMapping("/hello")public String hello(){HelloClient hello = Feign.builder().target(HelloClient.class, "http://localhost:8764/");return hello.hello();}/*** 测试请求根据id获取用户* @return*/@GetMapping("/{id:\\d+}")public User getUserById(@PathVariable Long id){HelloClient hello = Feign.builder().decoder(new GsonDecoder()).target(HelloClient.class, "http://localhost:8764/");return hello.getUserById(id);}/*** 测试请求根据id获取用户* @return*/@PostMapping("/getUsers")public List<User> getUsers(){HelloClient hello = Feign.builder().decoder(new GsonDecoder()).target(HelloClient.class, "http://localhost:8764/");return hello.getUsers();}}
8.8 启动项目测试
测试一: Postman 请求localhost:8864/hello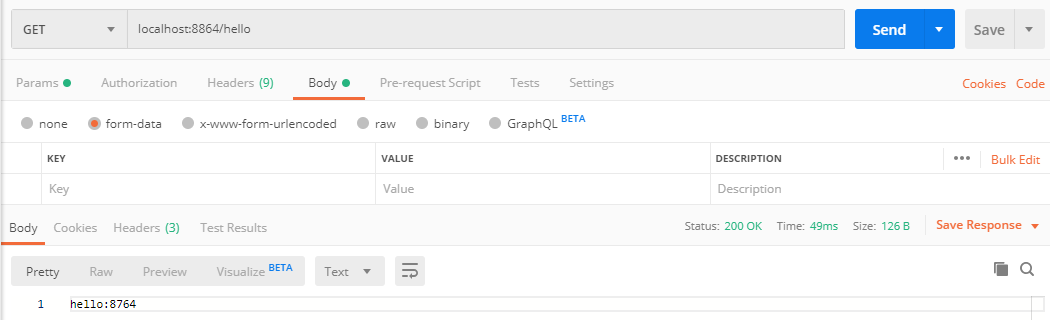
测试二: Postman 请求localhost:8864/1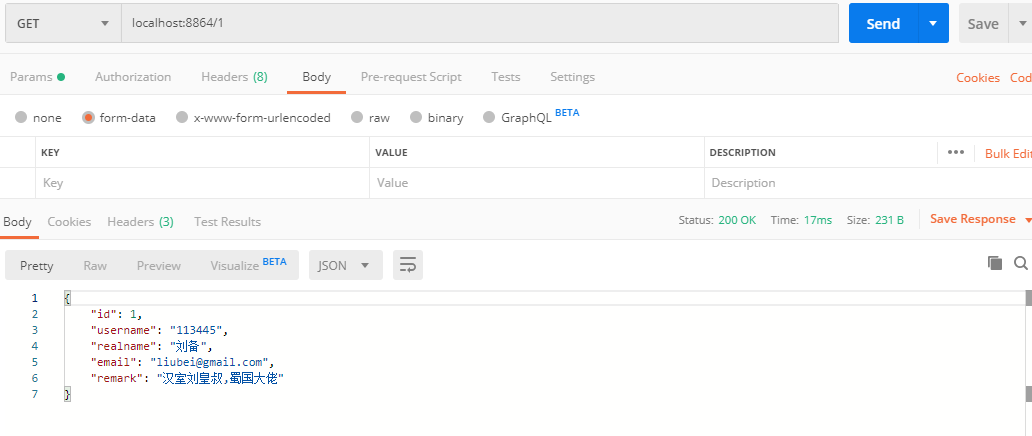
测试三: Postman 请求localhost:8864/getUsers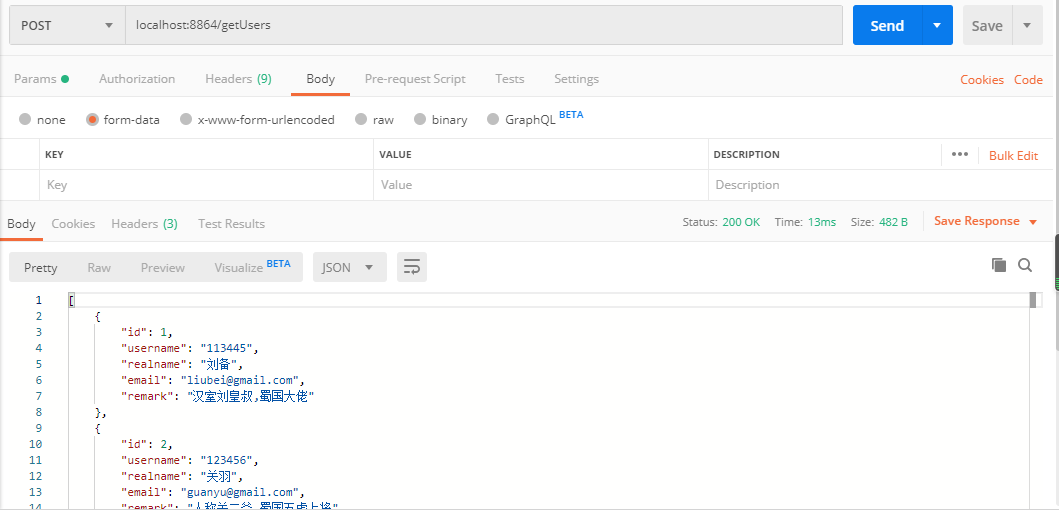
8.9 实现原理
通过上面的测试我们可以看到验证结果是没问题的,Feign帮我们实现了服务之间的调用,实际上它是帮我们动态生成代理类,Feign使用的是JDK动态代理,生成的代理会将请求的信息封装,交给Feign.Client接口发送请求,接口的默认实现类最终会使用java.net.HttpURLConnection来发送Http请求。
很多人可能看到了decoder(new GsonDecoder()),这其实是为了解密返回的JSON字符串转成我们需要的对象,因为我们引入的Gson的包,Feign把请求的数据encode编码之后我们需要decode进行解码。

若有收获,就点个赞吧
0 人点赞
