微前端解决的问题
问题:
- 现代网站越来越复杂:业务功能越来越多,开发人员越来越多
- 软件工程中,工程问题开始大于软件本身的技术问题
- 这个时候需要一种解决方案来降低工程的复杂性
理论支撑:
- 由“康威定律”知系统的复杂度主要取决于系统之间的沟通方式
- 人越多,沟通越多,协同越多,效率越低,内耗越高
- 软件组件和模块越多,之间的交互越多,,效率越低,内耗越高
- 降低内耗的有效方式是减少沟通成本(降低沟通或干脆不沟通)
解决方案:
- 解耦:后端微服务,前端微前端,微前端是把后端技术范式“微服务”扩展到了前端,目的还是“解耦”
- 对技术的解耦,本质是对人的解耦。
- 把一个网站分成多个模块,每个模块由独立的团队完成,各团队之间沟通减少,内部依赖性高,即技术和架构上的“高内聚低耦合”。
- 同时,各团队之间技术选型可以不一样,每个团队选择适合自己团队的技术框架实现,用最合适的、成本最低的方式实现网站。
补充说明:
当然,任何技术都没有银弹,合适场景下选适合的技术。
微前端落地实现
技术选型
- 微前端框架:qiankun
- 开发环境:IDEA(不用vscode)
环境准备
```shell准备开发环境
安装nodejs
下载地址:http://nodejs.cn/download/
根据你的操作系统,安装合适的nodejs
安装完的nodejs默认带包管理器npm
npm设置淘宝镜像源,国内网络环境不好
首先查看当前镜像源
npm config get registry
设置淘宝镜像源
npm config set registry https://registry.npm.taobao.org
需要换回时改为官方的镜像源
npm config set registry https://registry.npmjs.org
不用npm,安装包管理器yarn
npm install -g yarn
集成开发工具
安装IDEA,也安装vscode
<a name="h6th7"></a># 创建项目并实践微前端我们使用多种技术框架创建多个demo,区分为使用打包工具webpack打包的和不适用webpack打包的使用webpack打包的,是使用nodejs现代技术,比如vue、react、angular等框架组件化、模块化开发的<br />不使用webpack打包的,是传统老项目,比如jQuery,HTML,CSS,js开发的静态网站,或者php,JSP等后端渲染技术的网站也归属于这类。创建多个项目:- vue2:vue2框架搭建的demo,绑定端口**8001**- vue3:vue3框架创建的demo,绑定端口**8002**- react:react框架创建的demo,绑定端口**8003**- angular:angular框架创建的demo,绑定端口**8004**- h5:非webpack打包的,纯html静态网站(代表老旧网站,使用html+css+js写的静态页面,另外php,JSP,jQuery等等也等同),绑定端口**8005**然后我们选其中一个demo为主应用,其他demo为子应用,扩展为微前端架构<br />我实验了vue2和react做主应用,其他自己实验吧,举一反三- 选vue2为主应用,绑定端口**8000**- 选react为主应用,绑定端口**9000**<a name="FxVEQ"></a>## 创建一个工作区```shell# 创建一个目录作为工作区mkdir micro-frond-ends-democd micro-frond-ends-demo
创建vue2-demo
###安装vue-cli# 文档:https://cli.vuejs.org/zh/guide/installation.htmlnpm install -g @vue/cli# 创建vue2-demovue create vue2-democd vue2-demo# 修改绑定端口为8001# 创建一个与package.json同级的文件vue.config.js并添加如下内容module.exports = {devServer: {port: 8001 //修改为你需要的端口}}# 启动项目yarn serve
创建vue3-demo
# 创建vue3-demovue create vue3-democd vue3-demo# 更改端口绑定为8002# 创建一个与package.json同级的文件vue.config.js并添加如下内容module.exports = {devServer: {port: 8002 //修改为你需要的端口}}# 启动项目yarn serve
打开地址: http://localhost:8002/
创建react-demo
# npx是 npm 5.2+ 附带的 package 运行工具# 文档:https://react.docschina.org/docs/create-a-new-react-app.html#create-react-appnpx create-react-app my-app# 修改端口绑定到8003# package.json的scripts执行前增加环境变量# windows:set PORT=8003 && react-scripts start# linux或macos:PORT=4003 react-scripts start"serve": "set PORT=8003 && react-scripts start",# 启动项目yarn serve
创建angualr-demo
# 安装angualr-cli# 文档:https://angular.cn/clinpm install -g @angular/cli#创建项目ng new angualr-demo# 修改端口# package.json文件scripts增加"serve": "ng serve --port 8004"# 启动项目yarn serve
打开地址: http://localhost:8004/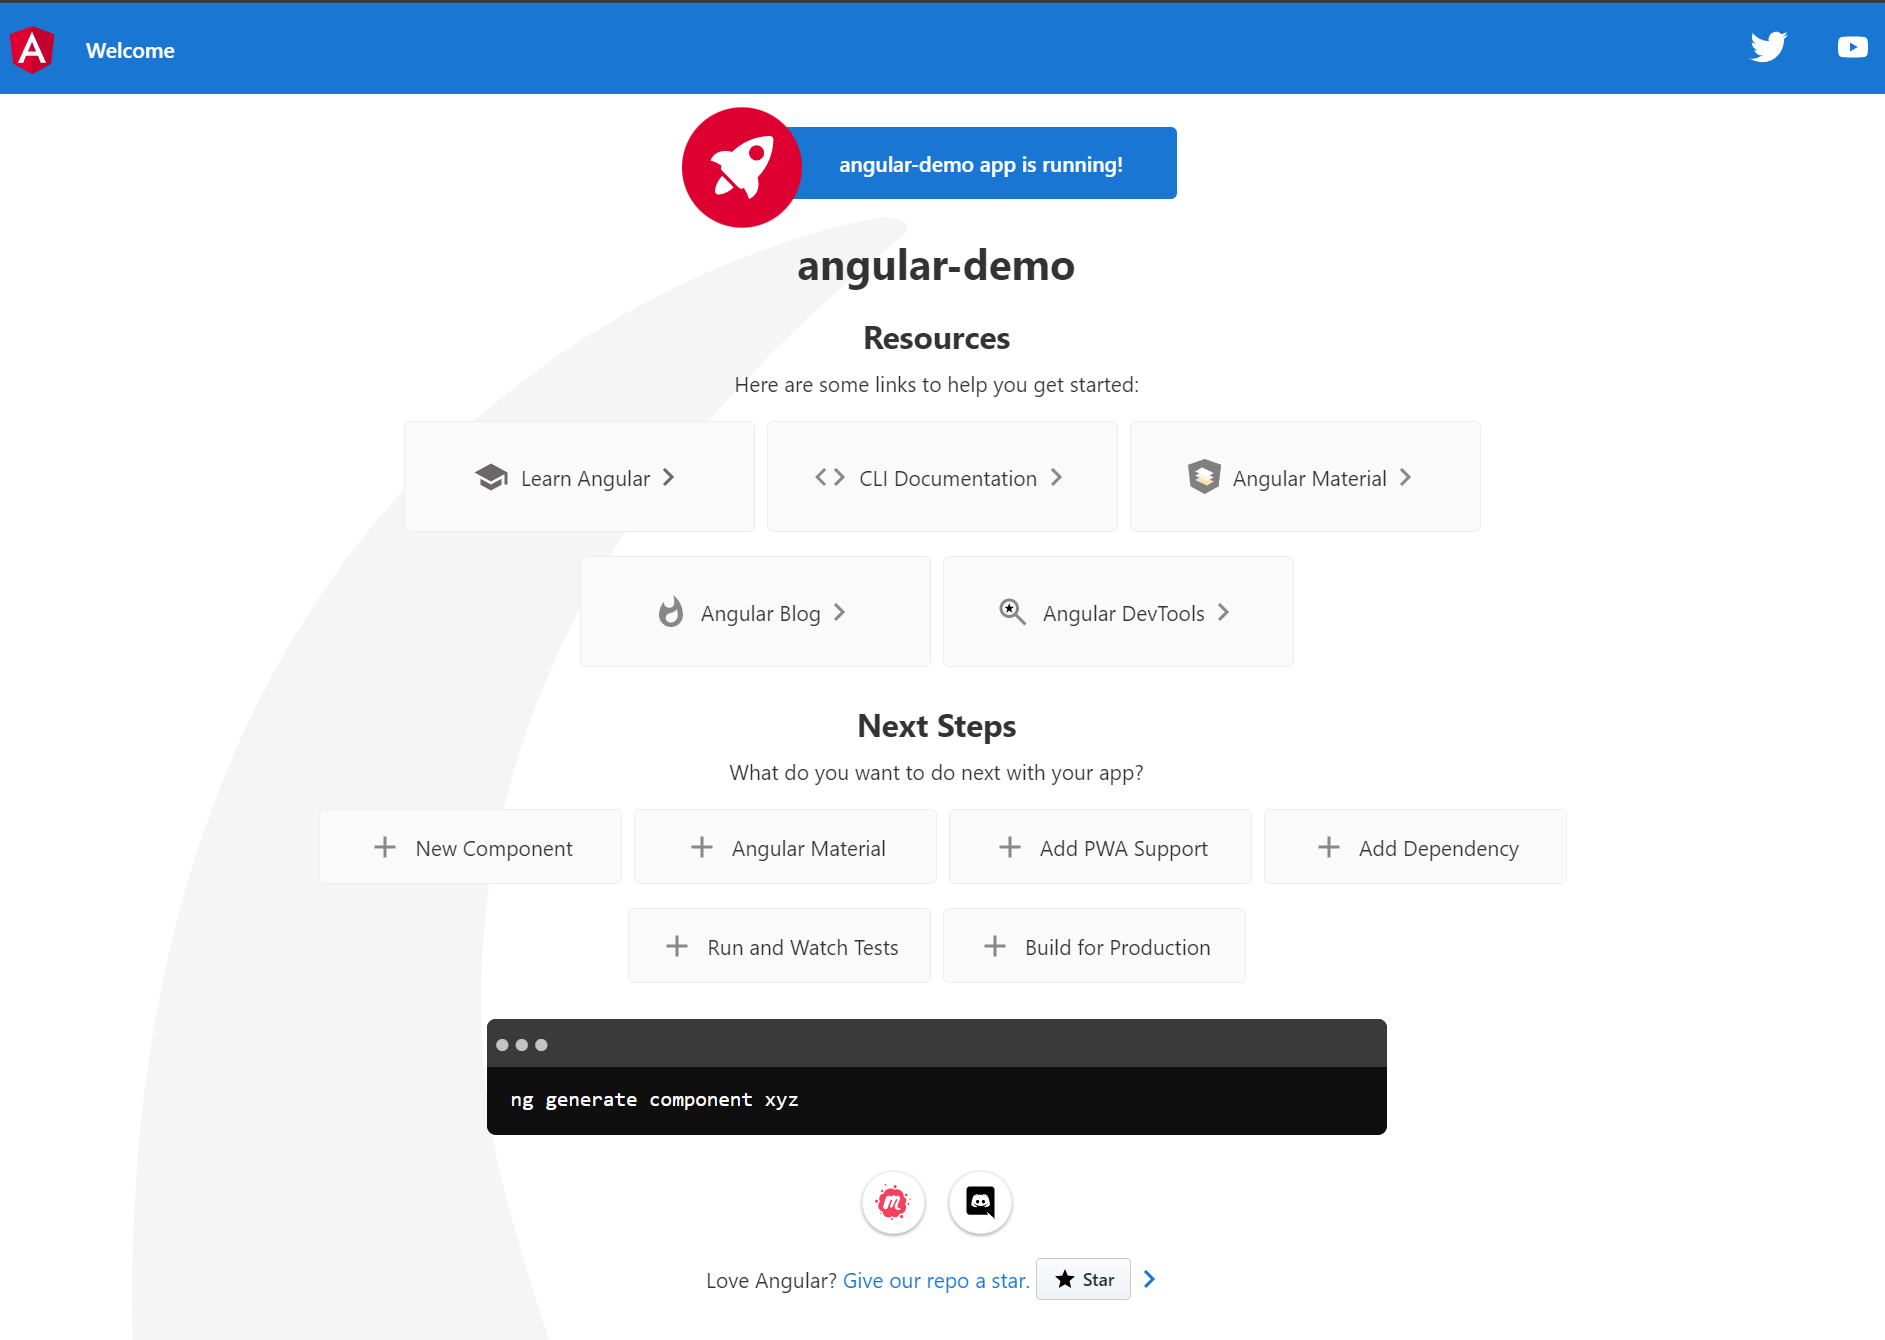
创建静态h5-demo
创建一个简单的html
<!DOCTYPE html><html lang="en"><head><meta charset="UTF-8"><title>H5静态页面</title><script src="//cdn.bootcss.com/jquery/3.4.1/jquery.min.js"></script></head><body><div class="content"><h1>h5-demo</h1>静态HTML页面示例</div><div class="h5-content"></div><style>.content {text-align: center;font-size: large;padding: 200px 0;}</style></body></html>
为了方便启动,安装一个简单的http-server,然后配置可以跨域访问,新建package.json
{"name": "h5-demo","version": "1.0.0","main": "index.html","scripts": {"serve": "cross-env PORT=8005 http-server . --cors","test": "echo \"Error: no test specified\" && exit 1"},"author": "","license": "MIT","devDependencies": {"cross-env": "^7.0.2","http-server": "^0.12.1"}}
启动项目
# 安装依赖yarn#启动项目yarn serve
改造为微前端
- 按照qiankun官网微前端文档:https://qiankun.umijs.org/zh/guide/tutorial
- 1.改造主应用
- 2.改造子应用

我们做一个如上图的主应用,中间content部分替换为子应用
- 设计语言使用阿里的:ant desgin
- vue组件库使用 ant desgin vue
- react组件库使用 ant desgin
主应用使用vue
# 创建一个vue2的项目vue create main-vuecd main-vue# 安装ant desgin vueyarn add ant-design-vue##### 引入ant并创建布局,App.vue改为<template><a-layout id="components-layout-demo-top-side"><a-layout-header class="header"><a-menu theme="dark" mode="horizontal"><a-menu-item key="1"><a href="/home">首页</a></a-menu-item><a-menu-item key="2"><a href="/vue2">vue2示例</a></a-menu-item><a-menu-item key="3"><a href="/vue3">vue3示例</a></a-menu-item><a-menu-item key="4"><a href="/react">react示例</a></a-menu-item><a-menu-item key="5"><a href="/angular">angular示例</a></a-menu-item><a-menu-item key="6"><a href="/h5">h5示例</a></a-menu-item></a-menu></a-layout-header><a-layout-content><a-layout-content class="content"><div id="subapp">Content 内容</div></a-layout-content></a-layout-content><a-layout-footer style="text-align: center;color:white;background-color: #1a1919">Ant Design ©2018 Created by Ant UED</a-layout-footer></a-layout></template><style>#subapp {text-align: center;min-height: 800px;}</style><script>export default {name: 'App',}</script>##### 注册为qiankun主应用#创建子应用路由数组 apps.jsmodule.exports = [{name: 'vue2-demo',entry: '//localhost:8001',container: '#subapp',activeRule: '/vue2',},{name: 'vue3-demo',entry: '//localhost:8002',container: '#subapp',activeRule: '/vue3',},{name: 'react-demo',entry: '//localhost:8003',container: '#subapp',activeRule: '/react',},{name: 'angular-demo',entry: '//localhost:8004',container: '#subapp',activeRule: '/angular',},{name: 'h5-demo',entry: '//localhost:8005',container: '#subapp',activeRule: '/h5',},]# main.js注册子应用import Vue from 'vue'import App from './App.vue'import Antd from 'ant-design-vue';import 'ant-design-vue/dist/antd.css';// 为 Angular 微应用所做的 zone 包注入//Angular 运行依赖于 zone.js。// qiankun 基于 single-spa 实现,single-spa 明确指出一个项目的 zone.js 只能存在一份实例,所以我们在主应用注入 zone.js。//解决微应用是angualr式, zone.js 的问题//必须import 'zone.js/dist/zone'//安装命令:yarn add zone.jsimport "zone.js/dist/zone";import {registerMicroApps, start} from 'qiankun';import apps from './apps'Vue.config.productionTip = falseVue.use(Antd);new Vue({render: h => h(App)}).$mount('#app')/** 微前端 **///注册微应用registerMicroApps(apps);//设置默认进入的子应用// setDefaultMountApp('/h5');//启动微前端start();
改造微应用
建议一个一个的改造子应用,主应用中定义子路由的apps.js可以注释一部分,子应用一个一个的注册,调试
微应用vue2-demo
在 src 目录新增 public-path.js
if (window.__POWERED_BY_QIANKUN__) {__webpack_public_path__ = window.__INJECTED_PUBLIC_PATH_BY_QIANKUN__;}
入口文件 main.js 修改,为了避免根 id #app 与其他的 DOM 冲突,需要限制查找范围。 ```shell // import Vue from ‘vue’ // import App from ‘./App.vue’ // // Vue.config.productionTip = false // // new Vue({ // render: h => h(App), // }).$mount(‘#app’)
import ‘./public-path’; import Vue from ‘vue’; import App from ‘./App.vue’;
Vue.config.productionTip = false;
let instance = null;
function render(props = {}) { const {container} = props; instance = new Vue({ render: (h) => h(App), }).$mount(container ? container.querySelector(‘#app’) : ‘#app’); }
// 独立运行时 if (!window.POWERED_BY_QIANKUN) { render(); }
//qiankun生命周期钩子 export async function bootstrap() { console.log(‘[vue] vue app bootstraped’); }
export async function mount(props) { console.log(‘[vue] vue app mount’); console.log(‘[vue] props from main framework’, props); render(props); }
export async function unmount() { console.log(‘[vue] vue app unmount’); instance.$destroy(); instance.$el.innerHTML = ‘’; instance = null; }
3. 打包配置修改(vue.config.js)```shellconst {name} = require('./package.json');module.exports = {devServer: {port: 8001,//修改为你需要的端口headers: {'Access-Control-Allow-Origin': '*',},},configureWebpack: {output: {library: `${name}-[name]`,libraryTarget: 'umd', // 把微应用打包成 umd 库格式jsonpFunction: `webpackJsonp_${name}`,},},};
微应用vue3-demo
基本跟vue2-demo一致,只是js改成了ts
- 在 src 目录新增 public-path.js ```shell if (window.POWERED_BY_QIANKUN) { // eslint-disable-next-line no-undef webpack_public_path = window.INJECTED_PUBLIC_PATH_BY_QIANKUN; }
2. 入口文件 main.js 修改,为了避免根 id #app 与其他的 DOM 冲突,需要限制查找范围。```shellimport './public-path';import {createApp} from 'vue';import App from './App.vue';let instance = null;function render(props = {}) {const {container} = props;instance = createApp(App);instance.mount(container ? container.querySelector('#app') : '#app');}if (!window.__POWERED_BY_QIANKUN__) {render();}export async function bootstrap() {console.log('%c ', 'color: green;', 'vue3.0 app bootstraped');}function storeTest(props) {props.onGlobalStateChange &&props.onGlobalStateChange((value, prev) => console.log(`[onGlobalStateChange - ${props.name}]:`, value, prev),true,);props.setGlobalState &&props.setGlobalState({ignore: props.name,user: {name: props.name,},});}export async function mount(props) {storeTest(props);render(props);instance.config.globalProperties.$onGlobalStateChange = props.onGlobalStateChange;instance.config.globalProperties.$setGlobalState = props.setGlobalState;}export async function unmount() {instance.unmount();instance._container.innerHTML = '';instance = null;}
- 打包配置修改(vue.config.js) ```shell const {name} = require(‘./package’);
module.exports = {
devServer: {
port: 8002, //修改为你需要的端口
headers: {
‘Access-Control-Allow-Origin’: ‘*’,
},
},
// 自定义webpack配置
configureWebpack: {
output: {
// 把子应用打包成 umd 库格式
library: ${name}-[name],
libraryTarget: ‘umd’,
jsonpFunction: webpackJsonp_${name},
},
},
};
<a name="toks3"></a>## 微应用react-demo1. 在 src 目录新增 public-path.js```shellif (window.__POWERED_BY_QIANKUN__) {__webpack_public_path__ = window.__INJECTED_PUBLIC_PATH_BY_QIANKUN__;}
- 设置 history 模式路由的 base
```shell
3. 入口文件 index.js 修改,为了避免根 id #root 与其他的 DOM 冲突,需要限制查找范围。```shell// import React from 'react';// import ReactDOM from 'react-dom';// import './index.css';// import App from './App';// import reportWebVitals from './reportWebVitals';//// ReactDOM.render(// <React.StrictMode>// <App />// </React.StrictMode>,// document.getElementById('root')// );//// // If you want to start measuring performance in your app, pass a function// // to log results (for example: reportWebVitals(console.log))// // or send to an analytics endpoint. Learn more: https://bit.ly/CRA-vitals// reportWebVitals();import './public-path';import React from 'react';import ReactDOM from 'react-dom';import App from './App';function render(props) {const { container } = props;ReactDOM.render(<App />, container ? container.querySelector('#root') : document.querySelector('#root'));}if (!window.__POWERED_BY_QIANKUN__) {render({});}export async function bootstrap() {console.log('[react16] react app bootstraped');}export async function mount(props) {console.log('[react16] react app mount');console.log('[react16] props from main framework', props);render(props);}export async function unmount(props) {console.log('[react16] react app unmount');const { container } = props;ReactDOM.unmountComponentAtNode(container ? container.querySelector('#root') : document.querySelector('#root'));}
- 修改 webpack 配置,安装插件 @rescripts/cli
根目录新增 .rescriptsrc.js ```shell const { name } = require(‘./package’);yarn add @rescripts/cli
module.exports = {
webpack: (config) => {
config.output.library = ${name}-[name];
config.output.libraryTarget = ‘umd’;
config.output.jsonpFunction = webpackJsonp_${name};
config.output.globalObject = ‘window’;
return config;},devServer: (_) => {const config = _;config.headers = {'Access-Control-Allow-Origin': '*',};config.historyApiFallback = true;config.hot = false;config.watchContentBase = false;config.liveReload = false;return config;},
};
修改 package.json:```shell- "start": "react-scripts start",+ "serve": "set PORT=8003 && rescripts start",- "build": "react-scripts build",+ "build": "rescripts build",- "test": "react-scripts test",+ "test": "rescripts test",- "eject": "react-scripts eject"
微应用angular-demo
接入angular较为繁琐,当然这对于选用angualr技术的团队来说,这不算什么。
我这边使用最新版angular,集成顺利
ng version_ _ ____ _ ___/ \ _ __ __ _ _ _| | __ _ _ __ / ___| | |_ _|/ △ \ | '_ \ / _` | | | | |/ _` | '__| | | | | | |/ ___ \| | | | (_| | |_| | | (_| | | | |___| |___ | |/_/ \_\_| |_|\__, |\__,_|_|\__,_|_| \____|_____|___||___/Angular CLI: 13.0.4Node: 16.13.0Package Manager: npm 8.1.0OS: win32 x64Angular:...Package Version------------------------------------------------------@angular-devkit/architect 0.1300.4 (cli-only)@angular-devkit/core 13.0.4 (cli-only)@angular-devkit/schematics 13.0.4 (cli-only)@schematics/angular 13.0.4 (cli-only)
在 src 目录新增 public-path.js 文件
if (window.__POWERED_BY_QIANKUN__) {// eslint-disable-next-line no-undef__webpack_public_path__ = window.__INJECTED_PUBLIC_PATH_BY_QIANKUN__;}
设置 history 模式路由的 base,src/app/app-routing.module.ts 文件 ```shell
- import { APP_BASE_HREF } from ‘@angular/common’; @NgModule({ imports: [RouterModule.forRoot(routes)], exports: [RouterModule],
- // @ts-ignore
- providers: [{ provide: APPBASEHREF, useValue: window.__POWERED_BY_QIANKUN ? ‘/angular’ : ‘/‘ }] })
3. 修改入口文件,src/main.ts 文件。```shell// import { enableProdMode } from '@angular/core';// import { platformBrowserDynamic } from '@angular/platform-browser-dynamic';//// import { AppModule } from './app/app.module';// import { environment } from './environments/environment';//// if (environment.production) {// enableProdMode();// }//// platformBrowserDynamic().bootstrapModule(AppModule)// .catch(err => console.error(err));import 'public-path';import { enableProdMode, NgModuleRef } from '@angular/core';import { platformBrowserDynamic } from '@angular/platform-browser-dynamic';import { AppModule } from './app/app.module';import { environment } from './environments/environment';if (environment.production) {enableProdMode();}let app: void | NgModuleRef<AppModule>;async function render() {app = await platformBrowserDynamic().bootstrapModule(AppModule).catch((err) => console.error(err));}if (!(window as any).__POWERED_BY_QIANKUN__) {render();}export async function bootstrap(props: Object) {console.log(props);}export async function mount(props: Object) {render();}export async function unmount(props: Object) {console.log(props);// @ts-ignoreapp.destroy();}
- 修改 webpack 打包配置
先安装 @angular-builders/custom-webpack 插件,注意:angular 9 项目只能安装 9.x 版本,angular 10 项目可以安装最新版。
yarn add @angular-builders/custom-webpack
在根目录增加 custom-webpack.config.js ,内容为:
const {name} = require('./package');module.exports = {devServer: {headers: {'Access-Control-Allow-Origin': '*',},},output: {library: `${name}-[name]`,libraryTarget: 'umd',//加这行 报错,去掉// jsonpFunction: `webpackJsonp_${appName}`,},};
修改 angular.json,将 [packageName] > architect > build > builder 和 [packageName] > architect > serve > builder 的值改为我们安装的插件,将我们的打包配置文件加入到 [packageName] > architect > build > options。
- "builder": "@angular-devkit/build-angular:browser",+ "builder": "@angular-builders/custom-webpack:browser","options": {+ "customWebpackConfig": {+ "path": "./custom-webpack.config.js"+ }}- "builder": "@angular-devkit/build-angular:dev-server",+ "builder": "@angular-builders/custom-webpack:dev-server",
- 解决 zone.js 的问题
在父应用引入 zone.js,需要在 import qiankun 之前引入。
// 为 Angular 微应用所做的 zone 包注入//Angular 运行依赖于 zone.js。// qiankun 基于 single-spa 实现,single-spa 明确指出一个项目的 zone.js 只能存在一份实例,所以我们在主应用注入 zone.js。//解决微应用是angualr式, zone.js 的问题//必须import 'zone.js/dist/zone'//安装命令:yarn add zone.jsimport "zone.js/dist/zone";
将微应用的 src/polyfills.ts 里面的引入 zone.js 代码删掉。
// import 'zone.js'; // Included with Angular CLI.
- 修正 ng build 打包报错问题,修改 tsconfig.json 文件,参考issues/431 ```shell
- “target”: “es2015”,
- “target”: “es5”,
- “typeRoots”: [
- “node_modules/@types”
- ], ```
- 为了防止主应用或其他微应用也为 angular 时,
会冲突的问题,建议给 加上一个唯一的 id,比如说当前应用名称。
src/index.html :
- <app-root></app-root>+ <app-root id="angular9"></app-root>
src/app/app.component.ts :
- selector: 'app-root',+ selector: '#angular9 app-root',
特别说明:angular本身适配了single-spa,如果嫌弃angular接入步骤太繁琐,也可以选择使用 single-spa-angular 插件,参考single-spa-angular 的官网 和 angular demo。我尝试安装没有成功,各种报错。。。遂放弃。
微前端h5-demo
增加一个entry.js入口文件
//声明一个入口文件,用于暴漏相对应的生命周期//额外创建一个script文件entry用于 export 相对应的 lifecyclesconst render = ($) => {//页面渲染完了 执行操作 比如使用jQuery$('#h5-content').html('Hello, render with jQuery');return Promise.resolve();};((global) => {global['h5-demo'] = {bootstrap: () => {console.log('生命周期 bootstrap');return Promise.resolve();},mount: () => {console.log('生命周期 mount');return render($);},unmount: () => {console.log('生命周期 unmount');return Promise.resolve();},};})(window);
index.html增加entry.js
<script src="entry.js" entry></script>
npm管理多个项目
多个项目手工启动麻烦,使用npm管理
在主工作区micro-frond-ends-demo目录创建package.json
cd micro-frond-ends-demoyarn init#然后安装npm-run-all 文档:https://github.com/mysticatea/npm-run-allyarn add npm-run-all --devnpm-run-all 提供了多种运行多个命令的方式,常用的有以下几个:--parallel: 并行运行多个命令--serial: 多个命令按排列顺序执行--continue-on-error: 是否忽略错误,添加此参数 npm-run-all 会自动退出出错的命令,继续运行正常的--race: 添加此参数之后,只要有一个命令运行出错,那么 npm-run-all 就会结束掉全部的命令### 添加常用脚本"scripts": {"all:install": "npm-run-all --serial install:*","all:serve": "npm-run-all --parallel serve:*","install:vue2-demo": "cd vue2-demo && yarn","install:vue3-demo": "cd vue3-demo && yarn","install:react-demo": "cd react-demo && yarn","install:angular-demo": "cd angular-demo && yarn","install:h5-demo": "cd h5-demo && yarn","install:main-vue2": "cd main-vue2 && yarn","serve:vue2-demo": "cd vue2-demo && yarn serve","serve:vue3-demo": "cd vue3-demo && yarn serve","serve:react-demo": "cd react-demo && yarn serve","serve:angular-demo": "cd angular-demo && yarn serve","serve:h5-demo": "cd h5-demo && yarn serve","serve:main-vue2": "cd main-vue2 && yarn serve"}# 安装全部项目依赖yarn all:install# 启动所有项目yarn all:serve
改造完成 看下效果
首页 http://localhost:8000/home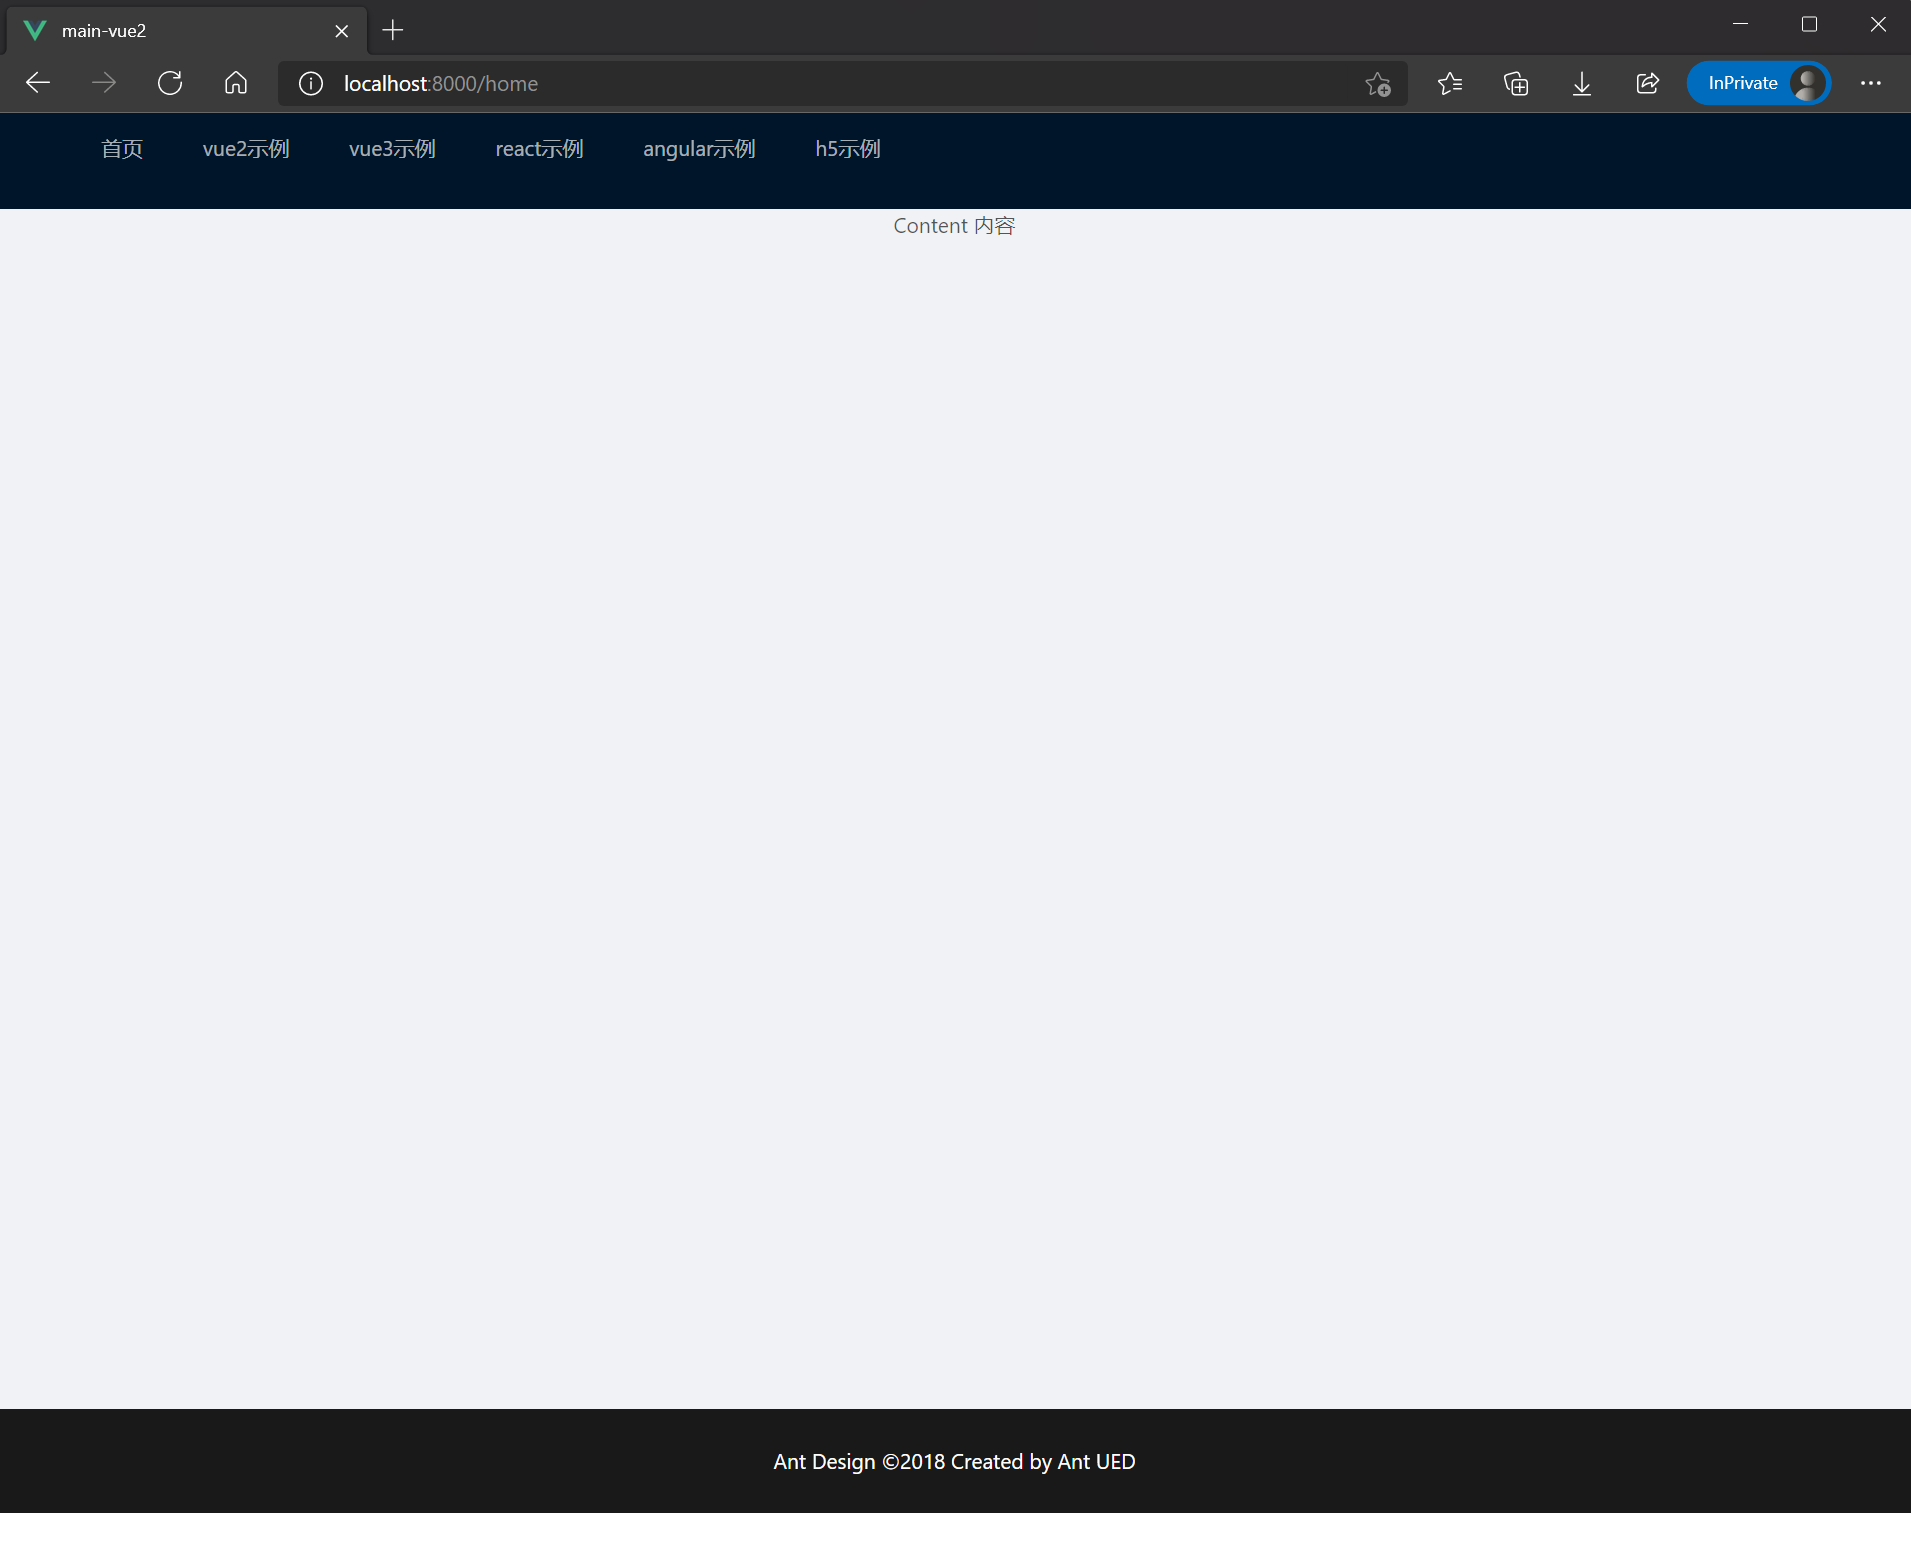
vue2示例:http://localhost:8000/vue2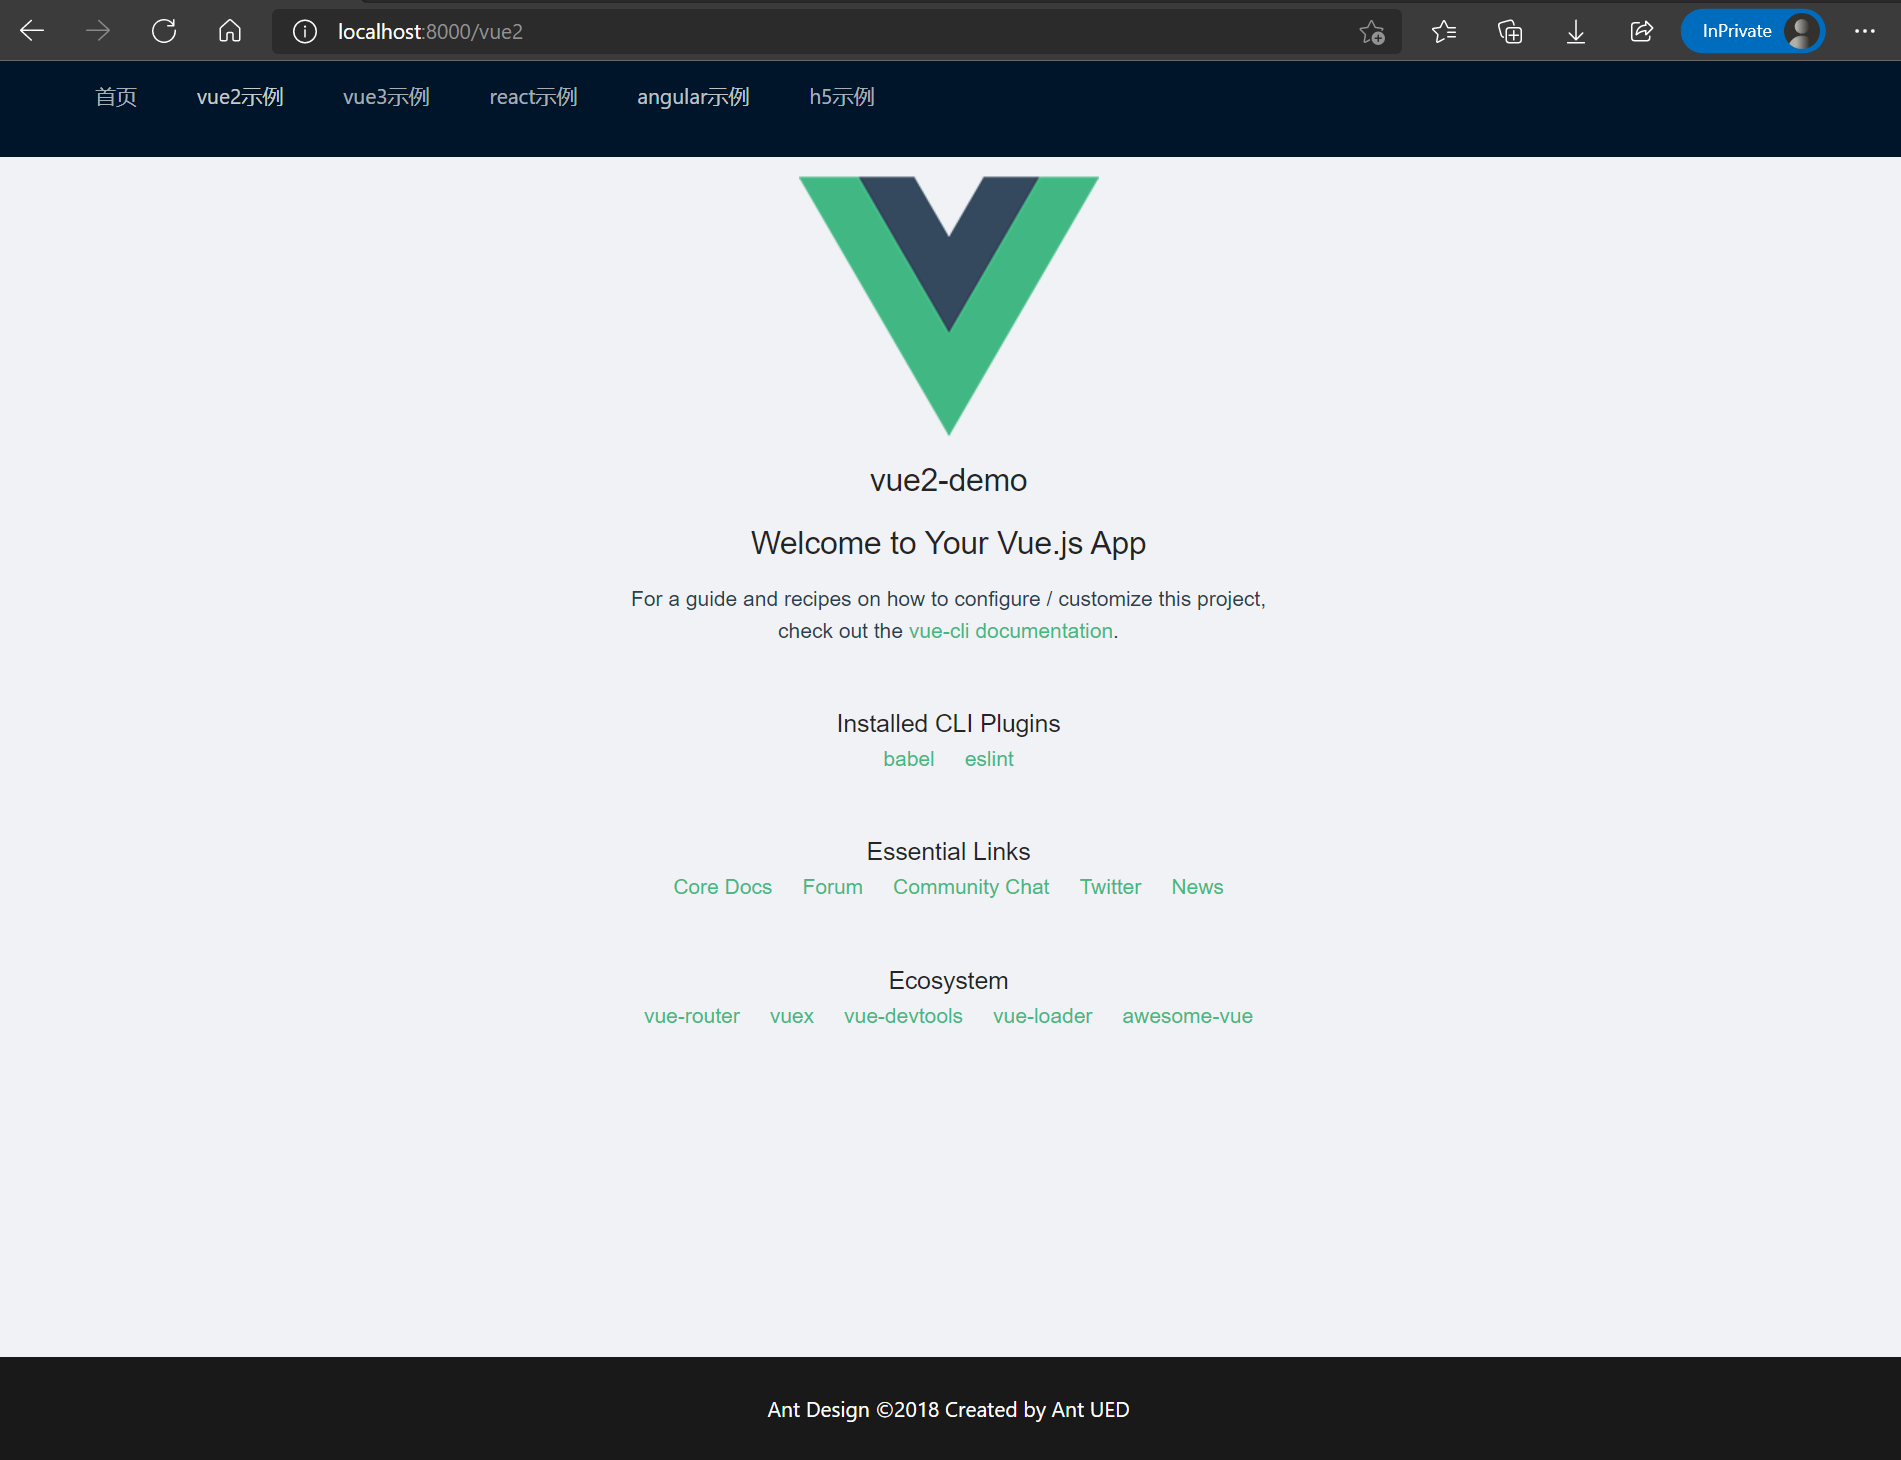
vue3示例:http://localhost:8000/vue3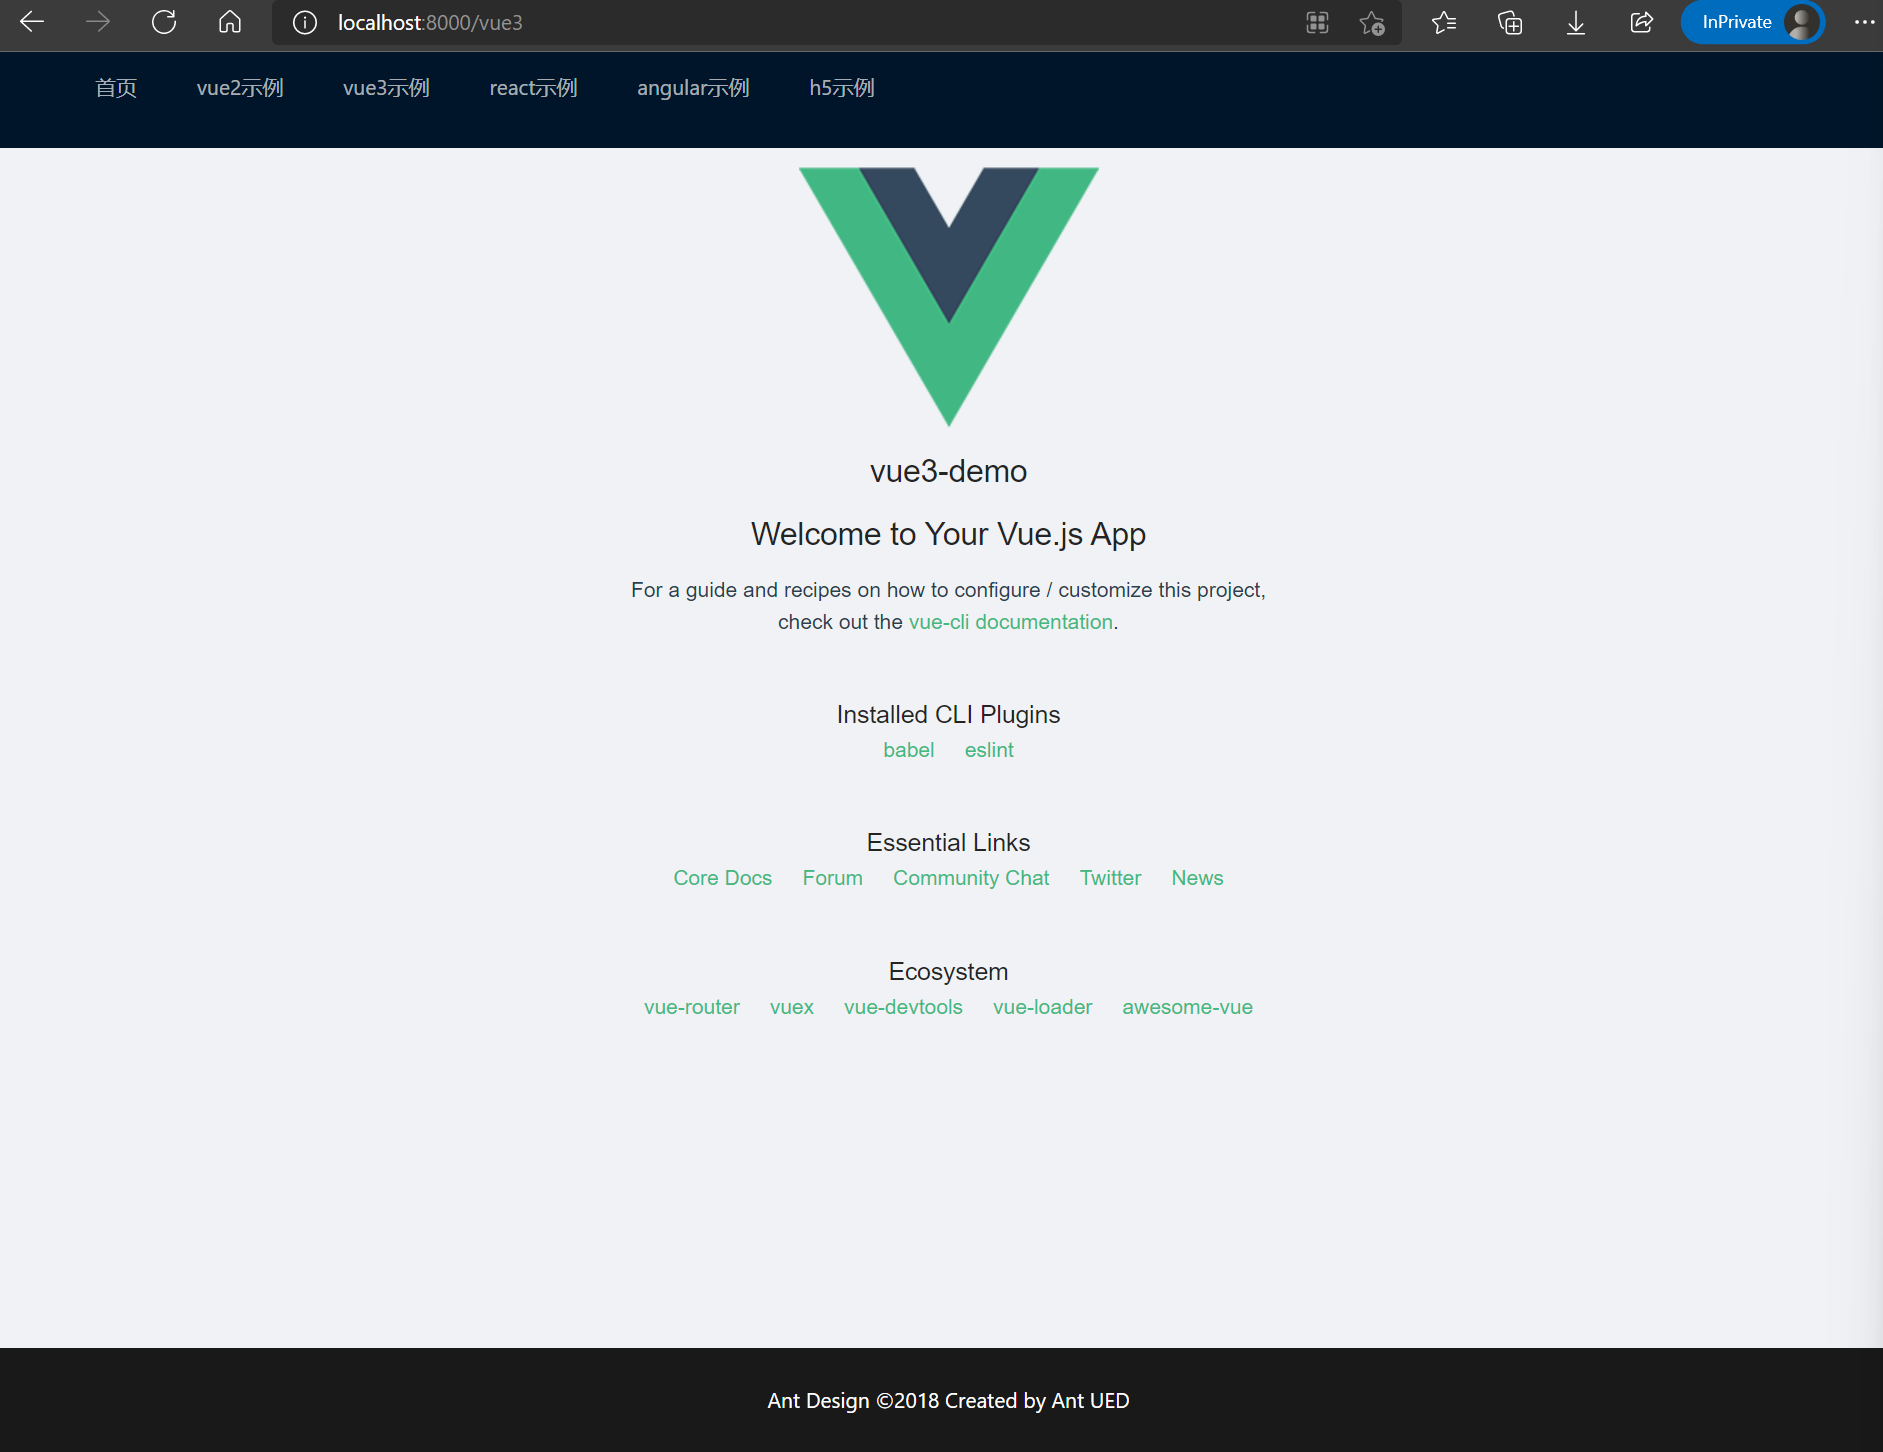
react示例:http://localhost:8000/react
angular示例:http://localhost:8000/angular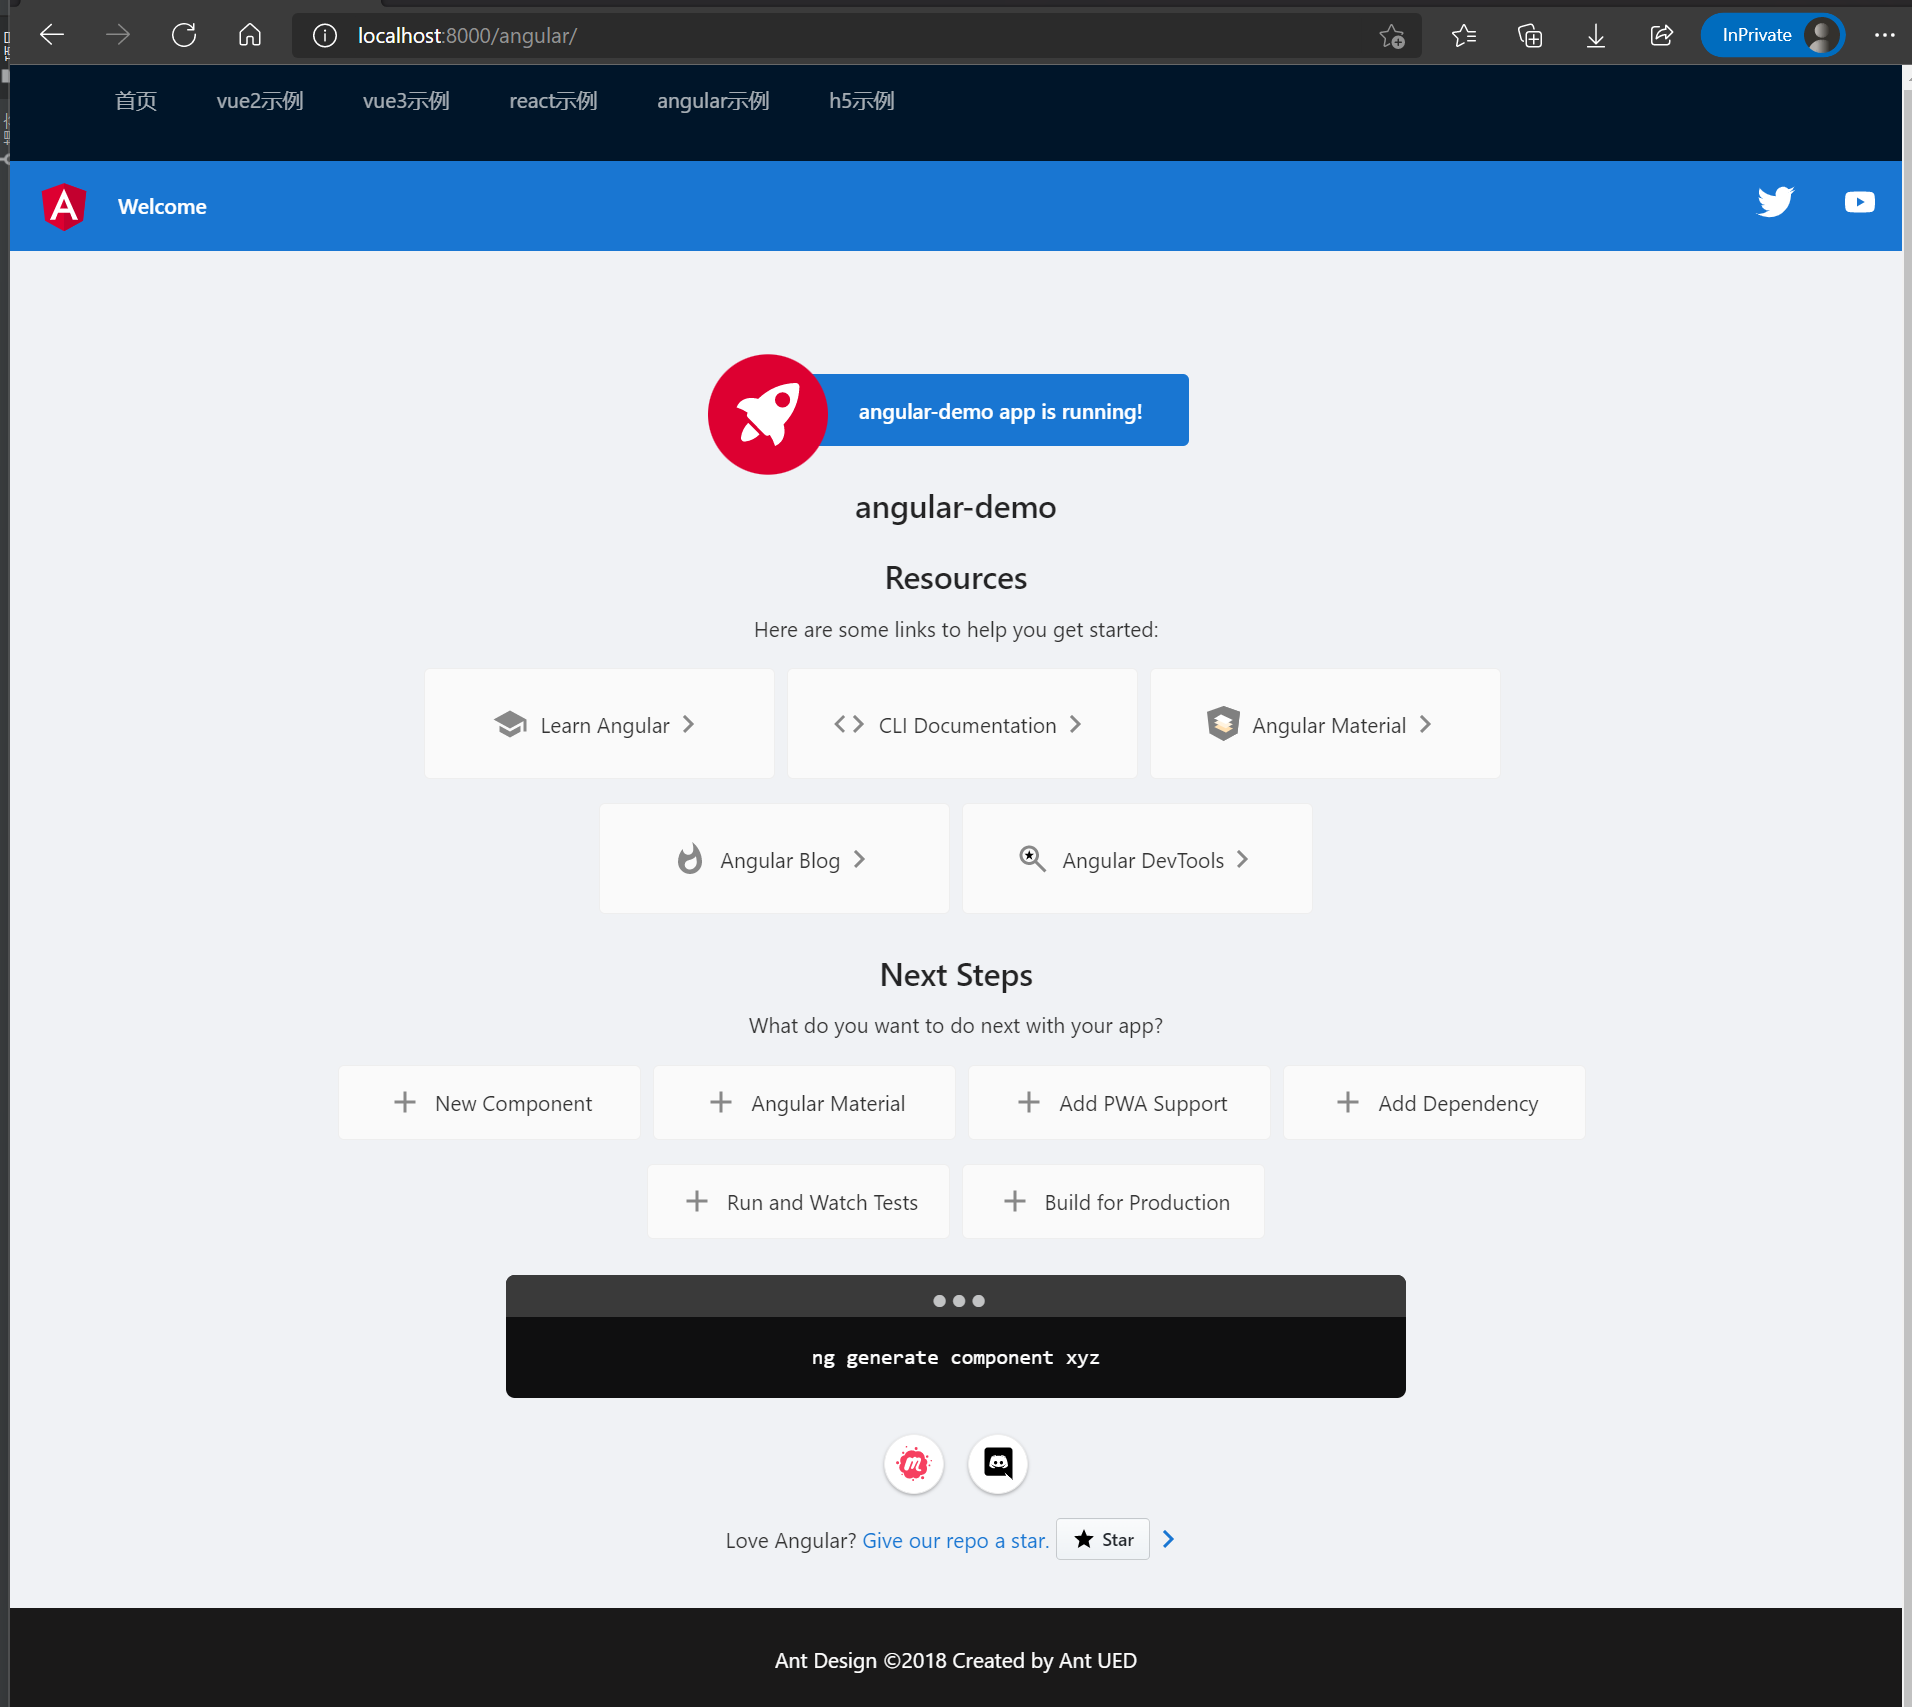
h5示例:http://localhost:8000/h5
主应用使用react
布局依旧
# 创建项目npx create-react-app main-react# 修改端口绑定到9000,package.json增加"serve": "set PORT=8003 && react-scripts start",# 启动项目yarn serve# 启动无问题后改造为微前端主应用## 安装ant desgin 设置布局和导航栏yarn add antd# App.js改为import './App.css';import {Layout, Menu} from 'antd';const {Header, Content, Footer} = Layout;function App() {return (<div className="App"><Layout className="layout"><Header><div className="logo"/><Menu theme="dark" mode="horizontal"><Menu.Item key="1"><a href="/home">首页</a></Menu.Item><Menu.Item key="2"><a href="/vue2">vue2示例</a></Menu.Item><Menu.Item key="3"><a href="/vue3">vue3示例</a></Menu.Item><Menu.Item key="4"><a href="/react">react示例</a></Menu.Item><Menu.Item key="5"><a href="/angular">angular示例</a></Menu.Item><Menu.Item key="6"><a href="/h5">h5示例</a></Menu.Item></Menu></Header><Content style={{padding: '0 50px'}}><div id="subapp">Content 内容</div></Content><Footer style={{textAlign: "center",color:"white",backgroundColor: "#1a1919"}}>Ant Design ©2018 Created by Ant UED</Footer></Layout></div>);}export default App;# 把main-vue中的微应用路由apps.js拿过来# index.js注册微应用import React from 'react';import ReactDOM from 'react-dom';import './index.css';import App from './App';import reportWebVitals from './reportWebVitals';import apps from './apps'//解决微应用是angualr式, zone.js 的问题//必须import 'zone.js/dist/zone'//安装命令:yarn add zone.jsimport 'zone.js/dist/zone';import {registerMicroApps, start} from "qiankun";ReactDOM.render(<React.StrictMode><App/></React.StrictMode>,document.getElementById('root'));// If you want to start measuring performance in your app, pass a function// to log results (for example: reportWebVitals(console.log))// or send to an analytics endpoint. Learn more: https://bit.ly/CRA-vitalsreportWebVitals();//qiankun 微前端registerMicroApps(apps);start();
启动看效果,简单截图几个如下: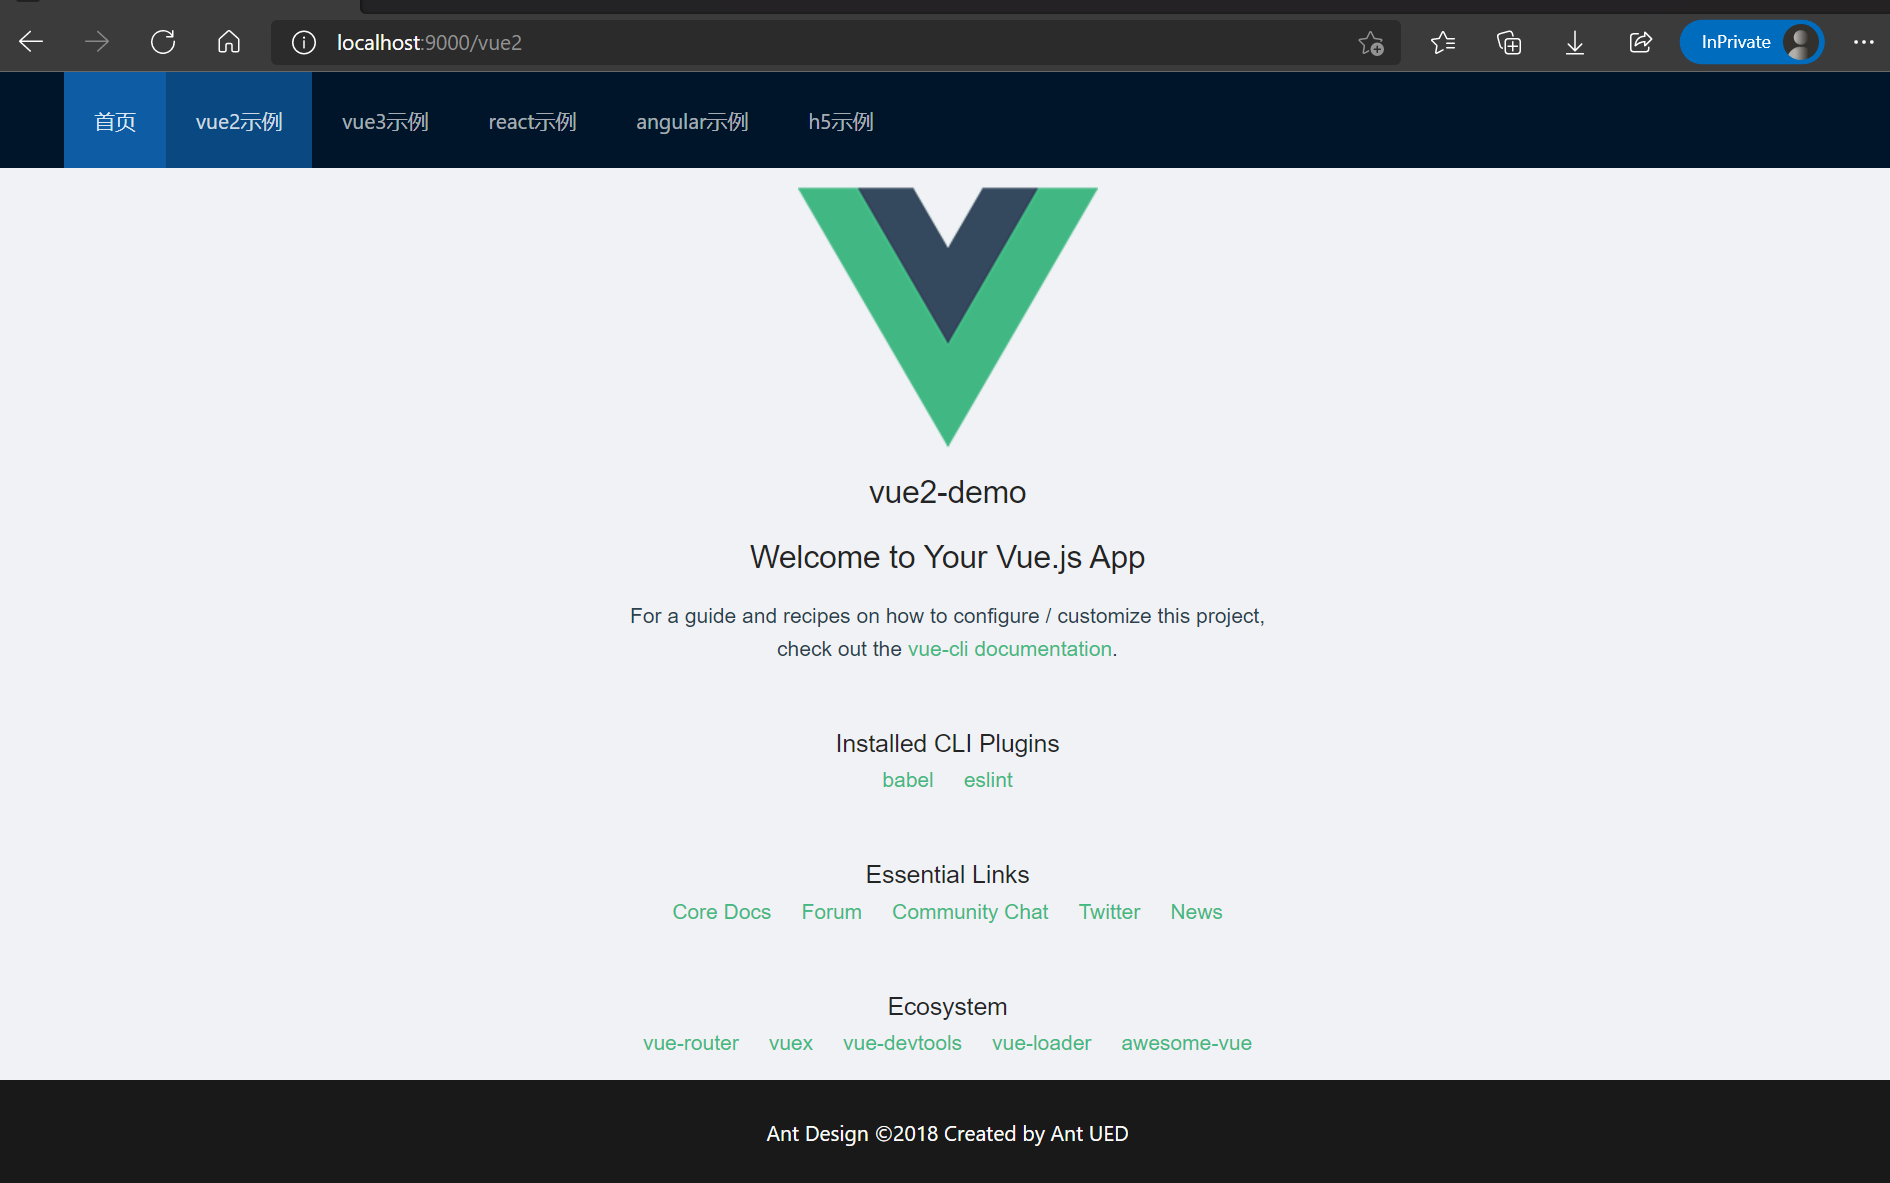


默认浏览器打开
多项目统一管理,micro-frond-ends-demo下的package.json
{"name": "micro-frond-ends-demo","version": "1.0.0","main": "index.js","author": "","license": "MIT","scripts": {"all:install": "npm-run-all --serial install:*","all:serve": "npm-run-all --parallel serve:*","install:micro-frond-ends-demo": "yarn","install:vue2-demo": "cd vue2-demo && yarn","install:vue3-demo": "cd vue3-demo && yarn","install:react-demo": "cd react-demo && yarn","install:angular-demo": "cd angular-demo && yarn","install:h5-demo": "cd h5-demo && yarn","install:main-vue2": "cd main-vue2 && yarn","install:main-react": "cd main-react && yarn","serve:vue2-demo": "cd vue2-demo && yarn serve","serve:vue3-demo": "cd vue3-demo && yarn serve","serve:react-demo": "cd react-demo && yarn serve","serve:angular-demo": "cd angular-demo && yarn serve","serve:h5-demo": "cd h5-demo && yarn serve","serve:main-vue2": "cd main-vue2 && yarn serve","serve:main-react": "cd main-react && yarn serve"},"devDependencies": {"npm-run-all": "^4.1.5"}}
应用启动后的默认动作
### react默认启动后会打开浏览器,关闭打开行为# 通过环境变量方式,在react项目根目录创建文件.env#关闭自动打开浏览器BROWSER=none#绑定端口PORT=9000### vue默认启动后不打开浏览器,设置为打开# 通过修改vue.config.js文件配置module.exports = {devServer: {//绑定端口port: 8000,//默认打开浏览器open: true,}}### angular通过命令行可以直接修改ng serve --port 8004 --open
本项目设置为:启动所有项目,然后浏览器打开main-vue项目
源代码
https://gitee.com/dakuohao/micro-frond-ends-demo
完
(完)
