账单详情页要做的事情有两个,一个是编辑当前账单操作,另一个是删除当前账单操作,如下图所示: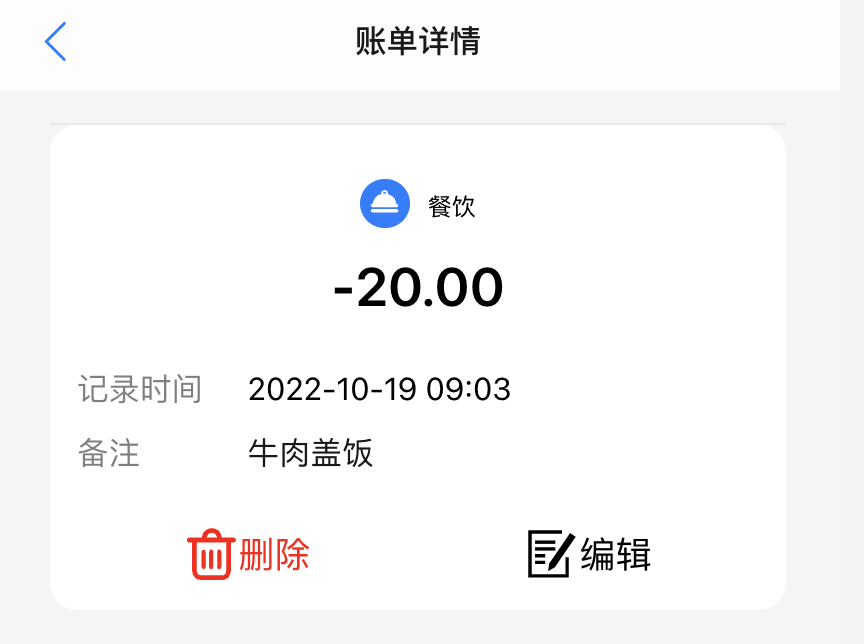
这里是第一次涉及内页,所以我们需要制作一个公用的头部 Header,支持传参接收 title 信息。我们在上一章节提取的「添加账单弹窗组件」,在这里派上了用场,新增和编辑可以复用,唯一的差别就是编辑的时候,需要传入当前账单的 id 给「添加账单组件」,组件内通过账单详情接口,获取账单详情,并将获取的参数用于各个字段初始化值,这就实现了组件的复用。
下面我们来具体实现一下。
公用头部
在 components 目录下新建 Header 目录,老规矩,添加两个文件 index.jsx 和 style.module.less。
为 Header/index.jsx 添加代码如下:
import React from 'react';import PropTypes from 'prop-types';import { useHistory } from 'react-router-dom'import { NavBar, Icon } from 'zarm';import s from './style.module.less'const Header = ({ title = '' }) => {const history = useHistory()return <div className={s.headerWarp}><div className={s.block}><NavBarclassName={s.header}left={<Icon type="arrow-left" theme="primary" onClick={() => history.goBack()} />}title={title}/></div></div>};Header.propTypes = {title: PropTypes.string, // 标题};export default Header;
在container/Detail/index.jsx中使用
import React from 'react';import Header from '@/components/Header';import s from './style.module.less';const Detail = () => {return <div className={s.detail}><Header title='账单详情' /></div>}export default Detail
账单明细
接下来,我们通过浏览器地址栏上的参数,来获取该笔账单的详情,如下所示:
// container/Detail/index.jsximport React, { useEffect, useState } from 'react';import { useLocation } from 'react-router-dom';import qs from 'query-string';import Header from '@/components/Header';import { get } from '@/utils';import s from './style.module.less';const Detail = () => {const location = useLocation(); // 获取 locaton 实例,我们可以通过打印查看内部都有些什么内容。const { id } = qs.parse(location.search);const [detail, setDetail] = useState({});console.log('location', location);useEffect(() => {getDetail()}, []);const getDetail = async () => {const { data } = await get(`/api/bill/detail?id=${id}`);setDetail(data);}return <div className={s.detail}><Header title='账单详情' /></div>}export default Detail
我们先来看看,浏览器控制台打印出的 location 如下所示:
可以看到,我们想要的参数在 search 属性中,我想把 ?id=917 转换成 json 键值对的形式,如:
{id: 917}
所以我通过 npm install query-string 引入了查询字符串解析的一个插件,通过如下方式:
qs.parse(location.search)
可以将浏览器查询参数变成一个对象形式,所以我们在代码中可以通过 const 的解构,将 id 取出。最后通过 get 方法请求详情接口。接下来,我们给账单明细部分布局,并且将数据接入,代码如下所示:
import React, { useEffect, useState } from 'react';import { useLocation } from 'react-router-dom';import qs from 'query-string';import dayjs from 'dayjs';import cx from 'classnames';import Header from '@/components/Header';import CustomIcon from '@/components/CustomIcon';import { get, typeMap } from '@/utils';import s from './style.module.less';const Detail = () => {const location = useLocation(); // 路由 location 实例const { id } = qs.parse(location.search); // 查询字符串反序列化const [detail, setDetail] = useState({}); // 订单详情数据useEffect(() => {getDetail()}, []);const getDetail = async () => {const { data } = await get(`/api/bill/detail?id=${id}`);setDetail(data);}return <div className={s.detail}><Header title='账单详情' /><div className={s.card}><div className={s.type}>{/* 通过 pay_type 属性,判断是收入或指出,给出不同的颜色*/}<span className={cx({ [s.expense]: detail.pay_type == 1, [s.income]: detail.pay_type == 2 })}>{/* typeMap 是我们事先约定好的 icon 列表 */}<CustomIcon className={s.iconfont} type={detail.type_id ? typeMap[detail.type_id].icon : 1} /></span><span>{ detail.type_name || '' }</span></div>{detail.pay_type == 1? <div className={cx(s.amount, s.expense)}>-{ detail.amount }</div>: <div className={cx(s.amount, s.incom)}>+{ detail.amount }</div>}<div className={s.info}><div className={s.time}><span>记录时间</span><span>{dayjs(Number(detail.date)).format('YYYY-MM-DD HH:mm')}</span></div><div className={s.remark}><span>备注</span><span>{ detail.remark || '-' }</span></div></div><div className={s.operation}><span><CustomIcon type='shanchu' />删除</span><span><CustomIcon type='tianjia' />编辑</span></div></div></div>}export default Detail
需为底部的两个按钮添加事件。首先,为删除按钮添加删除事件:
import { useLocation, useHistory } from 'react-router-dom';import { get, post, typeMap } from '@/utils';import { Modal, Toast } from 'zarm';...const history = useHistory();// 删除方法const deleteDetail = () => {Modal.confirm({title: '删除',content: '确认删除账单?',onOk: async () => {const { data } = await post('/api/bill/delete', { id })Toast.show('删除成功')history.goBack()},});}
这里我们利用 Zarm 组件提供的 Modal 组件,该组件提供了调用方法的形式唤起弹窗,我们利用这个属性 为「删除」加一个二次确认的形式,避免误触按钮。
最麻烦的编辑事件处理,我们先来明确一下思路。在点击「编辑」按钮之后,我们会唤起之前写好的「添加账单弹窗」,然后将账单 detail 参数通过 props 传递给弹窗组件,组件在接收到 detail 时,将信息初始化给弹窗给的相应参数。
我们来看代码的实现,首先在 Detail/index.jsx 内添加代码:
import React, { useEffect, useState, useRef } from 'react';import PopupAddBill from '@/components/PopupAddBill';...const editRef = useRef();...<div className={s.operation}><span onClick={deleteDetail}><CustomIcon type='shanchu' />删除</span><span onClick={() => editRef.current && editRef.current.show()}><CustomIcon type='tianjia' />编辑</span></div>...<PopupAddBill ref={editRef} detail={detail} onReload={getDetail} />
紧接着,我们修改 PopupAddBill 组件,如下所示:
const PopupAddBill = forwardRef(({ detail = {}, onReload }, ref) => {...const id = detail && detail.id // 外部传进来的账单详情 iduseEffect(() => {if (detail.id) {setPayType(detail.pay_type == 1 ? 'expense' : 'income')setCurrentType({id: detail.type_id,name: detail.type_name})setRemark(detail.remark)setAmount(detail.amount)setDate(dayjs(Number(detail.date)).$d)}}, [detail])...useEffect(async () => {const { data: { list } } = await get('/api/type/list');const _expense = list.filter(i => i.type == 1); // 支出类型const _income = list.filter(i => i.type == 2); // 收入类型setExpense(_expense);setIncome(_income);// 没有 id 的情况下,说明是新建账单。if (!id) {setCurrentType(_expense[0]);};}, []);...// 添加账单const addBill = async () => {if (!amount) {Toast.show('请输入具体金额')return}const params = {amount: Number(amount).toFixed(2),type_id: currentType.id,type_name: currentType.name,date: dayjs(date).unix() * 1000,pay_type: payType == 'expense' ? 1 : 2,remark: remark || ''}if (id) {params.id = id;// 如果有 id 需要调用详情更新接口const result = await post('/api/bill/update', params);Toast.show('修改成功');} else {const result = await post('/api/bill/add', params);setAmount('');setPayType('expense');setCurrentType(expense[0]);setDate(new Date());setRemark('');Toast.show('添加成功');}setShow(false);if (onReload) onReload();}})
首先,通过 setXXX 将 detail 的数据依次设置初始值;其次,账单种类需要判断是否是编辑或是新建;最后,修改添加账单按钮,如果是「编辑」操作,给 params 参数添加一个 id,并且调用的接口变成 /api/bill/update。
以上,就是账单详情的实现。

若有收获,就点个赞吧
0 人点赞
