配置 git 提交的校验钩子
- husky: git提交时触发hooks
- commitlint: 对提交的内容做规范校验 husky,主要对pre-commit和commit-msg钩子做校验。
目录结构是下面这样子的:# 安装huskyyarn add husky -D# 初始化husky配置,在根目录新增.husky配置文件。初始化配置pre-commitnpx husky-init# 另外新增一个hooks,commit-msgnpx husky add .husky/commit-msg

在commit-msg文件中添加npm run commitlint
在pre-commit文件中有个npm run test我们先注释掉,不然会报错。安装commitlint
添加配置文件,新建# 添加依赖文件yarn add @commitlint/config-conventional @commitlint/cli -D
commitlint.config.js,然后添加下面的代码:module.exports = {extends: ['@commitlint/config-conventional'],// 校验规则rules: {'type-enum': [2,'always',['feat','fix','docs','style','refactor','perf','test','chore','revert','build',],],'type-case': [0],'type-empty': [0],'scope-empty': [0],'scope-case': [0],'subject-full-stop': [0, 'never'],'subject-case': [0, 'never'],'header-max-length': [0, 'always', 72],},}
配置scripts
因为我们需要运行npm run commitlint,所以需要在package.json文件中添加如下代码:
配置结束,现在当我们填写# 在scrips中添加下面的代码{"scripts": {"commitlint": "commitlint --config commitlint.config.js -e -V"},}
commit信息的时候,前面就需要带着下面的subject
比如:'feat','fix','docs','style','refactor','perf','test','chore','revert','build',
git commit -m "feat: test",注意feat:后面有个空格
我们来写一个错误的来测试一下: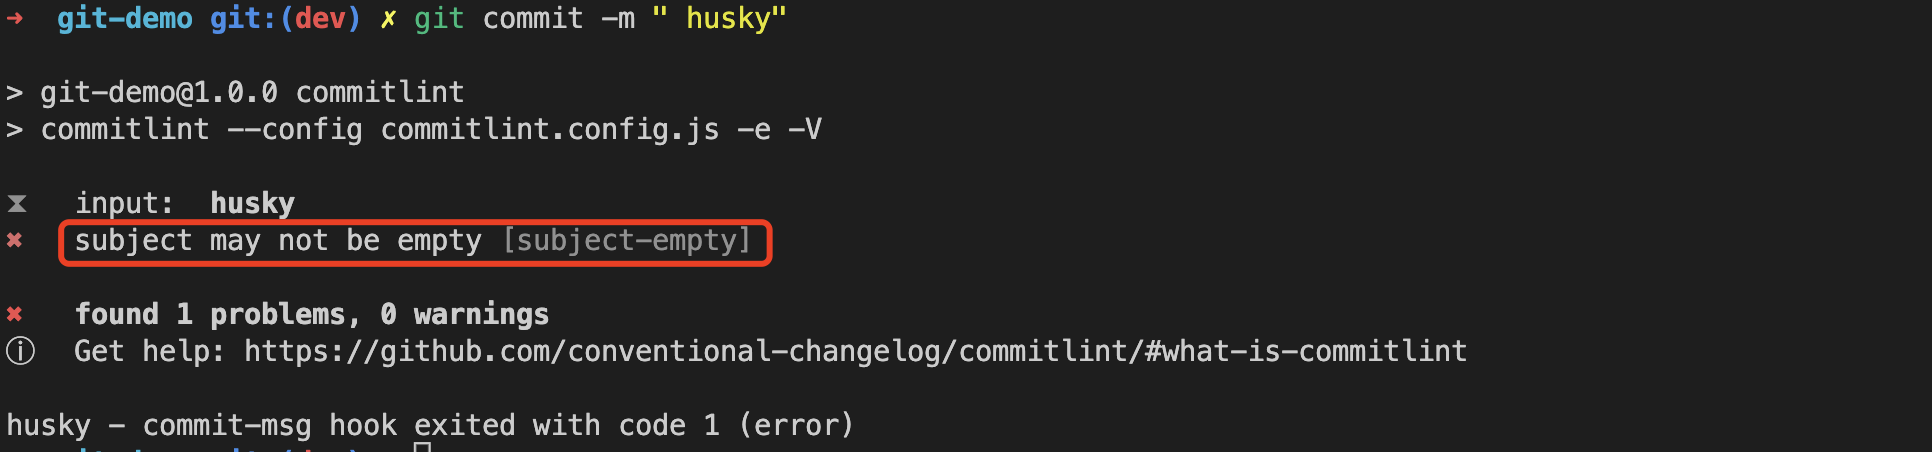
提示subject是空的。
使用正确的提交方式,提交成功了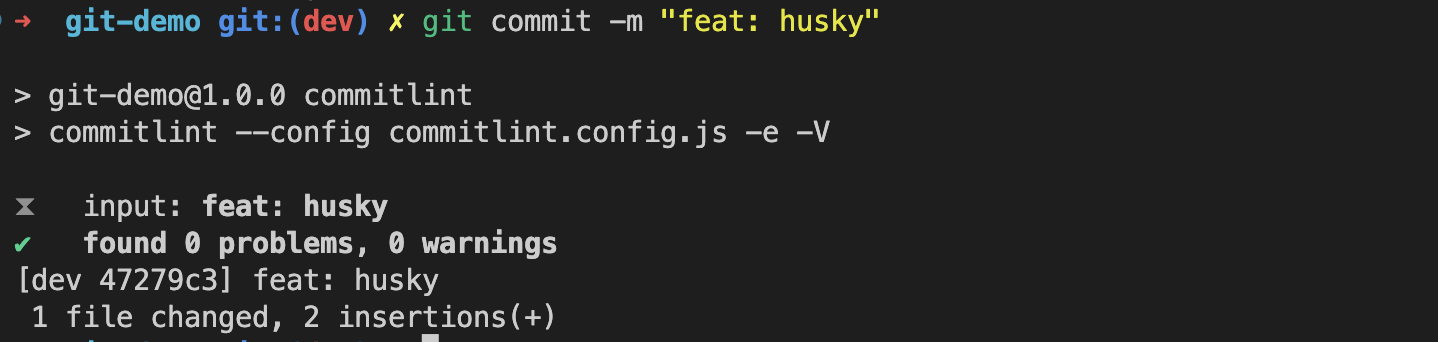
使用 commitizen 做git规范化提交
由于添加了commitlint验证,对于不熟悉提交规范的新手同学会有一定影响,可以添加 commitizen 工具,手动生成规范化commit。
Commitizen是一个格式化commit message的工具。
# 工具安装yarn add -D commitizen
使用cz-conventional-changelog
安装工具
yarn add cz-conventional-changelog -D
配置命令
"script": {"commit": "cz"}
在package.json 中添加定义commitizen使用规则,
{"config": {"commitizen": {"path": "./node_modules/cz-conventional-changelog"}},}
当执行git commit的时候,就可以提示我们填写代码规则了
自定义 commitizen 规则
使用 cz-customizable 工具
# 安装依赖yarn add cz-customizable -D
配置命令
"script": {"commit": "git-cz"}
在package.json 中添加自定义commitizen,使用git-cz执行git commit命令
"config": {"commitizen": {"path": "./node_modules/cz-customizable"}}
在根目录创建的.cz-config.js, 自定义commit提示内容
module.exports = {types: [{ value: 'feat', name: '✨feat: 新功能' },{ value: 'fix', name: '🐛fix: 修复' },{ value: 'docs', name: '✏️docs: 文档变更' },{ value: 'style', name: '💄style: 代码格式(不影响代码运行的变动)' },{value: 'refactor',name: '♻️refactor: 重构(既不是增加feature,也不是修复bug)'},{ value: 'perf', name: '⚡️perf: 性能优化' },{ value: 'test', name: '✅test: 增加测试' },{ value: 'chore', name: '🚀chore: 构建过程或辅助工具的变动' },{ value: 'revert', name: '⏪️revert: 回退' },{ value: 'build', name: '📦️build: 打包' },{ value: 'ci', name: '👷CI: related changes' }],// override the messages, defaults are as followsmessages: {type: '请选择提交类型(必选):',// scope: '请输入文件修改范围(可选):',customScope: '请输入修改范围(可选):',subject: '请简要描述提交(必填):',// body: '请输入详细描述(可选,待优化去除,跳过即可):',// breaking: 'List any BREAKING CHANGES (optional):\n',footer: '请输入要关闭的issue(待优化去除,跳过即可):',confirmCommit: '确认使用以上信息提交?(y/n/e/h)'},// used if allowCustomScopes is trueallowCustomScopes: true,// allowBreakingChanges: ['feat', 'fix'],skipQuestions: ['body', 'footer'],// limit subject length, commitlint默认是72subjectLimit: 72}
当我们提交代码的时候,需要先git add .,然后执行npm run commit,就可以根据响应的提示填写commit信息 了,如下图所示:

若有收获,就点个赞吧
0 人点赞
