点击查看【bilibili】
代码地址:https://github.com/xiumubai/syt-admin
添加权限管理页面
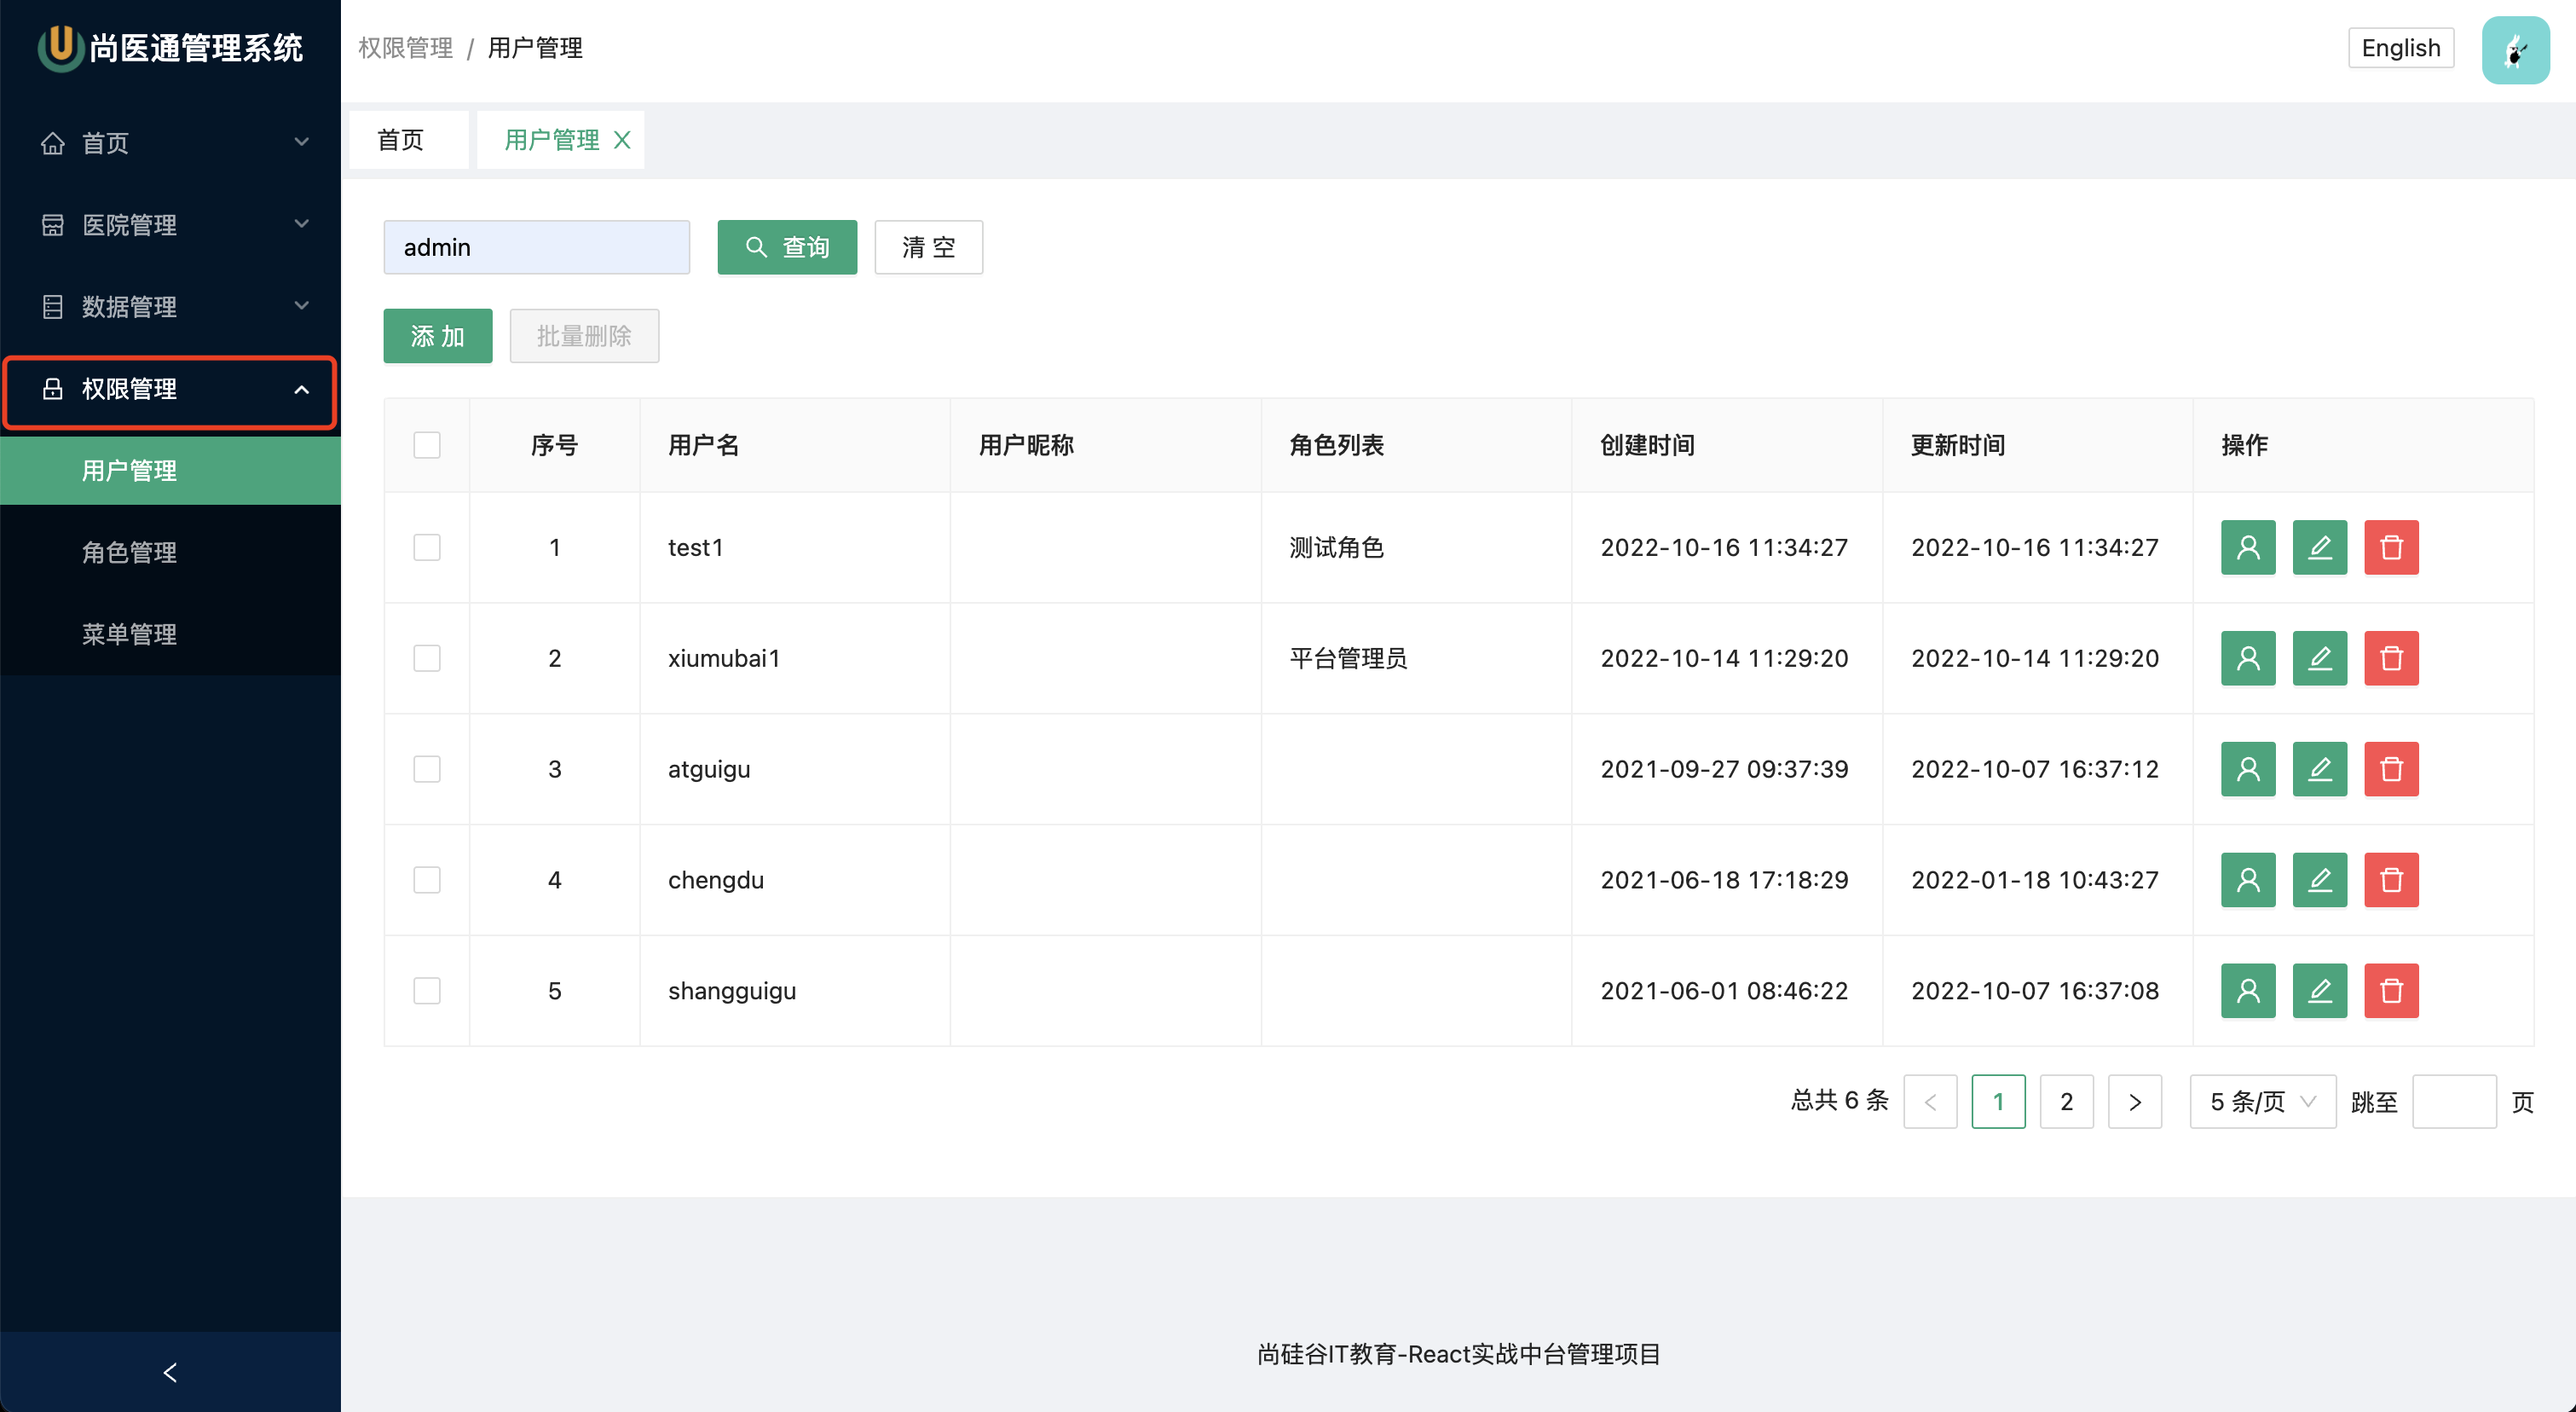
在这里添加了三个页面:用户管理、角色管理、菜单管理,用户对不同的用户权限做控制。
在src/pages下面添加了acl目录,此为权限管理的页面
修改路由
在菜单管理中,可以对菜单进行添加,所有需要设置权限的菜单必须要在这里进行配置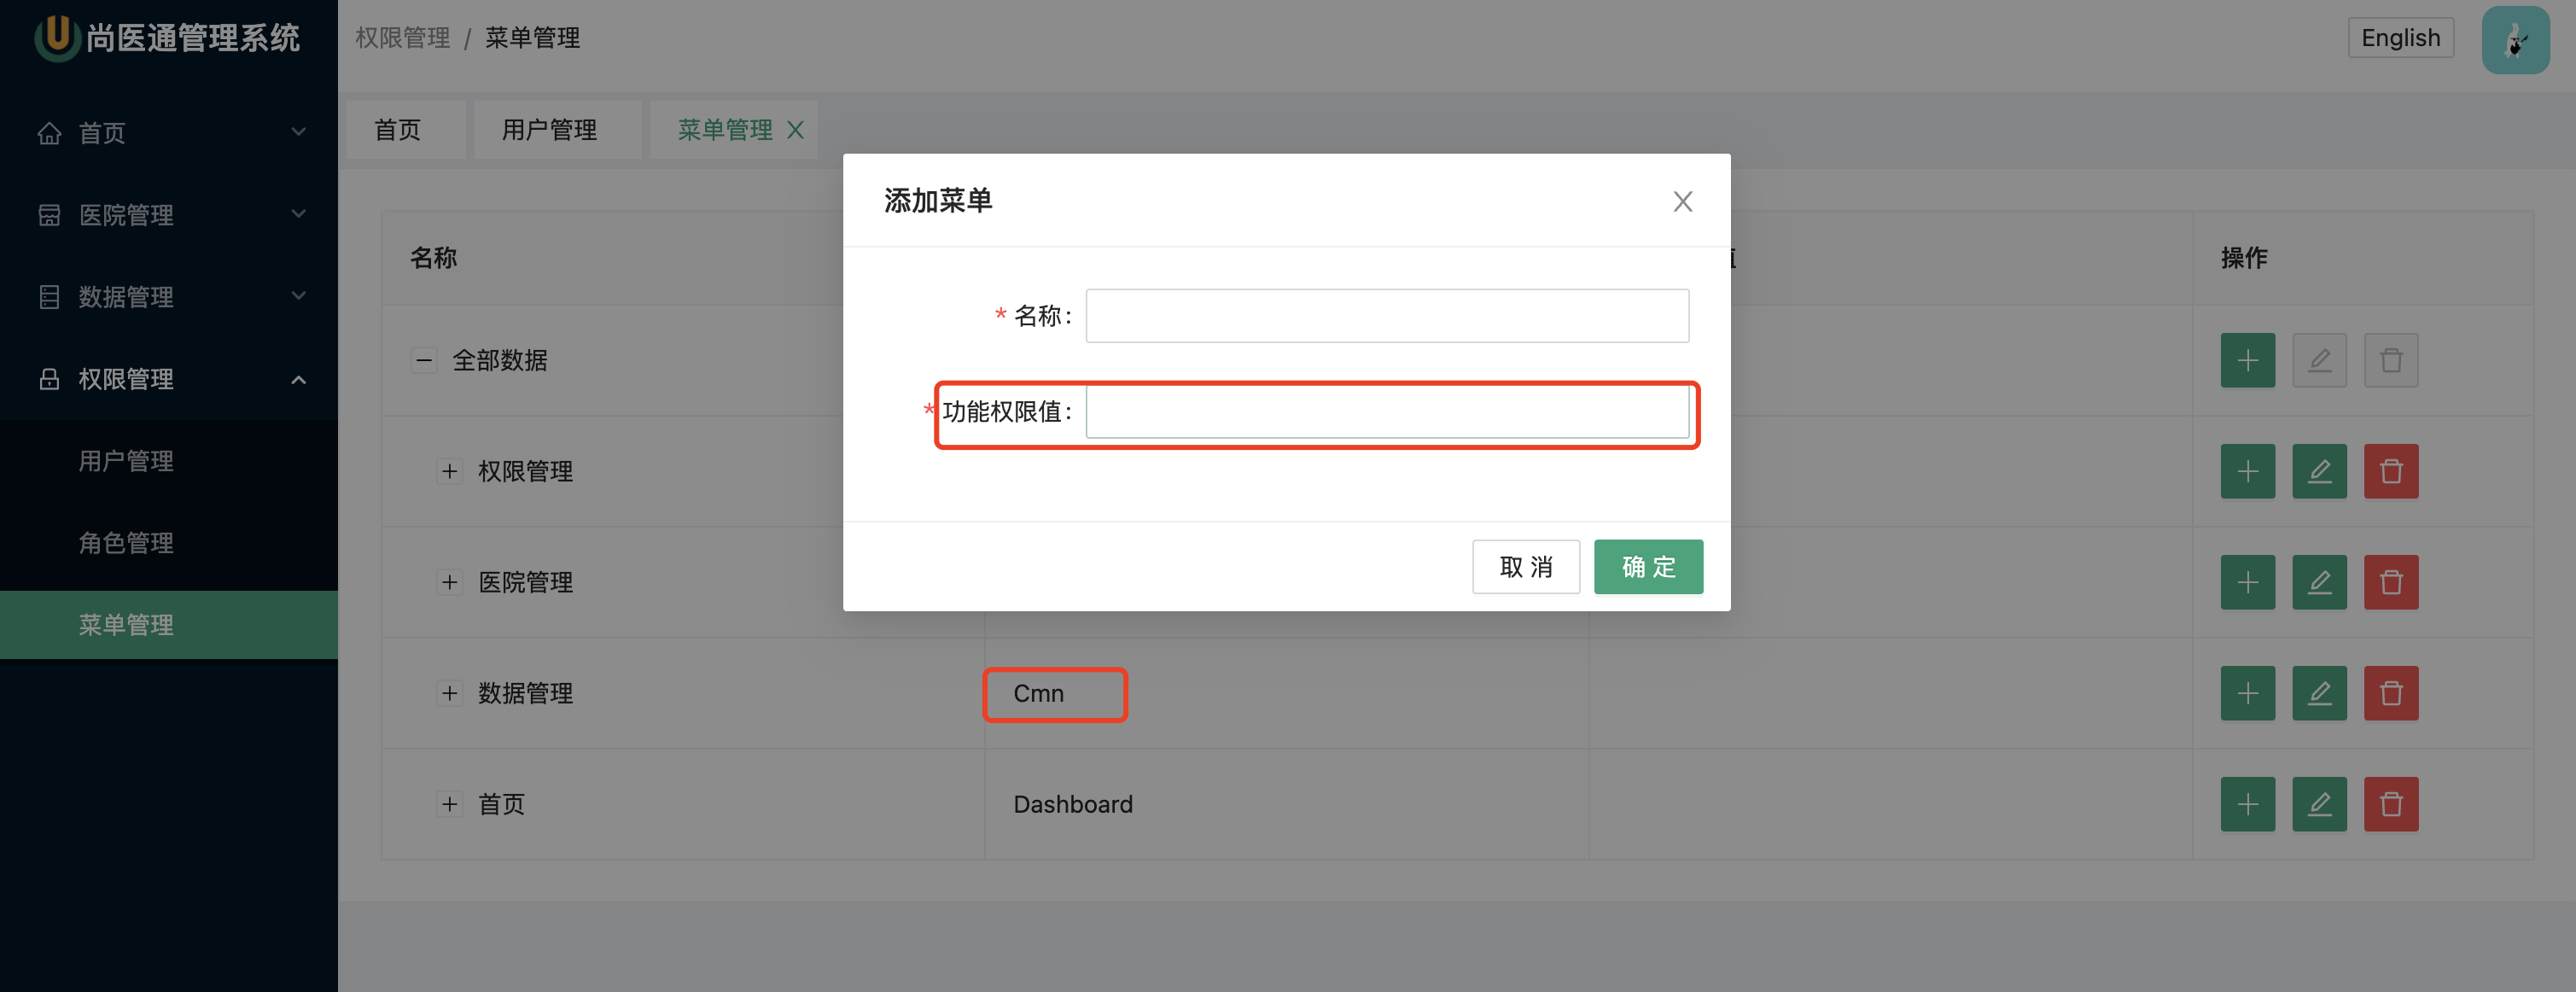
注意这里的功能权限值需要跟路由定义的name一致,比如:
{name: "Acl/User",path: "/syt/acl/user",meta: {title: "用户管理",},element: load(User),},
这里也可以对按钮增加,因为一个页面中的按钮也可以增加权限。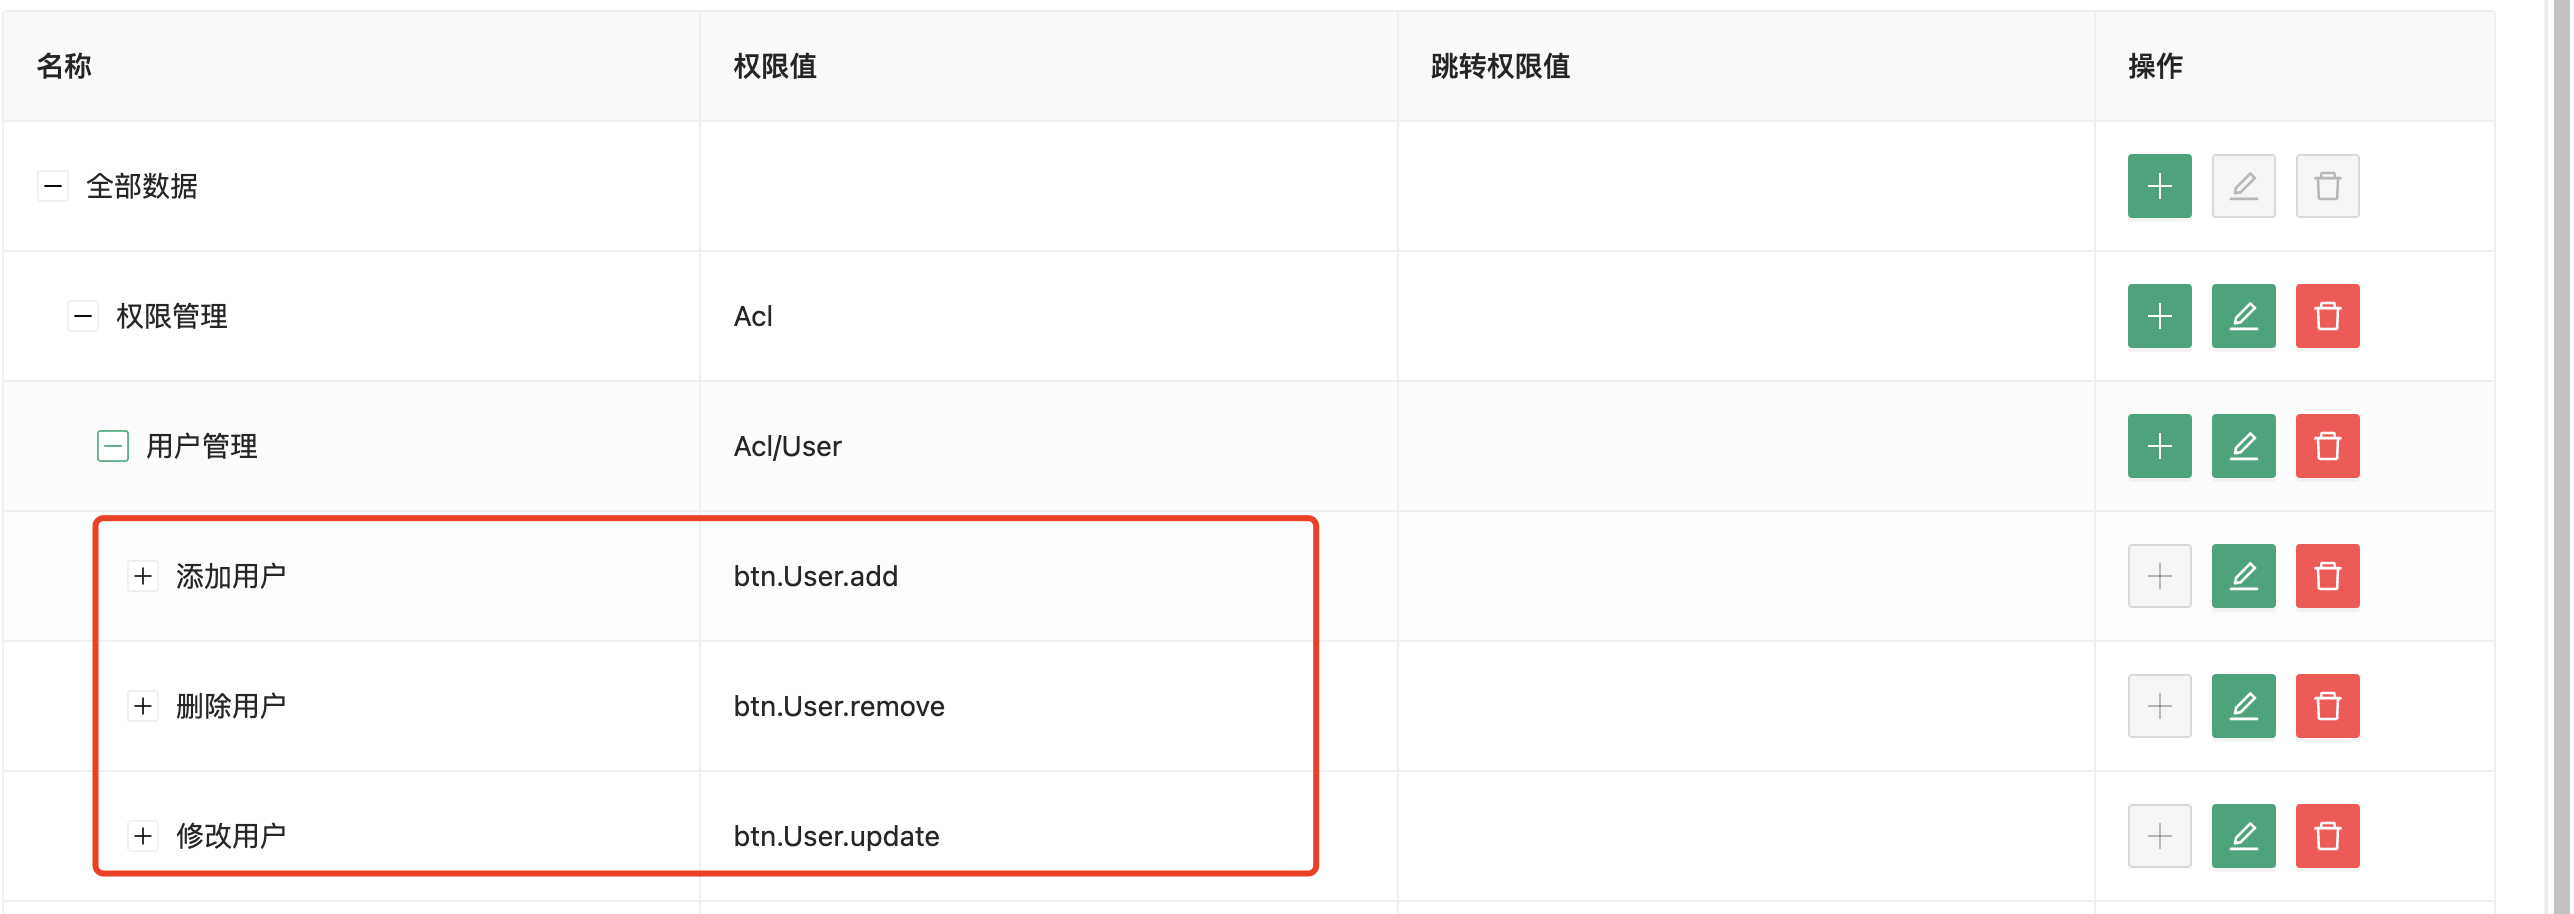
设置好了路由以后,在info接口当中,会返回当前用户所拥有的路由权限和按钮权限:
在渲染路由之前,需要对路由做筛选:
// 控制router的业务逻辑import { FilterRouter, TreeRouterFilter } from "./types";// 递归处理const treeRouterFilter: TreeRouterFilter = ({routeHash,allAsyncRoutes,lv = 0}) => {// TODOreturn allAsyncRoutes.filter(router => {const { children = [] } = router;router.children = treeRouterFilter({routeHash,allAsyncRoutes: children,lv: lv+1})return (lv === 0) || routeHash[router.name]})}// 处理权限控制的函数export const filterRouter: FilterRouter = ({allAsyncRoutes,routes}) => {// hash表结构化, 以优化时间复杂度const routeHash = (()=>{const hash: Record<string, any> = {};routes.forEach((route)=>{hash[route] = true});return hash})()return treeRouterFilter({routeHash,allAsyncRoutes,})}
import { useRoutes, } from "react-router-dom";import type { SRoutes } from "./types";import cloneDeep from 'lodash/cloneDeep'import { allAsyncRoutes, anyRoute, constantRoutes } from "./routes";import { useAppSelector } from "@/app/hooks";import { selectUser } from "@/pages/login/slice";import { filterRouter } from "./effect";const allRoutes = cloneDeep(allAsyncRoutes);/*自定义hook: 注册应用的所有路由*/export const useAppRoutes = () => {const {routes} = useAppSelector(selectUser);const resultRouter = routes?.length ? filterRouter({allAsyncRoutes: allRoutes,routes: routes}) : constantRoutesreturn useRoutes([...resultRouter, ...anyRoute]);};// 找到要渲染成左侧菜单的路由export const findSideBarRoutes = () => {const currentIndex = allRoutes.findIndex((route) => route.path === "/syt");return allRoutes[currentIndex].children as SRoutes;};export default allAsyncRoutes;
强制登陆控制
当用户在刷新页面的时候,会强制请求info接口,获取用户信息和权限列表,这里定义了一个高阶组件withAuthorization
import { FC } from "react";import { useLocation, Navigate } from "react-router-dom";import { Spin } from "antd";import { useAppDispatch, useAppSelector } from "@/app/hooks";import { getUserInfoAsync, selectUser, setToken } from "@/pages/login/slice";function withAuthorization(WrappedComponent: FC) { // FunctionComponentreturn () => {// 读取redux中管理的token和用户名 ==> 只要状态数据发生了改变, 当前组件函数就会自动重新执行const { token, name } = useAppSelector(selectUser);// 获取当前请求的路由地址const { pathname } = useLocation();const dispatch = useAppDispatch();// 如果有token, 说明至少登录过if (token) {// 如果要去的是登陆页面或根路径路由, 自动访问首页if (pathname === "/login" || pathname === "/") {return <Navigate to="/syt/dashboard" />;}// 访问的某个管理页面// 如果有用户名, 说明已经登陆, 直接渲染目标组件 LayoutComponent/xxx组件if (name) {return <WrappedComponent />;}// 还没有登陆, 分发请求获取用户信息的异步actiondispatch(getUserInfoAsync());return <Spin size="large" />;} else { // 没有登录过 => 都得去登陆页面// 判断是否是微信扫码登陆const params = new URLSearchParams(document.location.search.substring(1));const token = params.get('token');if (token) {// 微信扫码登陆,获取到token,直接跳转到首页dispatch(setToken(token))return <Navigate to="/syt/dashboard" />;}// 如果访问的是登陆页面, 直接显示对应的组件if (pathname === "/login") {return <WrappedComponent />;}// // 如果访问不是登录页面, 自动跳转到登陆页面return <Navigate to="/login" />;}};}export default withAuthorization;
这个组件中会判断登录逻辑,最后需要在App.tsx中使用,这样就能保证每次页面一刷新都会走登陆逻辑
import { ConfigProvider } from "antd";import zhCN from "antd/lib/locale/zh_CN";import enUS from "antd/lib/locale/en_US";import { useAppSelector } from "@/app/hooks";import { selectLang } from "@/app/appSlice";import { useAppRoutes } from "./router";import withAuthorization from "./components/withAuthorization";function App() {const lang = useAppSelector(selectLang);return <ConfigProvider locale={lang === "zh_CN" ? zhCN : enUS}>{useAppRoutes()}</ConfigProvider>;}export default withAuthorization(App);
定义store
我们的routes和buttons都需要存放在store中,便于在组件中取值。
...const initialState: UserState = {...routes: [],buttons: []}// 创建当前redux模块的管理对象sliceconst userSlice = createSlice({name: 'user', // 标识名称initialState, // 初始状态// 配置同步action对应的reducer => 同步action会自动生成reducers: {setToken: (state, action) => {const token = action.payload;state.token = tokenlocalStorage.setItem('token_key', token)}},// 为前面定义的异步action, 定义对应的reducerextraReducers(builder) {builder// 获取用户信息请求成功后的reducer处理.addCase(getUserInfoAsync.fulfilled, (state, action) => {// 将返回的name和avatar只保存到reduxconsole.log(action);const {name, avatar, routes, buttons} = action.payloadstate.name = namestate.avatar = avatarstate.routes = routes;state.buttons = buttons;})},})
按钮权限
按钮的控制就更加的简单,只要根据buttons列表中去筛选当前传的key是否存在,来决定展示与否
import { useAppSelector } from "@/app/hooks";import { selectUser } from "@/pages/login/slice"const AuthButton = (props: { authKey: any; children: any; }) => {const { authKey, children } = props;const {buttons} = useAppSelector(selectUser);const authorized = buttons?.includes(authKey);return (authorized ? children : null)}export default AuthButton
使用方式:
import AuthButton from '@/components/authButton'<AuthButton authKey="btn.User.assgin"><Buttontype="primary"icon={<UserOutlined />}onClick={() => handleAddUser(3, row)}></Button></AuthButton>
注意authKey的值需要跟后台配置的值相同。

若有收获,就点个赞吧
0 人点赞
