分析这个页面
analysis.jsstate = {salesType: 'all',currentTabKey: '',rangePickerValue: getTimeDistance('year'),//getTimeDistance工具函数};<SalesCardsalesData={salesData}isActive={this.isActive}// 选择框的 高亮selectDate={this.selectDate} // select的改变rangePickerValue={rangePickerValue} // 日期选择器的valuehandleRangePickerChange={this.handleRangePickerChange}loading={loading}/>
意外的是:
isActive 居然是函数,而不是简单的传了个curtabview即可
一般的设计思路:
如果将curtab放在props上,那么tabchange的事件也是通过prop传递给ui组件
ui组件改变的时候 调用prop的值
同时传递curtab给ui组件是为了在ui组件的class高亮时判断: curtab===item.tab?’active’
pro里:
细分的组件就完完全全变为了ui组件。连一点点逻辑的控制都给抽象到了props组件里
比如这里的className={isActive(‘today’)}
({ salesData, isActive, loading, selectDate })<div className={styles.salesExtra}><a className={isActive('today')} onClick={() => selectDate('today')}><FormattedMessage id="app.analysis.all-day" defaultMessage="All Day" /></a><a className={isActive('week')} onClick={() => selectDate('week')}><FormattedMessage id="app.analysis.all-week" defaultMessage="All Week" /></a></div># 默认高亮:selec的高亮1.日期选择器的控制 (静态渲染的时候 通过读取datapicker的value来判断 如果日期选择器有符合的则高亮isActive = type => {const { rangePickerValue } = this.state;const value = getTimeDistance(type);// 'allday'变为value [starttime,endtime]if (!rangePickerValue[0] || !rangePickerValue[1]) {return '';}if (rangePickerValue[0].isSame(value[0], 'day') &&rangePickerValue[1].isSame(value[1], 'day')) {return styles.currentDate;}return '';};2.用户的select控制 用户select控制也要改变日期选择器的valueselectDate = type => {const { dispatch } = this.props;this.setState({rangePickerValue: getTimeDistance(type),});// <RangePickervalue={rangePickerValue}onChange={handleRangePickerChange}style={{ width: 256 }}///>dispatch({type: 'chart/fetchSalesData',});};由于 datepicker的value改变了 再反向决定 select的高亮(静态渲染 isactive由此解耦了 datepicker。datepicker只需要按部就班的改变rangePickerValue即可
所以 selectchange 、datechange、type都是走的一个请求吧?
tabchange是在props就可以了的
解析一下时间的处理:
<div className={styles.salesExtra}><a className={isActive('today')} onClick={() => selectDate('today')}><FormattedMessage id="app.analysis.all-day" defaultMessage="All Day" /></a>// 近7天<a className={isActive('week')} onClick={() => selectDate('week')}><FormattedMessage id="app.analysis.all-week" defaultMessage="All Week" /></a><a className={isActive('month')} onClick={() => selectDate('month')}><FormattedMessage id="app.analysis.all-month" defaultMessage="All Month" /></a><a className={isActive('year')} onClick={() => selectDate('year')}><FormattedMessage id="app.analysis.all-year" defaultMessage="All Year" /></a></div><RangePickervalue={rangePickerValue}onChange={handleRangePickerChange}style={{ width: 256 }}/>prop组件isActive = type => {const { rangePickerValue } = this.state;//const value = getTimeDistance(type);// rangePickerValue 看来是返回数组 [start,end];两个变量变为了一个变量 节约了变量// 比我想象的复杂! [{isSame:func,date:xxx},{}]// 不过不是自己构造的 return [moment(`${year}-01-01 00:00:00`), moment(`${year}-12-31 23:59:59`)];// moment里带的if (!rangePickerValue[0] || !rangePickerValue[1]) {return '';}// 如果当前rangePickerValue与selec计算出的时间范围一致 那么就if (// 一个数据还可以 调用isSame方法?rangePickerValue[0].isSame(value[0], 'day') &&rangePickerValue[1].isSame(value[1], 'day')) {return styles.currentDate;//}return '';};
const value = getTimeDistance(type);// getTimeDistance函数// type:today 1,week 7days,month 30days,yearexport function getTimeDistance(type) {const now = new Date();const oneDay = 1000 * 60 * 60 * 24;if (type === 'today') {now.setHours(0);now.setMinutes(0);now.setSeconds(0);return [moment(now), moment(now.getTime() + (oneDay - 1000))];}if (type === 'week') {let day = now.getDay();now.setHours(0);now.setMinutes(0);now.setSeconds(0);if (day === 0) {day = 6;} else {day -= 1;}const beginTime = now.getTime() - day * oneDay;return [moment(beginTime), moment(beginTime + (7 * oneDay - 1000))];}if (type === 'month') {const year = now.getFullYear();const month = now.getMonth();const nextDate = moment(now).add(1, 'months');const nextYear = nextDate.year();const nextMonth = nextDate.month();return [moment(`${year}-${fixedZero(month + 1)}-01 00:00:00`),moment(moment(`${nextYear}-${fixedZero(nextMonth + 1)}-01 00:00:00`).valueOf() - 1000),];}const year = now.getFullYear();return [moment(`${year}-01-01 00:00:00`), moment(`${year}-12-31 23:59:59`)];}
接受的日期是这个格式 
{dateRangeStart} 至 {dateRangeEnd}
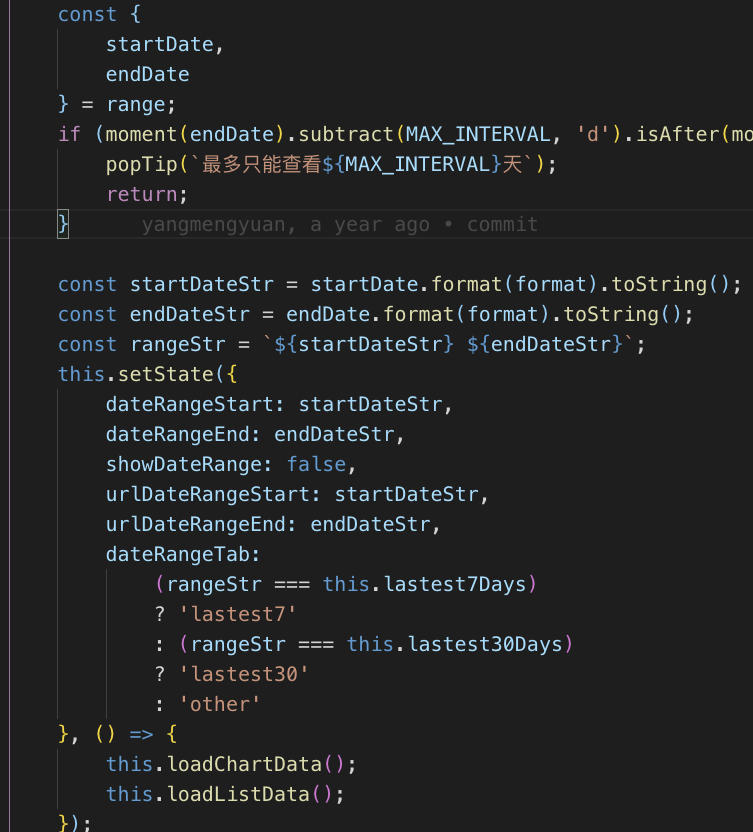
const format = 'YYYY.MM.DD';const urlFormat = 'YYYYMMDD';lastest7Days =// 以当前日期 往前推7day找到7天前的数据moment().subtract(7, 'd').format(format).toString()+ ' '+ moment().subtract(1, 'd').format(format).toString();lastest30Days =moment().subtract(30, 'd').format(format).toString()+ ' '+ moment().subtract(1, 'd').format(format).toString();dateRangeStart: moment().subtract(7, 'd').format(format).toString(),dateRangeEnd: moment().subtract(1, 'd').format(format).toString(),<DateRangestartDate={moment('2019.10.08', format)} // new Date() 将2019.10.02 转换为new date格式endDate={moment(dateRangeEnd, format)}/>
daterange 根据这样获得理想的数据
onChange={rangePickerValue => onChange(rangePickerValue)}const {startDate, endDate} = rangePickerValue;const startDateStr = startDate.format('YYYY.MM.DD').toString();const endDateStr = endDate.format('YYYY.MM.DD').toString();
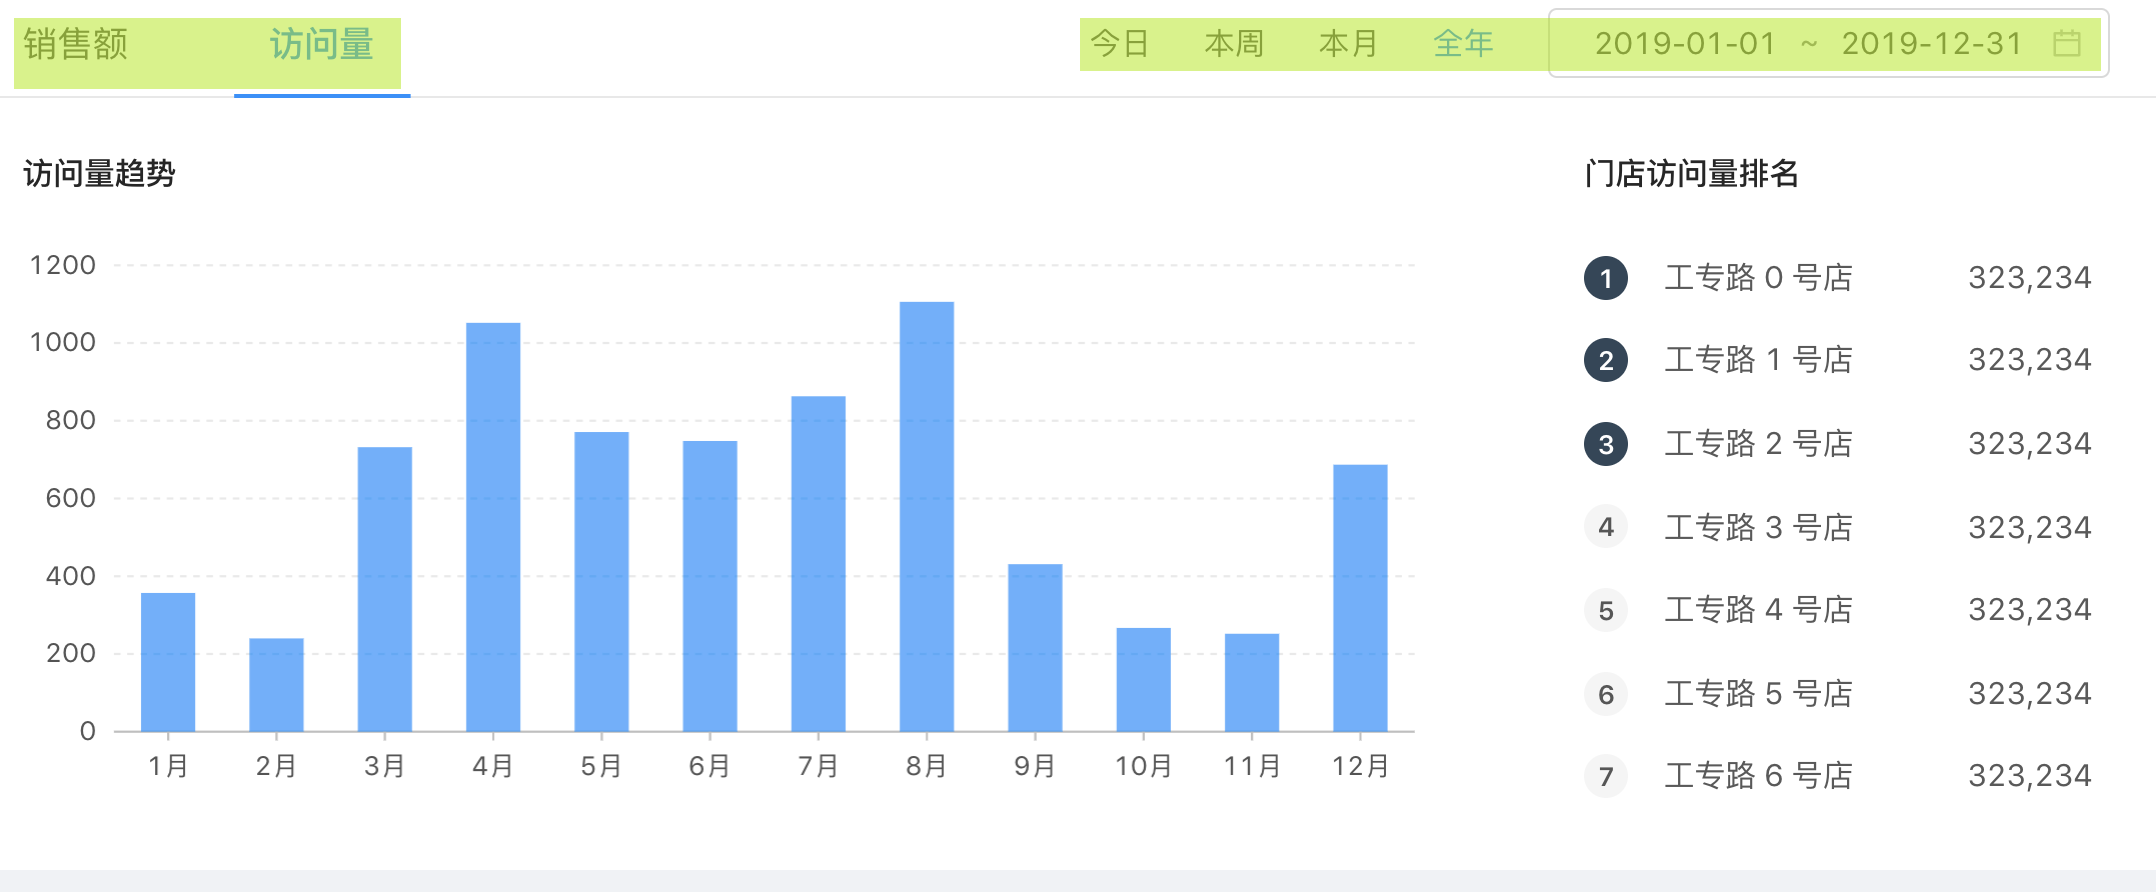
默认展示 近7天的数据 按照日期
按照日期
 datepicker
所以只需要 将date格式转换为 YYYY.MM.DD格式即可
传给后端的数据样式 也是 2019.08.09

若有收获,就点个赞吧
0 人点赞
