事件处理
事件方法
<button @click="greet">Greet</button>methods: {greet: function (event) {# 此时默认函数第一个参数是原生的dom事件// `this` 在方法里指向当前 Vue 实例alert('Hello ' + this.name + '!')// `event` 是原生 DOM 事件if (event) {alert(event.target.tagName)}}}
在html里向方法传值
<button @click="say('what')">Say what</button>methods: {say: function (message) {alert(message)}}
既传值又要接受event原生事件:用特殊变量 $event 把它传入方法
<button @click="warn('Form cannot be submitted yet.', $event)"> # $eventSubmit</button>// ...methods: {warn: function (message, event) {// 现在我们可以访问原生事件对象if (event) event.preventDefault()alert(message)}}
事件修饰符
在事件处理程序中调用 event.preventDefault() 或 event.stopPropagation() 是非常常见的需求。尽管我们可以在方法中轻松实现这点,但更好的方式是:方法只有纯粹的数据逻辑,而不是去处理 DOM 事件细节。
# before<button @click="warn('Form cannot be submitted yet.', $event)"> # $eventSubmit</button>// ...methods: {warn: function (message, event) {if (event) event.stopPropagation()}}# after<!-- 阻止单击事件继续传播 --><a @click.stop="doThis"></a>
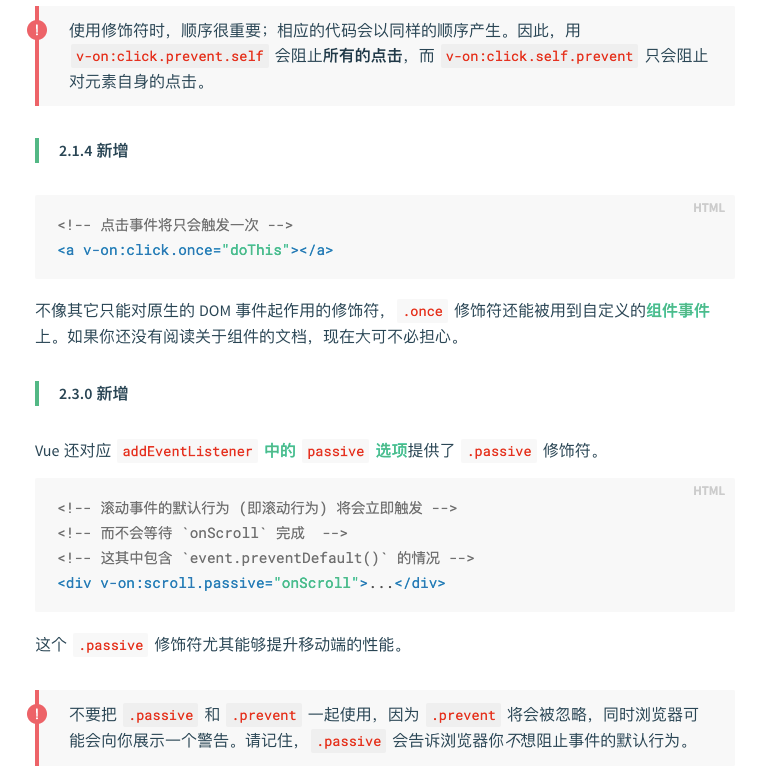
大大提升了开发体验,类似的事件修饰符有:
- .stop #阻止单击事件继续传播
- .prevent
- .capture
- .self
- .once
- .passive
<!-- 阻止单击事件继续传播 --><a v-on:click.stop="doThis"></a><!-- 提交事件不再重载页面 --><form v-on:submit.prevent="onSubmit"></form><!-- 修饰符可以串联 --><a v-on:click.stop.prevent="doThat"></a><!-- 只有修饰符 --><form v-on:submit.prevent></form><!-- 添加事件监听器时使用事件捕获模式 --><!-- 即元素自身触发的事件先在此处理,然后才交由内部元素进行处理 --><div v-on:click.capture="doThis">...</div> ###!useful ####<!-- 只当在 event.target 是当前元素自身时触发处理函数 --><!-- 即事件不是从内部元素触发的 --><div v-on:click.self="doThat">...</div> ###!useful ####
这部分建议 补充相关dom事件相关机制的知识

还有相关按键码
组件通信
父组件向子组件prop传值
组件使用者 传递给组件title数据(此时为静态数据)<blog-post title="My journey with Vue"></blog-post>Vue.component('blog-post', {props: ['title'],// 子组件接受父组件的值template: '<h3>{{ title }}</h3>'// 子组件的template 定义了子组件的样式})
// 组件使用者<blog-postv-for="post in posts"v-bind:key="post.id"v-bind:post="post" -- 传递给组件的数据 post/>// 组件内部定义Vue.component('blog-post', {props: ['post'],template: `<div class="blog-post"><h3>{{ post.title }}</h3><div v-html="post.content"></div></div>`})
warnning ⚠️
不应该在子组件里直接修改prop的值,因为一般是prop在父组件里改变之后 父级 prop 的更新会向下流动到子组件中。每次父级组件发生更新时,子组件中所有的 prop 都将会刷新为最新的值。
如果子组件修改了父组件的prop,那么数据流就是一个闭环了,很可能陷入无限循环中;
(啥?子组件还可以修改父组件传来的值,从而父组件里的数据就改变了?
=-==》 因为,是引用传递。无关vue,是js基础
在 JavaScript 中对象和数组是通过引用传入的,所以对于一个数组或对象类型的 prop 来说,在子组件中改变这个对象或数组本身将会影响到父组件的状态。
有哪些场景子组件可能会有修改父组件传下的prop的值呢?
- prop 用来传递一个初始值;这个子组件接下来希望将其作为一个本地的数据来使用
- prop 以一种原始的值传入且需要进行转换(加工)后显示在子组件里
不推荐直接修改prop然后展示修改后的prop,我们针对以上两个场景分别有如下解决方案
#1 子组件本地需要维护一个随时更新的变量,其中父组件的prop为初始值--> 子组件内部维护一个初始值为prop的dataprops: ['initialCounter'],data: function () {return {counter: this.initialCounter}}#2 prop只是数据加工=> computedprops: ['size'],computed: {normalizedSize: function () {return this.size.trim().toLowerCase()}}
插槽传值
见 插槽
父组件监听子组件事件
有些时候我们需要在父组件里监听子组件的事件,然后让父组件统一修改子组件里共享的父组件的数据
即子组件里有共同的属性,我们就将这个属性提到父组件里统一管理,
一般情况是 父组件接受事件改变父组件里的属性,从而使得子组件里承接的父组件里的数据自动更新;
但是现在的情况是 子组件要接受事件 通知父组件 让父组件改变
===>
1.子组件监听事件,然后往上手动通知父组件,事件发生了===》 原生的事件系统里 有冒泡本可以解决
2.父组件监听子组件的事件==》子组件调用父组件方法
在vue里,子组件通知父组件事件:
$emit(‘xxxname’) xxxname是父组件的方法
# 子组件 触发父级别的自定义事件enlarge-text<button @click="$emit('enlarge-text')">Enlarge text</button># 父组件<blog-post...@enlarge-text="changeFontfunc"></blog-post>
除了自定义事件有两种写法,比如子组件click触发通知父组件;
1.父组件 @on-click
2.父组件
子组件都是通过emit触发通知父组件
<template><button @click="handleClick"><slot></slot></button></template><script>export default {methods: {handleClick (event) {this.$emit('on-click', event);}}}</script>
子组件不仅是调用父组件方法,还要向父组件传值
<button v-on:click="$emit('enlarge-text', 0.1)">Enlarge text</button># 父<blog-post...v-on:enlarge-text="postFontSize += $event" # 直接$event接受这个值></blog-post>或者 作为第一个数传入函数方法<blog-post...v-on:enlarge-text="onEnlargeText"></blog-post>methods: {onEnlargeText: function (enlargeAmount) {this.postFontSize += enlargeAmount}}
等等。如果子组件是input非受控组件,那么能否在父组件上使用v-model使得 父组件的改变 子组件的input也改变呢?
即子组件的input的值的管理能力 是来自 父组件,但子组件作为用户的第一接触者,需要响应用户的改变从而更新父组件的值.
即 子组件v-model下的数据双向绑定
# 父组件<custom-input v-model="searchText"></custom-input># 子组件内部<input >想要子组件接受父组件的值,同时响应用户的交互,从而更新父组件的值。此时应该怎么写子组件?===》Vue.component('custom-input', {props: ['value'],template: `<input:value="value"@input="$emit('input', $event.target.value)">`})
因为v-model其实是两个数据处理结合的语法糖
<input v-model="searchText">==> 等价于<input:value="searchText"@input="searchText = $event.target.value">换在组件上就是:<custom-input:value="searchText"@input="searchText = $event" $event接受子组件的值 即子组件向父组件传$event.target.value></custom-input># 此时的value是传给子组件的prop 也可以换成 :searchText# 同样 input也可以换成其他事件方法<custom-input:searchText="searchText"@inputClick="searchText = $event" $event接受子组件的值 即子组件向父组件传$event.target.value></custom-input>===> 子组件Vue.component('custom-input', {props: ['searchText'],template: `<input:value="searchText"@input="$emit('inputClick', $event.target.value)">`})但是如果要保持父组件是用v-model的方式使用 就必须传值为 value 和 input。不能改变名字
:sync
之前针对input事件有个v-model的兼容
那么对于子组件的 非input事件就不能在通知父级改变同时兼有v-model的方式里吗?
索性,vue提供了 update:myPropName 的模式触发事件取而代之
# 子组件this.$emit('update:title', newTitle)# 父组件<text-documentv-bind:title="doc.title"v-on:update:title="doc.title = $event"></text-document># :sync 简写 ===> 类似 v-model。这里:title是传给子组件的prop。doc.title是值<text-document :title.sync="doc.title"></text-document>
.sync 修饰符的 v-bind 不能和表达式一起使用v-bind:title.sync=”doc.title + ‘!’”
(怎么可能定义两个数据修改源~)
当我们用一个对象同时设置多个 prop 的时候,也可以将这个 .sync 修饰符和 v-bind 配合使用:
这样会把 doc 对象中的每一个属性 (如 title) 都作为一个独立的 prop 传进去,然后各自添加用于更新的 v-on 监听器。
插槽
插槽就是 开放了一个空间给子组件渲染东西,但是父组件仍具有控制子组件渲染的插槽内容大致在哪里的权力;
插槽于父组件而言就是一个 子组件的占位符,
于子组件就是 渲染东西在父组件里的出口
# 组件使用者 决定了组件渲染的内容<alert-box>Something bad happened. # 这个内容会被释放到父组件的插槽内(如组件定义的有插槽的话</alert-box># 组件定义Vue.component('alert-box', {template: `<div class="demo-alert-box"><strong>Error!</strong><slot></slot> # 定义的slot决定了组件使用者渲染内容的出口</div>`})# 同时组件定义的相互配合 决定了slot渲染在组件的哪个部分
插槽提供了一个 除了prop以外 另一种向组件内部传数据的方式。即将数据写在组件开闭之间;然后组件内部使用slot来接住这个数据
<navigation-link url="/profile"><!-- 添加一个 Font Awesome 图标 --><span class="fa fa-user"></span>Your Profile</navigation-link># 组件内部<av-bind:href="url"class="nav-link"><slot></slot></a># 如果组件内部没有包含一个 <slot> 元素,则该组件起始标签和结束标签之间的任何内容都会被抛弃。
插槽的默认值
为一个插槽设置具体的后备 (也就是默认的) 内容是很有用的,它只会在没有提供内容的时候被渲染
<button type="submit"><slot>Submit</slot> # submit是默认会被渲染的内容。如果组件使用者并没有在组件开闭中间传入值</button>
具名插槽
父: xxxx
子:
父组件
<base-layout><template v-slot:header><h1>Here might be a page title</h1></template><template v-slot:default> v-slot:default 可以不写<p>A paragraph for the main content.</p><p>And another one.</p></template><template v-slot:footer><p>Here's some contact info</p></template></base-layout>
子组件
<div class="container"><header><slot name="header"></slot></header><main><slot></slot> # 默认对应 default</main><footer><slot name="footer"></slot></footer></div>
插槽作用域
父级模板里的所有内容都是在父级作用域中编译的;子模板里的所有内容都是在子作用域中编译的
<navigation-link url="/profile"># 这个插槽里的内容是读不到父组件的prop 如此时的urlLogged in as {{url}}</navigation-link>
组件使用者在插槽里读取子组件的数据
# 绑定 插槽prop<current-user><template v-slot:default="slotProps">{{ slotProps.user.firstName }}</template></current-user># 子组件传值给父组件<span><slot v-bind:user="user">{{ user.lastName }}</slot></span>
当被提供的内容只有默认插槽时,组件的标签才可以被当作插槽的模板来使用。这样我们就可以把 v-slot 直接用在组件上:
<current-user v-slot:default="slotProps">{{ slotProps.user.firstName }}</current-user>
但要出现多个插槽,请始终为所有的插槽使用完整的基于 <template> 的语法
解构插槽
<current-user v-slot="{ user }">{{ user.firstName }}</current-user><current-user v-slot="{ user: person }">{{ person.firstName }}</current-user>娄底写法<current-user v-slot="{ user = { firstName: 'Guest' } }">{{ user.firstName }}</current-user>
动态与异步组件
:is
在一个多标签的界面里,tab下面渲染界面的切换可以使用动态切换组件来实现
(特别是当tab里的内容过于复杂我们将每个内容都单独封装成了组件的时候)
此时,动态切换组件就十分有用了
<!-- 组件会在 `currentTabComponent` 改变时改变 --><component v-bind:is="currentTabComponent"></component>
currentTabComponent 可以包括 已注册组件的名字 or 一个组件的选项对象
is的坏处是 每次都是重新实例化组件。
实例化意味着会丢失组件本来的内部数据。比如tab下的一些浏览位置等
<!-- 失活的组件将会被缓存!--><keep-alive><component v-bind:is="currentTabComponent"></component></keep-alive>
异步组件
Vue.component('async-example', function (resolve, reject) {setTimeout(function () {// 向 `resolve` 回调传递组件定义resolve({template: '<div>I am async!</div>'})}, 1000)})# 将异步组件和 webpack 的 code-splitting 功能一起配合使用Vue.component('async-webpack-example', function (resolve) {// 这个特殊的 `require` 语法将会告诉 webpack// 自动将你的构建代码切割成多个包,这些包// 会通过 Ajax 请求加载require(['./my-async-component'], resolve)})简写Vue.component('async-webpack-example',// 这个 `import` 函数会返回一个 `Promise` 对象。() => import('./my-async-component'))局部注册new Vue({// ...components: {'my-component': () => import('./my-async-component')}})
深入细节
prop
如果在组件的prop里使用驼峰命名,那么在组件里传值就需要将驼峰命名传换为 连字;
(因为HTML 中的特性名是大小写不敏感的,浏览器会把所有大写字符解释为小写字符
Vue.component('blog-post', {// 在 JavaScript 中是 camelCase 的props: ['postTitle'], #驼峰template: '<h3>{{ postTitle }}</h3>'})<!-- 在 HTML 中是 kebab-case 的 --><blog-post post-title="hello!"></blog-post>
但 如果你使用字符串模板,那么这个限制就不存在了。
prop也可以接受类型校验,此时就不是数组传入数据了,而是对象
props: {title: String,likes: Number,isPublished: Boolean,commentIds: Array,author: Object,callback: Function,contactsPromise: Promise // or any other constructor}# prop验证props: {// 基础的类型检查 (`null` 和 `undefined` 会通过任何类型验证)propA: Number,// 多个可能的类型propB: [String, Number],// 必填的字符串propC: {type: String,required: true},// 带有默认值的数字propD: {type: Number,default: 100},}
注意那些 prop 会在一个组件实例创建之前进行验证,所以实例的属性 (如
data、computed等) 在default或validator函数中是不可用的。
类prop属性具有穿透性:
<bootstrap-date-input data-date-picker="activated"></bootstrap-date-input>
比如实例组件上挂载里data-xxx属性,但是子组件并没有显式用prop去接,那么这个属性data-date-picker="activated" 特性就会自动添加到 <bootstrap-date-input> 的根元素上。
组件的循环引用
递归组件
组件可以自己调用自己,常用于 递归生成组件上,比如 tree组件。
前提是组件本身有 name属性
Vue.component('todo-item', {// ...})export default {name: 'TodoItem',// ...}
组件之间的循环引用
如果组件之间存在相互循环引用的情况,比如 资源管理器;
类比 ul li 下面 又各自有 ul li
我们推荐的解决方式是:
# 在本地注册组件的时候,你可以使用 webpack 的异步 import:components: {TreeFolderContents: () => import('./tree-folder-contents.vue')}

