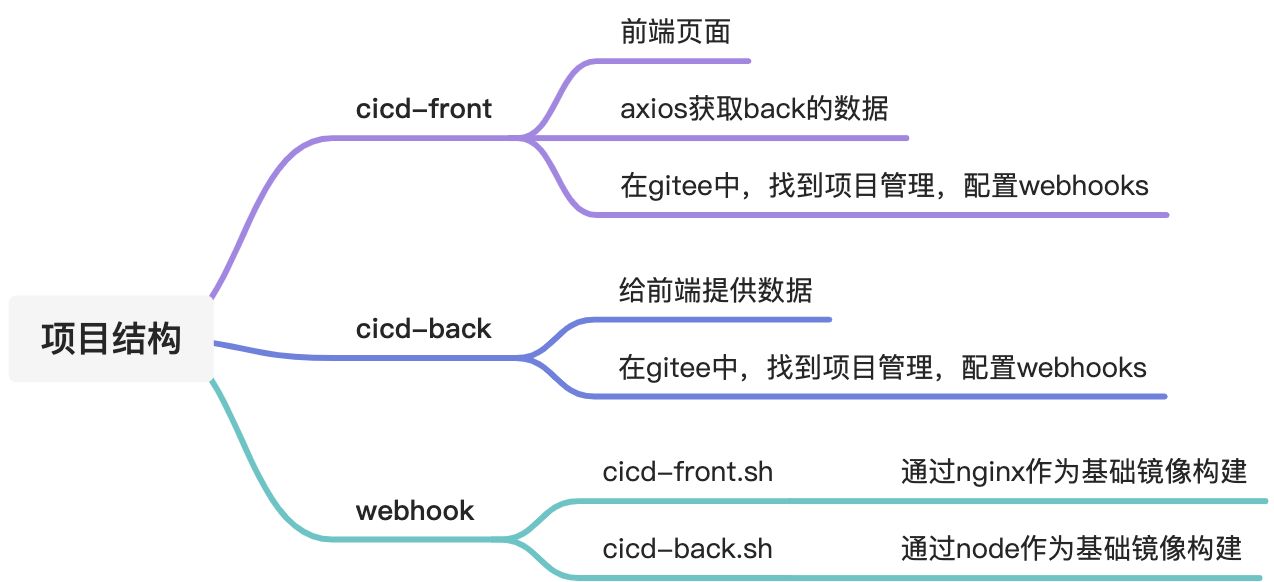
主要使用技术,gitee中的webhook钩子,然后通过node的子进程执行前/后端sh文件。
在sh脚本中添加docker构建镜像,并创建容器。
前端项目cicd-front
使用vue-cli初始化项目
vue create cicd-front
创建完成后安装axios库,用来获取服务端数据。
修改App.vue
<template><div id="app"><ul><li v-for="user in users" :key="user.id">{{ user.name }} : {{ user.age}}</li></ul></div></template><script>import axios from "axios";export default {name: "App",data() {return {users: [],};},mounted() {axios.get("/api/users").then((res) => {this.users = res.data;});},};</script>
添加Dockerfile文件
前端使用nginx作为基础镜像
FROM nginxLABEL name="cicd-front"LABEL version="1.0"COPY ./dist /usr/share/nginx/htmlCOPY ./nginx_front.conf /etc/nginx/conf.dEXPOSE 80
前端项目需要上传的是dist文件夹,并将其拷贝到/usr/share/nginx/html目录下。
新建nginxserver配置文件
新建nginx_front.conf文件,该文件会被复制到/etc/nginx/conf.d下。作用是修改nginx的启动配置
server {listen 80;server_name 1.123.34.56;location / {root /usr/share/nginx/html;index index.html index.htm;try_files $uri $uri/ /index.html;}location /api {# 前端请求/api接口,会进行代理proxy_pass http://1.123.34.56:3666;}}
后端cicd-back
初始化项目
npm init -y
创建server.js,使用node基础模块http创建服务器
let http = require("http");let users = [{ id: 1, name: "John", age: 27 },{ id: 2, name: "Tom", age: 37 },{ id: 3, name: "sam", age: 47 },];let server = http.createServer((req, res) => {res.setHeader("Access-Control-Allow-Origin", "*");if (req.url === "/api/users") {res.end(JSON.stringify(users));} else {res.end("not found");}});server.listen(3666, () => {console.log("server running in 3666");});
添加 res.setHeader(“Access-Control-Allow-Origin”, “*”); 解决跨域请求资源报错。
在package.json中配置启动脚本
{"scripts": {"start": "node ./server.js"}}
添加Dockerfile文件
FROM nodeLABEL name="cicd-back"LABEL version="1.0"COPY . /appWORKDIR /appRUN npm installEXPOSE 3666CMD npm start
webhook钩子服务器
创建服务器,开放端口4000
此处的端口设置是,配置前端和后端项目配置webhooks的依据。
let http = require("http");let server = http.createServer(function (req, res) {console.log(req.method, req.url);if (req.method == "POST" && req.url == "/webhook") {// 配置特殊的请求路径,用来设置前端和后端项目中webhooks的路径地址res.setHeader("Content-Type", "application/json");res.end(JSON.stringify({ ok: true }));}else{res.end("not found");}})server.listen(4000, () => {console.log("webhook server running 4000");});
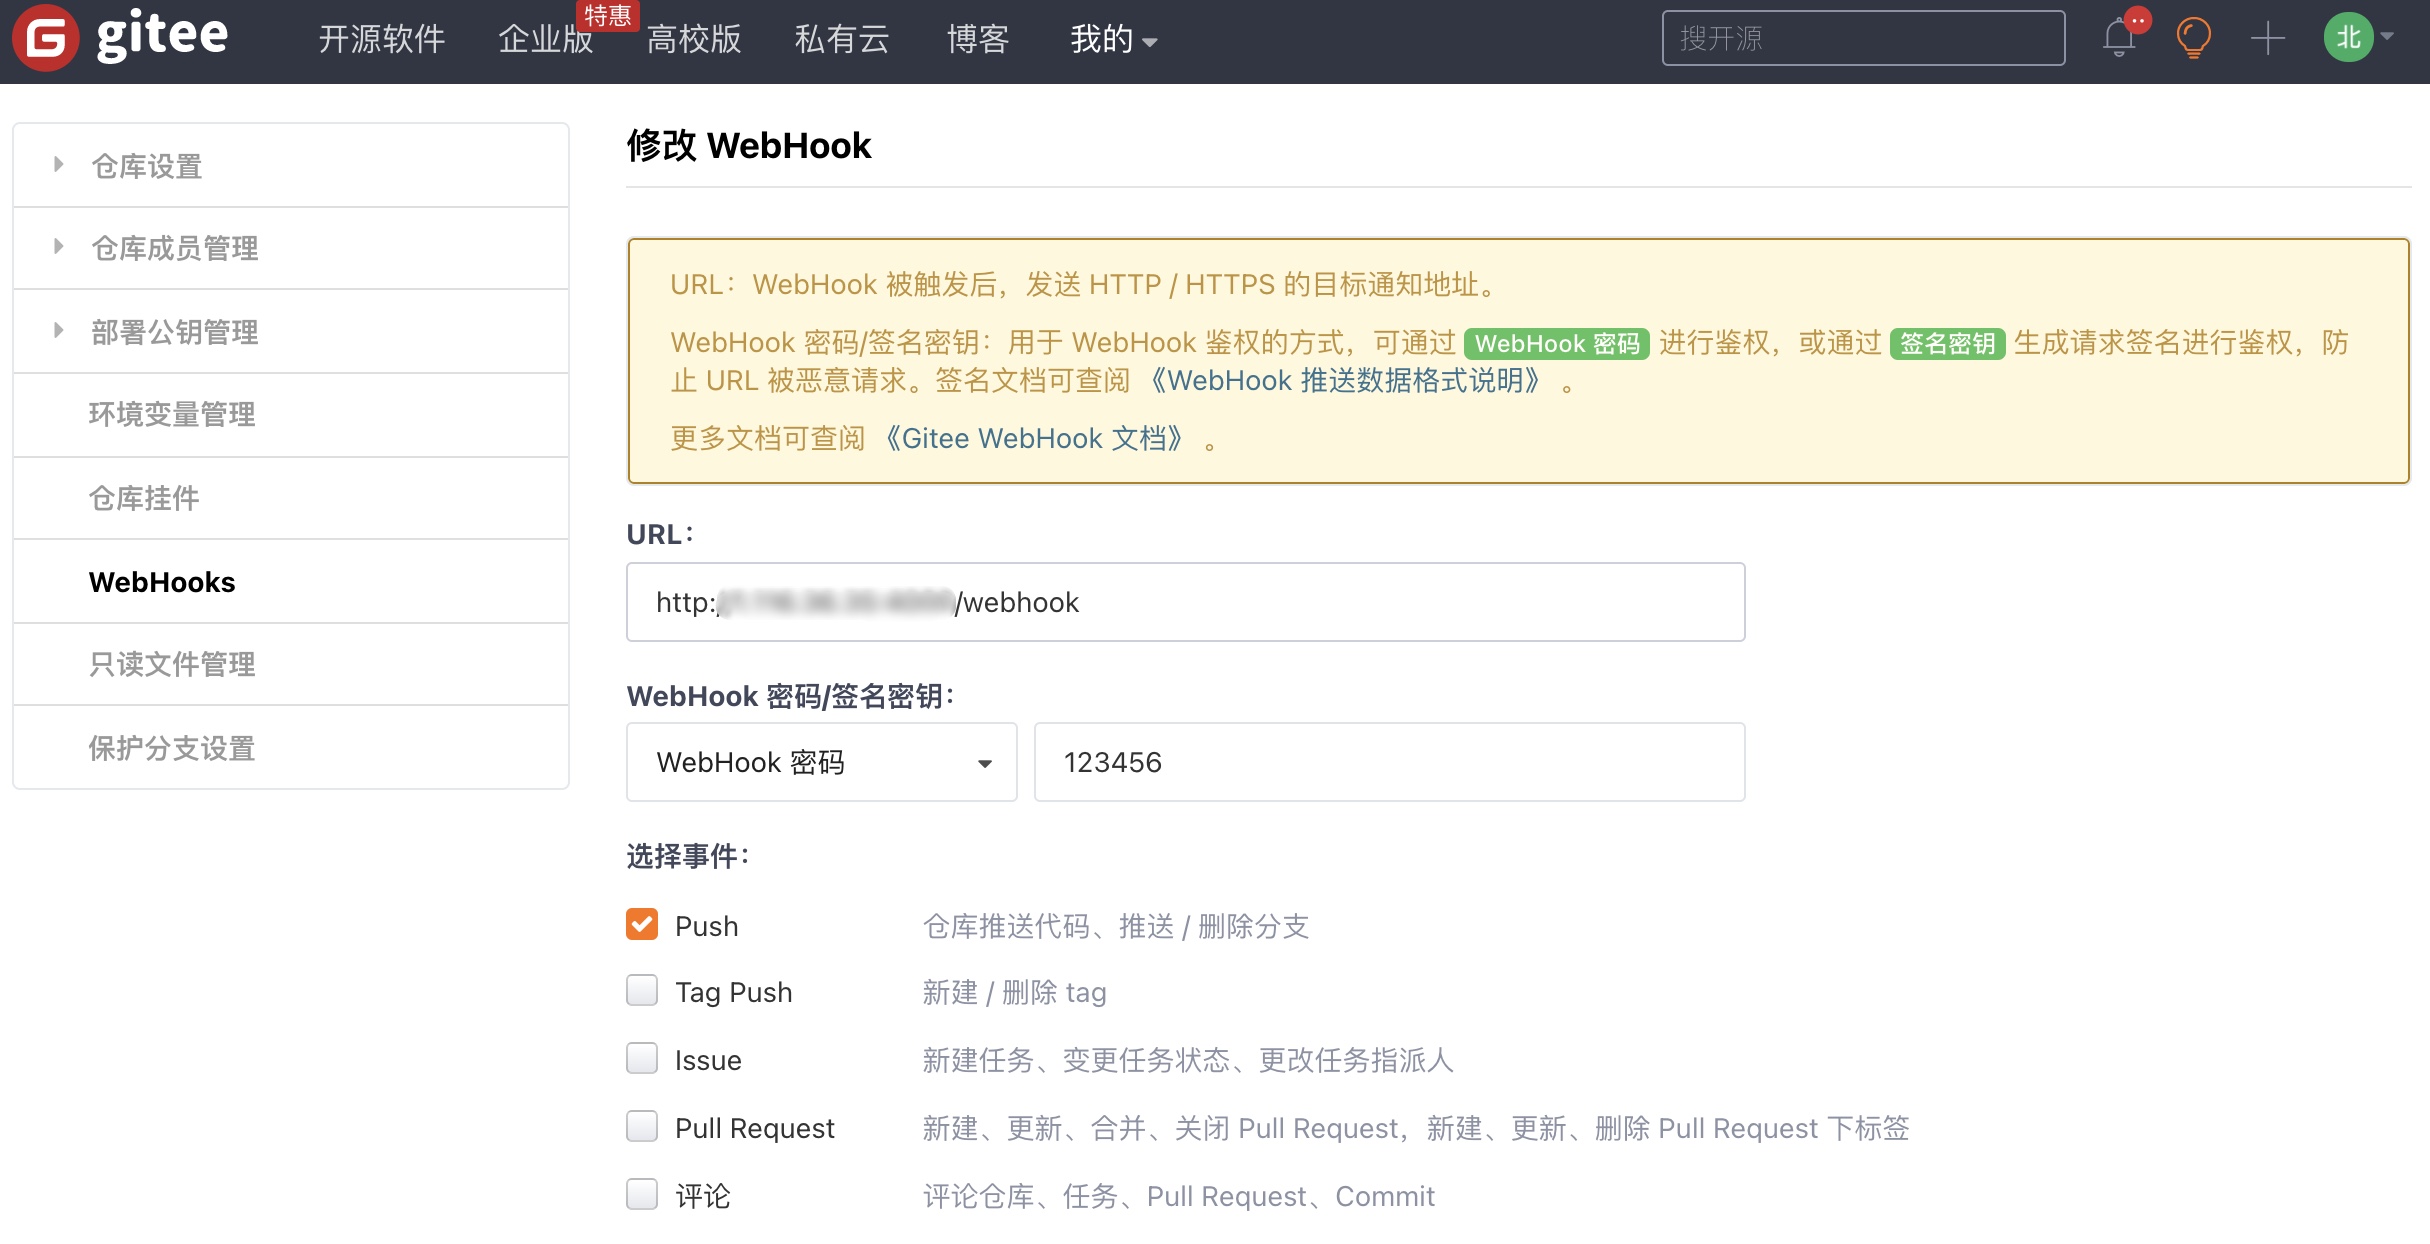
通过以上配置就可以测试webhook的功能。在webhook中填写地址为http://1.123.34.456:4000/webhook。当cicd-front或者cicd-back有代码推送时,可以测试webhook的返回结果。
更新webhook.js文件
主要是更新http.createServer函数中的逻辑处理
http.createServer(function (req, res) {console.log(req.method, req.url);if (req.method == "POST" && req.url == "/webhook") {let buffers = [];req.on("data", function (buffer) {buffers.push(buffer);});req.on("end", function () {let body = Buffer.concat(buffers);let event = req.headers["x-gitee-event"]; // "push hook"let token = req.headers["x-gitee-token"]; // webhook配置密码let timestamp = req.headers["x-gitee-timestamp"]; // 返回的时间戳,用于加解密// console.log(token, timestamp, sign(timestamp), "-=-=mimi-=-=");// https://gitee.com/help/articles/4290#article-header0// if(token !== "123456")if (crypto.createHmac("sha256", token).update(timestamp + "\n" + token).digest("hex") !== sign(timestamp)) {console.log("not allowed");// 未通过验证的,不进行部署构建return res.end("not allowed");}// 以下是通过验证后进行的构建部署res.setHeader("Content-Type", "application/json");res.end(JSON.stringify({ ok: true }));// console.log(event.toLowerCase().toString(), event.toLowerCase().toString().includes("push"),"-=-=");if (event.toLowerCase().toString().includes("push")) {let payload = JSON.parse(body);// https://gitee.com/help/articles/4186#article-header2// console.log(payload, "payload");// 子进程执行 cicd-front.sh 或者cicd-back.shlet child = spawn("sh", [`./${payload.repository.name}.sh`]);let buffes = [];child.stdout.on("data",function(chunk) {buffes.push(chunk);})child.stdout.on("end",function() {let log = Buffer.concat(buffes);console.log("cicd success",log);})}});} else {res.end("not found");}});
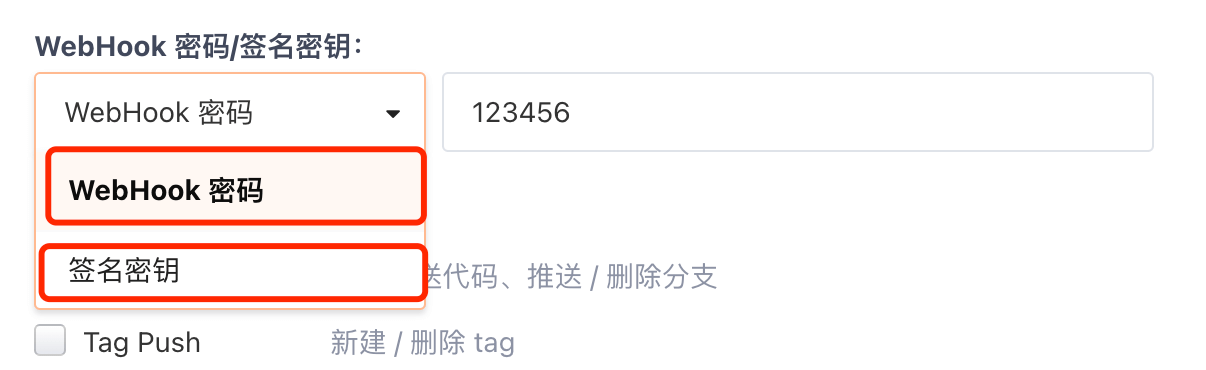
webhook中采用webhook密码,验证比较简单,直接比对req.headers[“x-gitee-token”] 和 服务器上的密码即可。如果采用签名密钥,需要进行加密解密对比。
添加sh执行脚本
cicd-front.sh脚本
#! /bin/bashWORK_PATH="/home/cicd/docker_webhook/cicd-front"cd $WORK_PATHecho "clean old code..."git reset --hard origin/mastergit clean -fecho "pull latest code..."git pull origin masterecho "bundle latest code..."rm -rf node_modulesnpm config set registry https://registry.npm.taobao.orgnpm installnpm run buildecho "start build..."docker build -t cicd-front:1.0 .echo "stop and destroy old container..."docker stop cicd-front-containerdocker rm cicd-front-containerecho "start new container..."docker container run -p 8081:80 --name cicd-front-container -d cicd-front:1.0
cicd-back.sh脚本
#! /bin/bashWORK_PATH="/home/cicd/docker_webhook/cicd-back"cd $WORK_PATHecho "clean old code..."git reset --hard origin/mastergit clean -fecho "pull latest code..."git pull origin masterecho "start build..."docker build -t cicd-back:1.0 .echo "stop and destroy old container..."docker stop cicd-back-containerdocker rm cicd-back-containerecho "start new container..."docker container run -p 3666:3666 --name cicd-back-container -d cicd-back:1.0
项目配置相关
本地ssh登录远程服务器
ssh -p 22 root@47.96.0.230# 接下来输入密码root@47.96.0.230's password:
设置gitee的ssh免密码登录
ssh-keygen -t rsa -b 4096 -C "email@qq.com"
在~ /.ssh 目录下生成id_rsa和id_rsa.pub公钥和私钥。把公钥添加到gitee账号中。https://gitee.com/profile/account_information,设置ssh公钥。
设置webhooks
打开或关闭某个端口
firewall-cmd --zone=public --add-port=4000/tcp --permanent // 开放4000端口firewall-cmd --remove-port=3306/udp --permanent //关闭4000
开启Linux服务器防火墙状态: systemctl start firewalld
停止Linux服务器防火墙状态: systemctl stop firewalld
查询Linux服务器防火墙所有开放端口: firewall-cmd —list-ports
重启Linux服务器防火墙: firewall-cmd —reload

若有收获,就点个赞吧
0 人点赞
