查看nginx安装目录
nginx.conf配置
keepalive_timeout 65; //keepalive_timeout,设置长连接时长为65秒,超过之后断开tcp连接
gzip on; //开启gzip文件压缩
location匹配规则
location 的匹配优先级规则:
- = 表示精确匹配。只有请求的url路径与后面的字符串完全相等时,才会命中。
- ^~xx 表示如果以xx开头,不区分大小写。
- ~ 表示该规则是使用正则定义的,区分大小写。
- ~*xx 表示以xx结尾,不区分大小写。如图片格式结尾的资源
nginx 的匹配优先顺序按照上面的顺序进行优先匹配,而且 只要某一个匹配命中直接退出,不再进行往下的匹配。
剩下的普通匹配会按照 最长匹配长度优先级来匹配,就是谁匹配的越多就用谁。
nginx 每条规则都要以分号结尾,可以运行 nginx -tc nginx.conf 查看配置规则是否生效
设置代理proxy_pass
正向代理和反向代理
正向代理是代理的客户端,比如在客户端使用vpn;
反向代理是代理的服务器,代理放在服务器,通过访问一个域名,可以访问到多个不同IP服务器。
proxy_redirect跳转重定向
proxy_buffering缓冲区
proxy_set_header:设置头信息
proxy_connect_timeout:超时时间
编辑nginx.conf文件
location / {proxy_pass http://localhost:8088;proxy_redirect default;proxy_set_header Host $http_host;proxy_set_header X-Real-Ip $remote_addr;proxy_connect_timeout 30;proxy_send_timeout 60;proxy_read_timeout 60;proxy_buffer_size 32k;proxy_buffering on;proxy_buffers 4 128k;proxy_busy_buffers_size 256k;proxy_max_temp_file_size 256k;}
设置try_files
当匹配不到uri的目录或者文件时,设置一个默认的显示页面。
常见的spa单页面应用,前端通常有2种设置路由的方式:hash和history hash模式一般不会有什么问题,刷新或者通过地址直接访问都可以正常显示,但一般不使用在生产环境。 history模式,可以通过pushState和relaceState实现,不触发浏览器的刷新行为,不触发服务器的请求,但是能触发popState事件,才可以监听路由变化来渲染指定的页面。 使用history存在些问题
- 刷新页面时,浏览器发送请求,到服务器就找不到对应文件目录
- 通过uri直接,直接请求页面,也请求不到
这两种情况下,当前地址不是根路径,因为都是前端路由,服务器端根本不存在对应的文件,则会直接导致 nginx 直接响应 404
为了解决history存在的问题,通常需要在服务器进行处理配置,增加通用匹配模式,可以在服务器的nginx上设置try_files配置。
server {listen 8088;server_name localhost;location / {root /dist;# history 模式重点就是这里try_files $uri $uri/ /index.html;}}
try_files 的作用就是按顺序检查文件是否存在,返回第一个找到的文件。$uri 是 nginx 提供的变量,指当前请求的 URI,不包括任何参数
try_files $uri $uri/ /index.html;如果url地址查询不到就会进入try_files匹配模式,如果路径是http://localhost:8088/abc, $uri就是/abc,表示匹配文件。 匹配不成功则匹配$uri/,表示访问 /abc/ 目录文件夹。 以上2个都失败则进行 index.html 请求。表示会有一个默认的页面设置作为最后结束显示
root和alias
在server/location的配置中,可以设置root或者alias。
- root表示跟请求路径,设置该参数会加上location后面设置的参数
- alias表示重定向的路径,设置该参数直接替换location参数,是直接用alias + try_files的路径
最终uri显示的地址为/dist/static/img/index.htmllocation /img/ {root /dist/static;try_files $uri $uri/ /index.html;}
最终uri显示的地址为/dist/static/index.htmllocation /img/ {alias /dist/static;try_files $uri $uri/ /index.html;}
推荐使用alias进行配置
https://juejin.cn/post/7048952689601806366
负载均衡upstream
假设每秒钟有 1000 个请求,一台服务器处理不过来,分分钟会挂掉。我们把服务器加到 3 台,这样每台处理 300 个,每台都轻轻松松。
nginx 负载均衡 主要是通过配置 upstream 来实现的:
upstream参数配置
| down | 当前sever暂时不参与负载均衡 |
|---|---|
| backup | 预留备份的服务器 |
| max_fails | 允许请求失败的次数 |
| fail_timeout | 经过max_fails失败后,服务器暂停的时间 |
| max_conns | 限制最大的连接数,防止一些低性能服务器收到过多请求 |
调度算法,upstream设置
| 正常轮询 | 按照时间顺序将请求均分到不同服务器 |
|---|---|
| 加权轮询weight | weight值越大,被访问到的几率越大 |
| ip_hash | 每个请求按访问IP的hash结果分配,来自同一个IP固定访问一个服务器 |
| least_conn | 最少链接数,哪个机器连接数少就分发 |
| url_hash | 按照访问的URL的hash结果分配,每个URL定向到同一个后端服务器 |
| hash关键值 | hash自定义的key |
首先使用node建立3个服务器端口9000,9001,9002
打开浏览器访问 http://test
const http = require("http");const server = http.createServer();const host = "0.0.0.0";const port = 9000;let n = 0;server.on("request", function(req,res){n += 1;console.log("request coming!",n);res.write("hello")res.end();});server.listen(port, host, function(req,res){console.log("server is running: http://",host,":",port);})
轮询策略
修改nginx.conf
upstream test {server 0.0.0.0:9000;server 0.0.0.0:9001;server 0.0.0.0:9002;}server {listen 5678;server_name localhost;location / {proxy_pass http://test;}}
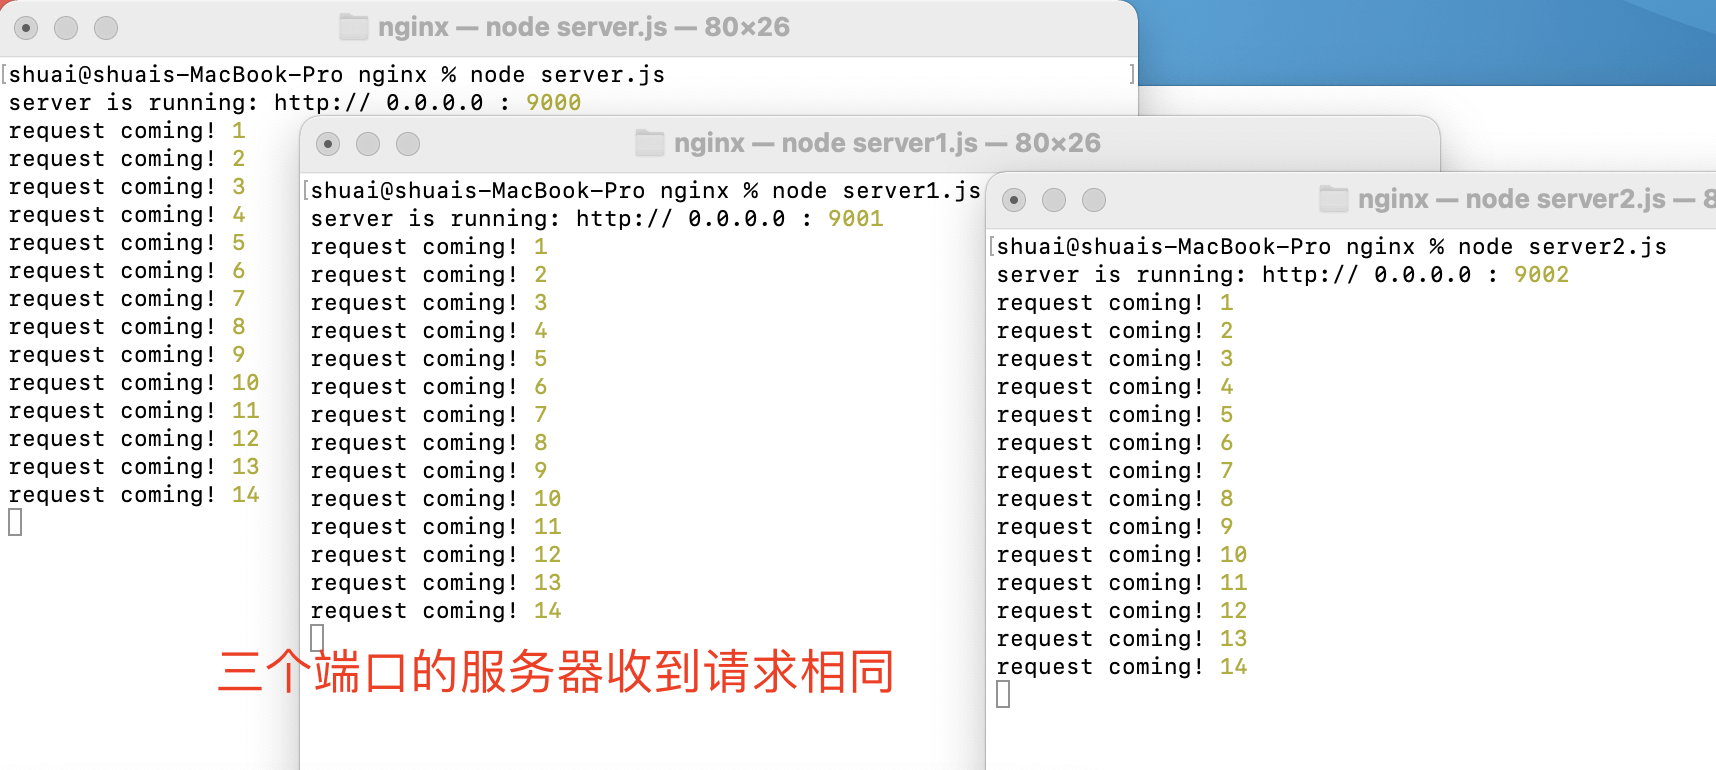
改动是比较简单的,增加了一个 upsteam 配置。这个是最简单的 轮询策略,大量请求打过来后,nginx 将这些请求 平均 分配到 3 台服务器上。会把请求均匀的分发到3个服务器上
加权轮询策略
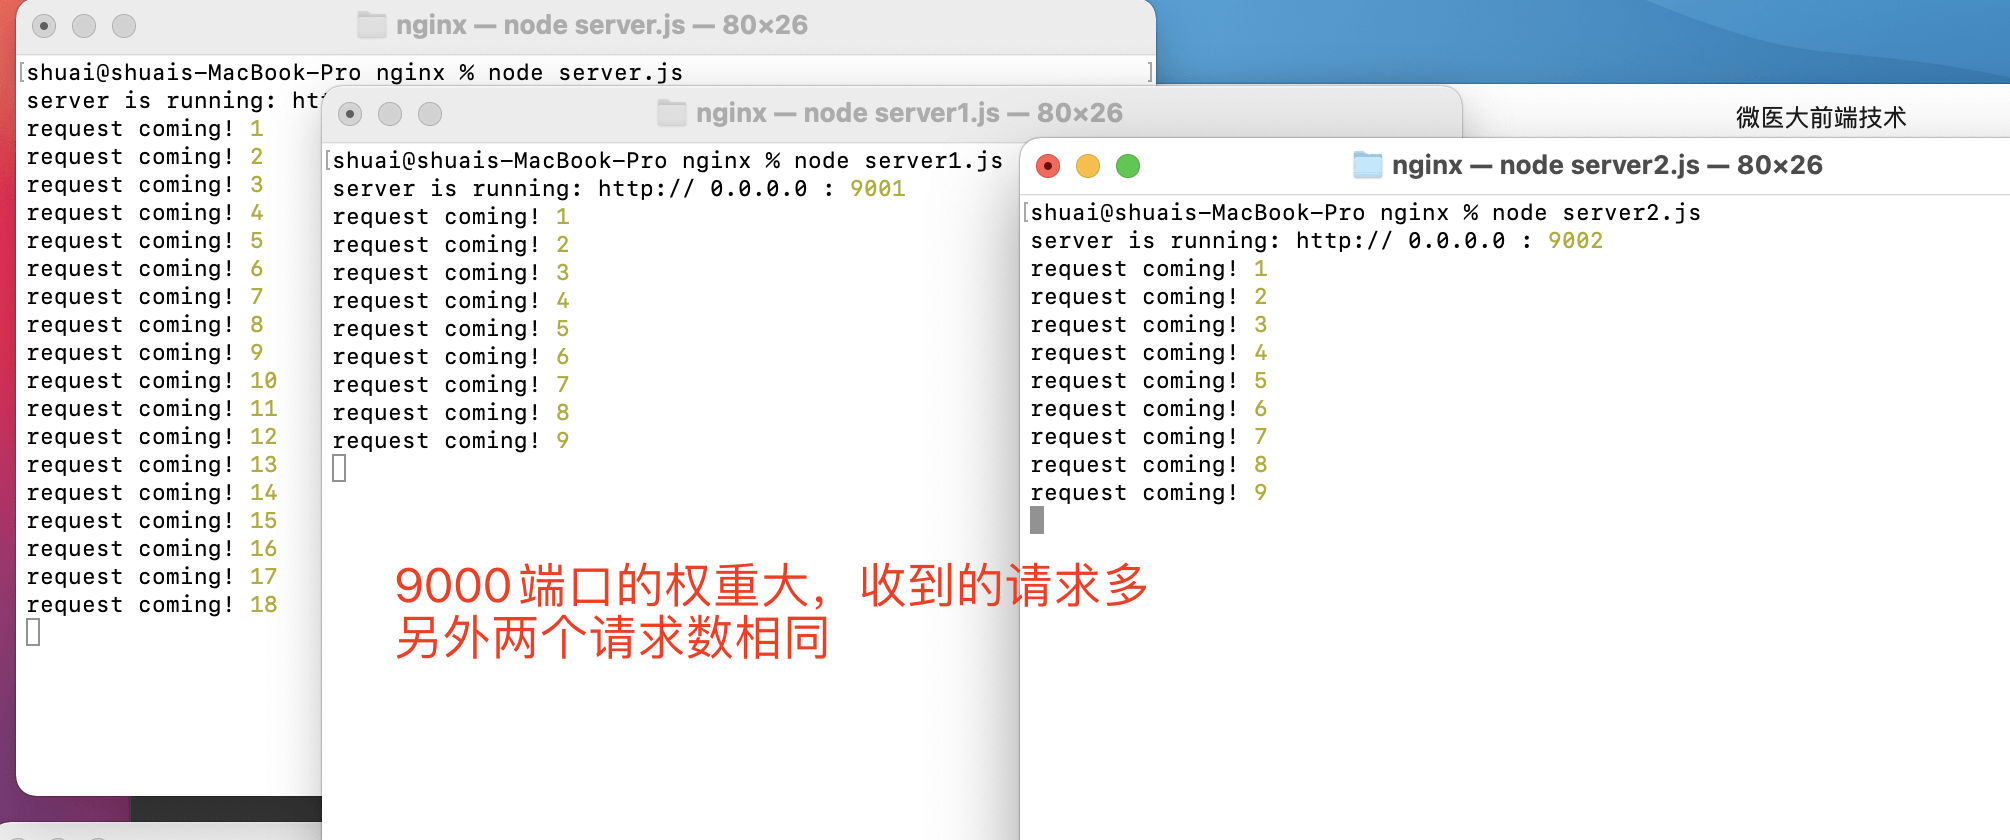
服务地址后面加上 weight 参数来表示权重, 这里的意思是 9000 端口处理50%的请求, 9001 端口处理25%的请求, 9002 端口处理25%的请求。
修改nginx.conf
upstream test {server 0.0.0.0:9000 weight=2;server 0.0.0.0:9001 weight=1;server 0.0.0.0:9002 weight=1;}server {listen 5678;server_name localhost;location / {proxy_pass http://test;}}
ip_hash 策略
根据 ip 来分配请求。固定的客户端发出的请求会被固定分配到一台服务器。接着修改 nginx.conf 配置
修改nginx.conf
upstream test {ip_hash;server 0.0.0.0:9000;server 0.0.0.0:9001;server 0.0.0.0:9002;}server {listen 5678;server_name localhost;location / {proxy_pass http://test;}}
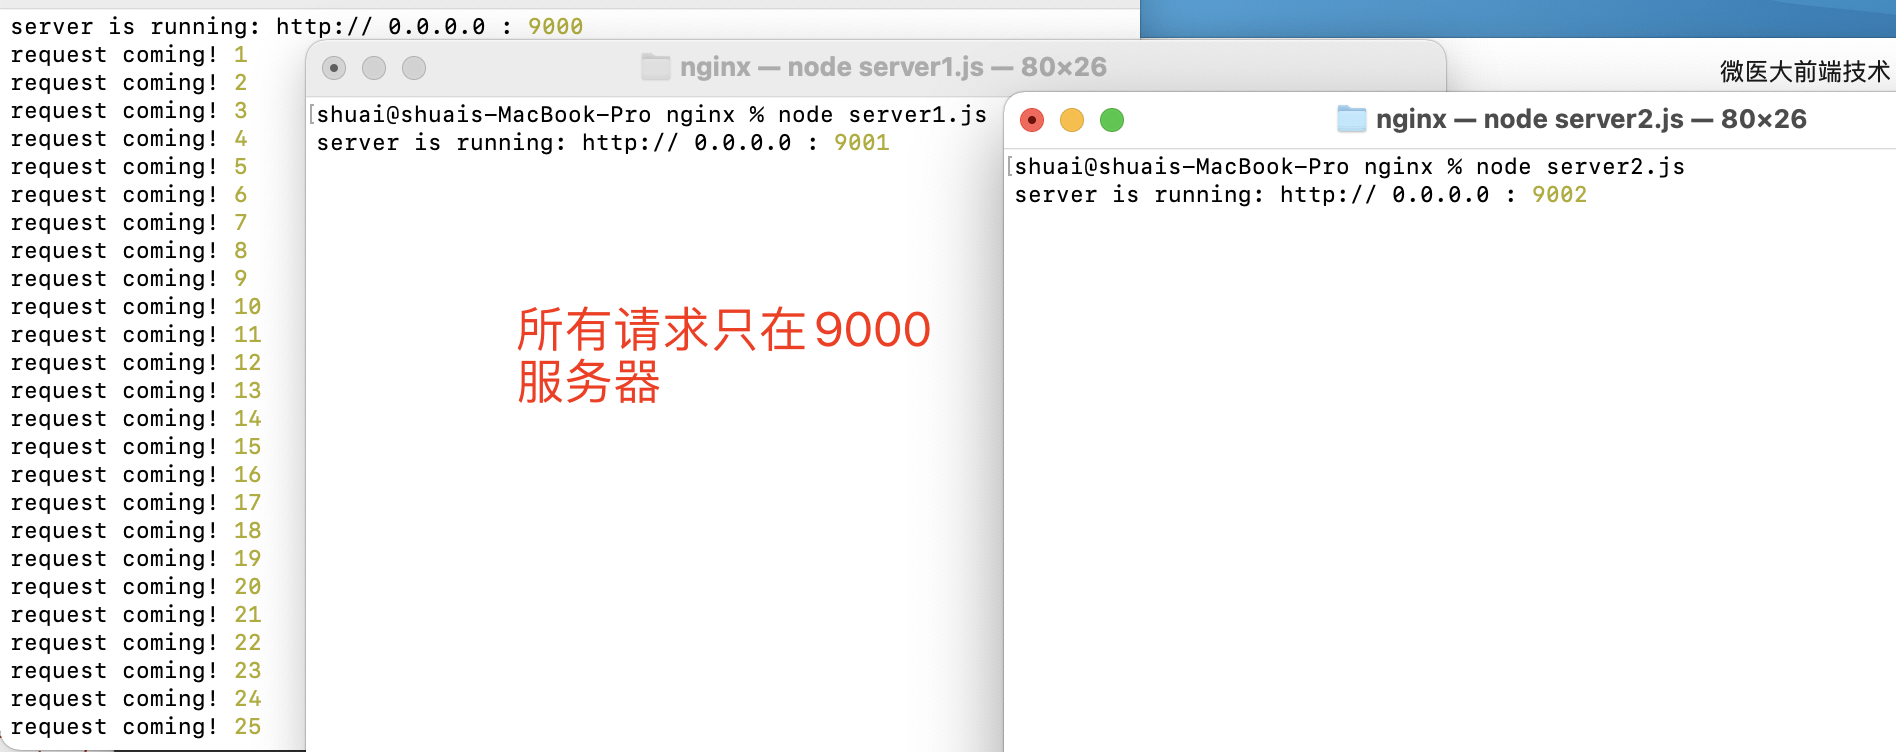
既然是根据 ip 来分配请求的,那我本机发 100 个请求,这 100 个请求应该会被打到同一台服务器上,另外两台接收到的请求数量为 0
缓存proxy_cache
配置代理缓存,编辑nginx.conf
upstream test{server 0.0.0.0:9000;server 0.0.0.0:9001;server 0.0.0.0:9002;}proxy_cache_path /opt/app/cache levels=1:2 keys_zone=my_cache:10m max_size=10g incative=60m use_temp_path=off;server {listen 80;server_name localhost;location / {proxy_cache test;proxy_pass http://test;proxy_cache_valid 200 304 12h;proxy_cache_valid any 10m;add_header Nginx-Cache "$upstream_cache_status";proxy_next_upstream error timeout invalid_header http_500 http_502 http_503 http_504;include proxy_params;}}
设置不缓存的页面proxy_no_cache
proxy_no_cache pathString;
server {listen 80;server_name localhost;# 设置不缓存变量if($request_uri ~ ^/(url3|login|register|password\/rest)){set $cookie_nocache 1;}location / {proxy_cache test;proxy_pass http://test;proxy_cache_valid 200 304 12h;proxy_cache_valid any 10m;proxy_no_cache $cookie_nocache;add_header Nginx-Cache "$upstream_cache_status";proxy_next_upstream error timeout invalid_header http_500 http_502 http_503 http_504;include proxy_params;}}


