使用方法
向服务端获取数据的方法。web端使用XMLHTTPRequest对象,node端使用http模块。
get获取数据
根据用户的ID获取数据信息
axios.get('/user?ID=12345').then(function (response) {// handle successconsole.log(response);}).catch(function (error) {// handle errorconsole.log(error);}).then(function () {// always executed});
也可以传递一个params对象进行请求
axios.get('/user', {params: {ID: 12345}}).then(function (response) {console.log(response);}).catch(function (error) {console.log(error);}).then(function () {// always executed});
还可以使用async和await语法
async function getUser() {try {const response = await axios.get('/user?ID=12345');console.log(response);} catch (error) {console.error(error);}}
post提交数据方式
直接提交数据对象作为参数
axios.post('/user', {firstName: 'Fred',lastName: 'Flintstone'}).then(function (response) {console.log(response);}).catch(function (error) {console.log(error);});
创建axios类
根据以上的使用方法,简单实现get的请求方式。以get为实例分析axios原理。
一:axios包含get方法
重新创建一个新的axios类,Nxios。
class Nxios{constructor(config){this.defaults = config;}// get方法包含url和configsget(url,config){config.url = url;return new Promise((resolve, reject) => {let xhr = new XMLHttpRequest();xhr.onreadystatechange = function () {if (xhr.readyState === 4 && xhr.status === 200) {resolve({statusCode: xhr.statusCode,msg: xhr.statusText,data: xhr.responseText})}};xhr.open(config.method, config.baseUrl + config.url, true);let headers = config.headersfor (let k in headers) {xhr.setRequestHeader(k, headers[k])}xhr.send()})}}export default Nxios;
通过封装XMLHttpRequest对象请求过程,可以简单实现get的需求。get方法返回promise对象,所以get请求后可以使用then/catch进行数据处理。
通用配置config
使用深copy引用config对象
在进行this.defaults = config赋值时,需要对config对象进行深copy。因为对象的引用都是值的引用,如果一个对象发生修改,则相互引用的对象都发生改变。
创建utils工具库,实现deepCopy方法,也可以直接使用loadsh的cloneDeep方法。
function deepCopy(obj) {let target = Array.isArray(obj) ? [] : {};for (let key in obj) {// 判断key属性值是obj自身属性,而不是原型链上的if (obj.hasOwnProperty(key)) {// 判断key对应的值必须存在并且是object对象时,进行迭代操作。if (obj[key] !== null && typeof obj[key] === 'object') {target[key] = deepCopy(obj[key])} else {//其他空,或者非object时,直接赋值target[key] = obj[key]}}}return target}export {deepCopy,};
然后对nxios对象进行修改
class Nxios{constructor(config){this.defaults = deepClone(config);}get(url, configs){// ......}}
处理config不同属性
属性分为:全局属性/配置属性/请求属性
在设置axios的config属性时,headers属性是需要和默认的配置属性相加。其它属性是要替换覆盖。
使用单独的merge方法进行处理
function merge(obj1, obj2) {let target = deepCopy(obj1)let source = deepCopy(obj2)Object.keys(source).reduce((prev, key) => {if(['url', 'method', 'baseUrl'].includes(key)) {prev[key] = source[key]}if(['headers'].includes(key)) {prev[key] = Object.assign(target[key], source[key]);}return prev}, target)return target;}export {merge}
拦截器interceptor
拦截器,对request方法和response做统一处理,创建interceptorManager类
class interceptorManager{constructor(){this.handlers = []}use(handlerResolve, handlerReject){this.handlers.push({fulfilled: handlerResolve,rejected: handlerReject})}}export default interceptorManager;
在nxios中引入interceptorManager类,然后在添加interceptors和在get中处理
class Nxios{constructor(config){// this.defaults = config;this.defaults = deepCopy(config);this.interceptors = {request: new interceptorManager,response: new interceptorManager}}get(url, config){let configs = merge(this.defaults, config);configs.url = url;// console.log(configs)let promise = Promise.resolve(configs);// 拦截器request,在promise.then之前,发起请求之前this.interceptors.request.handlers.forEach((handler)=>{promise = promise.then(handler.fulfilled,handler.rejected)})promise = promise.then(this.dispatch, undefined);// 拦截器response,在发起请求之后this.interceptors.response.handlers.forEach(function(handler){promise = promise.then(handler.fulfilled,handler.rejected)return promise})return promise}dispatch(configs){return new Promise((resolve, reject) => {let xhr = new XMLHttpRequest();xhr.onreadystatechange = function () {if (xhr.readyState === 4 && xhr.status === 200) {resolve({statusCode: xhr.statusCode,msg: xhr.statusText,data: xhr.responseText})}};xhr.open(configs.method, configs.baseUrl + configs.url, true);let headers = configs.headers// 设置了自定义header后,需要在后端进行header字段设置,可以只把需要添加的设置,也可以使用*表示所有。// ctx.set('Access-Control-Allow-Headers', 'Content-Type, Content-Length, Authorization, Accept, X-Requested-With , Request-Ajax, *');for (let k in headers) {xhr.setRequestHeader(k, headers[k])}xhr.send()})}}
适配器Adaptor
测试web
web端使用的ajax.js的XMLHTTPRequest对待,直接刷新index.html进行接口请求,可以通过network查看网络请求。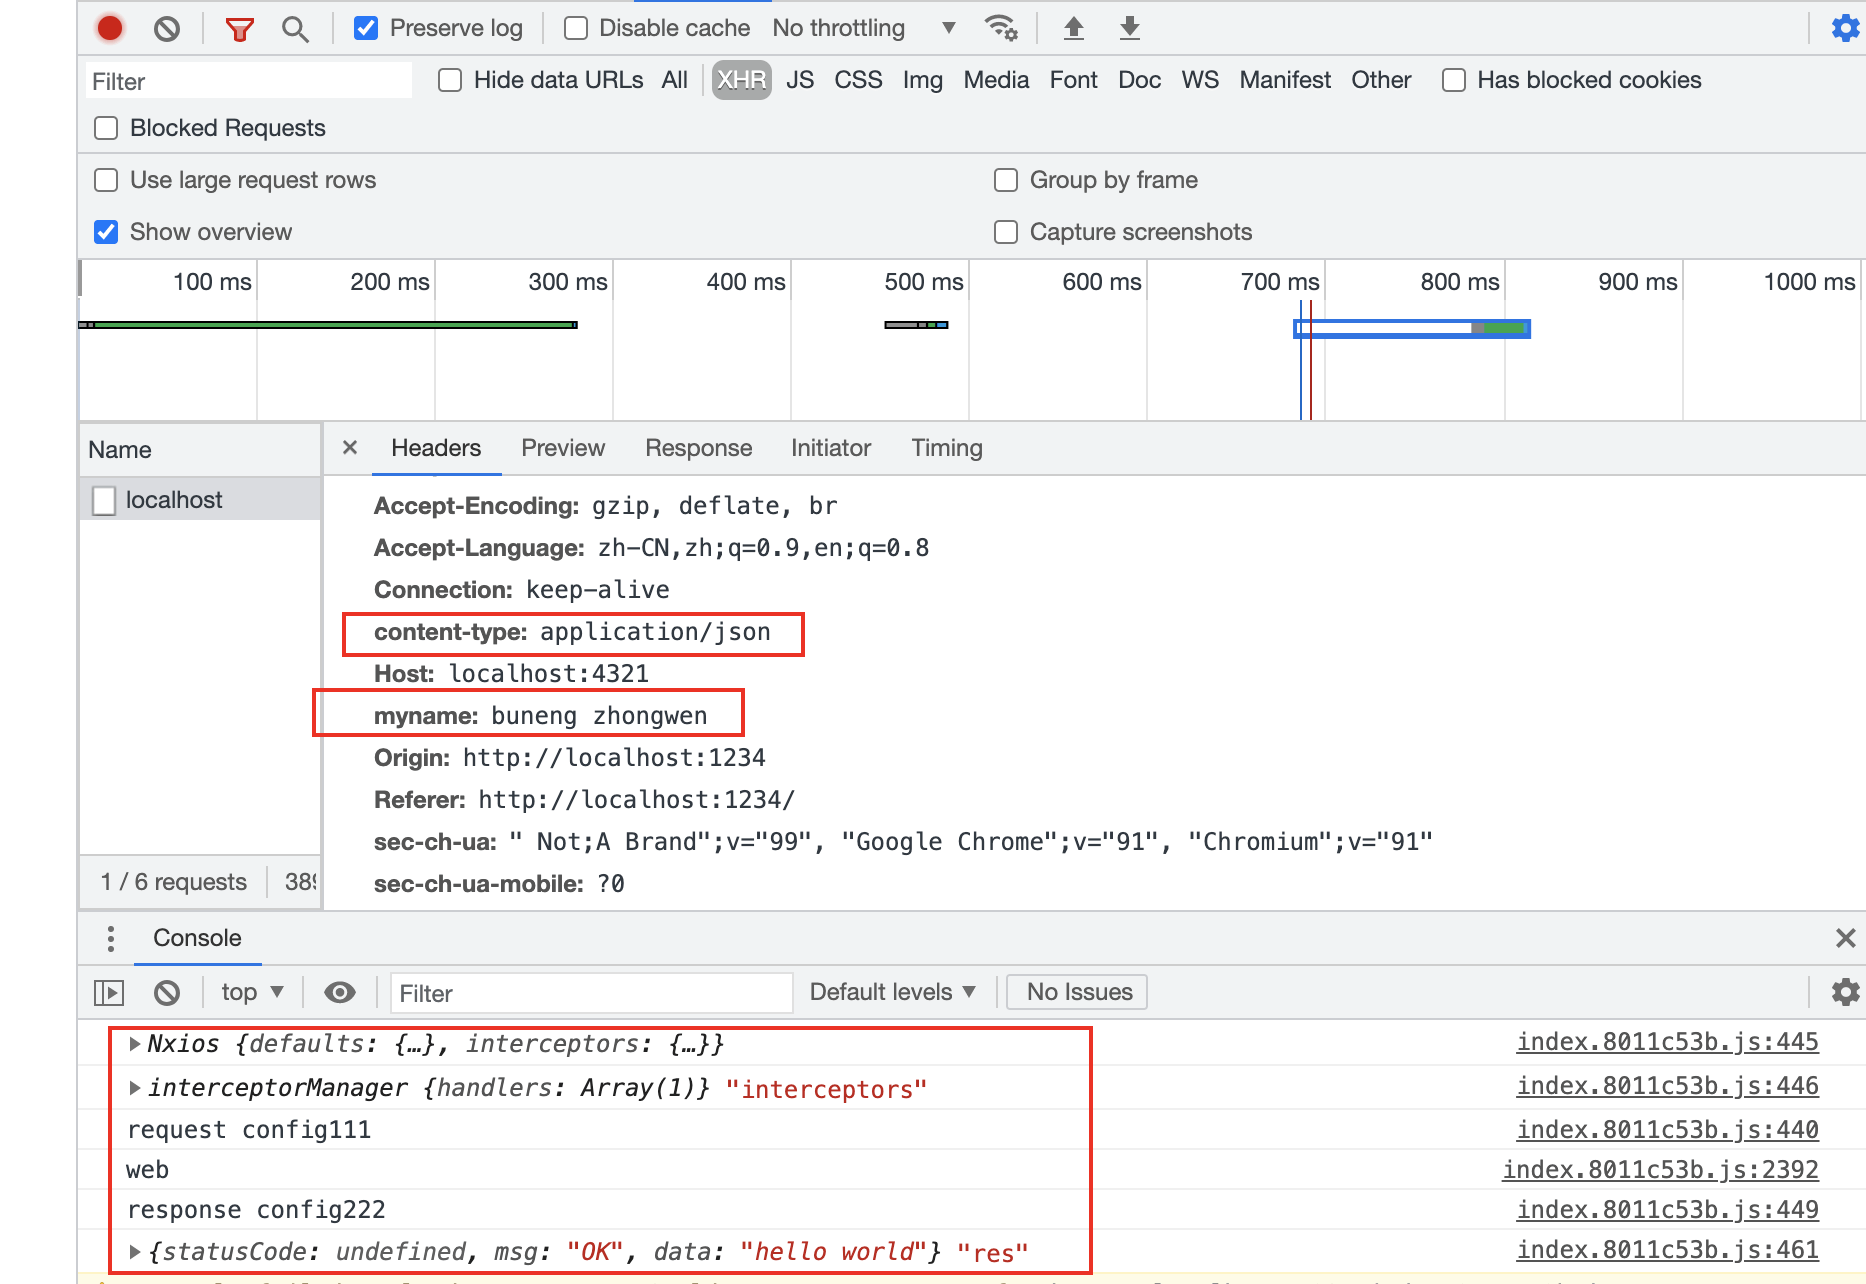
测试node
node环境下,使用的是http模块的接口,创建nodeHttp.js
import http from 'http';export default function(configs) {return new Promise(function(resolve, reject) {const postData = ''const options = {hostname: 'localhost',port:4321,path: '/',method: 'GET',headers:{'Content-Type': 'application/x-www-form-urlencoded','Content-Length': Buffer.byteLength(postData)}};const req = http.request(options, (res)=>{res.setEncoding('utf8');let chunks = [];let size = 0;res.on('data', chunk =>{chunks.push(chunk)size += chunk.length})res.on('end', () =>{resolve(chunks.join(''));})})req.on('error', (error) =>{console.error(`error: ${error.message}`);})req.write(postData)req.end()})}
注:node环境下测试,使用server/server_request.js,但是文件让node运行时支持ECMA语法,必须使用
node —experimental-specifier-resolution=node server_request.js
进行启动测试
使用server_request.js 进行测试
import nxios from '../client/js/nxios/index.js'// 在node环境中使用ECMA语法,需要使用实验配置node --experimental-specifier-resolution=node server_request.jsnxios.get('/').then(response =>{console.log('object', response);})
执行成功,打印出hello world。

若有收获,就点个赞吧
0 人点赞
