什么是 Thymeleaf
- Thymeleaf 是新一代的 Java 模板引擎,类似于 Velocity、FreeMarker 等传统引擎,其语言和 HTML 很接近,而且扩展性更高;
- Thymeleaf 的主要目的是将优雅的模板引入开发工作流程中,并将 HTML 在浏览器中正确显示。同时能够作为静态引擎,让开发成员之间更方便协作开发;
- Spring Boot 官方推荐使用模板,而且 Spring Boot 也为 Thymeleaf 提供了完整的自动化 配置解决方案;
- Thymeleaf 使用教程请戳 Tutorial: Using Thymeleaf,配合 Spring 使用的教程请戳 Tutorial: Thymeleaf + Spring。
整合过程
准备过程
正式开始整合过程之前,这里先给出本文的搭建环境,方便大家进行后续内容的学习。
- JDK 11(理论上其他版本的 JDK 也是可以的,但是更为推荐 JDK 1.8 及以后的版本)
- IDEA(这里没有啥要求,但我个人的话是出新的版本我就会更新,虽然臃肿,但是更新了确实好用 😂)
- SpringBoot 2.x(现在主流应该都是 2.x 版本,1.x 的都是老一点的版本了)
添加 Thymeleaf 依赖
添加 Thymeleaf 依赖有两种方式:
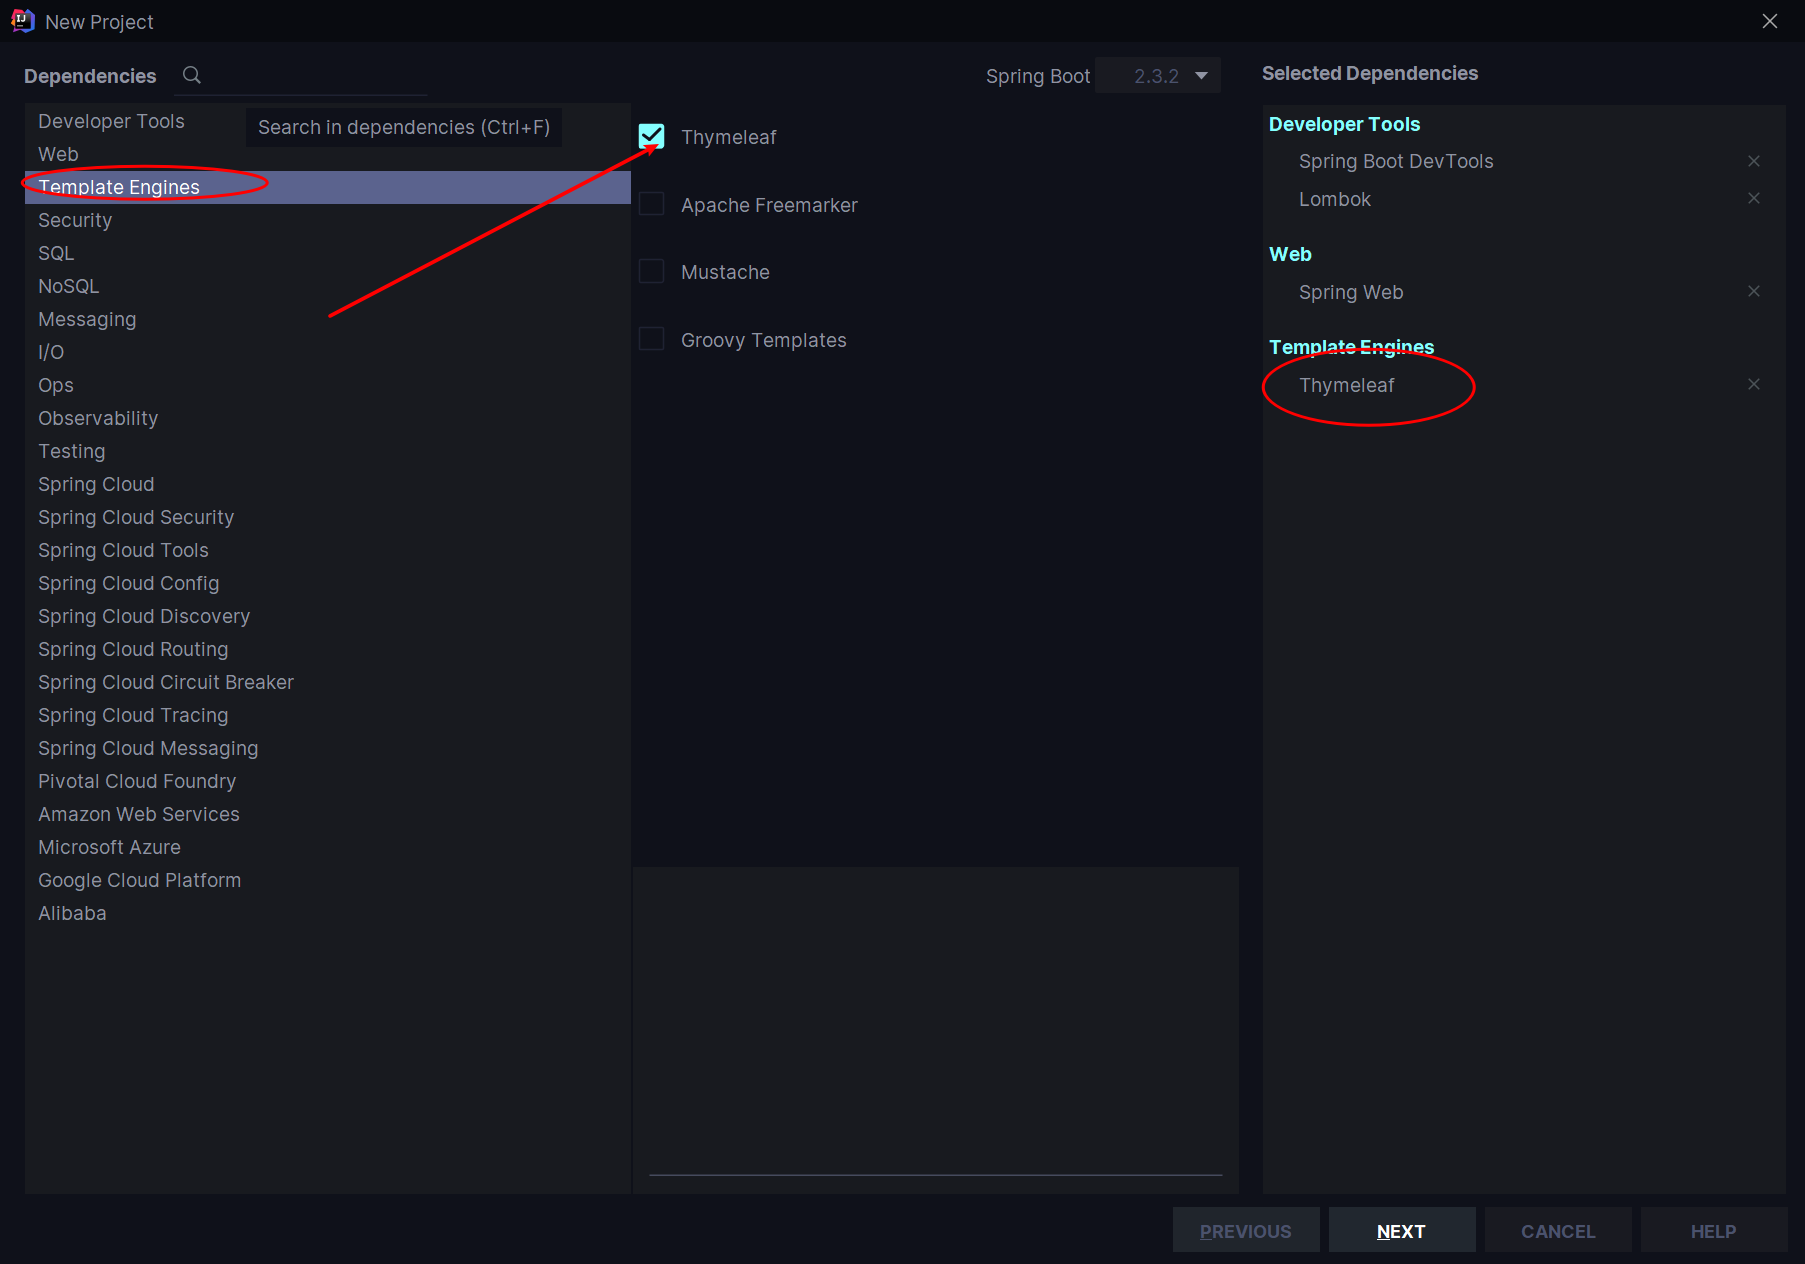
- 第一种
在新建项目时添加,在 Templeate Engines 中勾选 Thymeleaf;
- 第二种
对于忘记在新建项目时未添加 Thymeleaf 依赖的项目,可以直接在项目的 pom.xml 中手动添加依赖即可;
<dependency><groupId>org.springframework.boot</groupId><artifactId>spring-boot-starter-thymeleaf</artifactId></dependency>
编写实体类和 Controller
- 新建实体类
User
这里因为使用 Lombok,所以省去了各种 setter、getter,同时还省去了各种构造方法和重写 toString() 等方法,大大简化了代码。而我们所要做的,仅仅是在 pom.xml 中添加 Lombok 的依赖,然后在我们的实体类中加入对应的注解即可。
以下是在 pom.xml 中插入 Lombok 依赖的对应代码。
<dependency><groupId>org.projectlombok</groupId><artifactId>lombok</artifactId><optional>true</optional></dependency>
然后我们就可以编写我们的实体类,这里主要用到了 @Data、@Component、@AllArgsConstructor 、NoArgsConstructor 四个注解,其中各个注解的含义如下:
@Component:把类实例化到 Spring 容器,相当于在配置文件中配置;@Data:给类的所有属性提供get和set方法,此外还有equals、canEqual、hashCode、toString方法以及 默认参数为空的构造方法;@AllArgsConstructor:为类提供一个 全参构造方法,但此时不再提供默认构造方法;@NoArgsConstructor:因为使用了AllArgsConstructor会导致类没有默认空参构造方法,所以此时需要它为类提供一个 无参构造方法;
package com.cunyu.pojo;import lombok.AllArgsConstructor;import lombok.Data;import lombok.NoArgsConstructor;import org.springframework.stereotype.Component;/*** @author : cunyu* @version : 1.0* @className : User* @date : 2020/7/29 16:20* @description : User 实体类*/@Component@Data@AllArgsConstructor@NoArgsConstructorpublic class User {private int age;private String name;private String email;}
- 编写 Controller
此时主要需要注意的是 setViewName() 和 addObject(),前者表示方法对应的前端页面,也就是我们模板中对应文件名的 .html 文件,而后者则主要给属性注入值,然后将属性传递到前端模板。
package com.cunyu.controller;import com.cunyu.pojo.User;import org.springframework.stereotype.Controller;import org.springframework.web.bind.annotation.GetMapping;import org.springframework.web.bind.annotation.RequestMapping;import org.springframework.web.servlet.ModelAndView;/*** @author : cunyu* @version : 1.0* @className : UserController* @date : 2020/7/29 16:22* @description : UserController*/@Controllerpublic class UserController {// 访问 ip:port/index@GetMapping("/index")public ModelAndView index() {ModelAndView modelAndView = new ModelAndView();// 设置跳转的视图,即位于 templates/index.htmlmodelAndView.setViewName("index");modelAndView.addObject("title", "Thymeleaf 使用");modelAndView.addObject("desc", "Spring Boot 整合 Thymeleaf");User author = new User(25, "村雨遥", "747731461@qq.com");modelAndView.addObject("author", author);return modelAndView;}}
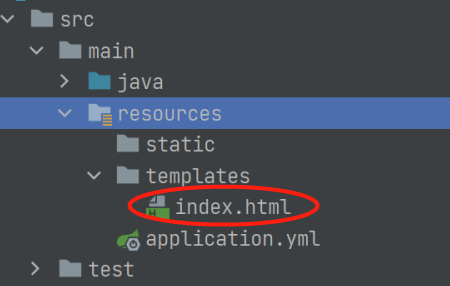
创建Thymeleaf 模板
第上面的代码中,我们设置了跳转的视图为 index,所以我们需要在 src/main/resources/templates 中创建 index.html。
<!DOCTYPE html><html xmlns="http://www.w3.org/1999/xhtml"xmlns:th="http://www.thymeleaf.org"><head><meta charset="UTF-8"><!-- 即 Controller 中的 title 属性 --><title th:text="${title}"></title></head><body><!-- 即 Controller 中的 desc 属性 --><h1 th:text="${desc}" th:align="center"></h1><!-- 即 Controller 中的 author 信息 --><h2 th:align="center">=====作者信息=====</h2><p th:text="${author?.name}"></p><p th:text="${author?.age}"></p><p th:text="${author?.email}"></p></body></html>
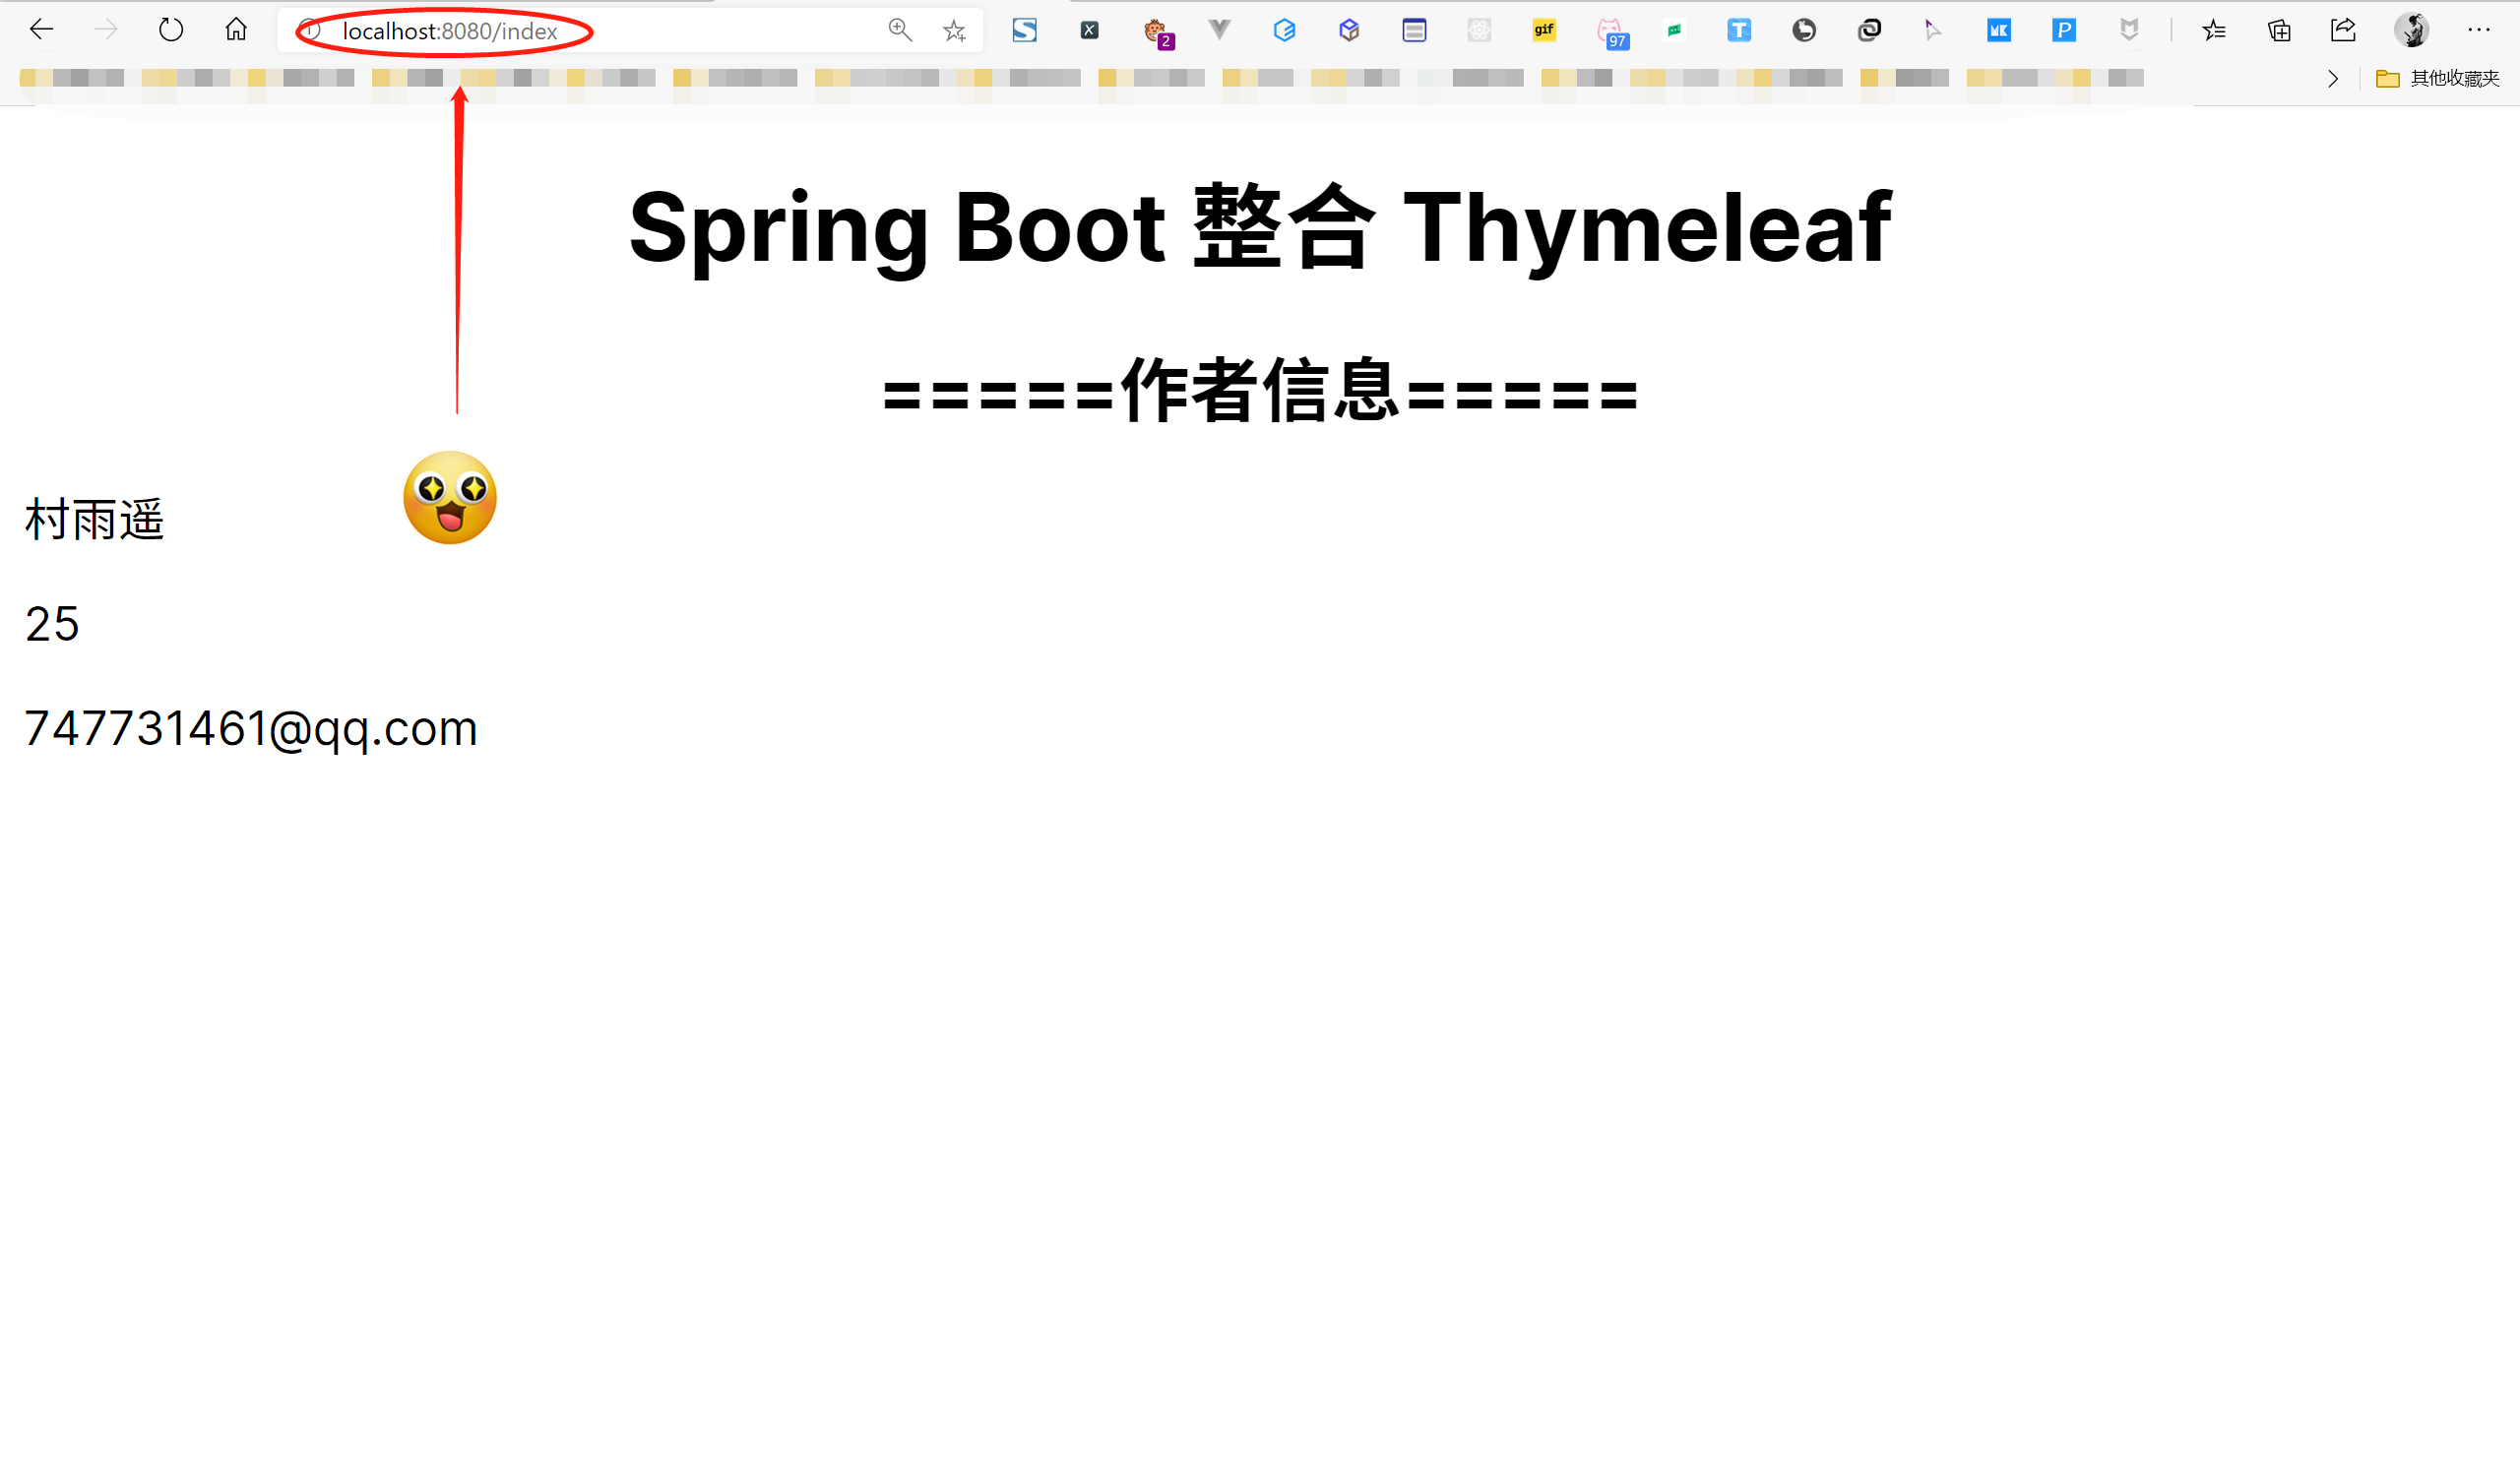
测试
启动项目,然后在浏览器中访问 http://localhost:8080/index,如果出现下图中的信息,说明整合成功。
注意事项
为了方便使用,我们在使用 Thymeleaf 模板时,可以添加一些自己的配置。而添加的位置则是项目的配置文件 application.yml,项目默认配置文件应该是 application.properties,但 SpringBoot 更加推荐使用 yml 来配置,所以我们这里需要手动将其改为 yml 的格式。
spring:thymeleaf:cache: falseprefix: classpath:/templates/suffix: .htmlmode: HTMLencoding: UTF-8servlet:content-type: text/html
总结
好了,以上就是我们今天的所有内容了。今天主要介绍了 Themeleaf 的相关简介,然后对利用 SpringBoot 整合 Thymeleaf 的过程进行了描述,最后则是使用 Thymeleaf 中常用的一些相关配置的注意事项。

若有收获,就点个赞吧
0 人点赞
