前言
目前而言,国内大家使用最多的持久层框架可能还是 MyBatis 吧,那既然如此,更强大的 Spring Boot 遇上炽手可热的 MyBatis,又会擦出什么样的火花呢?
那本文就来看看,如何利用 SpringBoot 来整合 Mybatis。
如下图是总结的整合过程的大概流程,那接下来我们就来开始具体的整合操作!
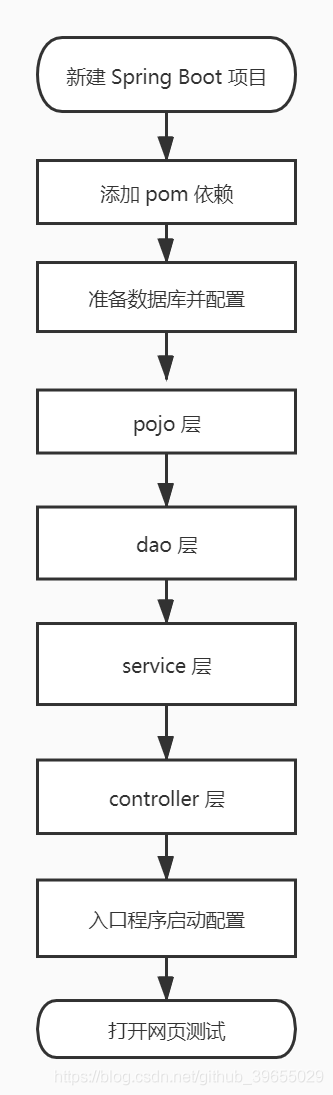
整合过程
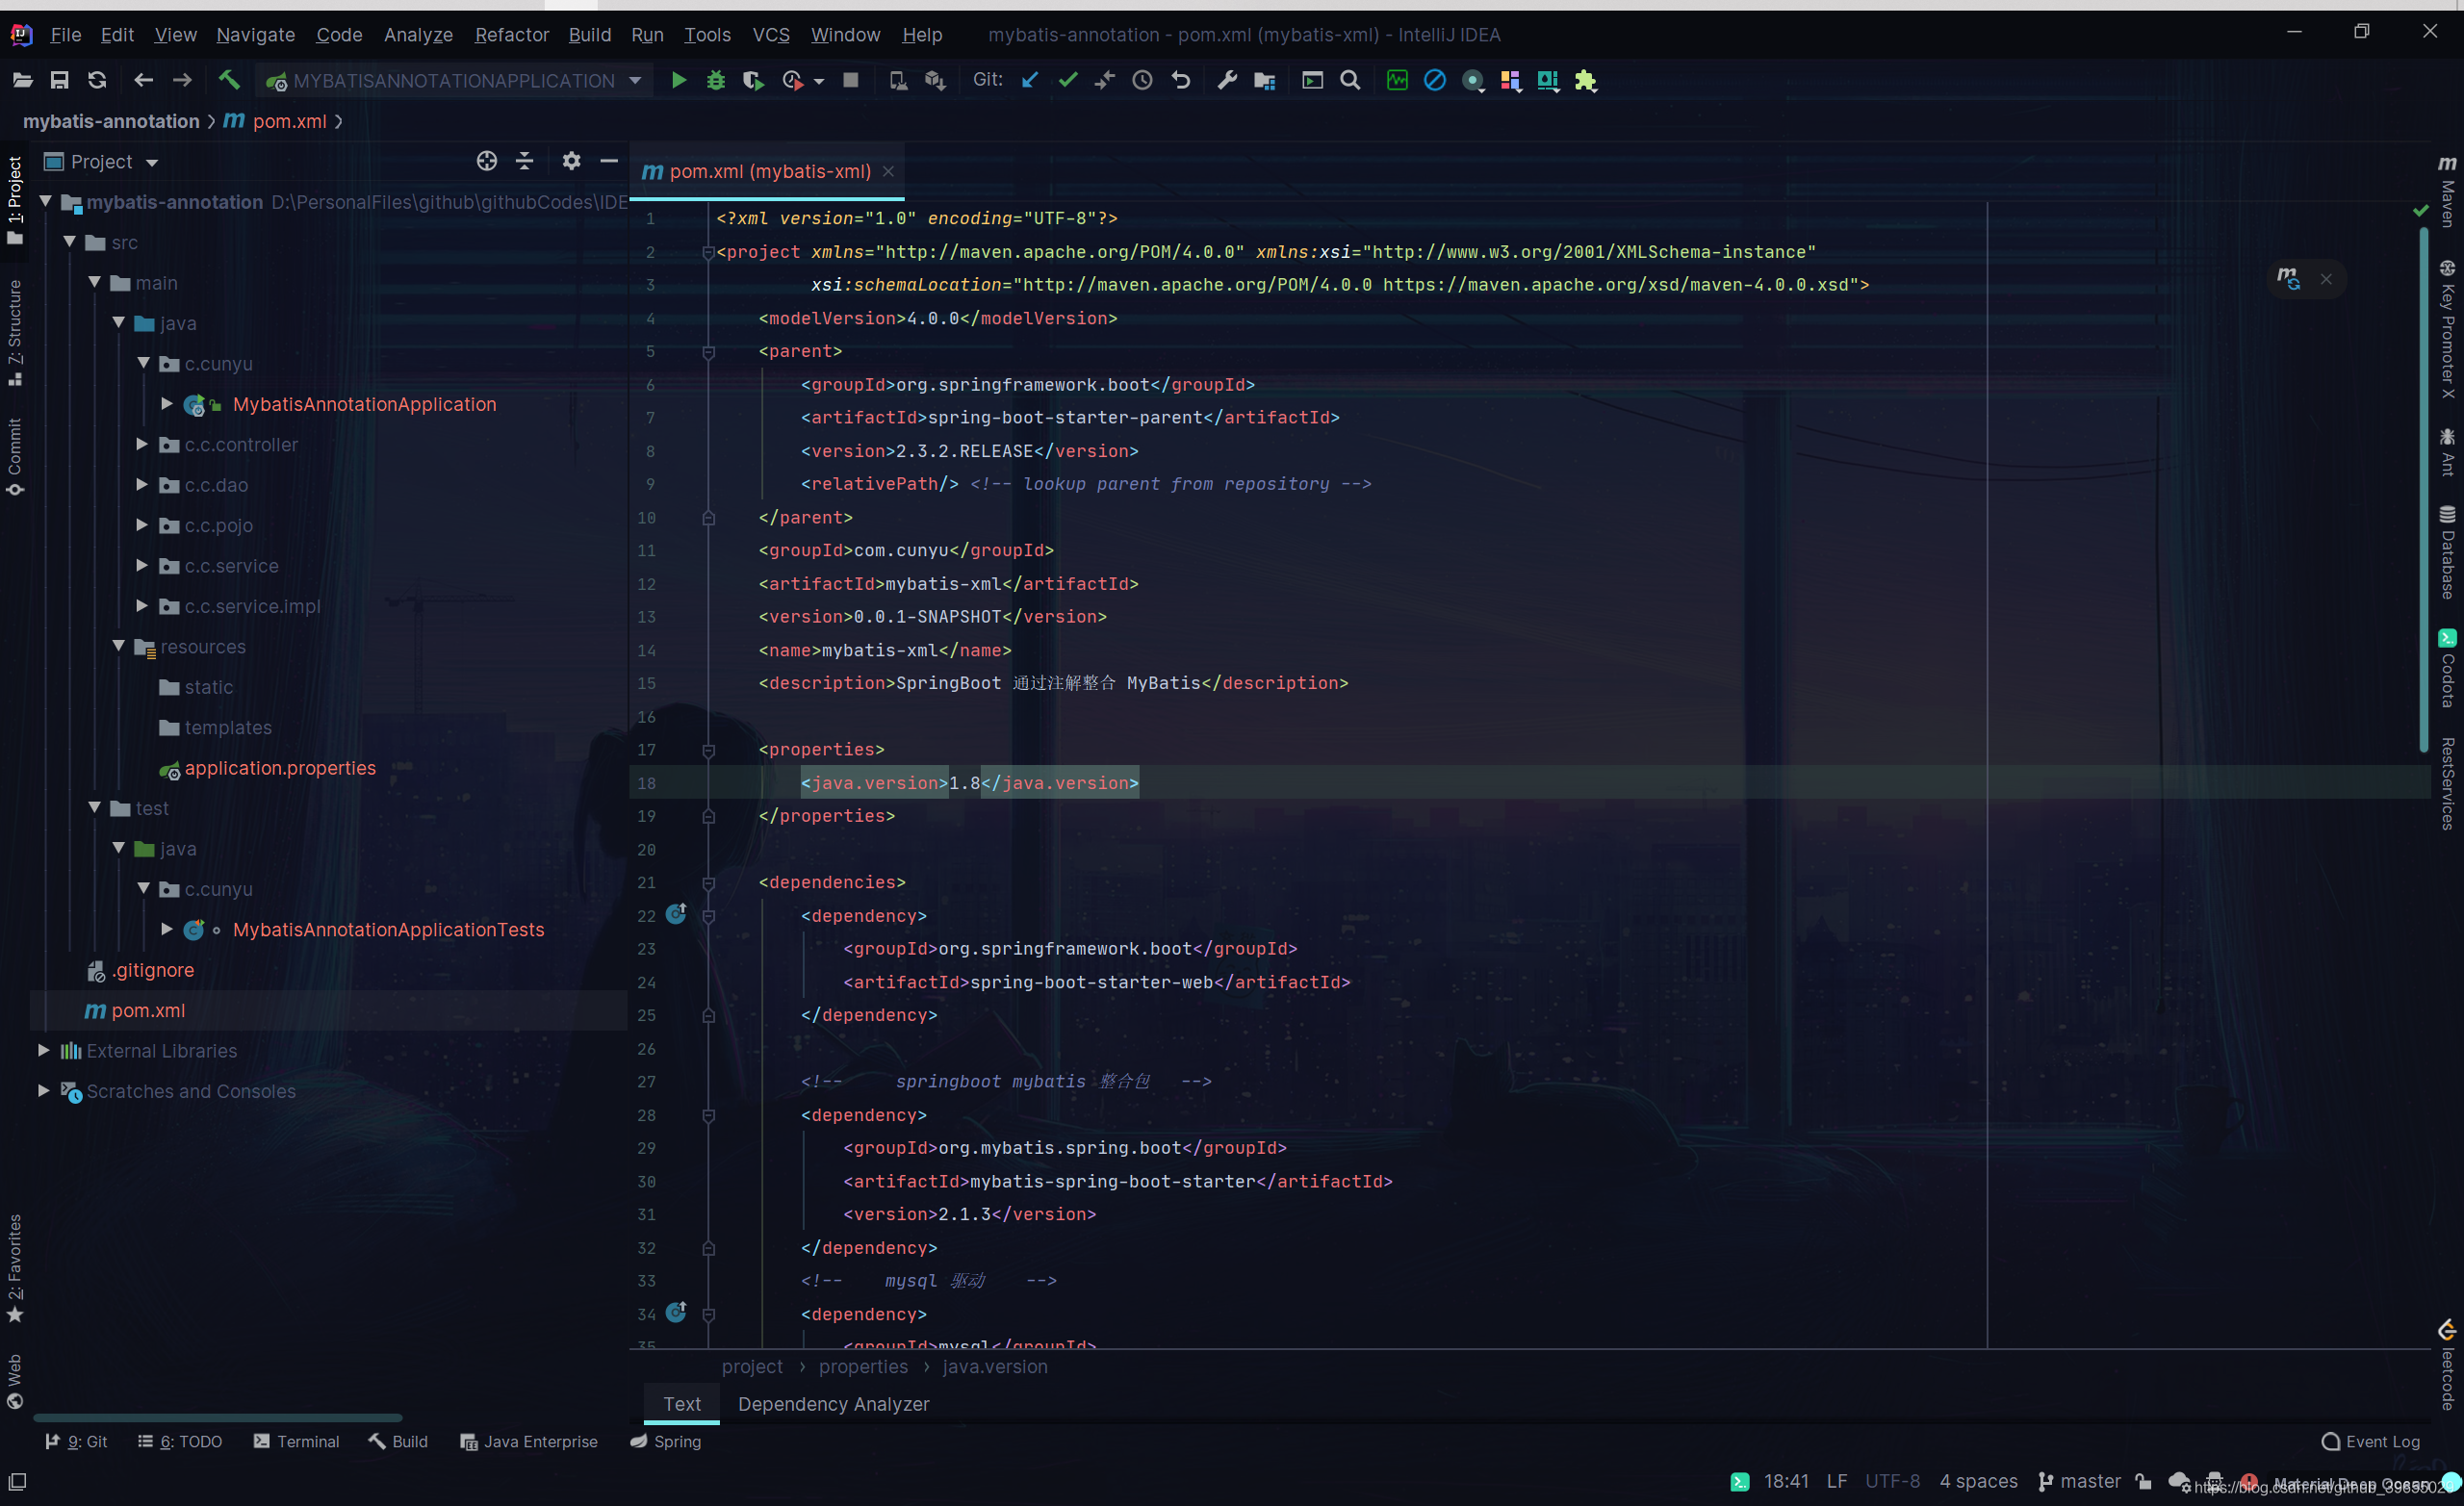
最终项目结构如下图所示:
新建 Spring Boot 项目
新建一个 Spring Boot 项目,添加 Web 组件,具体过程可以参照我的另一篇博客 创建 Spring Boot 项目的方式。
添加 pom 依赖
由于要整合 MyBatis,所以我们需要在项目的配置文件 pom.xml 中添加 mysql 驱动和 SpringBoot MyBatis 整合包;
<!-- springboot mybatis 整合包 --><dependency><groupId>org.mybatis.spring.boot</groupId><artifactId>mybatis-spring-boot-starter</artifactId><version>2.1.3</version></dependency><!-- mysql 驱动 --><dependency><groupId>mysql</groupId><artifactId>mysql-connector-java</artifactId><scope>runtime</scope></dependency>
准备数据库
- 数据库创建及输入插入
准备一张 user 表,有 id、name、age 三个属性,其中 id 为主键且自增,然后插入三条数据;
CREATE TABLE `user` (`id` int(11) NOT NULL AUTO_INCREMENT COMMENT '主键',`name` varchar(50) DEFAULT NULL COMMENT '姓名',`age` int(11) DEFAULT NULL COMMENT '年龄',PRIMARY KEY (`id`)) ENGINE=InnoDB AUTO_INCREMENT=1 DEFAULT CHARSET=utf8;INSERT INTO user values (1,"村雨遥",25);INSERT INTO user values (2,"张三",26);INSERT INTO user values (3,"李四",27);
- 数据源配置
在项目配置文件 application.properties 中配置数据源;
# 数据库配置spring.datasource.username=rootspring.datasource.password=0908spring.datasource.url=jdbc:mysql://localhost:3306/springboot?useUnicode=true&characterEncoding=UTF-8&serverTimezone=UTCspring.datasource.driver-class-name=com.mysql.cj.jdbc.Driver
pojo 层
根据数据库创建实体类,为了精简代码,后面过程中都或多或少用了 Lombok 插件,所以需要事先在 pom.xml 引入;
<dependency><groupId>org.projectlombok</groupId><artifactId>lombok</artifactId><optional>true</optional></dependency>
package com.cunyu.pojo;import lombok.AllArgsConstructor;import lombok.Data;import lombok.NoArgsConstructor;/*** @author : cunyu* @version : 1.0* @className : User* @date : 2020/7/26 20:44* @description : User 实体类*/@Data@NoArgsConstructor@AllArgsConstructorpublic class User {private Long id;private String name;private Integer age;}
dao 层
实体类创建完成后,编写实体类对应接口;
package com.cunyu.dao;import com.cunyu.pojo.User;import org.apache.ibatis.annotations.Mapper;import org.apache.ibatis.annotations.Select;/*** @InterfaceName : UserDao* @Author : cunyu* @Date : 2020/7/26 20:47* @Version : 1.0* @Description : User 类对应接口**/@Mapperpublic interface UserDao {/*** @param id 用户 id* @return 对应 id 的用户* @description 根据用户 id 查询用户* @date 2020/7/26 20:48* @author cunyu1943* @version 1.0*/@Select("SELECT id,name,age FROM user where id = #{id}")User getUserById(Long id);}
service 层
- service 接口
package com.cunyu.service;import com.cunyu.pojo.User;/*** @author : cunyu* @version : 1.0* @className : UserService* @date : 2020/7/26 20:57* @description : User service 接口*/public interface UserService {/*** @param id 用户 iD* @return 对应 id 的用户* @description 根据 id 查找用户* @date 2020/7/26 20:58* @author cunyu1943* @version 1.0*/User getUserById(Long id);}
- service 接口实现类
package com.cunyu.service.impl;import com.cunyu.dao.UserDao;import com.cunyu.pojo.User;import com.cunyu.service.UserService;import org.springframework.beans.factory.annotation.Autowired;import org.springframework.stereotype.Service;/*** @author : cunyu* @version : 1.0* @className : UserServiceImpl* @date : 2020/7/26 20:59* @description : service 接口实现类*/@Servicepublic class UserServiceImpl implements UserService {@Autowiredprivate UserDao userDao;@Overridepublic User getUserById(Long id) {return userDao.getUserById(id);}}
controller 层
package com.cunyu.controller;import com.cunyu.pojo.User;import com.cunyu.service.UserService;import org.springframework.beans.factory.annotation.Autowired;import org.springframework.web.bind.annotation.GetMapping;import org.springframework.web.bind.annotation.RestController;/*** @author : cunyu* @version : 1.0* @className : UserController* @date : 2020/7/26 21:01* @description : User controller*/@RestControllerpublic class UserController {/*** 自动注入*/@Autowiredprivate UserService userService;@GetMapping("/user")public User getUserById() {User user = userService.getUserById(1L);return user;}}
入口程序配置
在入口程序中配置 mapper 自动扫描;
package com.cunyu;import org.mybatis.spring.annotation.MapperScan;import org.springframework.boot.SpringApplication;import org.springframework.boot.autoconfigure.SpringBootApplication;@MapperScan(basePackages = "com.cunyu.dao")@SpringBootApplicationpublic class MybatisXmlApplication {public static void main(String[] args) {SpringApplication.run(MybatisXmlApplication.class, args);}}
网页测试
完成上述所有步骤之后,在浏览器中访问 http://localhost:8080/user,就可以在网页中显示对应 id 的 User 对象的所有信息;

总结
以上就是 Spring Boot 整合 MyBatis 的具体过程了,不过你可能也发现了,我们在 DAO 层未使用任何 XML 文件,取而代之的是各种不同的注解。那我们下一篇文章就来看看,Spring Boot 如何通过 XML 的方式来整合 MyBatis!

若有收获,就点个赞吧
0 人点赞
