两三个月前,有幸拿到了云筏的一个 4 核 16G,1TB硬盘,300M带宽位于欧洲的云服务器,自带的开箱即用的 RStudio Server 也非常给力,但最近这两天在升级 R 的时候遇上了不少问题,也懒得去折腾了,于是想把 RStudio Server 替换成 JupyterLab Server,这是一些折腾的笔记记录。
JupyterLab is a next-generation web-based user interface for Project Jupyter. JupyterLab enables you to work with documents and activities such as Jupyter notebooks, text editors, terminals, and custom components in a flexible, integrated, and extensible manner.
安装
JupyterLab 可以通过 conda , pip , pipenv or docker 的方式安装。
# condaconda install -c conda-forge jupyterlab# pippip install jupyterlab
nb_conda_kernels 是一个 Jupyter 的扩展功能(extension),可以管理多个 Conda 环境下的 Jupyter 核心(kernels),整合多 Conda 环境中各种不同版本的 Python 或 R 等语言。
安裝 nb_conda_kernels
nb_conda_kernels 必须安装在在 Jupyter(Jupyter Notebook 或 JupyterLab)所在的 Conda 环境中,可以直接放在 base 环境中,或是另外建立独立的 Conda 环境亦可。
这里我们建立一哥新的 Conda 环境,专门用于放置 JupyterLab:
# 建立 Conda 环境,并安裝 JupyterLabconda create --name jupyterlab python=3.7 jupyterlab
在此 Conda 环境加装 nb_conda_kernels 扩展功能套件:
# 安装 nb_conda_kernels 扩展功能套件conda install --name jupyterlab nb_conda_kernels
安装 Jupyter Kernels
所有需要在 Jupyter 中透过 nb_conda_kernels 来使用 Conda 环境,都需要安装对应语言的的 Jupyter 核心(kernels)。
建立一个 Python 2.7 的 Conda 环境:
# 建立 Python 2.7 的 Conda 环境conda create --name Python2 python=2.7.18# 安装 Python 的 Jupyter 核心conda install --name Python ipykernel
建立一个 R-4.0.2 的 Conda 环境:
# 建立 R 4.0.2 的 Conda 环境conda create --name R-4.0.2 --channel r r-essentials=4.0.2 r-base=4.0.2# 安装 R 的 Jupyter 核心conda install --name R-4.0.2 --channel r r-irkernel
启动
安装好所有的 Conda 环境以及对应的 Jupyter 核心之后,就可以依照一般的方式启动 JupyterLab:
# 载入 Jupyter 的 Conda 环境(下面两种方式都可以激活)$ conda activate jupyterlab$ source activate jupyterlab# 启动 JupyterLab$ jupyter lab --ip 0.0.0.0 --port 9090
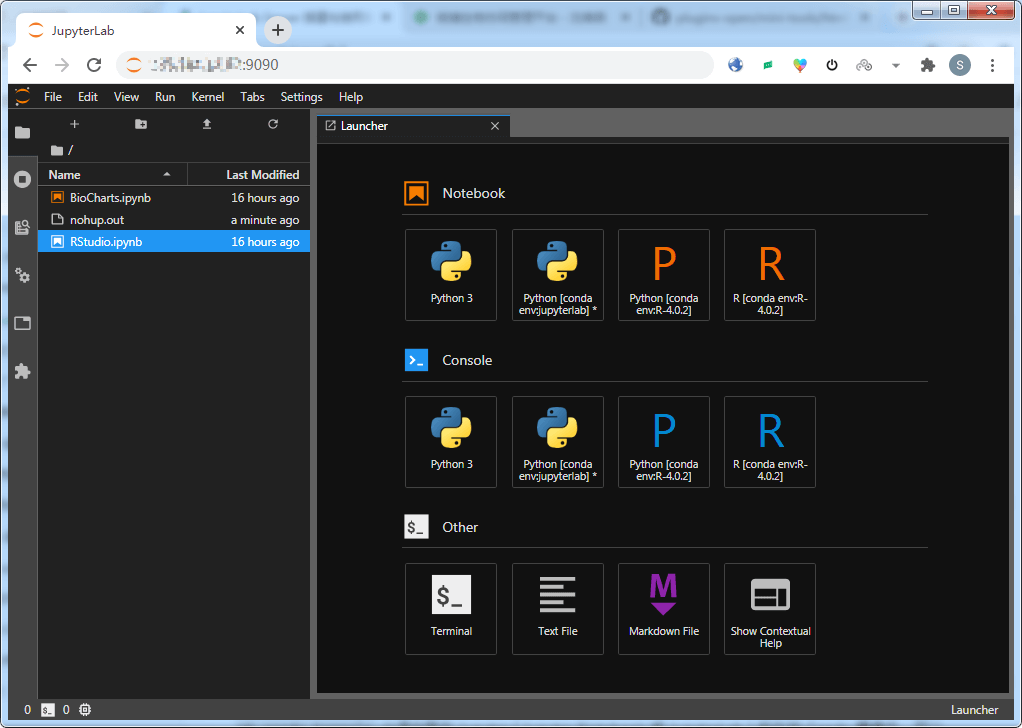
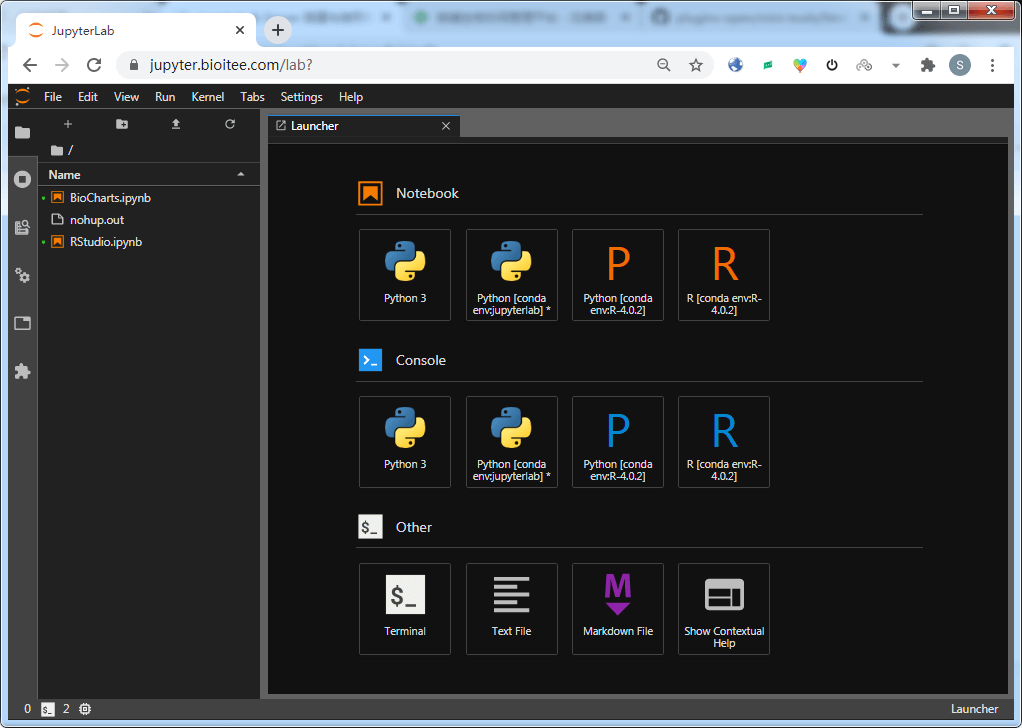
JupyterLab 各种 Conda 环境与语言版本
这样就可以在单一一个 JupyterLab 界面中同时使用不同 Conda 环境下的各种语言与版本了。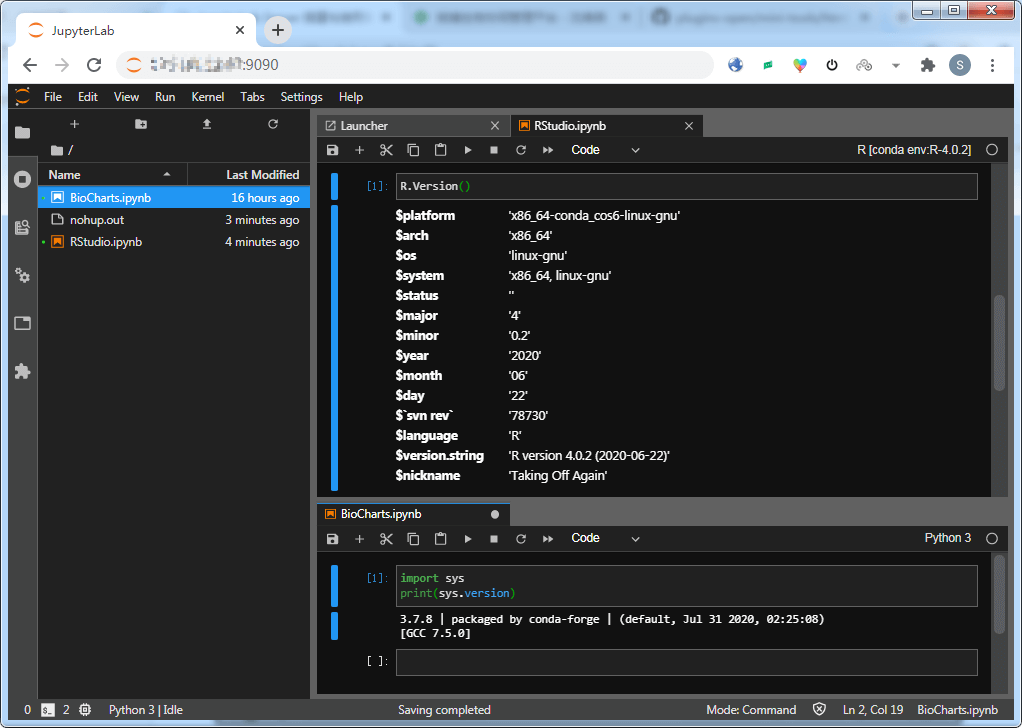
配置远程访问
1. 进入ipython环境,生成秘钥
# 假设你已经进入了ipythonIn [1]: from notebook.auth import passwdIn [2]: passwd()Enter password: #填写你的密码(用于访问jupyterlab的密码)Verify password: #再次填写你的密码Out[2]: 'argon2:$argon2id$v=19$m=10240,t=10,p=8$ShdM5...vHBHA$EUCjIE1L8joDbugmWIDqLw'#这是你的密码生成的密钥
2. 生成 jupyterlab 配置文件
$ jupyter lab --generate-configWriting default config to: /home/shenweiyan/.jupyter/jupyter_notebook_config.py
3. 修改配置文件
vi ~/.jupyter/jupyter_notebook_config.py
更改内容如下:
# 将ip设置为*,允许任何IP访问c.NotebookApp.ip = '*'# 这里的密码填写上面生成的密钥c.NotebookApp.password = 'argon2:$argon2id$v=19$m=10240,t=10,p=8$ShdM5...vHBHA$EUCjIE1L8joDbugmWIDqLw'# 禁止用host的浏览器打开jupyterc.NotebookApp.open_browser = False# 监听端口设置为8888或其他c.NotebookApp.port = 8888# 允许远程访问c.NotebookApp.allow_remote_access = True
接下来输入jupyter lab 就可以启动 jupyter-lab 服务啦!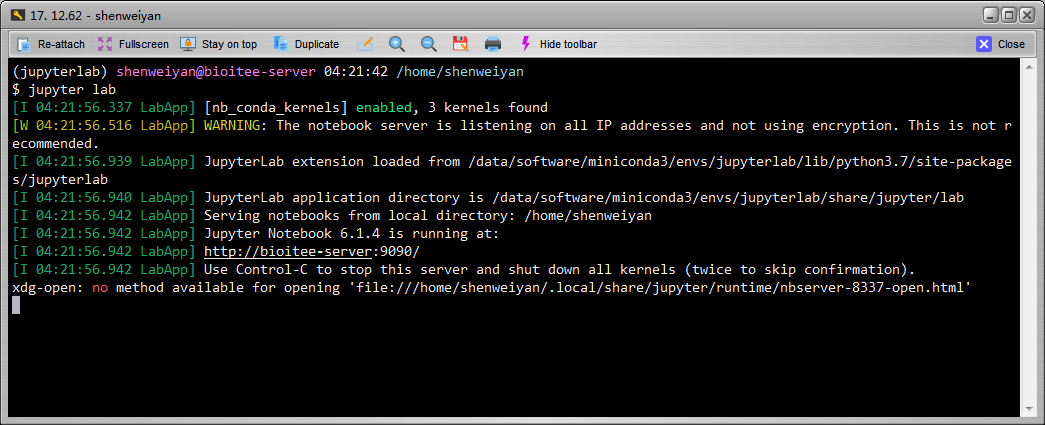
域名配置
JupyterLab 通过 nginx 转发的一个示例。
upstream jupyter {server 127.0.0.1:9090;}server {listen 80;server_name jupyter.bioitee.com;rewrite ^/(.*) https://jupyter.bioitee.com/$1 permanent;}server{listen 443 ssl;index index.html index.htm index.php default.html default.htm default.php;server_name jupyter.bioitee.com;root /data/apps/jupyterlab/notebooks;ssl_certificate ../certs/4564529_jupyter.bioitee.com.pem;ssl_certificate_key ../certs/4564529_jupyter.bioitee.com.key;ssl_ciphers "EECDH CHACHA20:EECDH CHACHA20-draft:EECDH AES128:RSA AES128:EECDH AES256:RSA AES256:EECDH 3DES:RSA 3DES:!MD5";ssl_protocols TLSv1 TLSv1.1 TLSv1.2;ssl_prefer_server_ciphers on;ssl_session_cache shared:SSL:10m;location / {proxy_pass http://jupyter;proxy_set_header Host $host;}location ~ /api/kernels/ {proxy_pass http://jupyter;proxy_set_header Host $host;# websocket supportproxy_http_version 1.1;proxy_set_header Upgrade "websocket";proxy_set_header Connection "Upgrade";proxy_read_timeout 86400;}location ~ /terminals/ {proxy_pass http://jupyter;proxy_set_header Host $host;# websocket supportproxy_http_version 1.1;proxy_set_header Upgrade "websocket";proxy_set_header Connection "Upgrade";proxy_read_timeout 86400;}access_log logs/jupyterlab_acc.log;error_log logs/jupyterlab_err.log;}
遇到的问题
- jupyter lab 启动的过程中,如果使用 —config=~/.jupyter/jupyter_notebook_config.py 作为启动参数之一,会导致其他的 Conda 环境在 web 端消失,只剩下一个 Python 3 的 Notebook 和 Console,具体原因目前没搞明白。
- jupyter lab —generate-config 默认生成的配置文件位于 ~/.jupyter/jupyter_notebook_config.py,目前不太清楚如何更改这个默认配置文件的路径。
安裝插件
安装简体中文语言包
pip install jupyterlab-language-pack-zh-CN
Jupyterlab-TOC
Jupyterlab-TOC 扩展在 JupyterLab 接口的左侧填充目录。如果打开笔记本或标记文件,将在侧边栏上生成相应的 TOC。条目是可滚动和可单击的。
此扩展已经默认集成到 JupyterLab 3.0 的核心 JupyterLab 扩展中。任何使用 JupyterLab >= 3.0 的人都已经安装了这个 JupyterLab 核心扩展,JupyterLab < 3.0 的人如果想要用这个扩展可以参考下面的链接安装。
Prerequisites:
- JupyterLab >=2.0
- NodeJS 12+
jupyter labextension install @jupyterlab/toc
参考资料
- Jupyter,《Starting JupyterLab》,JupyterLab 2.2.8 Documentation
- Jupyter,《Installation》,JupyterLab 2.2.8 Documentation
- Office 指南,《JupyterLab 整合多 Conda 環境不同版本 Python、R 語言教學》,Office 指南
- tailorProgram,《Centos7 配置 jupyter-lab 远程访问》,知乎

若有收获,就点个赞吧
0 人点赞
