Blast2GO 是一个基于序列相似性搜索的 GO 注释和功能分析工具,它可以直接统计分析基因功能信息,并可视化 GO 有向非循环图(DAG)上的相关功能特征,分析 BLAST、GO-mapping、GO 注释分析和富集分析结果。
Blast2GO Command Line (CLI) 的使用需要满足 Java 与 MySQL 的预安装。
Blast2GO Command Line (CLI) is a Java application and can be run on Mac, Linux and Windows 64-bit systems. It is always necessary to have Java 64-bit (version 1.6 or higher preferably from Sun/Oracle) installed, at least 1GB of RAM is recommended. The Blast2GO Command Line needs a Blast2GO database (DB) to perform the mapping step. This DB can be generated with the CLI itself; however the previous installation and configuration of a MySQL server (GPL license) is necessary.
From:Blast2GO Command Line User Manual
作为 Blast2GO 本地化所依赖的数据库,下面我们介绍一下 MySQL 的安装配置、存储位置修改及新版中低级密码设置不允许的解决方法。
一、MySQL 各个版本区别
MySQL 的官网下载地址 https://www.mysql.com/downloads/ 的界面会有几个版本的选择,这几个版本的区别如下。
Oracle MySQL Cloud Service (commercial)。
基于 MySQL 企业版构建的 Oracle MySQL 云服务,由 Oracle Cloud 提供技术支持,提供企业级的 MySQL 数据库服务,需付费。MySQL Enterprise Edition (commercial)。
MySQL 企业版本,包含了最全面的 MySQL 高级特性和管理工具。需付费,可以试用30天。MySQL Cluster CGE (commercial)。
MySQL 高级集群版,是一个实时开源事务数据库,专为在高吞吐量条件下快速,永久地访问数据而设计。需付费。MySQL Community Edition (GPL)。
MySQL 社区版本,开源免费,但不提供官方技术支持。
MySQL Community Edition(社区免费版,https://dev.mysql.com/downloads/) 又分为 MySQL Community Server、MySQL Cluster、MySQL Router、MySQL Shell、MySQL Workbench、MySQL on Windows、…、MySQL SUSE Repository 等根据不同的操作系统平台细分为多个版本。其中 MySQL Community Server 是开源免费的,这也是我们通常用的 MySQL 的版本。
二、MySQL 免安装版
MySQL 提供了 rpm、源码、免安装等多种安装方式,其中通过源码编译安装是比较耗时,过程相对复杂的一个过程。对于不想使用源码编译安装的童鞋,MySQL 提供了免安装直接解压可用的版本。

wget https://cdn.mysql.com/archives/mysql-8.0/mysql-8.0.12-el7-x86_64.tar.gz
三、MySQL 源码包下载
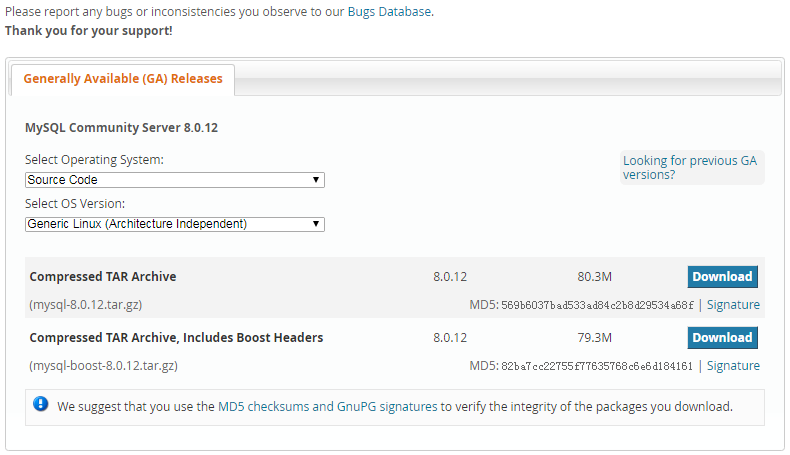
我们以 CentOS/RedHat 平台为例来说明。进入 MySQL Community Server 下载页面 https://dev.mysql.com/downloads/mysql/ ,在适合 Linux 系统的 Source Code 源码中选择带有 Boost 头的压缩包(MySQL 需要 Boost C++ 库构建)进行下载。
Source Code:源代码下载
Generic Linux (Architecture Independent):通用的 Linux(独立结构)。

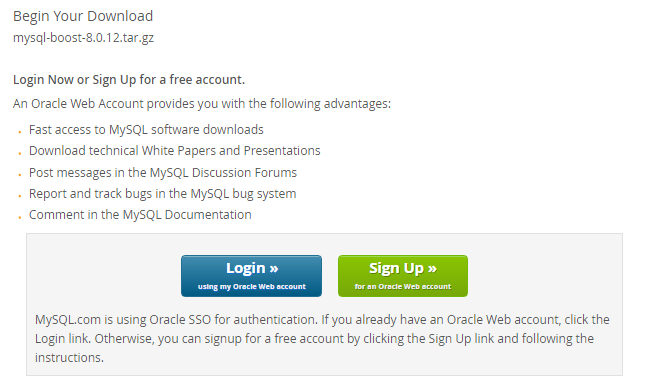
点击下载,需要注册 Oracle 账号,这里不细说。

$ wget https://cdn.mysql.com//Downloads/MySQL-8.0/mysql-boost-8.0.12.tar.gz
- 其他下载版本
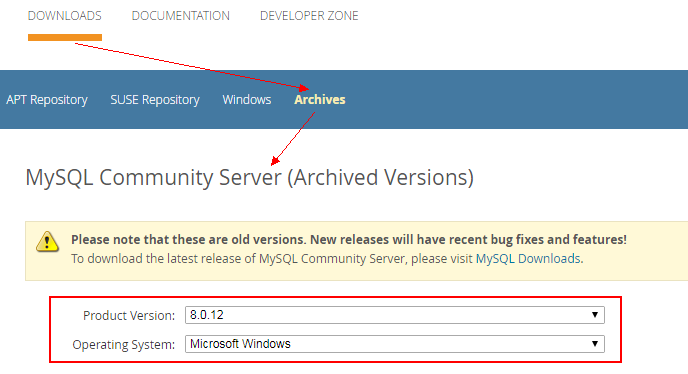
如果想要下载其他版本的 MySQL,可以在 https://downloads.mysql.com/archives/community/ 选择符合自己服务器的版本进行下载。
四、MySQL 源码编译安装
1. 安装依赖包
[root@ecs-steven ~]# yum -y install gcc gcc-c++ ncurses ncurses-devel cmake bison doxygen
2. 新建 MySQL 用户和用户组
[root@ecs-steven ~]# groupadd -r mysql && useradd -r -g mysql -s /sbin/nologin -M mysql
3. 新建 MySQL 数据库数据文件目录
[root@ecs-steven ~]# mkdir /usr/local/software/mysql# mysql-8.0.12 中可以不用新建数据保存的路径,在初始化 MySQL 数据库时可通过 --datadir 参数自动生成[root@ecs-steven ~]# mkdir /usr/local/software/mysql/{log,data} -p
Tip:真实的生产环境一般来说会把数据独立放在根目录下,方便磁盘挂载上去。
4. 执行预编译
[root@ecs-steven mysql-8.0.12]# cmake . -DCMAKE_INSTALL_PREFIX=/usr/local/software/mysql \-DMYSQL_DATADIR=/usr/local/software/mysql/data \-DWITH_BOOST=./boost \-DSYSCONFDIR=/etc \-DWITH_INNOBASE_STORAGE_ENGINE=1 \-DWITH_FEDERATED_STORAGE_ENGINE=1 \-DWITH_BLACKHOLE_STORAGE_ENGINE=1 \-DWITH_ARCHIVE_STORAGE_ENGINE=1 \-DWITH_MYISAM_STORAGE_ENGINE=1 \-DWITH_PARTITION_STORAGE_ENGINE=1 \-DENABLED_LOCAL_INFILE=1 \-DDEFAULT_CHARSET=utf8mb4 \-DDEFAULT_COLLATION=utf8mb4_general_ci \-DWITH_EMBEDDED_SERVER=1 \-DEXTRA_CHARSETS=all \-DMYSQL_TCP_PORT=3306 \-DWITH_SSL=system \-DMYSQL_UNIX_ADDR=/usr/local/software/mysql/mysqld.sock
各个参数解释:(详细说明,参考 MySQL 8.0 Reference Manual - 2.8.4 MySQL Source-Configuration Options)
-DCMAKE_INSTALL_PREFIX=/usr/local/software/mysql //安装路径-DMYSQL_DATADIR=/usr/local/software/mysql/data //数据文件存放位置-DWITH_BOOST=./boost //指定 boost 的位置-DSYSCONFDIR=/etc //设置 my.cnf 配置文件的所在目录,默认为安装目录-DWITH_INNOBASE_STORAGE_ENGINE=1 //安装 InnoDB 引擎-DWITH_BLACKHOLE_STORAGE_ENGINE=1 //安装 blackhole 存储引擎-DWITH_ARCHIVE_STORAGE_ENGINE=1 //安装 archive 存储引擎-DWITH_MYISAM_STORAGE_ENGINE=1 //安装 myisam 存储引擎-DWITH_PARTITION_STORAGE_ENGINE=1 //安装支持数据库分区-DENABLED_LOCAL_INFILE=1 //允许从本地导入数据-DDEFAULT_CHARSET=utf8mb4 //存储 emoji 时使用 utf8 数据会出错,建议使用完全兼容 utf8 的 utf8mb4-DDEFAULT_COLLATION=utf8mb4_general_ci //设置默认校对规则-DWITH_EMBEDDED_SERVER=1 //嵌入式服务器,MySQL 8.0 起该参数已经被移除-DEXTRA_CHARSETS=all //安装所有扩展字符集-DMYSQL_TCP_PORT=3306 //指定 TCP 端口为 3306-DWITH_SSL=system //启用系统 OpenSSL 库支持(yes 等同于 system )-DMYSQL_UNIX_ADDR=/usr/local/software/mysql/mysqld.sock //指定 mysql.sock 路径
5. 编译安装
[root@ecs-steven mysql-8.0.12]# make -j `grep processor /proc/cpuinfo | wc -l`#编译很消耗系统资源,小内存可能编译通不过[root@ecs-steven mysql-8.0.12]# make install
6. 配置 my.cnf 文件
MySQL 服务器有许多操作参数,我们可以使用命令行选项或配置文件(option files)在服务器启动时更改这些参数。
在 Windows 上,MySQL 安装程序会在基本安装目录中创建名为 my.ini 的文件作为默认选项文件(没有的话,可以自行创建)。在 Linux 中,MySQL 服务会依次从 /etc/my.cnf、/etc/mysql/my.cnf、/usr/local/mysql/etc/my.cnf、~/.my.cnf 读取默认的 my.cnf 配置文件;在命令行下可使用 mysqld —verbose —help 命令查看 MySQL 读取配置文件后启动的参数。
[root@ecs-steven etc]# cat /etc/my.cnf[client]port = 3306socket = /usr/local/software/mysql/mysqld.sock[mysqld]port = 3306socket = /usr/local/software/mysql/mysqld.sockbasedir = /usr/local/software/mysqldatadir = /usr/local/software/mysql/datapid-file = /usr/local/software/mysql/data/mysql.piduser = mysqlbind-address = 0.0.0.0server-id = 1init-connect = 'SET NAMES utf8mb4'character-set-server = utf8mb4back_log = 300max_connections = 1000max_connect_errors = 6000open_files_limit = 65535table_open_cache = 128max_allowed_packet = 4Mbinlog_cache_size = 1Mmax_heap_table_size = 8Mtmp_table_size = 16Mread_buffer_size = 2Mread_rnd_buffer_size = 8Msort_buffer_size = 8Mjoin_buffer_size = 8Mkey_buffer_size = 4Mthread_cache_size = 8ft_min_word_len = 4log_bin = mysql-binbinlog_format = mixedlog_error = /usr/local/software/mysql/data/mysql-error.logslow_query_log = 1long_query_time = 1slow_query_log_file = /usr/local/software/mysql/data/mysql-slow.logperformance_schema = 0explicit_defaults_for_timestampskip-external-lockingdefault_storage_engine = InnoDB#default-storage-engine = MyISAMinnodb_file_per_table = 1innodb_open_files = 500innodb_buffer_pool_size = 64Minnodb_write_io_threads = 4innodb_read_io_threads = 4innodb_thread_concurrency = 0innodb_purge_threads = 1innodb_flush_log_at_trx_commit = 2innodb_log_buffer_size = 2Minnodb_log_file_size = 32Minnodb_log_files_in_group = 3innodb_max_dirty_pages_pct = 90innodb_lock_wait_timeout = 120bulk_insert_buffer_size = 8Mmyisam_sort_buffer_size = 8Mmyisam_max_sort_file_size = 10Gmyisam_repair_threads = 1interactive_timeout = 28800wait_timeout = 28800[mysqldump]quickmax_allowed_packet = 16M[myisamchk]key_buffer_size = 8Msort_buffer_size = 8Mread_buffer = 4Mwrite_buffer = 4M
7. 初始化 MySQL 数据库
[root@ecs-steven mysql-5.7.13]# /usr/local/software/mysql/bin/mysqld --defaults-file=/etc/my.cnf --initialize-insecure --user=mysql --basedir=/usr/local/software/mysql --datadir=/usr/local/software/mysql/data
8. MySQL 服务启动与关闭
mysqld_safe is the recommended way to start a mysqld server on Unix. mysqld_safe adds some safety features such as restarting the server when an error occurs and logging runtime information to an error log.
From 4.3.2 mysqld_safe — MySQL Server Startup Script, MySQL 8.0 Reference Manual
# 启动[root@ecs-steven mysql-8.0.12]# /usr/local/software/mysql/bin/mysqld_safe --defaults-file=/etc/my.cnf --user=mysql &[1] 19351[root@ecs-steven mysql-8.0.12]# Logging to '/usr/local/software/mysql/data/mysql-error.log'.2018-09-21T08:51:39.325794Z mysqld_safe Starting mysqld daemon with databases from /usr/local/software/mysql/data# 关闭[root@ecs-steven ~]# /usr/local/software/mysql/bin/mysqladmin shutdown2018-09-22T01:48:11.500105Z mysqld_safe mysqld from pid file /usr/local/software/mysql/data/mysql.pid ended
9. 登陆数据库
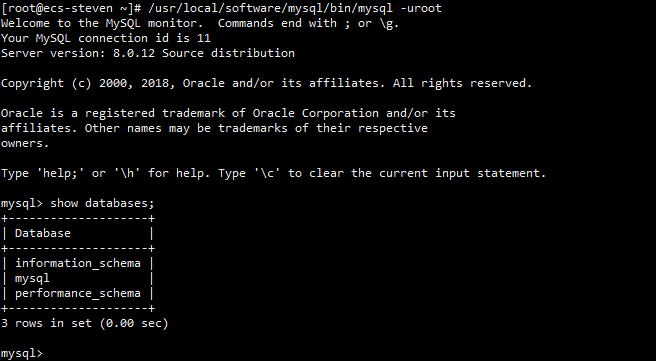
$ /usr/local/software/mysql/bin/mysql -uroot
MySQL 第一次安装完成后,是没有设置 root 密码的,直接回车 Enter 即可登陆:
10. 数据库其他配置
10.1 修改 root 账号密码
mysql -u rootmysql> use mysql;mysql> ALTER USER 'root'@'localhost' IDENTIFIED BY 'your password';Query OK, 0 rows affected (0.01 sec)# 我们也可以通过该命令直接重置 root 账号密码
10.2 查看目前的用户账号
mysql> select user,host from mysql.user;+------------------+-----------+| user | host |+------------------+-----------+| mysql.infoschema | localhost || mysql.session | localhost || mysql.sys | localhost || root | localhost |+------------------+-----------+4 rows in set (0.00 sec)mysql>
10.3 忘记 root 账号密码
① mysqladmin 关闭失败
[root@ecs-steven ~]# /usr/local/software/mysql/bin/mysqladmin shutdownmysqladmin: connect to server at 'localhost' failederror: 'Access denied for user 'root'@'localhost' (using password: NO)'
② 停止 mysql 服务
[root@ecs-steven ~]# /usr/local/software/mysql/bin/mysqld stop # 不起作用[root@ecs-steven ~]# kill -9 processes
③ 安全模式启动
[root@ecs-steven ~]# /usr/local/software/mysql/bin/mysqld_safe --defaults-file=/etc/my.cnf --user=mysql --skip-grant-tables &[1] 26389[root@ecs-steven ~]# 2018-11-15T03:10:48.938826Z mysqld_safe Logging to '/usr/local/software/mysql/data/mysql-error.log'.2018-11-15T03:10:48.973639Z mysqld_safe Starting mysqld daemon with databases from /usr/local/software/mysql/data
④ 无密码 root 帐号登陆
[root@ecs-steven ~]# /usr/local/software/mysql/bin/mysql -uroot#在下面的要求你输入密码的时候,你不用管,直接回车键一敲就过去了Welcome to the MySQL monitor. Commands end with ; or \g.Your MySQL connection id is 7Server version: 8.0.12 Source distributionCopyright (c) 2000, 2018, Oracle and/or its affiliates. All rights reserved.Oracle is a registered trademark of Oracle Corporation and/or itsaffiliates. Other names may be trademarks of their respectiveowners.Type 'help;' or '\h' for help. Type '\c' to clear the current input statement.mysql>
⑤ 修改密码,重新登陆
mysql> use mysql;Reading table information for completion of table and column namesYou can turn off this feature to get a quicker startup with -ADatabase changedmysql> flush privileges;Query OK, 0 rows affected (0.00 sec)mysql> ALTER USER 'root'@'localhost' IDENTIFIED BY 'your new password';Query OK, 0 rows affected (0.01 sec)mysql> \qBye# 重新登陆测试[root@ecs-steven ~]# /usr/local/software/mysql/bin/mysql -uroot -pEnter password:Welcome to the MySQL monitor. Commands end with ; or \g.Your MySQL connection id is 14Server version: 8.0.12 Source distributionCopyright (c) 2000, 2018, Oracle and/or its affiliates. All rights reserved.Oracle is a registered trademark of Oracle Corporation and/or itsaffiliates. Other names may be trademarks of their respectiveowners.Type 'help;' or '\h' for help. Type '\c' to clear the current input statement.mysql>
⑥ 正常重新启动
[root@ecs-steven mysql]# /usr/local/software/mysql/bin/mysqladmin shutdown -uroot -pEnter password:2018-11-15T06:48:33.125907Z mysqld_safe mysqld from pid file /usr/local/software/mysql/data/mysql.pid ended[1]+ Done /usr/local/software/mysql/bin/mysqld_safe --defaults-file=/etc/my.cnf --user=mysql (wd: ~)(wd now: /usr/local/software/mysql)[root@ecs-steven ~]# /usr/local/software/mysql/bin/mysqld_safe --defaults-file=/etc/my.cnf --user=mysql &[1] 29368[root@ecs-steven ~]# 2018-11-15T03:36:28.876747Z mysqld_safe Logging to '/usr/local/software/mysql/data/mysql-error.log'.2018-11-15T03:36:28.910624Z mysqld_safe Starting mysqld daemon with databases from /usr/local/software/mysql/data
五、设置启动脚本,开机自启动
注意:如果是使用免安装版本的 MySQL,需要补充 mysql.server 中的 basedir 和 datadir:
basedir=/usr/local/software/mysqldatadir=/usr/local/software/mysql/data
设置 MySQL 开机启动:
[root@ecs-steven ~]# ls -lrt /usr/local/software/mysql[root@ecs-steven ~]# cp /usr/local/software/mysql/support-files/mysql.server /etc/init.d/mysqld[root@ecs-steven ~]# chmod +x /etc/init.d/mysqld[root@ecs-steven ~]# systemctl enable mysqldmysqld.service is not a native service, redirecting to /sbin/chkconfig.Executing /sbin/chkconfig mysqld on
启动数据库:
[root@ecs-steven ~]# systemctl start mysqld[root@ecs-steven ~]# systemctl status mysqld
查看 MySQL 服务进程和端口:
[root@ecs-steven ~]# ps -ef | grep mysql[root@ecs-steven ~]# netstat -tunpl | grep 3306
参考资料
Blast2GO Command Line User Manual - Version 1.1 October 2015
anlan,blast2go 本地化,生信技能树
蜗牛,CentOS 7 安装并配置 MySQL 5.6,博客园
JagoWang,mysql 重置 root 密码及相关问题,GitHub
Mariana Monteiro,Local Blast2GO Database Installation,Blast2GO Blog
2.10.4 Securing the Initial MySQL Account,MySQL 8.0 Reference Manual
B.5.3.2 How to Reset the Root Password,MySQL 8.0 Reference Manual
黄杉,MySQL root密码重置报错:mysqladmin: connect to server at ‘localhost’ failed的解决方案,CSDN

