非受控组件
主要知识点
- ref
- defaultValue defaultChecked
- 手动操作DOM元素
例子一:
import React, { Component } from "react";class JsxBaseDemo extends Component {constructor(props) {super(props);this.state = {name: "lin",};this.nameInputRef = React.createRef(); // 创建 ref}alertName = () => {const elem = this.nameInputRef.current; // 通过 ref 获取 DOM 节点alert(elem.value); // 不是 this.state.name};render() {return (<>{/* 使用 defaultValue 而不是 value ,使用 ref */}<input defaultValue={this.state.name} ref={this.nameInputRef} />{/* state 并不会随着改变 */}<span>state.name: {this.state.name}</span><br></br><button onClick={this.alertName}>alert name</button></>);}}export default JsxBaseDemo;

总结一下非受控组件的特点:
1.input中的值不受state的控制
2.默认绑定defaultValue而不是value
3.使用ref来获取DOM节点的值
4.state 并不会随着改变
例子二:
import React, { Component } from "react";class JsxBaseDemo extends Component {constructor(props) {super(props);this.state = {name: "lin",};this.fileInputRef = React.createRef(); // 创建 ref}alertFile = () => {const elem = this.fileInputRef.current // 通过 ref 获取 DOM 节点alert(elem.files[0].name)}render() {return (<><input type="file" ref={this.fileInputRef} /><button onClick={this.alertFile}>alert file</button></>);}}export default JsxBaseDemo;

其实例子一可以用受控组件,也可以用非受控组件,但是例子二,就必须用DOM操作来获取文件名了。
那什么时候需要用DOM呢?不用用state来完成工作,这时候就需要用DOM操作了,也就引出了非受控组件,所以例子二是一个非常实际的场景。
非受控组件小结
- 必须手动操作DOM元素,setState实现不了
- 现实场景,文件上传,富文本编辑器
受控组件vs非受控组件选择
- 优先使用受控组件,符合React的设计原则,数据驱动视图
- 必须操作DOM时,再使用非受控组件
Portals
使用场景
- 组件会按照既定层次嵌套渲染
- 如何让组件渲染到父组件以外
例子:
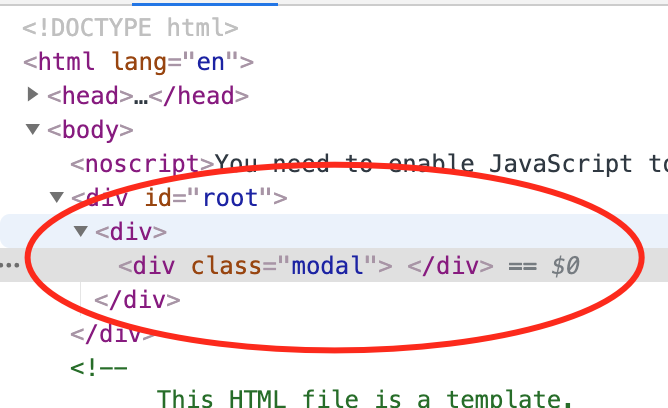
假如我们有这样一个需求,想定义一个modal框,正常定义的结构是这样的。
import React, { Component } from 'react'import JsxBaseDemo from './JsxBaseDemo'class index extends Component {render() {return (<div><JsxBaseDemo></JsxBaseDemo></div>)}}export default indexclass JsxBaseDemo extends Component {render() {return (<div className="modal"> {/* 给它个css定位fixed */}{this.props.children} {/* 相当于vue slot */}</div>);}}export default JsxBaseDemo;
我们来看一下正常的结构
使用Portals后的结构
class JsxBaseDemo extends Component {render() {return ReactDOM.createPortal(<div className="modal">{this.props.children}</div>,document.body // DOM 节点);}}export default JsxBaseDemo;
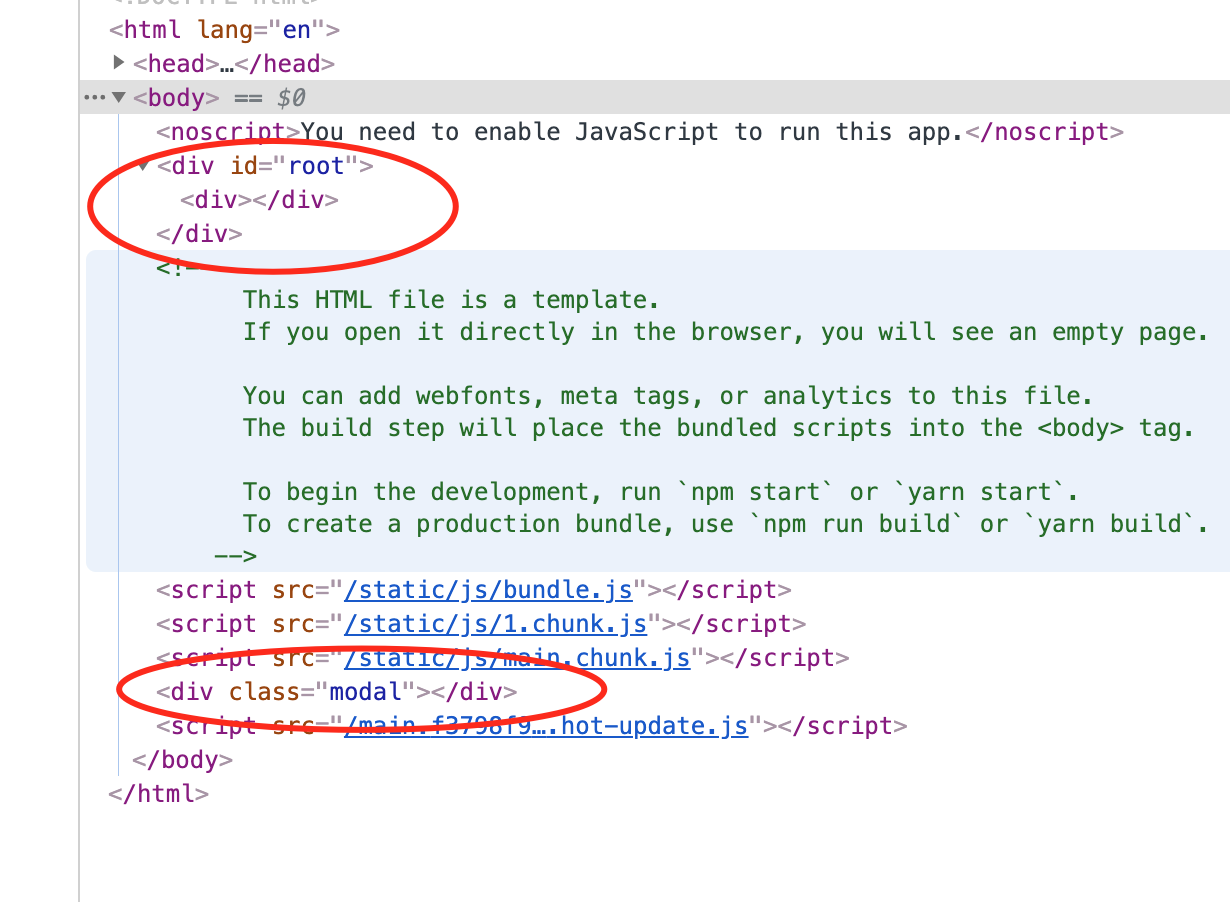
发现modal已经挂载到body上了
Portals使用场景小结
- overflow:hidden
- 父组件z-index值太小
- fixed需要放在body第一层级
Context
使用场景
- 公共信息(语言、主题)如何传递给每个组件
- 用props传递太繁琐
- 用redux小题大做
import React, { Component } from "react";// 创建 Context 填入默认值(任何一个 js 变量)const ThemeContext = React.createContext("light");// 底层组件 - 函数是组件function ThemeLink(props) {// const theme = this.context // 会报错。函数式组件没有实例,即没有 this// 函数式组件可以使用 Consumerreturn (<ThemeContext.Consumer>{(value) => <p>link's theme is {value}</p>}</ThemeContext.Consumer>);}// 底层组件 - class 组件class ThemedButton extends React.Component {// 指定 contextType 读取当前的 theme context。// static contextType = ThemeContext // 也可以用 ThemedButton.contextType = ThemeContextrender() {const theme = this.context; // React 会往上找到最近的 theme Provider,然后使用它的值。return (<div><p>button's theme is {theme}</p></div>);}}ThemedButton.contextType = ThemeContext; // 指定 contextType 读取当前的 theme context。// 中间的组件再也不必指明往下传递 theme 了。function Toolbar(props) {return (<div><ThemedButton /><ThemeLink /></div>);}class JsxBaseDemo extends Component {constructor(props) {super(props);this.state = {theme: "light",};}render() {return (<ThemeContext.Provider value={this.state.theme}><Toolbar /><hr /><button onClick={this.changeTheme}>change theme</button></ThemeContext.Provider>);}changeTheme = () => {this.setState({theme: this.state.theme === "light" ? "dark" : "light",});};}export default JsxBaseDemo;
创建: const ThemeContext = React.createContext(“light”);
顶层父组件使用提供一个值:
Class组件接收: static contextType = ThemeContext
Class组件使用:const theme = this.context; ||
**ThemedButton.contextType = ThemeContext;**
const ThemeContext = React.createContext(null)export default function ProviderDemo(){const [ contextValue , setContextValue ] = React.useState({ color:'#ccc', background:'pink' })return <div><ThemeProvider value={ contextValue } ><Son /></ThemeProvider></div>}// 类组件 - contextType 方式class ConsumerDemo extends React.Component{render(){const { color,background } = this.contextreturn <div style={{ color,background } } >消费者</div>}}ConsumerDemo.contextType = ThemeContextconst Son = ()=> <ConsumerDemo />
函数组件接收和使用:
{(value) =>
link’s theme is {value}
}
问与答
问:context 与 props 和 react-redux 的对比?
答: context解决了:
- 解决了 props 需要每一层都手动添加 props 的缺陷。
- 解决了改变 value ,组件全部重新渲染的缺陷。
异步组件
知识点
- React.lazy
- React.Suspense
import React from "react";const ContextDemo = React.lazy(() => import("./JsxBaseDemo"));class App extends React.Component {render() {return (<div><p>引入一个动态组件</p><hr /><React.Suspense fallback={<div>Loading...</div>}><ContextDemo /></React.Suspense></div>);// 1. 强制刷新,可看到 loading (看不到就限制一下 chrome 网速)// 2. 看 network 的 js 加载}}export default App;
创建异步组件:const ContextDemo = React.lazy(() => import(“./组件”))创建异步组件。
使用组件:<ContextDemo/>

若有收获,就点个赞吧
0 人点赞
