密码模式需要注入一个AuthenticationManager,于是咱们接着上篇授权码模式的文档的代码添加一点东西即可。
1.配置AuthenticationManagerBean
@Configuration@EnableWebSecuritypublic class SecurityConfig extends WebSecurityConfigurerAdapter {@Bean@Overrideprotected AuthenticationManager authenticationManager() throws Exception {return super.authenticationManager();}@Bean@Overridepublic UserDetailsService userDetailsService() {UserDetails user =User.builder().username("gaoxi").password("{noop}123456").roles("USER").build();return new InMemoryUserDetailsManager(user);}}
2.注入并设置AuthenticationManager
@Configuration@EnableAuthorizationServerpublic class AuthServerConfig implements AuthorizationServerConfigurer {@Overridepublic void configure(AuthorizationServerSecurityConfigurer security) throws Exception {}@Overridepublic void configure(ClientDetailsServiceConfigurer clients) throws Exception {// @formatter:offclients.inMemory().withClient("gaoxi").secret("{noop}123456").scopes("read","write").authorizedGrantTypes("password","refresh_token","authorization_code","implicit","client_credentials").redirectUris("http://www.baidu.com");// @fomatter:on}@Resourceprivate AuthenticationManager authenticationManager;@Overridepublic void configure(AuthorizationServerEndpointsConfigurer endpoints) throws Exception {endpoints.authenticationManager(authenticationManager);}}
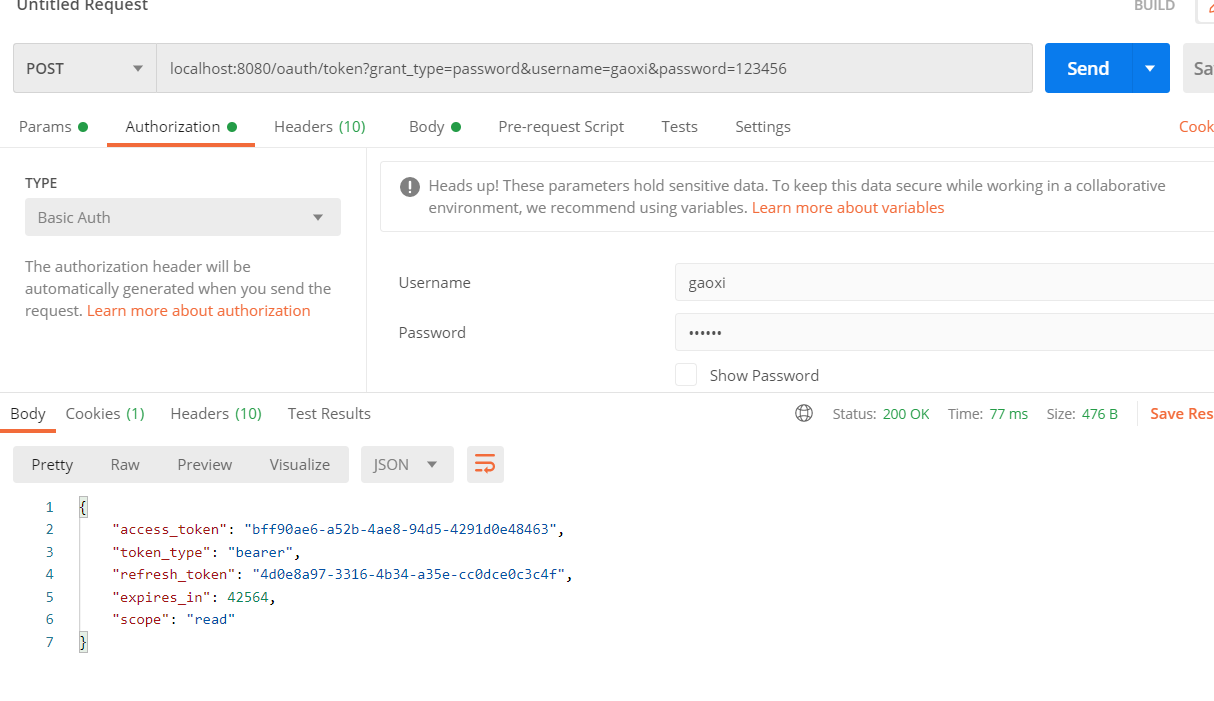
3.Postman请求localhost:8080/oauth/token?grant_type=password&username=gaoxi&password=123456 注意Authorization中内容。

