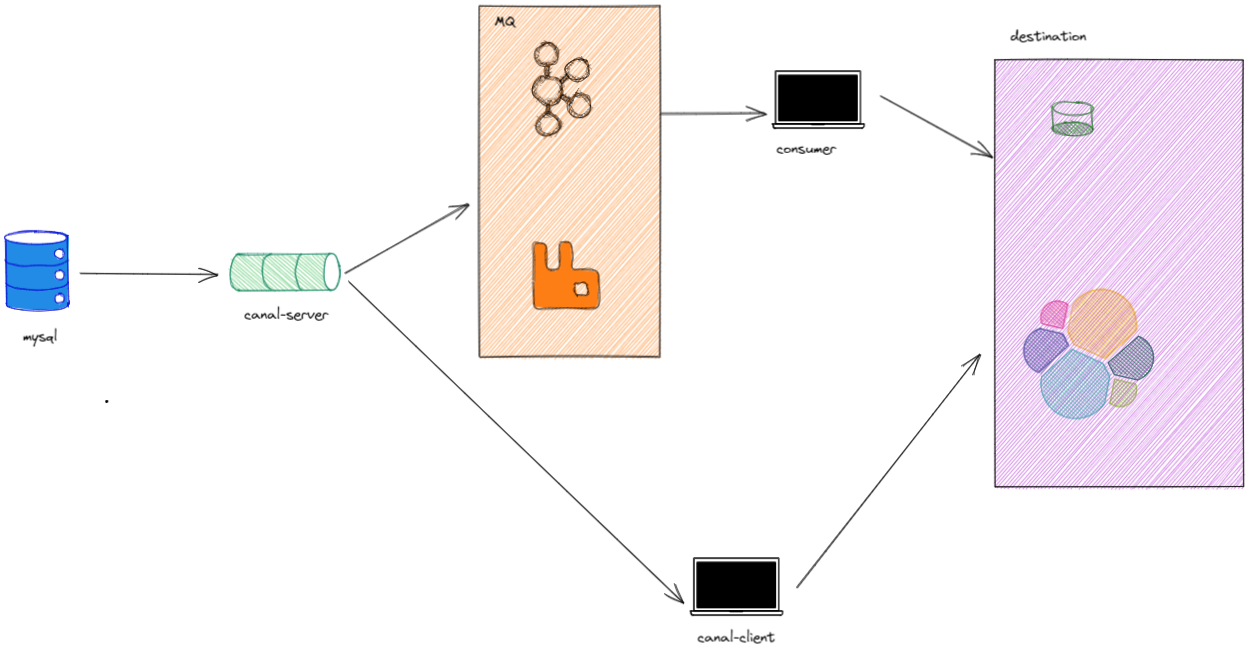
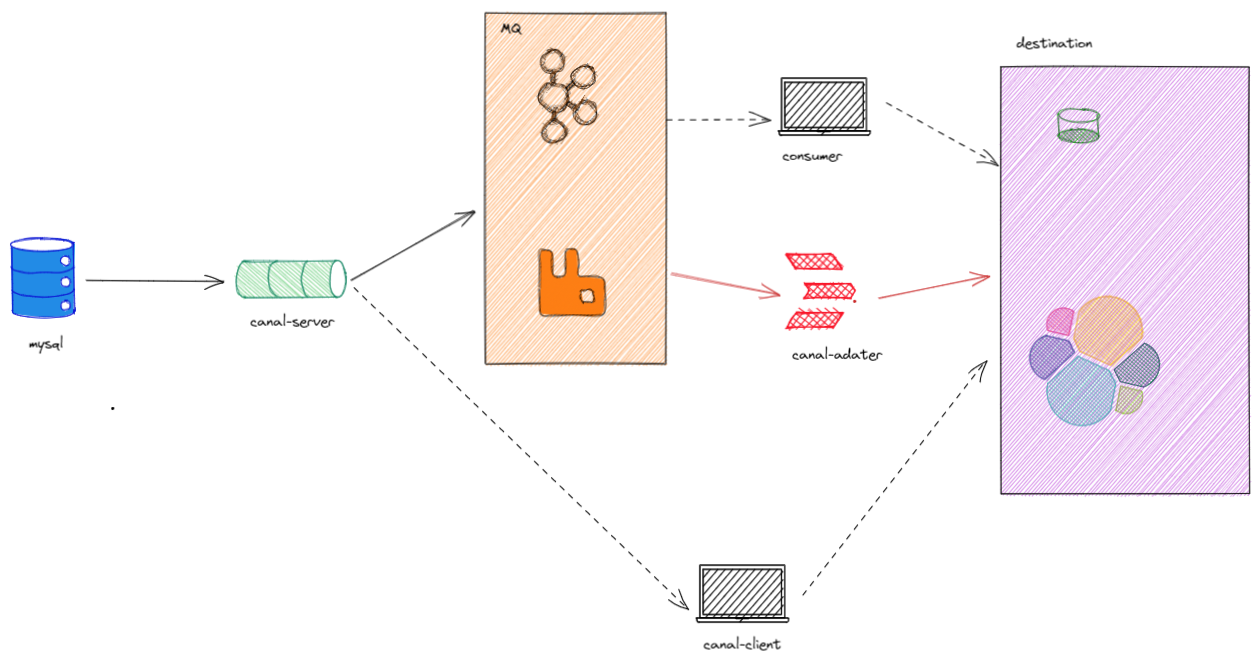
在之前的文章中,我们已经学习了如何使用Canal-Server、Canal-Admin。并配置了相关server配置、Instance配置。<br />那么现在的binlog数据已经顺利的可以取出来了。之后就是将这些binlog加工处理输出到目的地了。我们可以通过canal-client(tcp)直接取binlog日志然后处理,或者取消息队列中的binlog日志进行处理。<br /><br />这样的话需要程序员额外写代码去处理binlog。于是Canal提供了一个叫CanalAdpter的组件。他的作用就是替代图中canal-client和consumer的位置。完成从binlog->目的地的数据输送和处理逻辑。<br />
1.同步ES
- 需求
数据表:student和class。要求每新增一条学生记录同步到对应的ES中(学生和班级信息)
- 环境
elasticsearch7.7.1
canal-admin-1.1.5
canal-server-1.1.5
canal-adapter-1.1.5
mysql5.7.0
1.1数据库搭建
create database demo;-- Table structure for class-- ----------------------------DROP TABLE IF EXISTS `class`;CREATE TABLE `class` (`id` int(11) NOT NULL,`name` varchar(255) CHARACTER SET utf8 COLLATE utf8_general_ci NULL DEFAULT NULL,PRIMARY KEY (`id`) USING BTREE) ENGINE = InnoDB-- Table structure for student-- ----------------------------DROP TABLE IF EXISTS `student`;CREATE TABLE `student` (`id` int(11) NOT NULL,`name` varchar(30) CHARACTER SET utf8 COLLATE utf8_general_ci NULL DEFAULT NULL,`birthday` date NULL DEFAULT NULL,`class_id` int(11) NULL DEFAULT NULL,PRIMARY KEY (`id`) USING BTREE) ENGINE = InnoDB
1.2启动并配置canal-server
- 启动canal-server
canal-server的启动在前面的canal-admin文章中写过。这里就不啰嗦了
- 配置
1.3canal-adapter操作步骤
- 下载并解压压缩包
- 拉取canal源码,修改后重新打包ex7相关jar
https://blog.csdn.net/qq_42569136/article/details/116059493
- 修改服务配置(官方wiki上的配置有点老) ```yaml server: port: 8081 spring: jackson: date-format: yyyy-MM-dd HH:mm:ss time-zone: GMT+8 default-property-inclusion: non_null
canal.conf: mode: tcp #tcp kafka rocketMQ rabbitMQ flatMessage: true zookeeperHosts: syncBatchSize: 1000 retries: 0 timeout: accessKey: secretKey: consumerProperties:
# canal tcp consumercanal.tcp.server.host: 1921.68.2.5:11111 #如果是集群就一定不配,但是1.1.5好像用集群不行canal.tcp.zookeeper.hosts:canal.tcp.batch.size: 500canal.tcp.username:canal.tcp.password:
srcDataSources: defaultDS: url: jdbc:mysql://127.0.0.1:3306/demo?useUnicode=true username: root password: 123456 canalAdapters:
- instance: test # instance文件名或topic名称 canal instance Name or mq topic name
groups:
- groupId: g1
outerAdapters:
- name: logger #输出到日志中
- name: es7 #输入到es7中
hosts: 192.168.2.1:9300 # 注意一定是这个地址 http://127.0.0.1:9200 for rest mode
properties:
mode: transport # or rest
security.auth: test:123456 # only used for rest mode
cluster.name: elasticsearch
- groupId: g1
outerAdapters:
4. 修改es同步配置```yamldataSourceKey: defaultDSdestination: testgroupId: g1esMapping:_index: mytest_student_id: _id# upsert: true# pk: idsql: "select a.id as _id,a.id,a.name as stuName,a.birthday as stuBirthday,a.class_id as stuClassId,b.name as stuClassName from student as a left join class as b on a.class_id = b.id"# objFields:# _labels: array:;etlCondition: "where a.c_time>={}"commitBatch: 3000
启动es并创建索引
PUT /mytest_student{"settings" : {"number_of_shards" : 1},"mappings" : {"properties" : {"id":{ "type" : "long" },"stuName": { "type" : "text" },"stuBirthday" : { "type" : "date" },"stuClassId": { "type" : "long" },"stuClassName" : { "type" : "text" }}}}
结果演示


