原文: https://javatutorial.net/how-to-create-java-war-file-with-maven
在继续进行下一步之前,请确保已在系统上安装了 JDK 和 Maven。

如果您尚未安装 JDK,请点击此处。
如果您尚未安装 Maven,请点击此处。
使用 Eclipse 生成 WAR 文件
步骤 1 – 打开 Eclipse 并创建一个新的 Maven 项目(文件 -> 新建 -> 其他 -> Maven 项目)

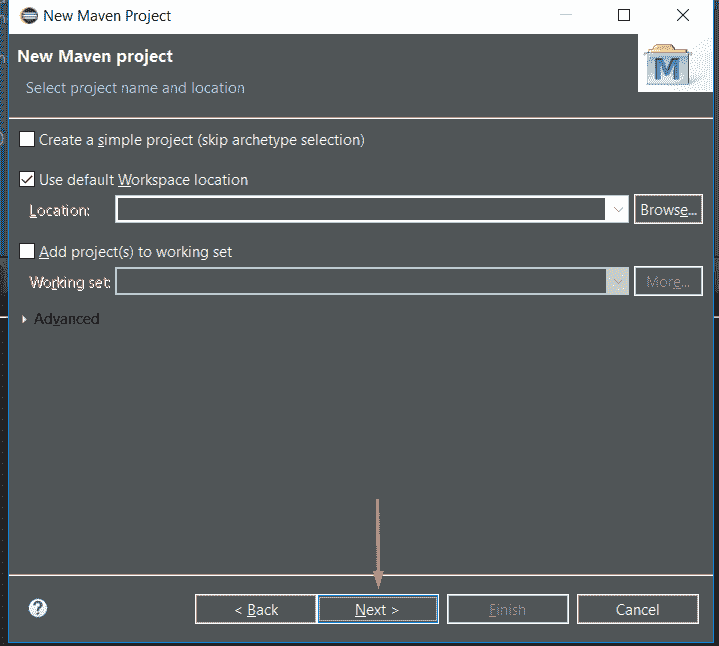
步骤 2 – 创建 Maven 项目后,在新窗口中单击“下一步”,如下所示:
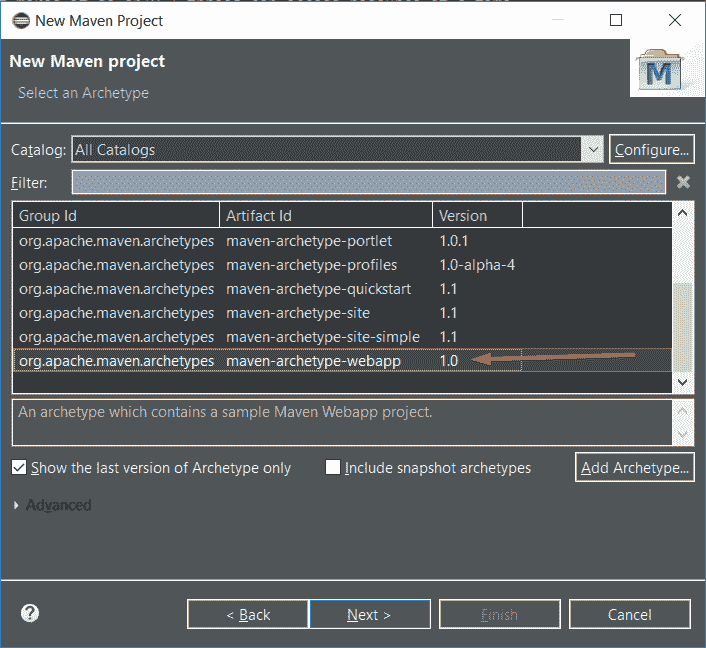
步骤 3 – 选择maven-archetype-webapp并单击“Next”,如下所示:
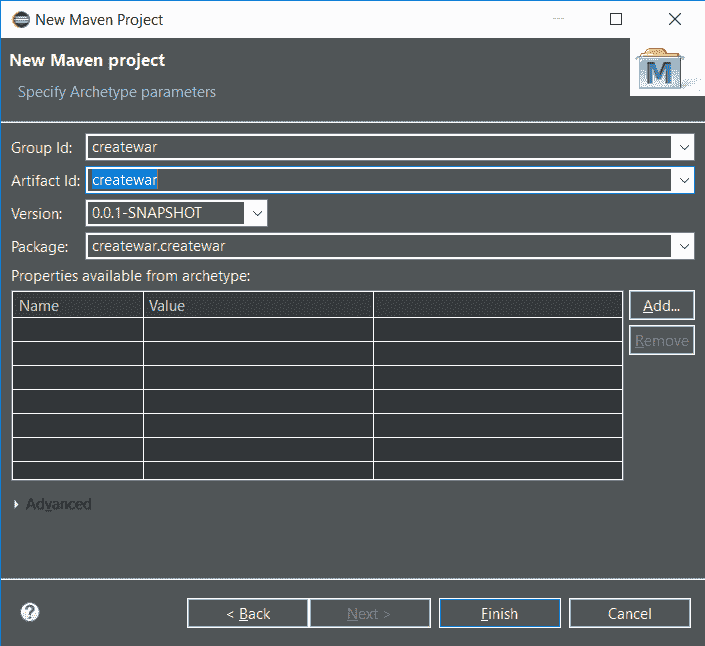
步骤 4 – 输入详细信息,例如我的,然后单击“完成”
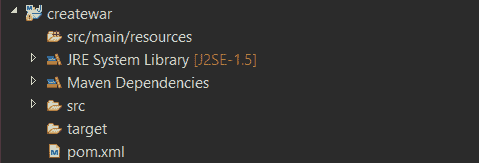
您的 Maven 项目目录应类似于以下内容:
并且pom.xml应该看起来像这样:
<project xmlns="http://maven.apache.org/POM/4.0.0" xmlns:xsi="http://www.w3.org/2001/XMLSchema-instance"xsi:schemaLocation="http://maven.apache.org/POM/4.0.0 http://maven.apache.org/maven-v4_0_0.xsd"><modelVersion>4.0.0</modelVersion><groupId>createwar</groupId><artifactId>createwar</artifactId><packaging>war</packaging><version>0.0.1-SNAPSHOT</version><name>createwar Maven Webapp</name><url>http://maven.apache.org</url><dependencies><dependency><groupId>junit</groupId><artifactId>junit</artifactId><version>3.8.1</version><scope>test</scope></dependency></dependencies><build><finalName>createwar</finalName></build></project>
步骤 6 – 将pom.xml替换为以下代码:
<project xmlns="http://maven.apache.org/POM/4.0.0" xmlns:xsi="http://www.w3.org/2001/XMLSchema-instance"xsi:schemaLocation="http://maven.apache.org/POM/4.0.0 http://maven.apache.org/xsd/maven-4.0.0.xsd"><modelVersion>4.0.0</modelVersion><groupId>CrunchifyTutorial</groupId><artifactId>CrunchifyTutorial</artifactId><version>0.0.1-SNAPSHOT</version><packaging>war</packaging><build><sourceDirectory>src</sourceDirectory><plugins><plugin><artifactId>maven-compiler-plugin</artifactId><version>3.1</version><configuration><source>1.7</source><target>1.7</target></configuration></plugin><plugin><artifactId>maven-war-plugin</artifactId><version>2.4</version><configuration><warSourceDirectory>WebContent</warSourceDirectory><failOnMissingWebXml>false</failOnMissingWebXml></configuration></plugin></plugins></build><dependencies><dependency><groupId>javax.servlet</groupId><artifactId>servlet-api</artifactId><version>2.5</version></dependency></dependencies></project>
最重要的几行是:
<packaging>war</packaging>
和:
<artifactId>maven-compiler-plugin</artifactId>
这就是我们有效地将其转换为 WAR 的地方。
步骤 7 – 右键点击“Project- > Run As -> Maven build…”
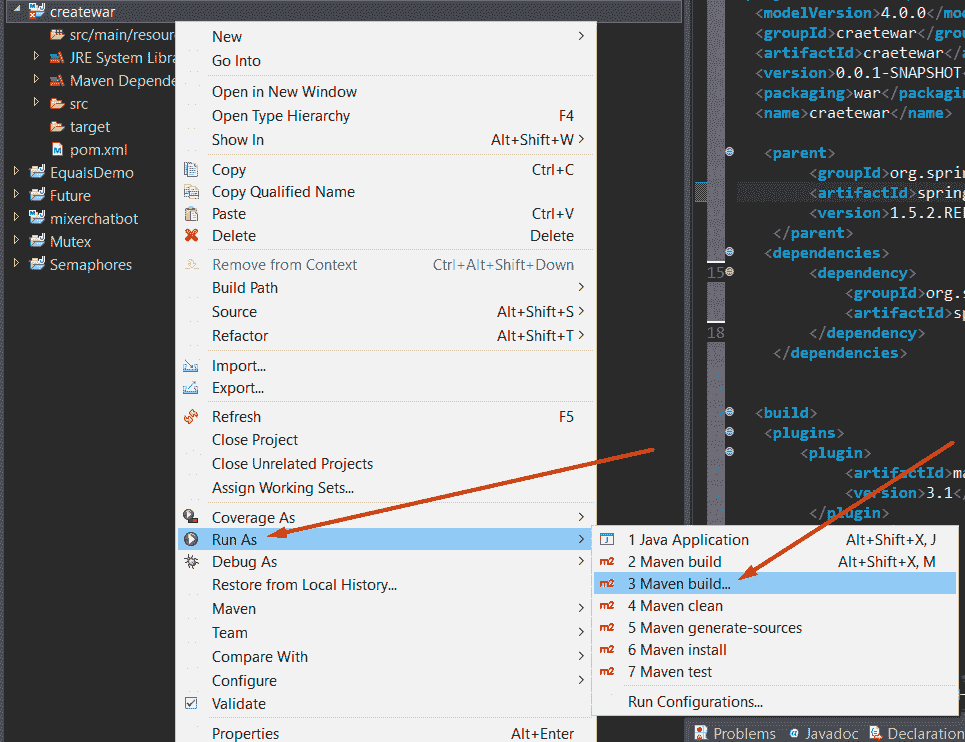
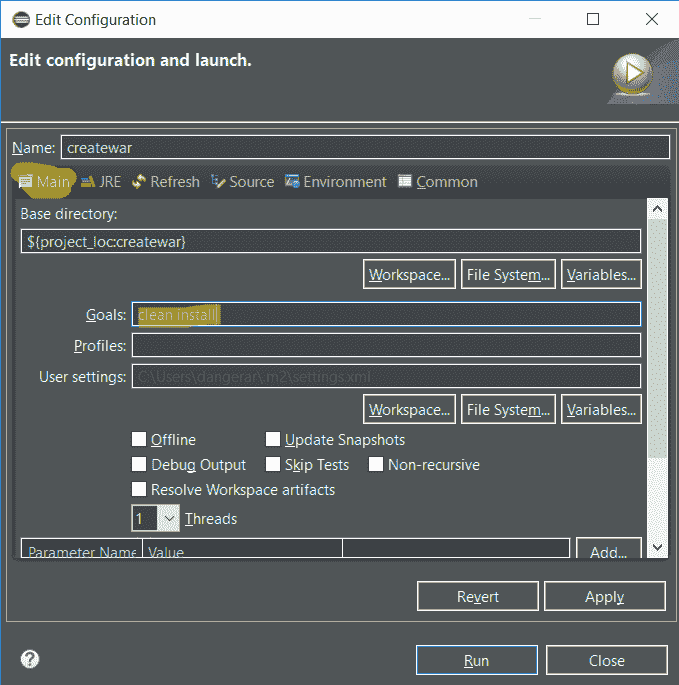
步骤 8 – 在“目标”部分中键入clean install,然后单击“运行”,如下所示:
步骤 9 – 您应该看到BUILD SUCCESS,像这样:
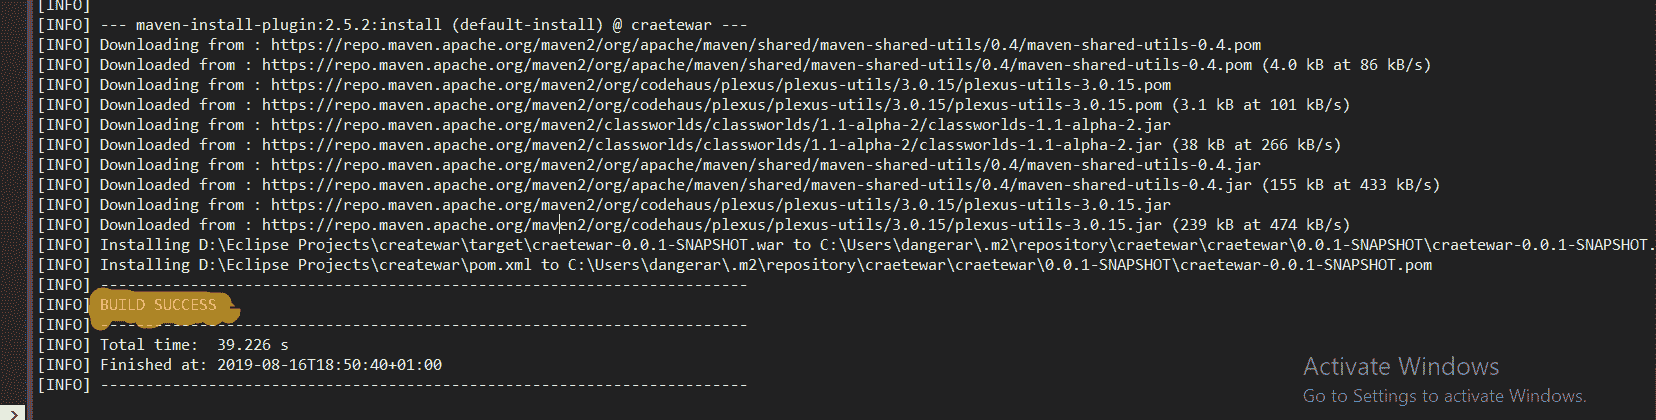
恭喜! 您有您的.war文件。

使用 CMD 生成 WAR 文件
步骤 1 – 通过在我们安装了 Java 的地方添加编译器来修改pom.xml文件。
pom.xml
<project xmlns="http://maven.apache.org/POM/4.0.0" xmlns:xsi="http://www.w3.org/2001/XMLSchema-instance" xsi:schemaLocation="http://maven.apache.org/POM/4.0.0 http://maven.apache.org/xsd/maven-4.0.0.xsd"><modelVersion>4.0.0</modelVersion><groupId>craetewar</groupId><artifactId>craetewar</artifactId><version>0.0.1-SNAPSHOT</version><packaging>war</packaging><name>craetewar</name><parent><groupId>org.springframework.boot</groupId><artifactId>spring-boot-starter-parent</artifactId><version>1.5.2.RELEASE</version></parent><dependencies><dependency><groupId>org.springframework.boot</groupId><artifactId>spring-boot-starter-web</artifactId></dependency></dependencies><build><finalName>createwarexample</finalName><plugins><plugin><artifactId>maven-compiler-plugin</artifactId><version>3.1</version><configuration><fork>true</fork><executable>C:\Program Files\Java\jdk1.8.0_211\bin\javac.exe</executable></configuration></plugin></plugins></build></project>
注意:<executable>是重要的部分。 您的 Java 版本可能有所不同,请确保牢记这一点并放置正确的文件夹路径。
步骤 2 – 在终端中转到项目的文件夹路径,例如:

步骤 3 - 运行mvn clean install,它将负责创建 WAR 文件:
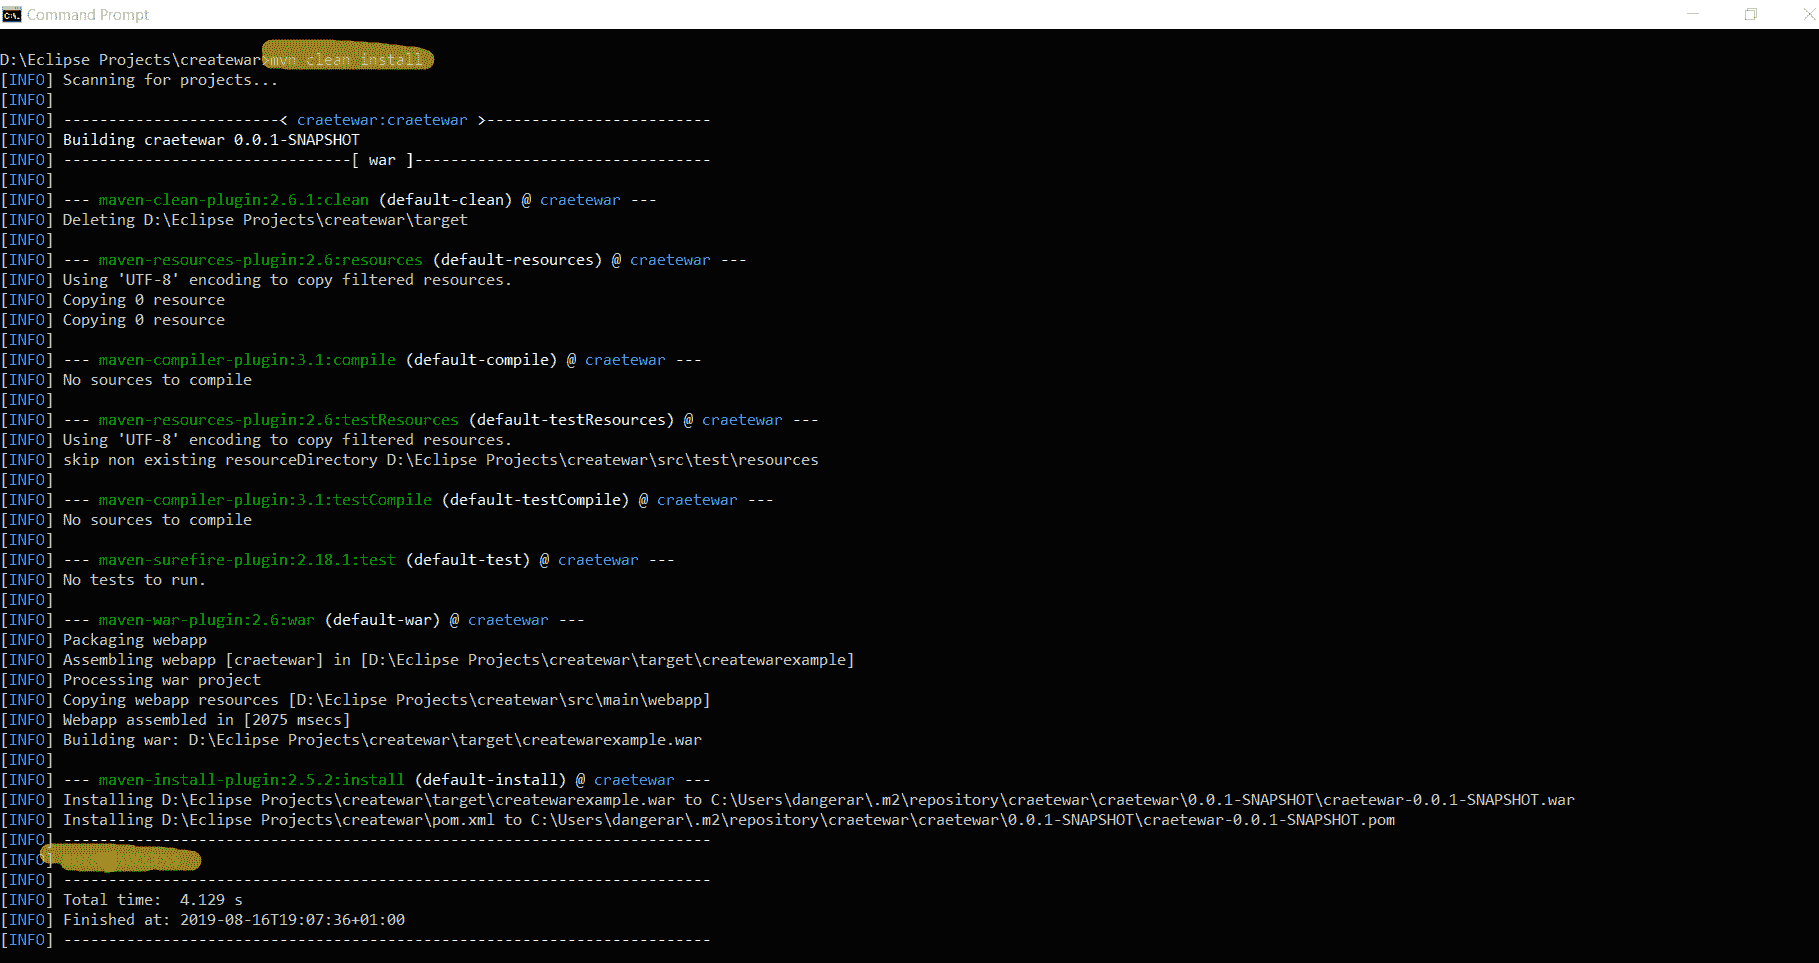
有我们的 WAR 文件:

好的! 我们已经成功使用 Eclipse 和 Terminal 生成了 WAR 文件。
如果您有兴趣生成 JAR 文件,我已经有关于该主题的文章。 您可以通过单击此处来遵循它。

若有收获,就点个赞吧
0 人点赞
