代理模式
静态代理
直接看例子
package com.lyd.demo01;public class Host implements Rent{@Overridepublic void rent() {System.out.println("房东出租房子");}}
package com.lyd.demo01;public class Proxy implements Rent{Host host;public Proxy() {}public Proxy(Host host) {this.host = host;}@Overridepublic void rent() {//经过一些步骤才能租房seeHouse();hetong();fare();host.rent();}/*中介能做房东不能做的事* */public void seeHouse(){System.out.println("中介带你看房");}public void hetong(){System.out.println("签租赁合同");}public void fare(){System.out.println("收中介费");}}
package com.lyd.demo01;public class Client {public static void main(String[] args) {/*不去直接找房东租房,而是找代理代理租房,代理去找房东租房至于代理怎么租的房,我们不用管,只要找代理就行了,不用直接接触房东。为什么不直接找房东而要找中介呢。因为中介在租房时要做一些格外的事,是房东做不了的。别看中介租房和房东租房都是租房,中介租房多做了一些事。在中介这里可以横向的拓展更多的事,收中介费啊,看房啊,为什么这些事不在房东这里拓展非要去中介这里拓展呢抽象的看,房东相当于源码,你去房东这里拓展,不就是相当于改源码吗,中介相当于加一层,调用房东的同时,做格外的事,如果出错了也方便排错这不就像是三层架构吗,dao层处理数据,要拓展一些新功能,在到service层代理dao层,横向发展* */Host host =new Host();Proxy proxy =new Proxy(host);proxy.rent();}}
动态代理
接上面租房的例子。
主要使用InvocationHandler接口和Proxy类。
动态代理就是靠反射自动生成一个代理,不用在一个一个写代理了。
package com.lyd.demo01;import com.sun.org.apache.xml.internal.security.keys.storage.implementations.CertsInFilesystemDirectoryResolver;import java.lang.reflect.InvocationHandler;import java.lang.reflect.Method;import java.lang.reflect.Proxy;public class ProxyInvocationHandler implements InvocationHandler {private Object target;//被代理的东西public void setTarget(Object target){this.target=target;}//生成代理类public Object getProxy(){return Proxy.newProxyInstance(this.getClass().getClassLoader(),target.getClass().getInterfaces(),this);}//处理代理实例,并返回结果@Overridepublic Object invoke(Object proxy, Method method, Object[] args) throws Throwable {//需要拓展什么业务时就可以在直接加A();return method.invoke(target,args);}public void A(){System.out.println("执行了A方法");}}
package com.lyd.demo01;public class Client {public static void main(String[] args) {Host host =new Host();ProxyInvocationHandler pih =new ProxyInvocationHandler();pih.setTarget(host);//动态代理的是接口Rent proxy =(Rent) pih.getProxy();proxy.rent();/*执行结果:* 执行了A方法* 房东出租房子* */}}
AOP模式图
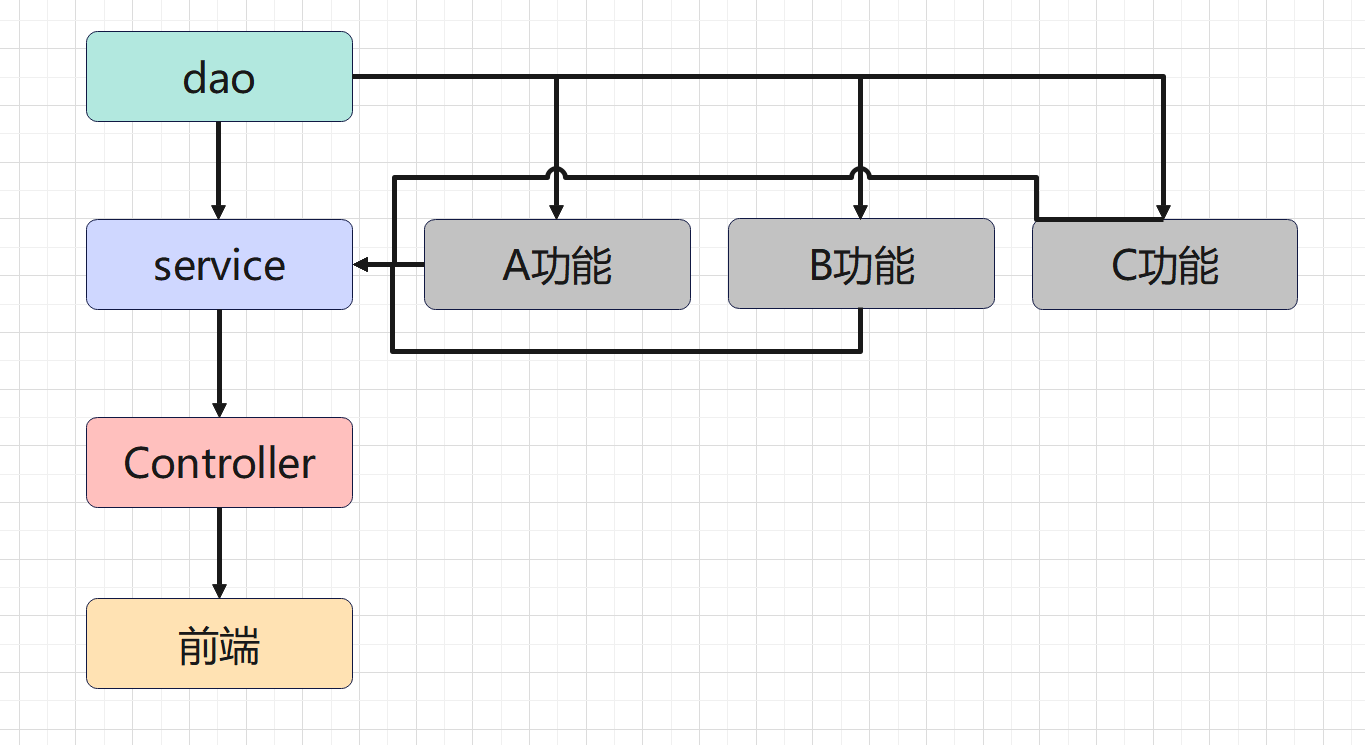
Spring实现AOP
使用AOP需要导入一个依赖包
<dependency><groupId>org.aspectj</groupId><artifactId>aspectjweaver</artifactId><version>1.9.1</version><scope>runtime</scope></dependency>
使用Spring的API接口
设置一个接口和实现类
public interface IUserService {public void add();public void delete();public void update();public void select();}public class UserService implements IUserService{@Overridepublic void add() {System.out.println("增加了一个用户");}@Overridepublic void delete() {System.out.println("删除了一个用户");}@Overridepublic void update() {System.out.println("修改了一个用户");}@Overridepublic void select() {System.out.println("查询了一个用户");}}
我们有一个需求,在增删改查方法前后都要加上一个日志功能。
如果在上面的add,delete,update,select方法里面都加上前置日志和后置日志,很麻烦。
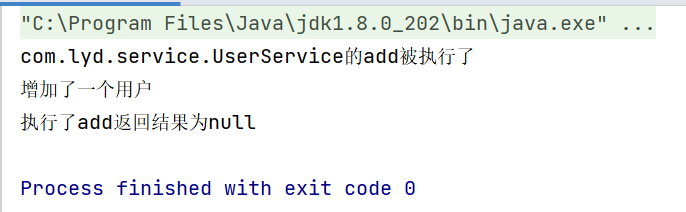
package com.lyd.log;import org.springframework.aop.MethodBeforeAdvice;import java.lang.reflect.Method;//前置日志,看接口名字就知道是方法执行之前执行public class Log implements MethodBeforeAdvice {//method:要执行的目标对象方法//args:参数//target:目标对象@Overridepublic void before(Method method, Object[] args, Object target) throws Throwable {System.out.println(target.getClass().getName()+"的"+method.getName()+"被执行了");}}
package com.lyd.log;import org.springframework.aop.AfterReturningAdvice;import java.lang.reflect.Method;//后置日志,看接口名字就知道是方法执行之后执行public class AfterLog implements AfterReturningAdvice {//returnValue:返回值@Overridepublic void afterReturning(Object returnValue, Method method, Object[] args, Object target) throws Throwable {System.out.println("执行了"+method.getName()+"返回结果为"+returnValue);}}
设置配置文件,注入上面的xml名称空间
<?xml version="1.0" encoding="UTF-8"?><beans xmlns="http://www.springframework.org/schema/beans"xmlns:xsi="http://www.w3.org/2001/XMLSchema-instance"xmlns:aop="http://www.springframework.org/schema/aop"xsi:schemaLocation="http://www.springframework.org/schema/beanshttps://www.springframework.org/schema/beans/spring-beans.xsdhttp://www.springframework.org/schema/aophttps://www.springframework.org/schema/aop/spring-aop.xsd"><!--注册bean--><bean id="userService" class="com.lyd.service.UserService"/><bean id="log" class="com.lyd.log.Log"/><bean id="afterLog" class="com.lyd.log.AfterLog"/><!--使用原生的Spring接口--><!--配置AOP:需要导入AOP的约束--><aop:config><!--切入点:expression:表达式,execution(要执行的位置)--><aop:pointcut id="pointcut" expression="execution(* com.lyd.service.UserService.*(..))"/><!--执行环绕增加--><aop:advisor advice-ref="log" pointcut-ref="pointcut"/><aop:advisor advice-ref="afterLog" pointcut-ref="pointcut"/></aop:config></beans>
执行
public static void main(String[] args) {ApplicationContext context = new ClassPathXmlApplicationContext("ApplicationContext.xml");//动态代理的是接口IUserService user = context.getBean("userService", IUserService.class);user.add();}
使用自定义类实现AOP
接上面增删改查的例子
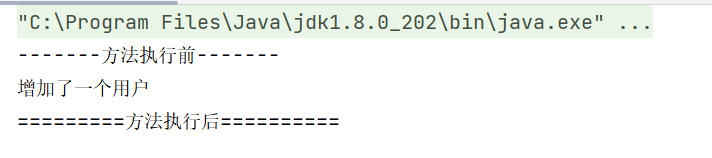
写一个新的自定义类,两个方法一前一后的执行
package com.lyd.diy;/*** @author liyadong* @create 2022-04-01-14:57*/public class DiyPointCut {public void before(){System.out.println("-------方法执行前-------");}public void after(){System.out.println("=========方法执行后==========");}}
修改配置文件
<?xml version="1.0" encoding="UTF-8"?><beans xmlns="http://www.springframework.org/schema/beans"xmlns:xsi="http://www.w3.org/2001/XMLSchema-instance"xmlns:aop="http://www.springframework.org/schema/aop"xsi:schemaLocation="http://www.springframework.org/schema/beanshttps://www.springframework.org/schema/beans/spring-beans.xsdhttp://www.springframework.org/schema/aophttps://www.springframework.org/schema/aop/spring-aop.xsd"><!--注册bean--><bean id="userService" class="com.lyd.service.UserService"/><bean id="diy" class="com.lyd.diy.DiyPointCut"/><aop:config><!--自定义的切面,ref要引用的类--><aop:aspect ref="diy"><!--切入点,就是要代理哪个方法--><aop:pointcut id="point" expression="execution(* com.lyd.service.UserService.*(..))"/><!--通知在哪里执行什么方法aop:before:在切入点之前执行aop:after:在切入点之后执行method:要执行的方法,这个方法就是diy里面的pointcut-ref:切入点--><aop:before method="before" pointcut-ref="point"/><aop:after method="after" pointcut-ref="point"/></aop:aspect></aop:config></beans>
注解实现AOP
设置配置文件
<?xml version="1.0" encoding="UTF-8"?><beans xmlns="http://www.springframework.org/schema/beans"xmlns:xsi="http://www.w3.org/2001/XMLSchema-instance"xmlns:aop="http://www.springframework.org/schema/aop"xsi:schemaLocation="http://www.springframework.org/schema/beanshttps://www.springframework.org/schema/beans/spring-beans.xsdhttp://www.springframework.org/schema/aophttps://www.springframework.org/schema/aop/spring-aop.xsd"><!--注册bean--><bean id="userService" class="com.lyd.service.UserService"/><bean id="annotationPointCut" class="com.lyd.diy.AnnotationPointCut"/><!--开启注解支持--><aop:aspectj-autoproxy/></beans>
添加一个自定义注解实现类
package com.lyd.diy;import org.aspectj.lang.ProceedingJoinPoint;import org.aspectj.lang.annotation.After;import org.aspectj.lang.annotation.Around;import org.aspectj.lang.annotation.Aspect;import org.aspectj.lang.annotation.Before;//使用注解的方式实现AOP@Aspect //标记这个类是一个切面public class AnnotationPointCut {@Before("execution(* com.lyd.service.UserService.*(..))")public void before(){System.out.println("-------Ann方法执行前-------");}@After("execution(* com.lyd.service.UserService.*(..))")public void after(){System.out.println("=========Ann方法执行后==========");}//在环绕增强中,我们可以给定一个参数,代表我们要获取处理切入的点@Around("execution(* com.lyd.service.UserService.*(..))")public void around(ProceedingJoinPoint jp) throws Throwable {System.out.println("++++++++++++Ann环绕前++++++++");//执行方法Object object = jp.proceed();System.out.println("++++++++++++Ann环绕后++++++++");}}
运行代码和上面一样的

若有收获,就点个赞吧
0 人点赞
