添加依赖
或者在创建SpringBoot项目的时候勾选Redis
<dependency><groupId>org.springframework.boot</groupId><artifactId>spring-boot-starter-data-redis</artifactId></dependency>
设置Redis的配置文件
spring:redis:#Redis服务器的地址host: xxx.xxx.xxx.xxx#端口port: 6379#密码password: xxxxxx#数据库索引,默认是0database: 0#链接超时时间(毫秒)timeout: 1800000#连接池最大连接数(使用负值表示没有限制)lettuce:pool:max-active: 20#最大阻塞等待时间(负数表示没有限制)max-wait: -1#连接池中的最大空闲连接max-idle: 5#连接池中最小空闲链接min-idle: 0
到我们SpringBoot2.x版本,其内置的Redis中间件再也不是Jedis了,而是换成了lettuce。
那么lettuce是什么呢,其与Jedis有什么区别呢?
- lettuce: Lettuce 是 一种可伸缩,线程安全,完全非阻塞的Redis客户端,多个线程可以共享一个RedisConnection,它利用Netty NIO 框架来高效地管理多个连接,从而提供了异步和同步数据访问方式,用于构建非阻塞的反应性应用程序。
Jedis: Jedis 在实现上是直连 redis server,多线程环境下非线程安全,除非使用连接池,为每个 redis实例增加 物理连接。 这种方式更加类似于我们 BIO 一条线程连一个客户端,并且是阻塞式的,会一直连接着客户端等待客户端的命令
测试
通过如上简单的配置以后,就可以在SpringBoot里面使用Redis了,用法也很简单
@Autowiredprivate RedisTemplate redisTemplate;@Testvoid contextLoads() {//opForXxxx:操作什么数据类型的方法//opsForValue()操作字符串//opsForList()操作List//......//常用的方法都可以直接通过redistemplate操作,比如事务和基本的CRUD//获取redis的连接对象,通过数据库连接对象可以对数据库进行操作// RedisConnection connection = redisTemplate.getConnectionFactory().getConnection();// connection.flushDb();// connection.flushAll();redisTemplate.opsForValue().set("spk1","lisi");Object spk1 = redisTemplate.opsForValue().get("spk1");System.out.println(spk1);}
在打开Shell在Redis里面查询全部键,发现用SpringBoot添加进去的key有乱码问题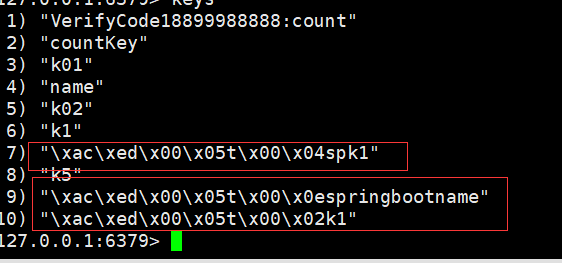
源码
点开RedisTemplate,发现有一个属性,keySerializer,键的序列化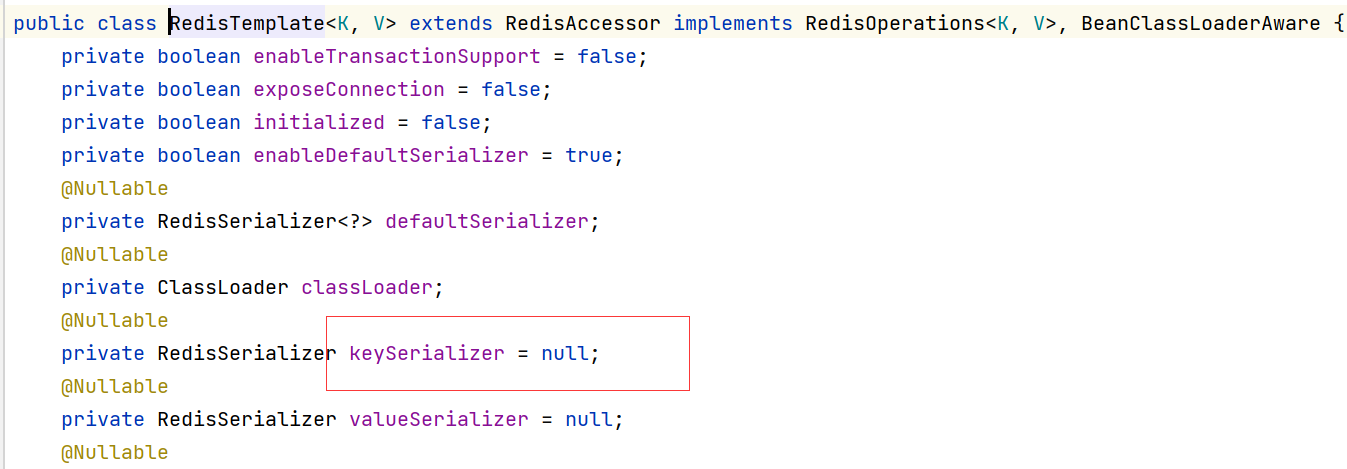
去看赋值,会发现默认用的jdk序列化,而它使用的编码是ISO-8859-1,会出现转义,这时候我们可能要用JSON序列化
这时候找到RedisAuto自动装配类,发现当redisTemplate不存在时,才注入自带的,否这不注入,所以可以重写这个redisTemplate方法。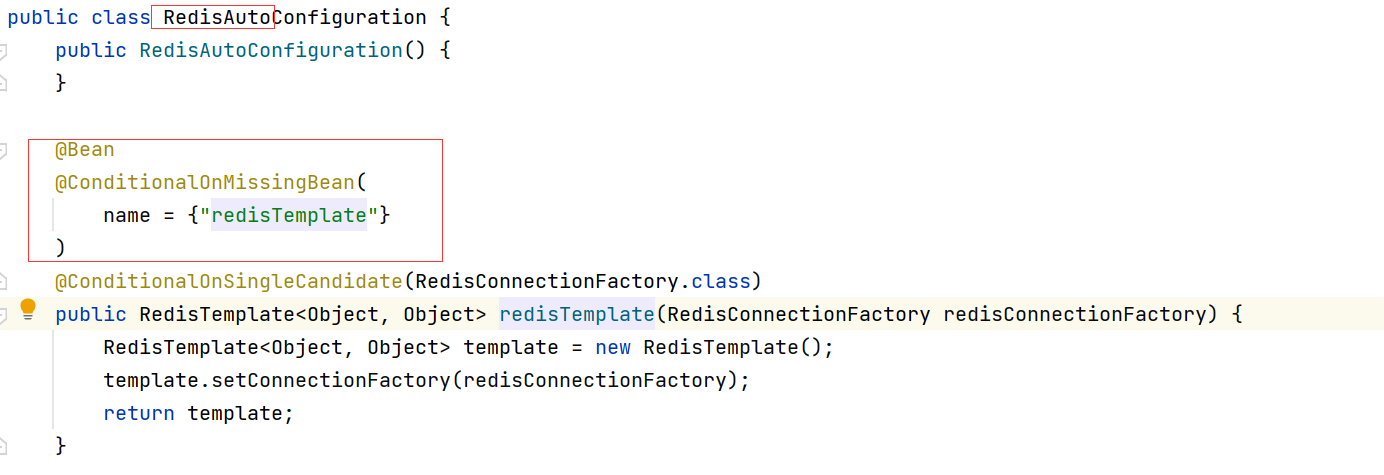
RedisConfig配置
既然默认的redisTemaple无法满足情况,我们就自己写一个,配置类,这个配置类怎么写呢,我们直接照抄RedisAutoConfiguration里面的方法,进行修改
package com.example.demo2.config;import org.springframework.context.annotation.Bean;import org.springframework.context.annotation.Configuration;import org.springframework.data.redis.connection.RedisConnectionFactory;import org.springframework.data.redis.core.RedisTemplate;import org.springframework.data.redis.serializer.GenericJackson2JsonRedisSerializer;import org.springframework.data.redis.serializer.StringRedisSerializer;@Configurationpublic class RedisConfig {//固定模板@Beanpublic RedisTemplate<String, Object> redisTemplate(RedisConnectionFactory redisConnectionFactory) {RedisTemplate<String, Object> template = new RedisTemplate();template.setConnectionFactory(redisConnectionFactory);//String序列化StringRedisSerializer serializer = new StringRedisSerializer();template.setKeySerializer(serializer);template.setValueSerializer(serializer);//Json序列化GenericJackson2JsonRedisSerializer genericJackson2JsonRedisSerializer = new GenericJackson2JsonRedisSerializer();template.setHashKeySerializer(genericJackson2JsonRedisSerializer);template.setHashValueSerializer(genericJackson2JsonRedisSerializer);template.afterPropertiesSet();return template;}}
现在添加数据就不会出现上面的乱码问题了,如果用Shell查看,中文还出现上面的乱码问题。其实这不是乱码问题,应该是数据进制问题,用Shell重新打开Redis客户端,输入这个命令redis-cli --raw,然后就没有问题了。

若有收获,就点个赞吧
0 人点赞
