构建SpringBoot项目
- 创建maven工程
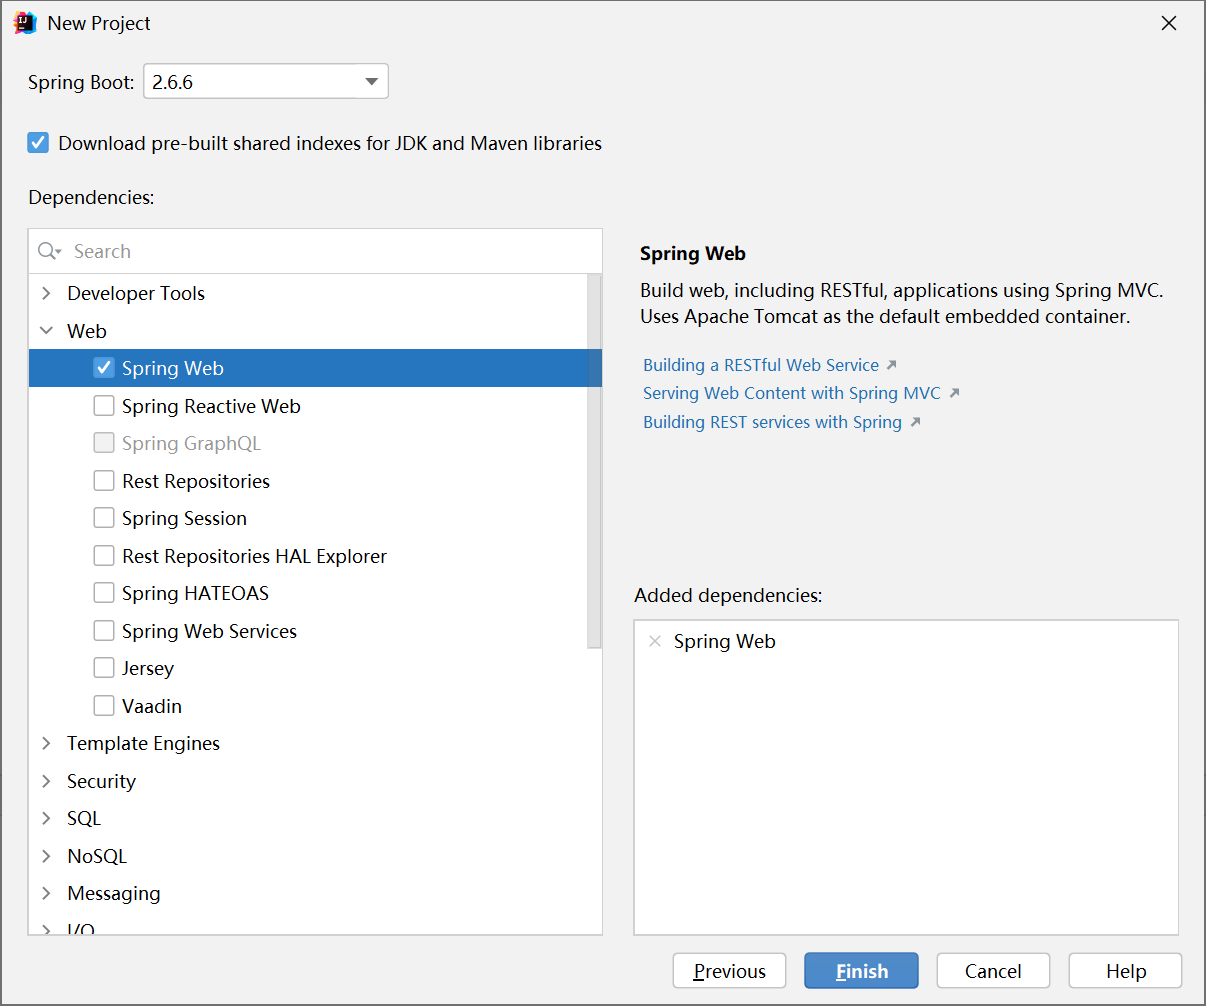
- 导入Spring Boot 相关依赖
```xml
org.springframework.boot spring-boot-starter-parent 2.3.9.RELEASE
3. 编写主程序,启动SpringBoot应用```java@SpringBootApplicationpublic class HelloWorldStarter {public static void main(String[] args) {SpringApplication.run(HelloWorldStarter.class, args);}}
点击左边的小叶子运行main方法。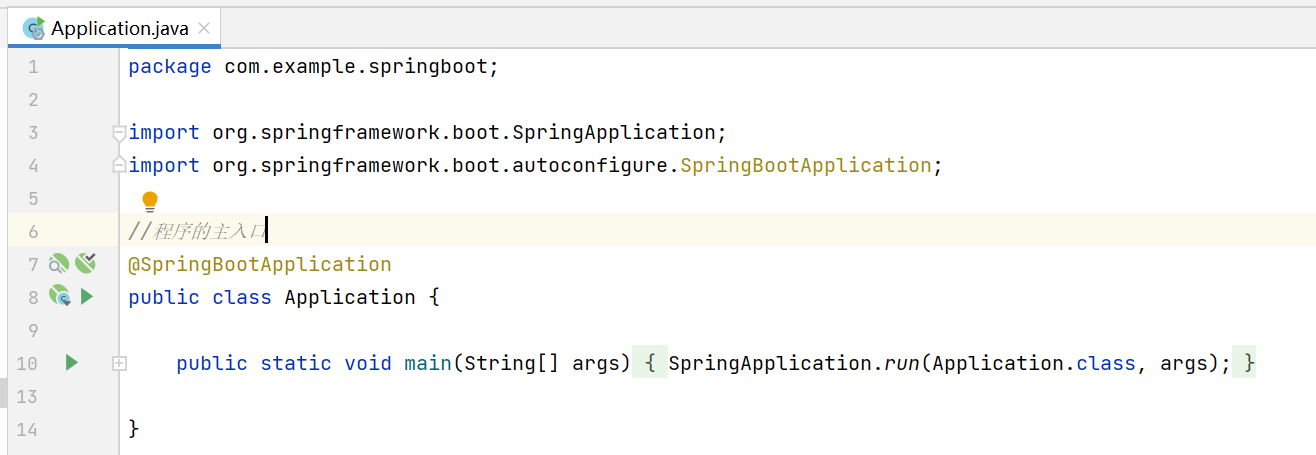
- 编写相关的Controller、Service等,项目结构

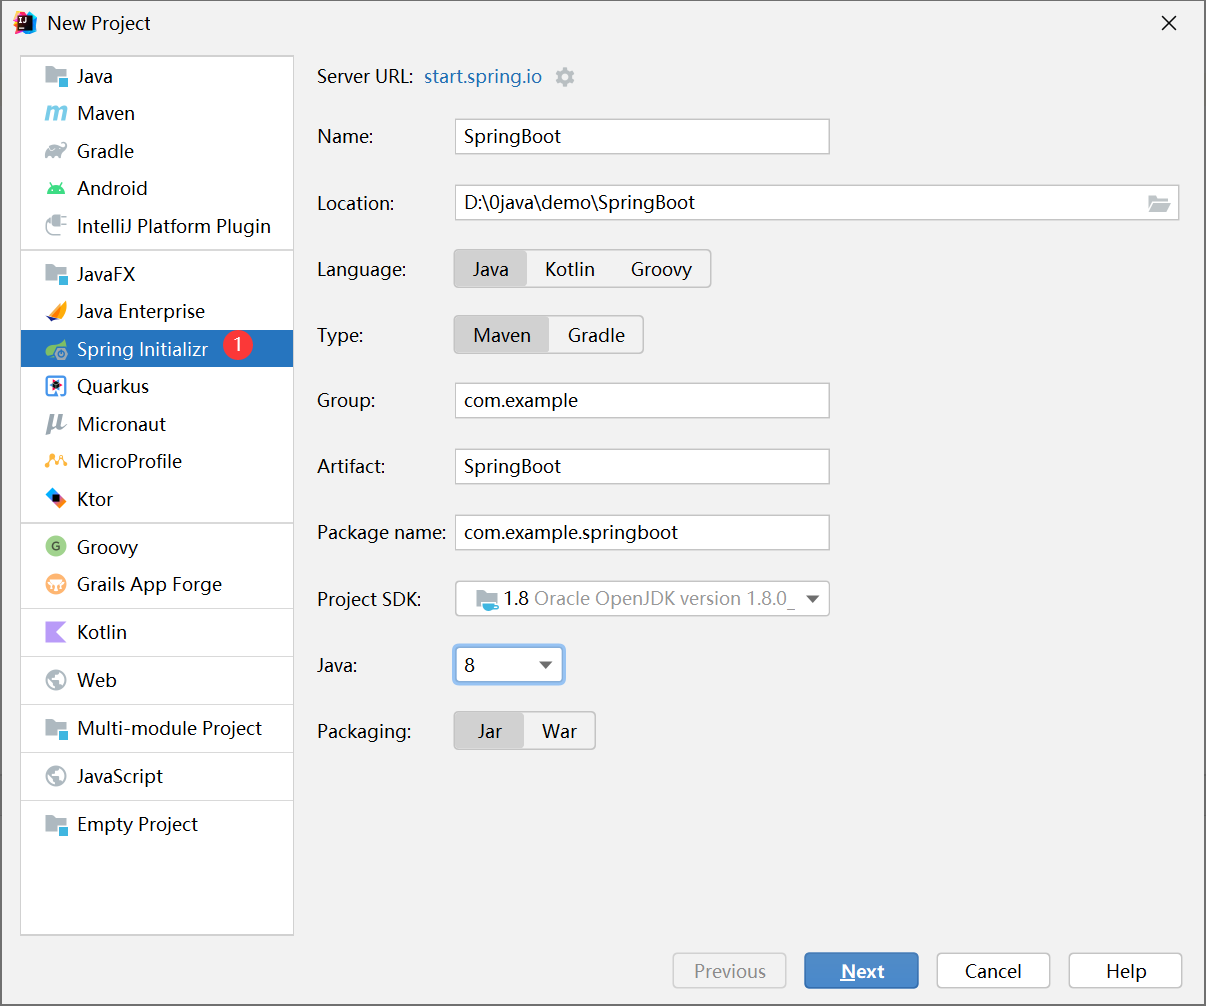
使用Spring initializer快速创建
SpringBoot项目介绍
程序主入口
Application.java是程序的主入口。@SpringBootApplication注解:@SpringBootApplication标注在某个类上,说明这个类是主配置类,通过这个类的main方法来运行程序。
代码结构
要在Application.java的同级目录下建立controller,dao,pojo,serivce层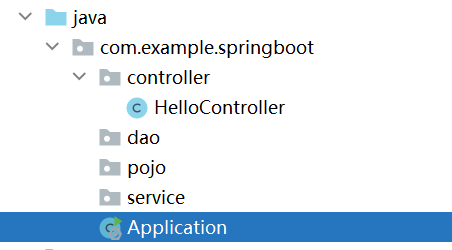
简单接口
运行项目,访问localhost:8080/hello,就能看到下面返回的结果了
package com.example.springboot.controller;import org.springframework.web.bind.annotation.RequestMapping;import org.springframework.web.bind.annotation.RequestParam;import org.springframework.web.bind.annotation.RestController;@RestControllerpublic class HelloController {@RequestMapping("/hello")public String hello(){return "hello,springboot";}}
关于pom.xml
springboot创建的pom.xml里面引用了一个父项目spring-boot-starter-parent。而spring-boot-starter-parent项目中又引入了一层父项目spring-boot-dependencies,spring-boot-dependencies就是核心依赖工程。
spring-boot-dependencies中真正管理Spring Boot应用里面的所有依赖版本,即Spring Boot 的版本仲裁中心。
启动器
在pom.xml里面的依赖,前缀统一spring-boot-starter。这个就是启动器
比如spring-boot-starter-web,他就会帮我们自动导入web环境所有的依赖,而spring-boot-starter-test就会自动帮我们导入测试的所有依赖…..
springboot会将所有的功能场景都变成一个个启动器。
需要什么功能,就只需要找到对应的启动器就可以了。
<dependency><groupId>org.springframework.boot</groupId><artifactId>spring-boot-starter-web</artifactId></dependency>
静态资源
默认路径
默认静态资源可以放在如下文件夹下面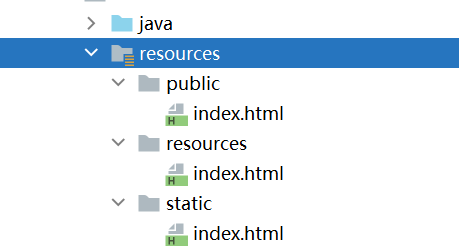
优先级:resource > static(默认) > public
自定义路径
一旦设置了自定义的静态资源路径,默认的就失效了
spring:mvc:static-path-pattern: /lyd/**
首页
在上面的静态资源路径下默认index.html就是首页
拓展SpringMVC
就是javaconfig,用java类来配置spring
package com.example.springboot.config;import org.springframework.context.annotation.Configuration;import org.springframework.web.servlet.config.annotation.WebMvcConfigurer;//实现WebMvcConfigurer接口,且使用了@Configuration注解@Configurationpublic class MyMvcConfig implements WebMvcConfigurer {//在这里面可以重写WebMvcConfigurer里面的方法,就会用你自己配置的配置了}

若有收获,就点个赞吧
0 人点赞
