在part-2中我们重点讨论了G6的数据灌入与Node/Edge实例的创建。第三章,我们来讨论,这些数据挂载在group中是如何绘制的。
这里的核心函数便是canavs.draw()
render() {Util.each(data.nodes, node => { self.add(NODE, node)});Util.each(data.edges, edge => {self.add(EDGE, edge)});self.paint();}paint() {this.emit('beforepaint');this.get('canvas').draw();this.emit('afterpaint');}
这块的逻辑是这样的。
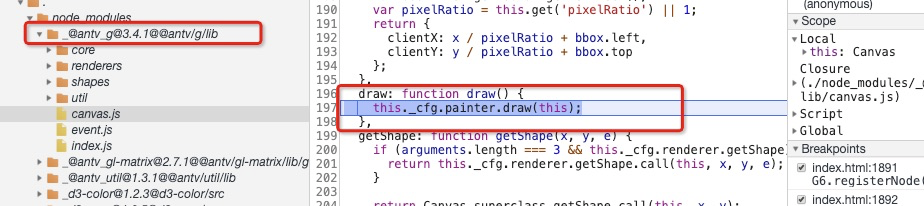
- G支持canvas和svg两种绘图方式,因此this._cfg.painter就是通过用户配置的render后获取不同painter实例
- 查看下图的调用栈,可知,draw —> _drawGroup—>递归执行_drawGroup得到最后一层children 即用户添加的shapes —> 执行drawShape

shape是谁?
是用户自定义shape,它由group.addShape()方法创建,实例化的过程如下 /g/src/core/group.js
Shape在 /g/src/shapes/*.js
addShape(type, cfg) {const canvas = this.get('canvas');cfg.canvas = canvas;cfg.type = type;const rst = new Shape[shapeType](cfg);this.add(rst);return rst;},
Shape.drawInner在哪?
很显然,Circle实例的drawInner方法继承与Shape,/g/src/core/shape.js ,在父类Shape上,没有createPath等方法,需要子类自己去实现。
Util.augment(Shape, isPointInPath, {isShape: true,drawInner(context) {const self = this;self.createPath(context);self.afterPath(context);},})
核心!createPath
我们以Circle为例,createPath完成核心的绘制工作 /g/src/shapes/circle.js
这里就只有canvas API,详见MDN
const Util = require('../util/index');const Shape = require('../core/shape');const Circle = function(cfg) {Circle.superclass.constructor.call(this, cfg);};Util.extend(Circle, Shape);Util.augment(Circle, {type: 'circle',createPath(context) {const attrs = this._attrs;const cx = attrs.x;const cy = attrs.y;const r = attrs.r;context.beginPath();context.arc(cx, cy, r, 0, Math.PI * 2, false);context.closePath();}});module.exports = Circle;


若有收获,就点个赞吧
0 人点赞
