JavaFX API的javafx.scene.control包中的Label类可用于显示一个文本元素。
我们可以包装文本元素以适应特定空间,添加图形图像或使用JavaFX Label控件应用视觉效果。
以下代码显示如何使用Label显示文本。
import javafx.application.Application;import javafx.geometry.HPos;import javafx.geometry.Insets;import javafx.scene.Group;import javafx.scene.Scene;import javafx.scene.control.Label;import javafx.scene.layout.GridPane;import javafx.scene.paint.Color;import javafx.stage.Stage;public class Main extends Application {public static void main(String[] args) {Application.launch(args);}@Overridepublic void start(Stage primaryStage) {Group root = new Group();Scene scene = new Scene(root, 300, 130, Color.WHITE);GridPane gridpane = new GridPane();gridpane.setPadding(new Insets(5));gridpane.setHgap(10);gridpane.setVgap(10);Label label = new Label("Label");GridPane.setHalignment(label, HPos.CENTER);gridpane.add(label, 0, 0);root.getChildren().add(gridpane);primaryStage.setScene(scene);primaryStage.show();}}
创建标签
JavaFX API提供了Label类的三个构造函数来创建标签。
//An empty labelLabel label1 = new Label();//A label with the text elementLabel label2 = new Label("Name");//A label with the text element and graphical iconImage image = new Image("01.png");Label label3 = new Label("Name", new ImageView(image));
标签内容
创建标签后,我们可以使用Label类中的以下方法添加文本和图形内容。
- setText(String text) - 设置标签的文本标题
- setGraphic(Node graphic) - 设置图形图标
setGraphicTextGap()方法设置文本和图标之间的间距。setTextFill()方法设置标签文本的颜色。以下代码创建文本标签,向其添加图标,并为文本设置填充颜色。
Label label1 = new Label("Name");Image image = new Image("01.png");label1.setGraphic(new ImageView(image));label1.setTextFill(Color.web("#FF76a3"));

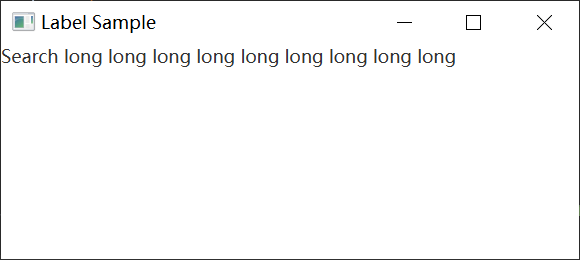
以下代码显示如何设置Label Text颜色。
import javafx.application.Application;import javafx.scene.Group;import javafx.scene.Scene;import javafx.scene.control.Label;import javafx.scene.layout.HBox;import javafx.scene.paint.Color;import javafx.stage.Stage;public class Main extends Application {public static void main(String[] args) {launch(args);}@Overridepublic void start(Stage stage) {Scene scene = new Scene(new Group());stage.setTitle("Label Sample");stage.setWidth(400);stage.setHeight(180);HBox hbox = new HBox();Label label1 = new Label("Search");label1.setTextFill(Color.web("#0076a3"));hbox.setSpacing(10);hbox.getChildren().add((label1));((Group) scene.getRoot()).getChildren().add(hbox);stage.setScene(scene);stage.show();}}

setTextAlignment()方法可以在其布局区域内设置标签内容的对齐方式。setContentDisplay()方法设置图形相对于文本的位置。该方法接受以下ContentDisplay常量中的一个:LFFT,RIGHT,CENTER,TOP,BOTTOM。
标签字体
如果未设置Label控件的字体,则使用默认字体大小进行渲染。要设置字体文本大小,请使用Label类中的setFont方法。
以下代码将label1文本的大小设置为30点像素,将字体名称设置为Arial。
label.setFont(new Font("Arial", 30));

将文本大小设置为32点像素,将字体名称设置为Cambria。
label.setFont(Font.font("Cambria", 32));
以下代码显示如何设置标签的字体。
import javafx.application.Application;import javafx.scene.Group;import javafx.scene.Scene;import javafx.scene.control.Label;import javafx.scene.layout.HBox;import javafx.scene.text.Font;import javafx.stage.Stage;public class Main extends Application {public static void main(String[] args) {launch(args);}@Overridepublic void start(Stage stage) {Scene scene = new Scene(new Group());stage.setWidth(400);stage.setHeight(180);HBox hbox = new HBox();Label label1 = new Label("Search");label1.setFont(new Font("Arial", 30));hbox.setSpacing(10);hbox.getChildren().add((label1));((Group) scene.getRoot()).getChildren().add(hbox);stage.setScene(scene);stage.show();}}

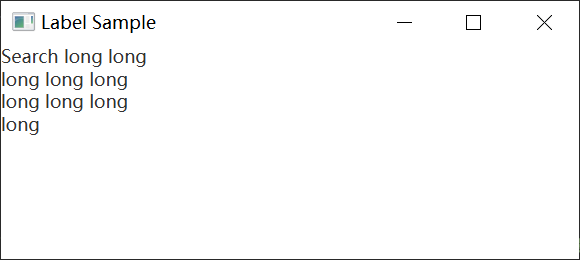
包装文本
要包装文本以将文本适合布局区域,请使用setWrapText方法并设置为true值。
Label label = new Label("A long long long long long text");label.setWrapText(true);
以下代码显示如何包装Label。
import javafx.application.Application;import javafx.scene.Group;import javafx.scene.Scene;import javafx.scene.control.Label;import javafx.scene.layout.HBox;import javafx.scene.text.TextAlignment;import javafx.stage.Stage;public class Main extends Application {public static void main(String[] args) {launch(args);}@Overridepublic void start(Stage stage) {Scene scene = new Scene(new Group());stage.setTitle("Label Sample");stage.setWidth(400);stage.setHeight(180);HBox hbox = new HBox();Label label1 = new Label("Search long long long long long long long long long ");label1.setPrefWidth(100);label1.setWrapText(true);hbox.setSpacing(10);hbox.getChildren().add((label1));((Group) scene.getRoot()).getChildren().add(hbox);stage.setScene(scene);stage.show();}}
当不可能渲染文本字符串时,我们可以使用setTextOverrun方法控制如何从标签渲染文本。setTextOverrun方法接受一个OverrunStyle值。
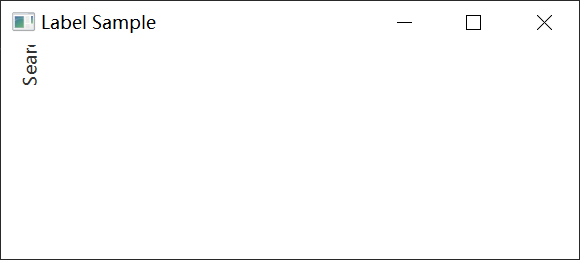
应用效果
我们可以对Label控件应用视觉效果或转换。以下代码将标签旋转270度,并将其位置垂直平移。
Label label = new Label("Name");label.setRotate(270);label.setTranslateY(50);

以下代码显示如何使用旋转创建垂直标签。
import javafx.application.Application;import javafx.scene.Group;import javafx.scene.Scene;import javafx.scene.control.Label;import javafx.scene.layout.HBox;import javafx.scene.text.TextAlignment;import javafx.stage.Stage;public class Main extends Application {public static void main(String[] args) {launch(args);}@Overridepublic void start(Stage stage) {Scene scene = new Scene(new Group());stage.setTitle("Label Sample");stage.setWidth(400);stage.setHeight(180);HBox hbox = new HBox();Label label1 = new Label("Search");label1.setRotate(270);hbox.setSpacing(10);hbox.getChildren().add((label1));((Group) scene.getRoot()).getChildren().add(hbox);stage.setScene(scene);stage.show();}}
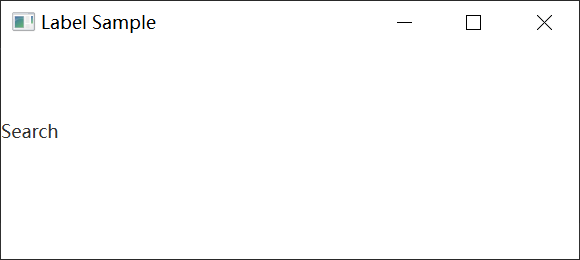
以下代码显示了如何使用setTranslateY来移动标签。
import javafx.application.Application;import javafx.scene.Group;import javafx.scene.Scene;import javafx.scene.control.Label;import javafx.scene.layout.HBox;import javafx.scene.text.TextAlignment;import javafx.stage.Stage;public class Main extends Application {public static void main(String[] args) {launch(args);}@Overridepublic void start(Stage stage) {Scene scene = new Scene(new Group());stage.setTitle("Label Sample");stage.setWidth(400);stage.setHeight(180);HBox hbox = new HBox();Label label1 = new Label("Search");label1.setTranslateY(50);hbox.setSpacing(10);hbox.getChildren().add((label1));((Group) scene.getRoot()).getChildren().add(hbox);stage.setScene(scene);stage.show();}}
当用户将鼠标光标悬停在标签上时,可以缩放标签。当在标签上触发MOUSE_ENTERED事件时,以下代码将缩放效果应用于标签。
以下代码显示如何缩放标签。
import javafx.application.Application;import javafx.event.EventHandler;import javafx.scene.Group;import javafx.scene.Scene;import javafx.scene.control.Label;import javafx.scene.input.MouseEvent;import javafx.scene.layout.HBox;import javafx.stage.Stage;public class Main extends Application {public static void main(String[] args) {launch(args);}@Overridepublic void start(Stage stage) {Scene scene = new Scene(new Group());stage.setTitle("Label Sample");stage.setWidth(400);stage.setHeight(180);HBox hbox = new HBox();final Label label1 = new Label("Search long long long long long long long long long ");label1.setOnMouseEntered((e)->{label1.setScaleX(1.5);label1.setScaleY(1.5);});label1.setOnMouseExited((e)->{label1.setScaleX(1);label1.setScaleY(1);});hbox.setSpacing(10);hbox.getChildren().add((label1));((Group) scene.getRoot()).getChildren().add(hbox);stage.setScene(scene);stage.show();}}

标签鼠标事件
以下代码显示了如何为标签添加鼠标进出事件处理程序。
import javafx.application.Application;import javafx.event.EventHandler;import javafx.scene.Group;import javafx.scene.Scene;import javafx.scene.control.Label;import javafx.scene.input.MouseEvent;import javafx.scene.layout.HBox;import javafx.stage.Stage;public class Main extends Application {public static void main(String[] args) {launch(args);}@Overridepublic void start(Stage stage) {Scene scene = new Scene(new Group());stage.setTitle("Label Sample");stage.setWidth(400);stage.setHeight(180);HBox hbox = new HBox();final Label label1 = new Label("Search long long long long long long long long long ");label1.setOnMouseEntered((e)->{label1.setScaleX(1.5);label1.setScaleY(1.5);});label1.setOnMouseExited((e)->{label1.setScaleX(1);label1.setScaleY(1);});hbox.setSpacing(10);hbox.getChildren().add((label1));((Group) scene.getRoot()).getChildren().add(hbox);stage.setScene(scene);stage.show();}}
更新标签
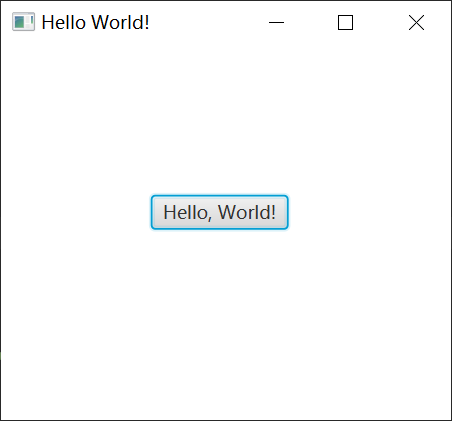
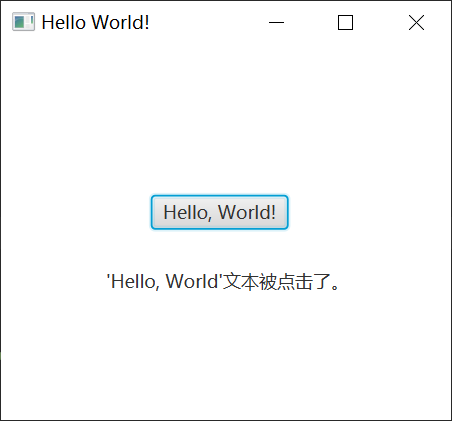
以下代码显示了如何在Button单击事件中更改Label文本。
import javafx.application.Application;import javafx.event.ActionEvent;import javafx.event.EventHandler;import javafx.scene.Group;import javafx.scene.Scene;import javafx.scene.control.Button;import javafx.scene.control.Label;import javafx.stage.Stage;public class Main extends Application {public static void main(String[] args) {Application.launch(args);}@Overridepublic void start(Stage primaryStage) {Button btn = new Button();final Label lbl = new Label();primaryStage.setTitle("Hello World!");lbl.setLayoutX(70);lbl.setLayoutY(150);btn.setLayoutX(100);btn.setLayoutY(100);btn.setText("Hello, World!");btn.setOnAction((e)->lbl.setText("'Hello, World'文本被点击了。"));Group root = new Group();root.getChildren().add(btn);root.getChildren().add(lbl);primaryStage.setScene(new Scene(root, 300, 250));primaryStage.show();}}

若有收获,就点个赞吧
0 人点赞
