- I Introduction
- II Module Details
- III Programming Environment
- IV Tutorials
- Part A: Cardboard Creations
- Part B: Graphical Programming Projects
- Project 1 Burglar Alarm
- i Implementation
- ii Write a Program
- iii Connect a Device
- iv Upload a Program
- v Run a Program
- * Note: Similar to that of a multi-touch button, the button number of the twin-button is decided by the two electric contacts labeled as 1 and 2 on the back. You can change their number order by pushing those contacts. To be specific, the rules of the order are:
- Project 2 Sound Meter
- Project 3 Night-Light
- Project 4 Simple Phone Tripod
- Project 1 Burglar Alarm
- V Course Materials
- VI Attachments
I Introduction
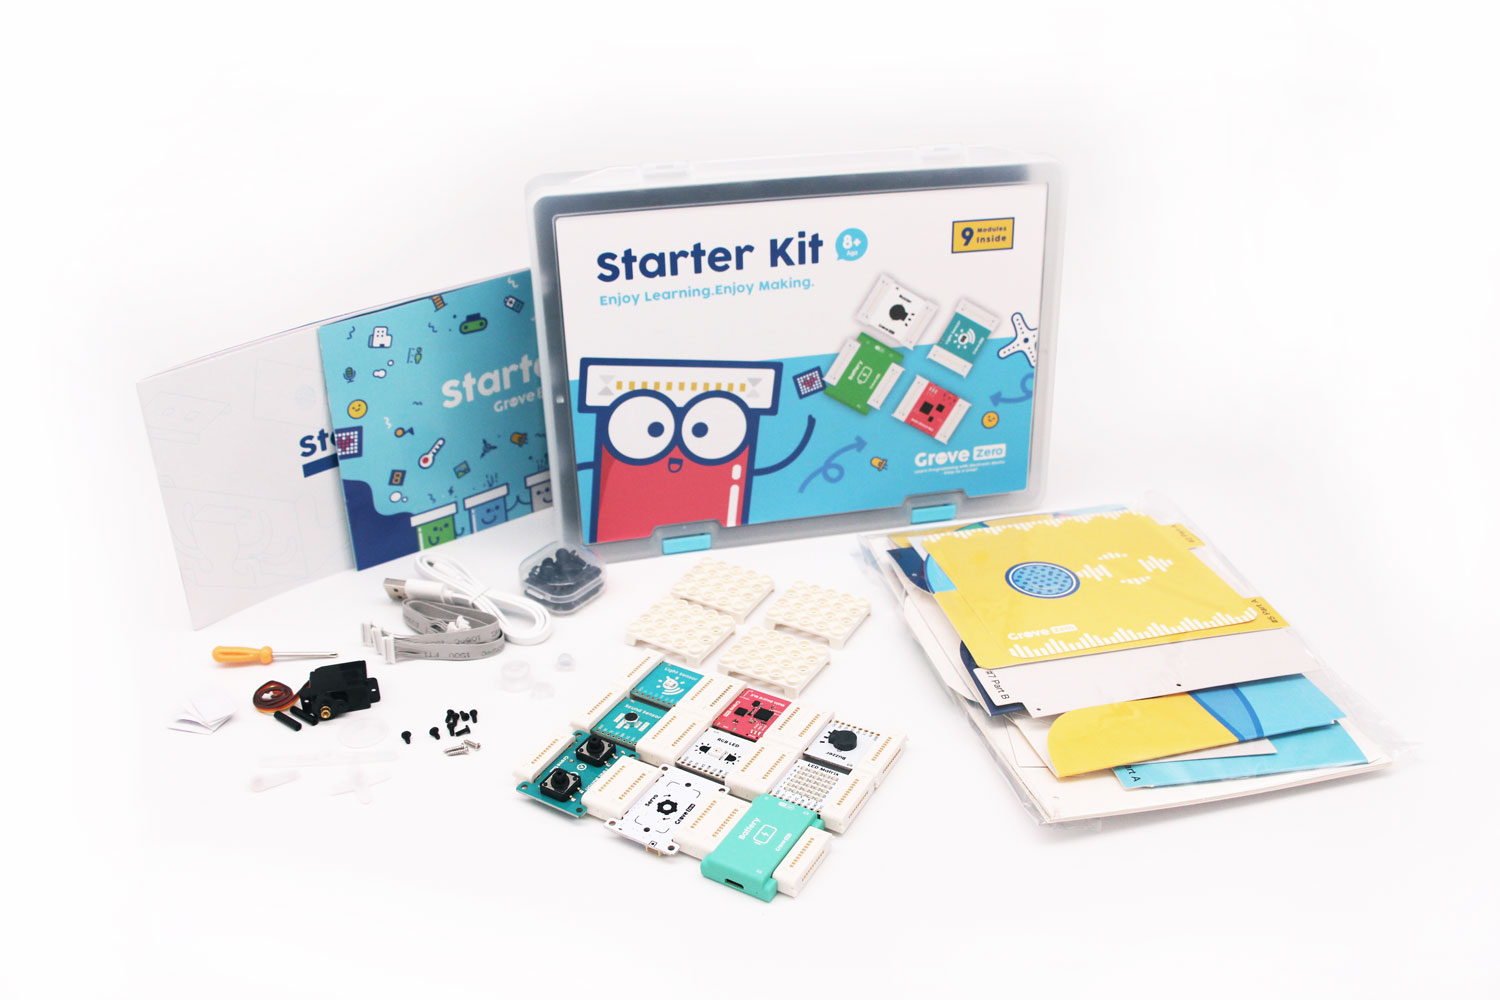
This kit includes 9 Grove Zero modules and is designed for kids who are beginners to graphical programming and robotics. The majority of the modules work as input or output modules, e.g. the light sensor (input module) and buzzer (output module). By connecting one or more of these modules to the included mainboard and battery, you can implement lots of exciting and fun projects! Additionally, we have graphical programming software, Codecraft to bring unlimited possibilities for your projects. A LEGO compatible base block is also provided for you to integrate LEGO into your creations.
II Module Details
Items included in the kit are as follows: mainboard BLE, light sensor, sound sensor, twin-button, buzzer, LED matrix, addressable RGB LED, servo, battery, USB cable, Starter Kit Project Invention Guide, etc. Below is an informative table about the specific module details. You can click one of the small images to see a large version of the modules, or click More Info to know more about them.
| Name | Image | Detail |
|---|---|---|
| Mainboard BLE |  |
It is a key component of your projects. Whatever programs you design, a flashing LED or an alarming buzzer, it will convert the received signals and command for the output modules to execute actions. It is available to be factory reset after the Reset button is pressed and held for 6 seconds. More Info |
| Light Sensor |  |
It measures the light intensity in an ambient environment and tells you it is bright or dark. More Info |
| Sound Sensor |  |
It measures the sound intensity in an ambient environment. More Info |
| Twin-Button |  |
A module composed of two buttons labeled as A and B. It can detect a short press, a long press or an ongoing press-down action. More Info |
| Buzzer |  |
A buzzer is ordinarily used for creating special audio effect to alert people. But sometimes you can use it to play some relaxing and enjoyable melodies too. More Info |
| LED Matrix |  |
It features a blue 5x6 LED grid that is able to show numbers, characters, bar graphs, pixel patterns, etc. More Info |
| RGB LED |  |
A basic LED that consists of the three origin colors (red, green, blue). By adjusting their RGB value, this module is possible to show colorful and numerous light displays. More Info |
| Servo |  |
The servo is an actuator that controls the angular position of the shaft. More Info |
| Battery |  |
It provides power supply for the entire circuit system of your projects. More Info |
III Programming Environment
IV Tutorials
Part A: Cardboard Creations
Follow the Project Invention Guide and use the included project sheet to create outer cases for projects like Music Visualizer, Night-Light and Sound Meter. For specifics, see Attachment 2: Starter Kit Project Invention Guide.
Part B: Graphical Programming Projects
Project 1 Burglar Alarm
i Implementation
Press the button A once, then the addressable RGB LED flashes red and the buzzer plays a Middle C tone. Both the LED and the buzzer will be turned off until the button B is pressed.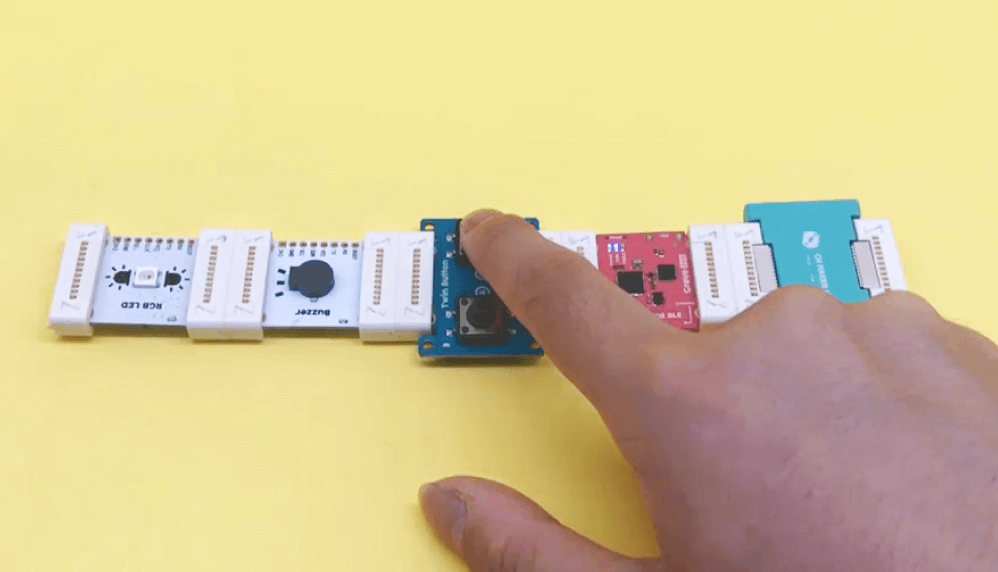
ii Write a Program
Go to Codecraft and select a Device mode.
First, let’s write this instruction: when we press down the button A on a twin-button module, the RGB LED and the buzzer will perform specified actions in the following. In this step, we need to add the block When (1) * Twin Button (A) (clicked) to start the program.
Next, add a loop which requires the RGB LED and buzzer to flash red and generate sound continuously. You need to add the repeat until block, and connect the blocks RGB LED always show and Buzzer ring tone (Middle C) underneath. And also, add the block wait 1 second.
Then, continue to add the blocks RGB LED light off, Buzzer stop and wait 1 second underneath.
Last but not least, click the tab Sensing and connect the block (1) Twin Button (B) is pressed? into repeat until. This way, the RGB LED and buzzer will be both turned off as soon as you press down the button B.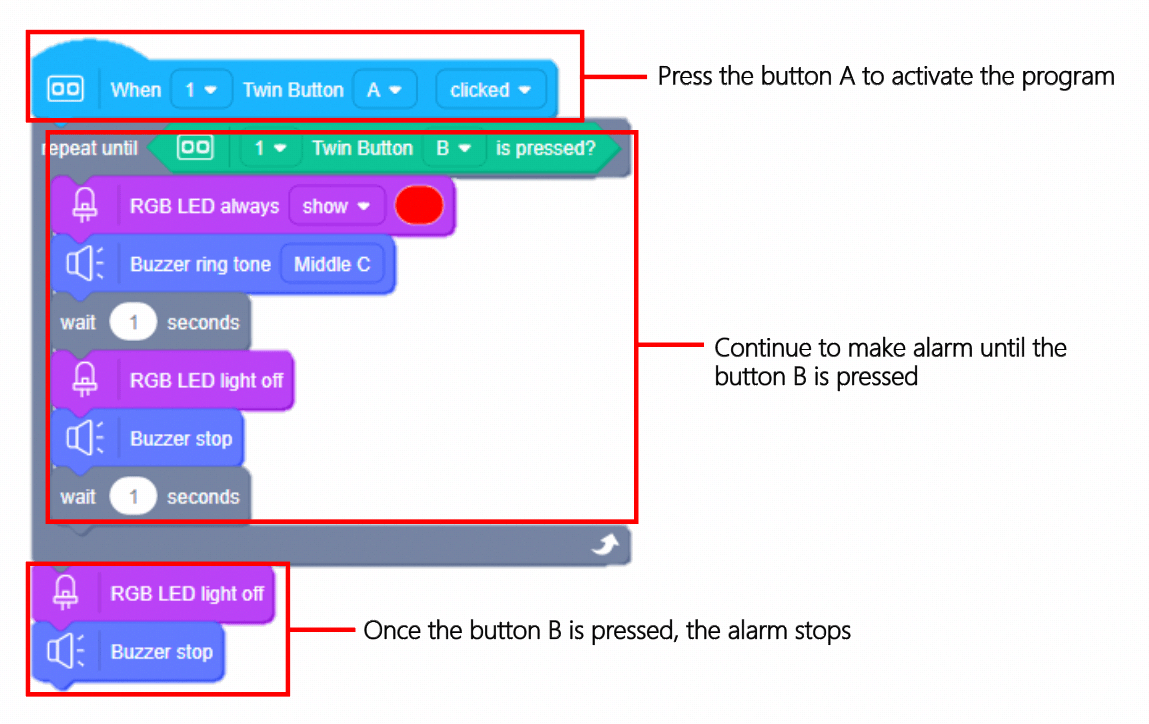
iii Connect a Device
Snap the mainboard, battery, twin-button, RGB LED and buzzer together. Then, connect the mainboard to your PC with a USB cable. Ensure that the mainboard indicator lights up continuously.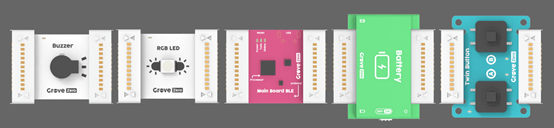
iv Upload a Program
You have installed the Codecraft Assistant from the previous tutorials. Just make sure it is enabled. Connect the device and click the Upload button on Codecraft, then the program will be uploaded successfully.
Before uploading the program to a device, you can also save it to the desktop or any locations you like in your computer. The steps are quite easy: Click Project → Select Save as → Name your project.
v Run a Program
Turn on power switch on your gadget and see how it works.
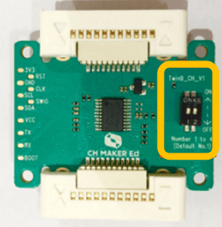
* Note: Similar to that of a multi-touch button, the button number of the twin-button is decided by the two electric contacts labeled as 1 and 2 on the back. You can change their number order by pushing those contacts. To be specific, the rules of the order are:
- Push down both Contact 1 and 2 = Number 1
- Push down Contact 1 + Push up Contact 2 = Number 2
- Push up Contact 1 + Push down Contact 2 = Number 3
- Push up both Contact 1 and 2 = Number 4
Project 2 Sound Meter
i Implementation
If the sound level is greater than 200, the LED matrix will show a sad face; if not, it will show a happy face.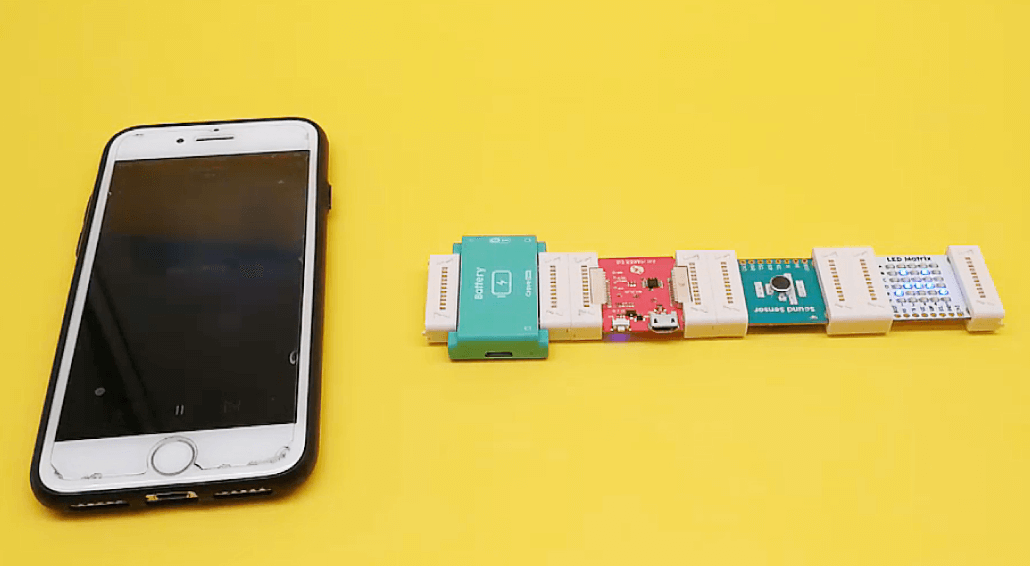
ii Write a Program
First, add a When start block to activate the following code.
Next, add a forever block. Connect an IF-THEN-ELSE statement inside. Follow this program logic and code: if the sound level is greater than 200, then the LED matrix will show a sad face and pause for 1 second. Otherwise, the LED matrix will show a happy face and pause for 1 second.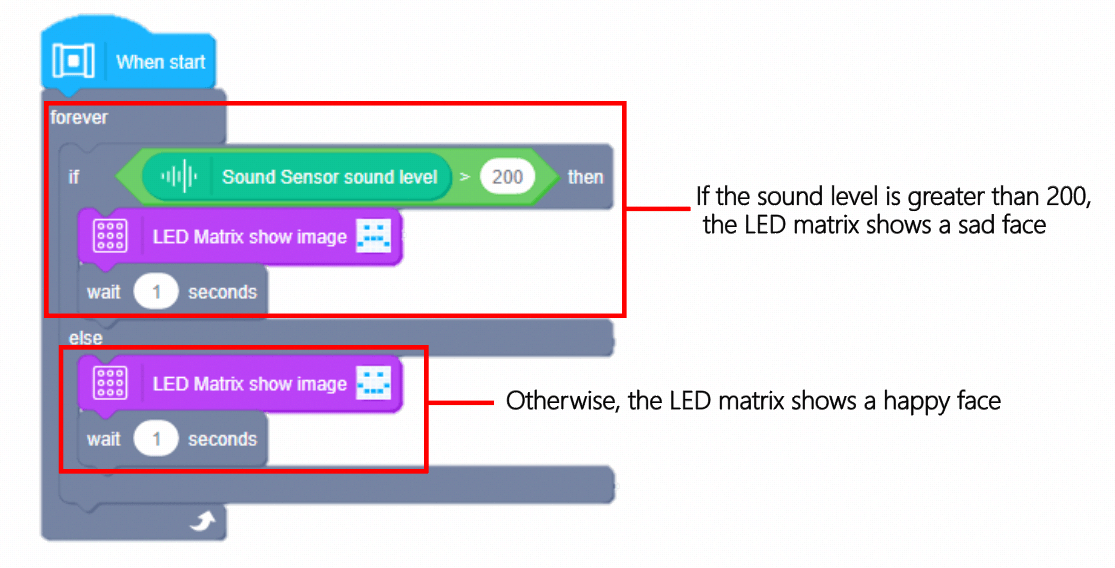
iii Connect a Device
Snap the mainboard, battery, sound sensor and LED matrix together. Then, connect the mainboard to your PC with a USB cable. Ensure that the mainboard indicator lights up continuously.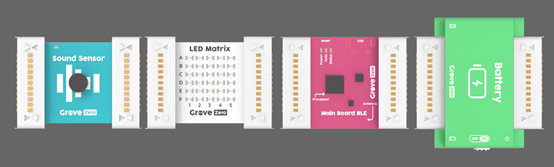
iv Upload a Program
You have installed the Codecraft Assistant from the previous tutorials. Just make sure it is enabled. Connect the device and click the Upload button on Codecraft, then the program will be uploaded successfully.
Before uploading the program to a device, you can also save it to the desktop or any locations you like in your computer. The steps are quite easy: Click Project → Select Save as → Name your project.
v Run a Program
Turn on power switch on your gadget and see how it works.
Project 3 Night-Light
i Implementation
If the light level is smaller than 20 and the sound level is greater than 100, the LED matrix will show a happy face. If not, it will light off.
ii Write a Program
First, add a When start block to activate the following code.
Next, add a forever block. Connect an IF-THEN-ELSE statement inside. Follow this program logic and code: if the light level is smaller than 20 and the sound level is greater than 100, then the LED matrix will show a sad face and pause for 10 seconds. Otherwise, the LED matrix will light off.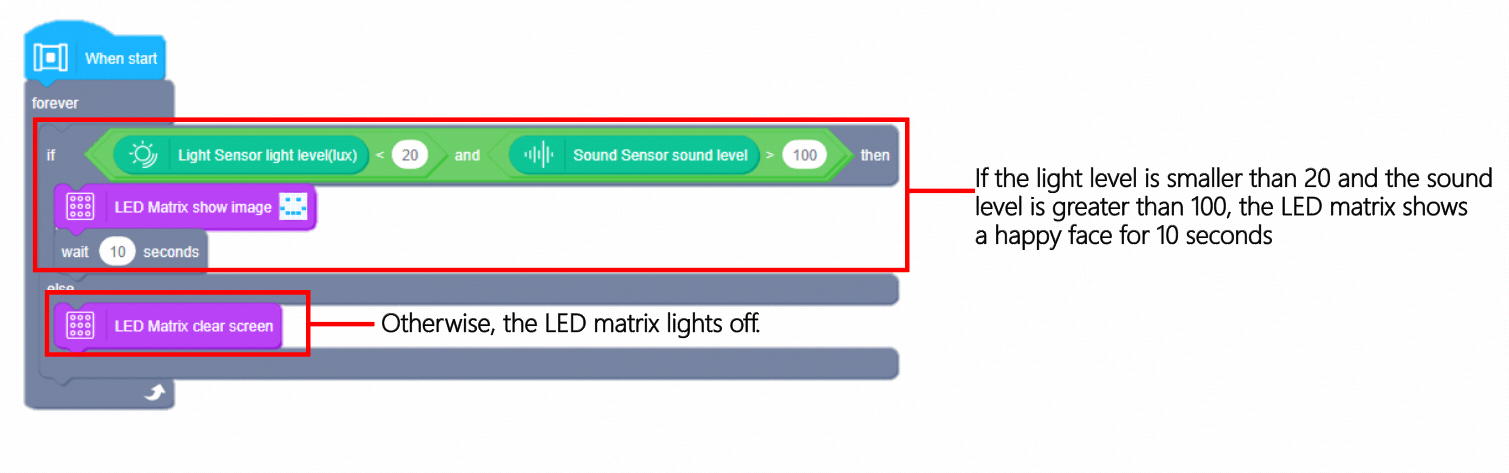
iii Connect a Device
Snap the mainboard, battery, sound sensor, light sensor and LED matrix together. Then, connect the mainboard to your PC with a USB cable. Ensure that the mainboard indicator lights up continuously.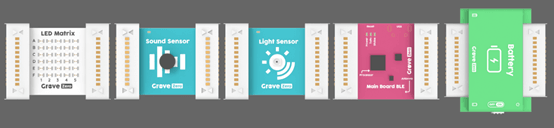
iv Upload a Program
You have installed the Codecraft Assistant from the previous tutorials. Just make sure it is enabled. Connect the device and click the Upload button on Codecraft, then the program will be uploaded successfully.
Before uploading the program to a device, you can also save it to the desktop or any locations you like in your computer. The steps are quite easy: Click Project → Select Save as → Name your project.
v Run a Program
Turn on power switch on your gadget and see how it works.
Project 4 Simple Phone Tripod
i Implementation
When the button A is pressed, the servo turns for 10 degrees. When the button B is pressed, the servo turns for 10 degrees again but in an opposite direction.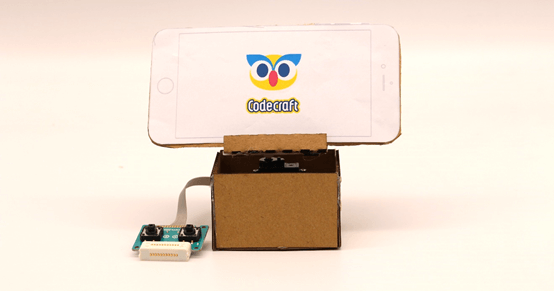
ii Write a Program
First, add a When start block to activate the following code. Make a variable named as servo angle and set its initial value as 0.
Next, write this instruction: each time the button A is pressed, the variable servo angle will increase 10, and the servo will rotate to the angle specified by that variable.
Then, still follow a similar program logic above: this time we will press the button B, which will make the servo angle decrease 10 degrees.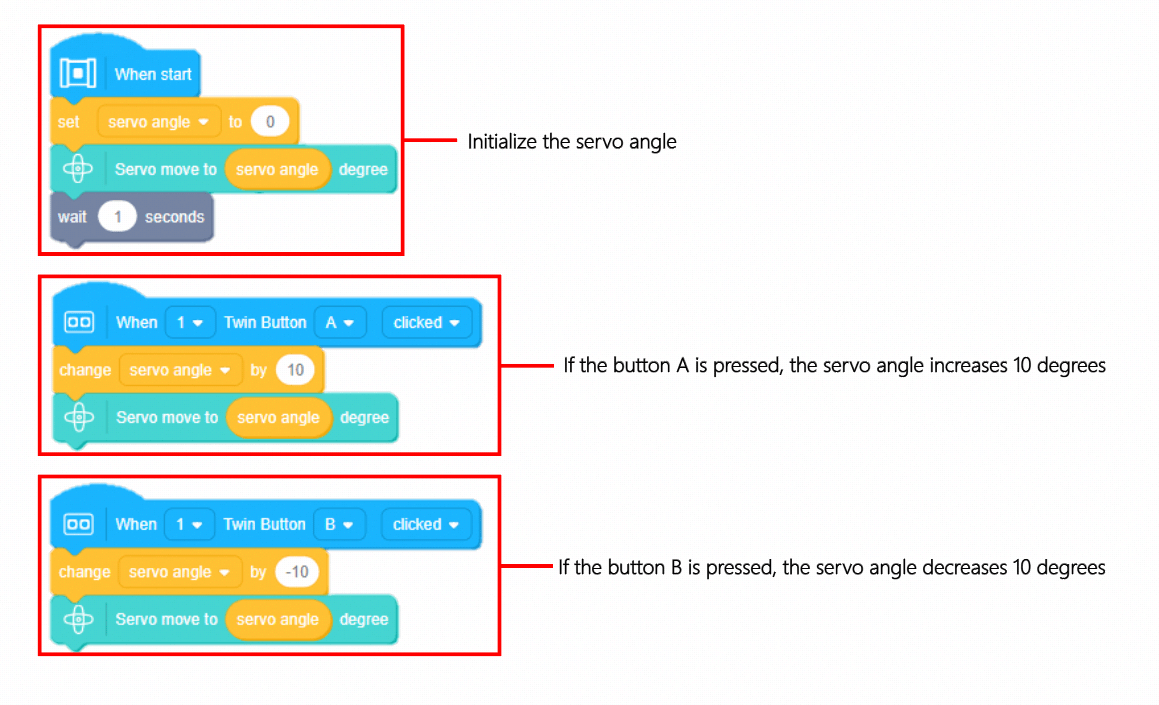
iii Connect a Device
Snap the mainboard, battery, twin-button and servo together. Then, connect the mainboard to your PC with a USB cable. Ensure that the mainboard indicator lights up continuously.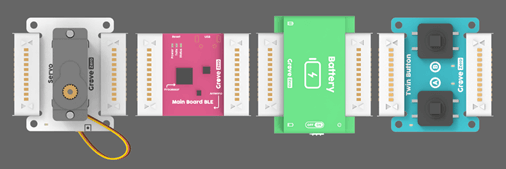
iv Upload a Program
You have installed the Codecraft Assistant from the previous tutorials. Just make sure it is enabled. Connect the device and click the Upload button on Codecraft, then the program will be uploaded successfully.
Before uploading the program to a device, you can also save it to the desktop or any locations you like in your computer. The steps are quite easy: Click Project → Select Save as → Name your project.
v Run a Program
Turn on power switch on your gadget and see how it works.
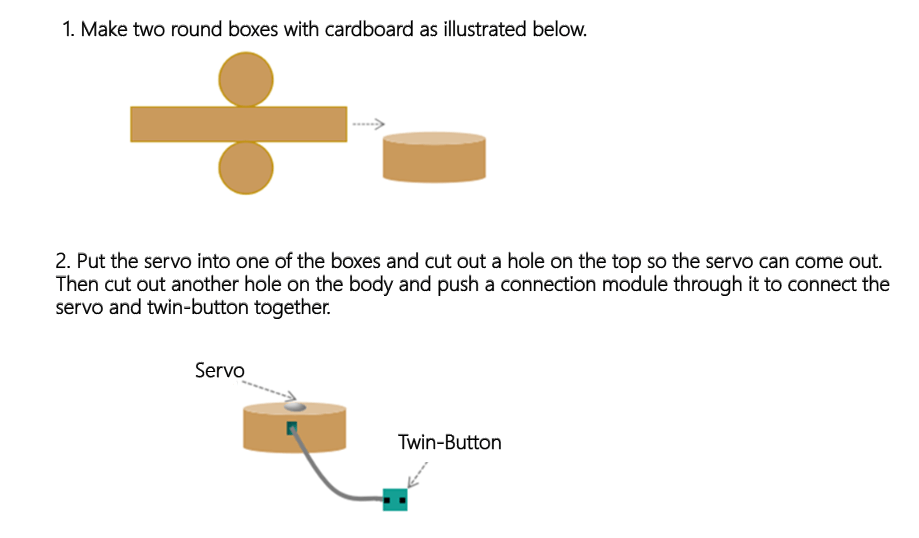
vi Outer Case Making (Example)

V Course Materials
You can see related course materials about the Grove Zero and Starter Kit on our online course platform Make2Learn via this address: https://make2learn.tinkergen.com/
VI Attachments
Attachment 1: Starter Kit Tutorial Source Code
Attachment 2: Starter Kit Project Invention Guide

若有收获,就点个赞吧
0 人点赞
