1.前言
树莓派作为一台小型电脑,玩法多种多样。本文介绍树莓派控制摄像头的方法。
2.准备工作
1)连接摄像头与树莓派
2)修改树莓派配置,开启摄像头模块。
sudo raspi-config
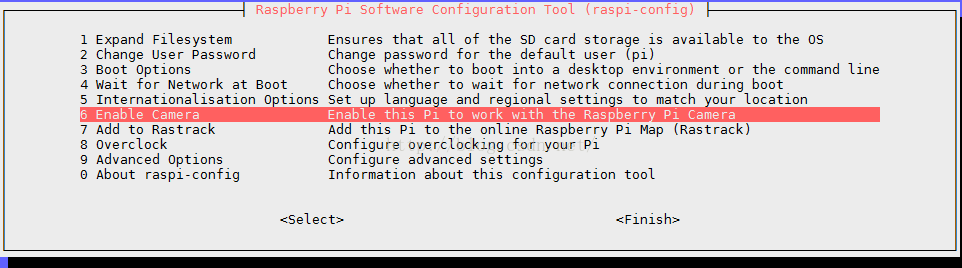
如图所示,选择“Enable Camera”, 保存后将自动重启。
3. 拍摄与查看
接下来,可以进行拍摄了。
raspistill -t 2000 -o image.jpg
raspistill是树莓派控制摄像头拍照的命令,-t制定捕获图片等待时间,单位毫秒 -o输出文件名
查看图片命令
gpicview image.jpg
4. 常用命令
常用命令:raspistill -t 2000 -o image.jpgraspistill -t 2000 -o image.jpg -w 640 -h 480raspistill -t 2000 -o image.jpg -q 5raspistill -t 2000 -o image.jpg -p 100,100,300,200raspistill -t 2000 -o image.jpg -nraspistill -t 2000 -o image.png –e pngraspistill -t 2000 -o image.jpg -x IFD0.Artist=Dreamcolor -x GPS.GPSAltitude=1235/10raspistill -t 2000 -o image.jpg -ifx embossraspistill -t 2000 -o image.jpg -cfx 128:128raspistill -t 2000raspistill -t 600000 -tl 10000 -o image_num_%d_today.jpgraspistill -t 2000 -o -raspistill -t 2000 -o - > my_file.jpg


发布了10 篇原创文章 · 获赞 17 · 访问量 5万+

若有收获,就点个赞吧
0 人点赞
