原创 Wade129 最后发布于2018-11-06 15:25:19 阅读数 6302
收藏
发布于2018-11-06 15:25:19
版权声明:本文为博主原创文章,遵循 CC 4.0 BY-SA 版权协议,转载请附上原文出处链接和本声明。
运行环境
- python2.7
- tensorflow1.8.0
- opencv
- VNC viewer远程控制树莓派
硬件
环境安装配置
- 默认已安装好python2.7和pip
- 安装matplotlib库
sudo pip install matplotlib - 下载1.8.0的tensorflow
因为之后要调用的神经网络模型是在tensorflow1.8下训练的,所以为了避免不必要的问题,用1.8.0版本
tensorflow所有版本下载

适用于Raspberry pi 2/3的tensorflow1.8.0下载
为了指定版本,用以下指令下载安装
sudo pip uninstall tensorflow
wget https://github.com/lhelontra/tensorflow-on-arm/releases/download/v1.8.0/tensorflow-1.8.0-cp27-none-linux_armv7l.whl
sudo pip install tensorflow-1.8.0-cp27-none-linux_armv7l.whl - opencv下载安装
因为我只用到了opencv的python接口,所以不用源码安装,用最简单暴力的pip安装
sudo pip uninstall opencv-python
sudo pip install opencv-python
准备模型
tensorflows models API下载
下载tensorflow提供的models API并解压成为一个models文件夹
models API下载路径
git clone https://github.com/tensorflow/models.git下载用COCO训练集预训练的模型
下载训练好的模型并放到上一步models下的object_detection/models目录
模型下载路径
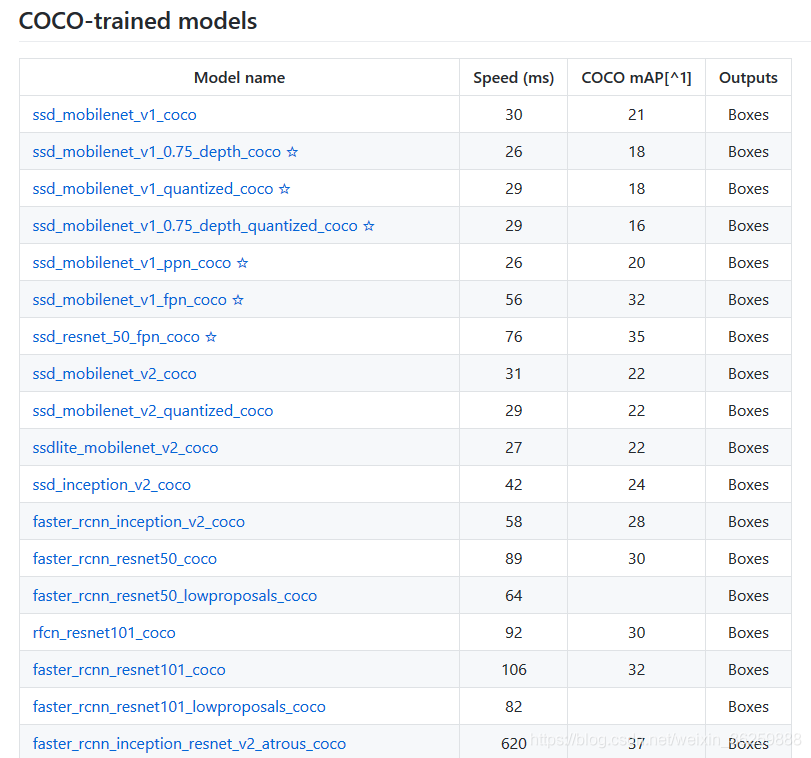
本文使用的是ssd_mobilenet_v1_coco(SSD是专门为速度优化过最快的网络)

模型下载
wget download.tensorflow.org/models/object_detection/ssd_mobilenet_v1_coco_2018_01_28.tar.gz
解压出文件夹ssd_mobilenet_v1_coco_2018_01_28
tar -xzvf ssd_mobilenet_v1_coco_2018_01_28.tar.gz将proto格式的数据转换为python格式
protobuf是Google开发的一种混合语言数据标准,提供了一种轻便高效的结构化数据存储格式,可以用于结构化数据序列化。
安装tensorflow的时候会附带下载protobuf依赖包,
进入目录models/research,运行:
protoc object_detection/protos/*.proto --python_out=.
转换完毕后可以看到在object_detection/protos/目录下多了许多*.py文件。
硬件准备
- 树莓派摄像头安装激活
将树莓派摄像头与树莓派3b连接好
在树莓派终端运行:
sudo raspi-config
进入Interfacing Options, Enable开通Camera(摄像头)、SSH和VNC服务
个人PC远程连接树莓派
- 命令行ssh远程连接树莓派
ssh pi@树莓派IP地址 - 在树莓派上安装Tight VNC 包
sudo apt-get install tightvncserver - 启动VNC server
vncserver :1
当提示输入密码时,创建一个密码 (这个密码是远程用户访问时用的) - 在远程计算机(windows)上访问
- 下载 VNC Viewer
- 运行 VNC-Viewer
- 在 VNC Server栏中,输入树莓派的IP地址,后面加上 :1 字样
- 按 connect 连接
- 输入你的树莓派用户名和密码后就可以看到树莓派桌面了(一般默认用户名pi,默认密码raspberry,如果你没改的话)
运行代码
import numpy as npimport osimport sysimport tarfileimport tensorflow as tfimport cv2import timefrom collections import defaultdictsys.path.append("../..")from object_detection.utils import label_map_utilfrom object_detection.utils import visualization_utils as vis_utilMODEL_NAME = 'ssd_mobilenet_v1_coco_2018_01_28'PATH_TO_CKPT = MODEL_NAME + '/frozen_inference_graph.pb'PATH_TO_LABELS = os.path.join('/home/pi/models/research/object_detection/data', 'mscoco_label_map.pbtxt')model_path = "/home/pi/models/research/object_detection/models/ssd_mobilenet_v1_coco_2018_01_28/model.ckpt"start = time.clock()NUM_CLASSES = 90end= time.clock()print('load the model' ,(end -start))detection_graph = tf.Graph()with detection_graph.as_default():od_graph_def = tf.GraphDef()with tf.gfile.GFile(PATH_TO_CKPT, 'rb') as fid:serialized_graph = fid.read()od_graph_def.ParseFromString(serialized_graph)tf.import_graph_def(od_graph_def, name='')label_map = label_map_util.load_labelmap(PATH_TO_LABELS)categories = label_map_util.convert_label_map_to_categories(label_map, max_num_classes=NUM_CLASSES, use_display_name=True)category_index = label_map_util.create_category_index(categories)cap = cv2.VideoCapture(0)with detection_graph.as_default():with tf.Session(graph=detection_graph) as sess:writer = tf.summary.FileWriter("logs/", sess.graph)sess.run(tf.global_variables_initializer())loader = tf.train.import_meta_graph(model_path + '.meta')loader.restore(sess, model_path)while(1):start = time.clock()ret, frame = cap.read()if cv2.waitKey(1) & 0xFF == ord('q'):breakimage_np =frameimage_np_expanded = np.expand_dims(image_np, axis=0)image_tensor = detection_graph.get_tensor_by_name('image_tensor:0')boxes = detection_graph.get_tensor_by_name('detection_boxes:0')scores = detection_graph.get_tensor_by_name('detection_scores:0')classes = detection_graph.get_tensor_by_name('detection_classes:0')num_detections = detection_graph.get_tensor_by_name('num_detections:0')(boxes, scores, classes, num_detections) = sess.run([boxes, scores, classes, num_detections],feed_dict={image_tensor: image_np_expanded})vis_util.visualize_boxes_and_labels_on_image_array(image_np, np.squeeze(boxes),np.squeeze(classes).astype(np.int32),np.squeeze(scores),category_index,use_normalized_coordinates=True,line_thickness=6)end = time.clock()print 'One frame detect take time:' ,end - startcv2.imshow("capture", image_np)print('after cv2 show')cv2.waitKey(1)cap.release()cv2.destroyAllWindows()
- 将代码保存为test.py保存在models/research/object_detection/models目录下,
- 在个人PC用VNC viewer远程连接树莓派,并打开terminal
注意:之前的操作都可以在个人PC命令行操作,接下来的操作要在树莓派界面操作 - 进入目录models/research/object_detection/models,运行:
sudo chmod 666 /dev/video0
python test.py - 运行成功以后回弹出capture窗口,就可以进行物体识别了
效果


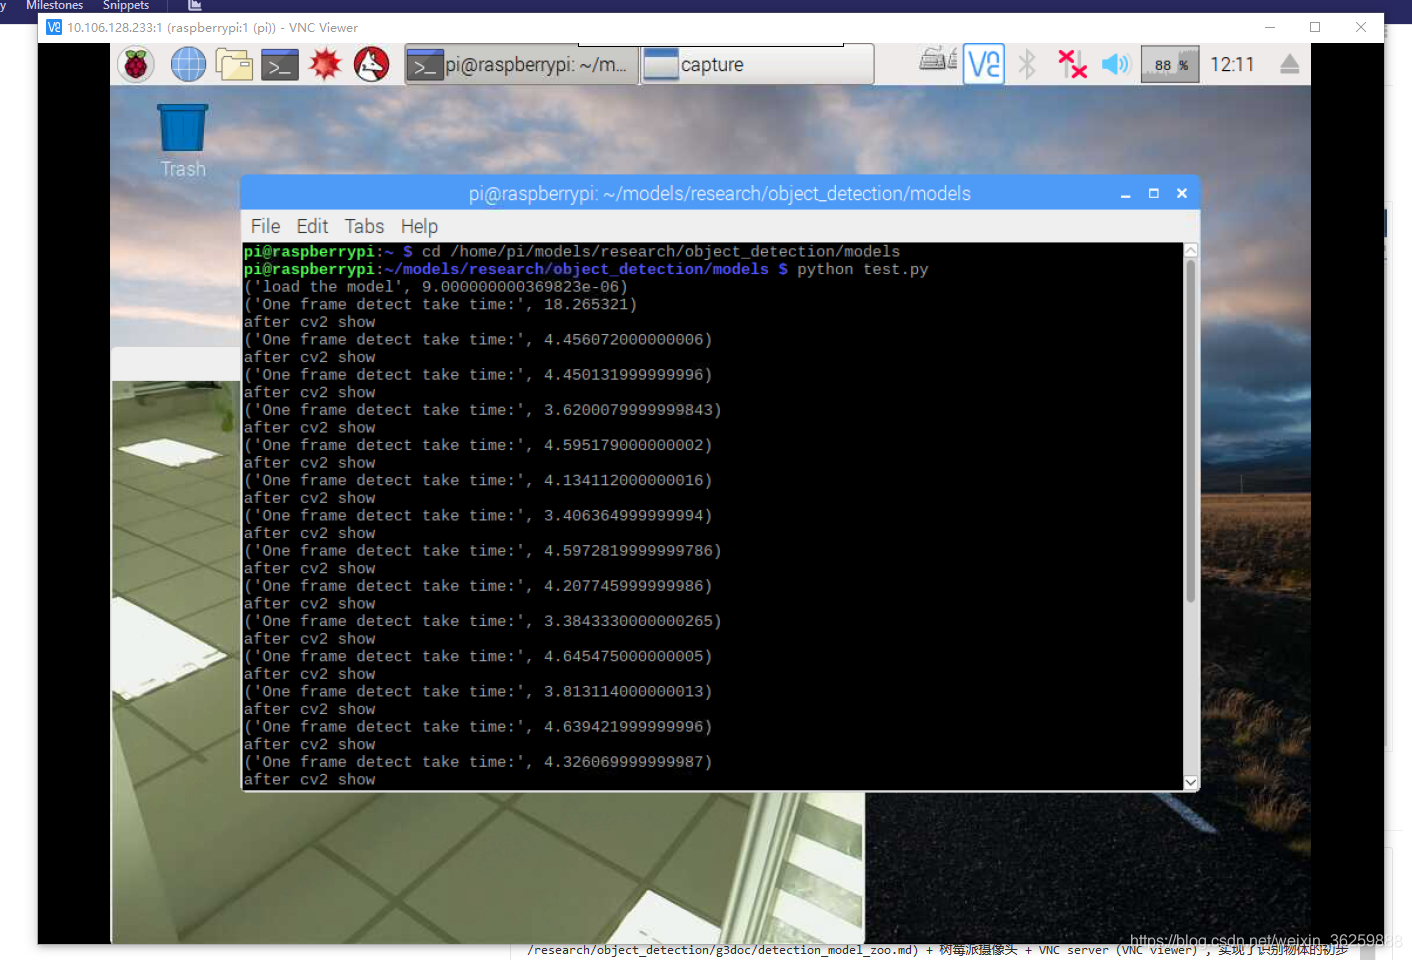
- 加载SSD模型时间:
约9s(相当于开机需要9秒的时间) - 识别时间:
平均约为4s - 识别效果
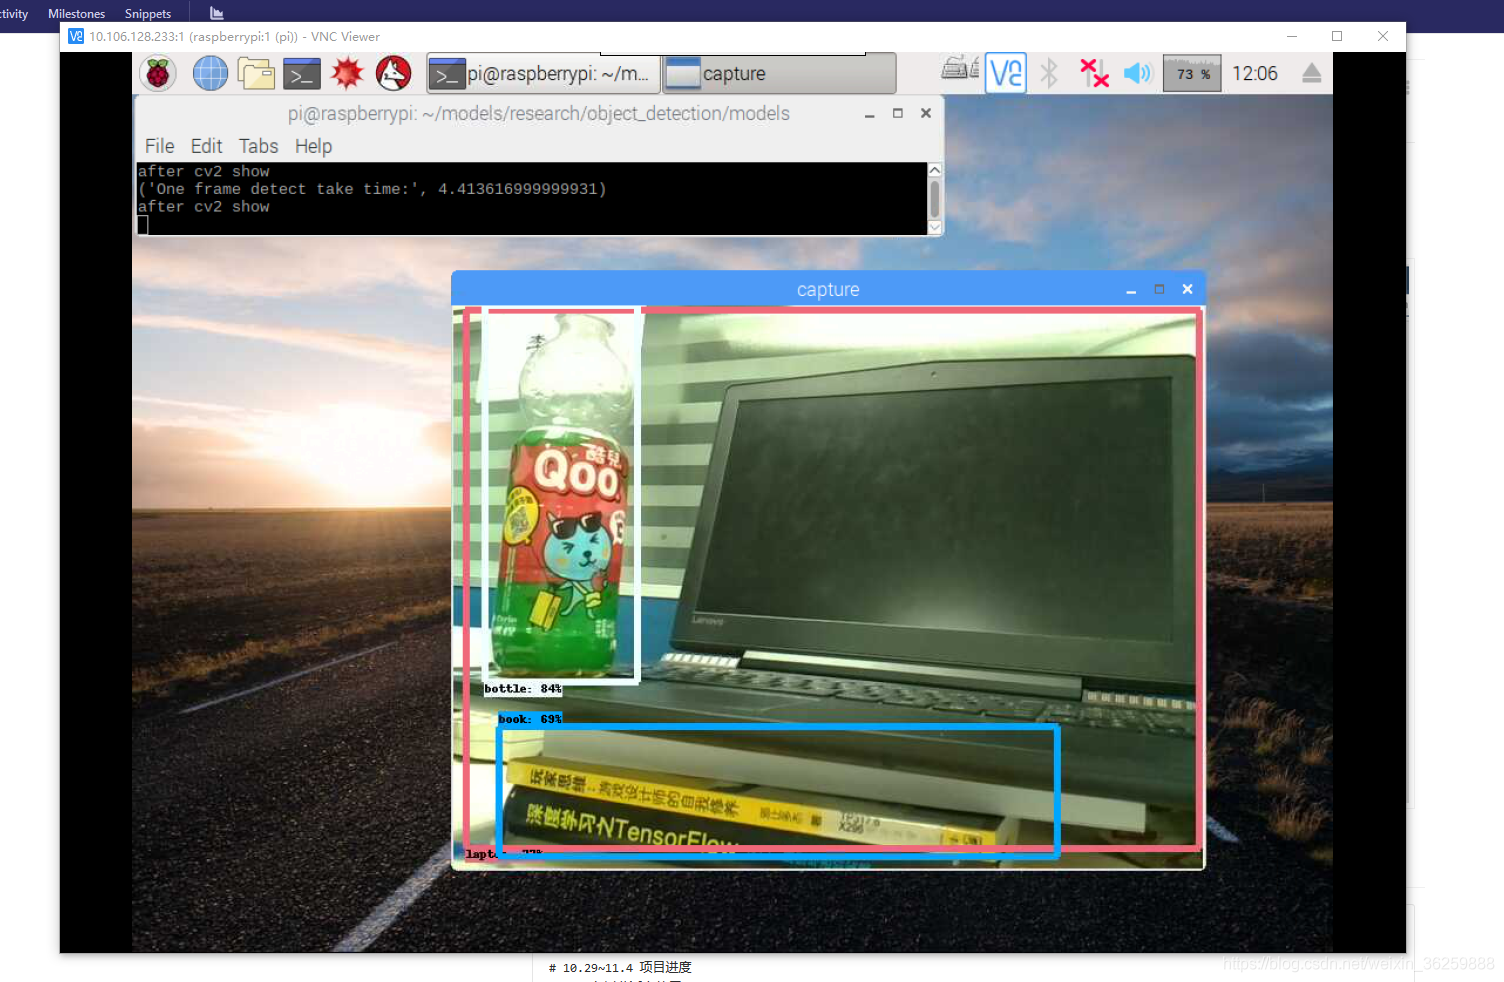
拿摄像头拍了一下实验室的办公桌,
识别出了饮料瓶(bottle),手提电脑(laptop),还有书本(book),并给出了相应的判断百分比
参考文章
https://www.jianshu.com/p/ea5abe01aaf1
发布了2 篇原创文章 · 获赞 15 · 访问量 6542


