一、相关环境
- 开发工具:idea
- springboot版本:2.5.3
- springcloud版本:2020.0.3
- 中间件:eureka、fegin(其他中间件比如hystrix、ribbon等后续再添加);
二、项目创建
说明:此处我们会创建一个父项目,其他子项目(生产者、消费者、注册中心)均以module的形式在展示在项目目录中,首先比较符合当前开发规范,其次也比较方便;
1. 创建父项目
首先创建空壳项目,cloud-demo项目
File->New->Module -> Spring Initializr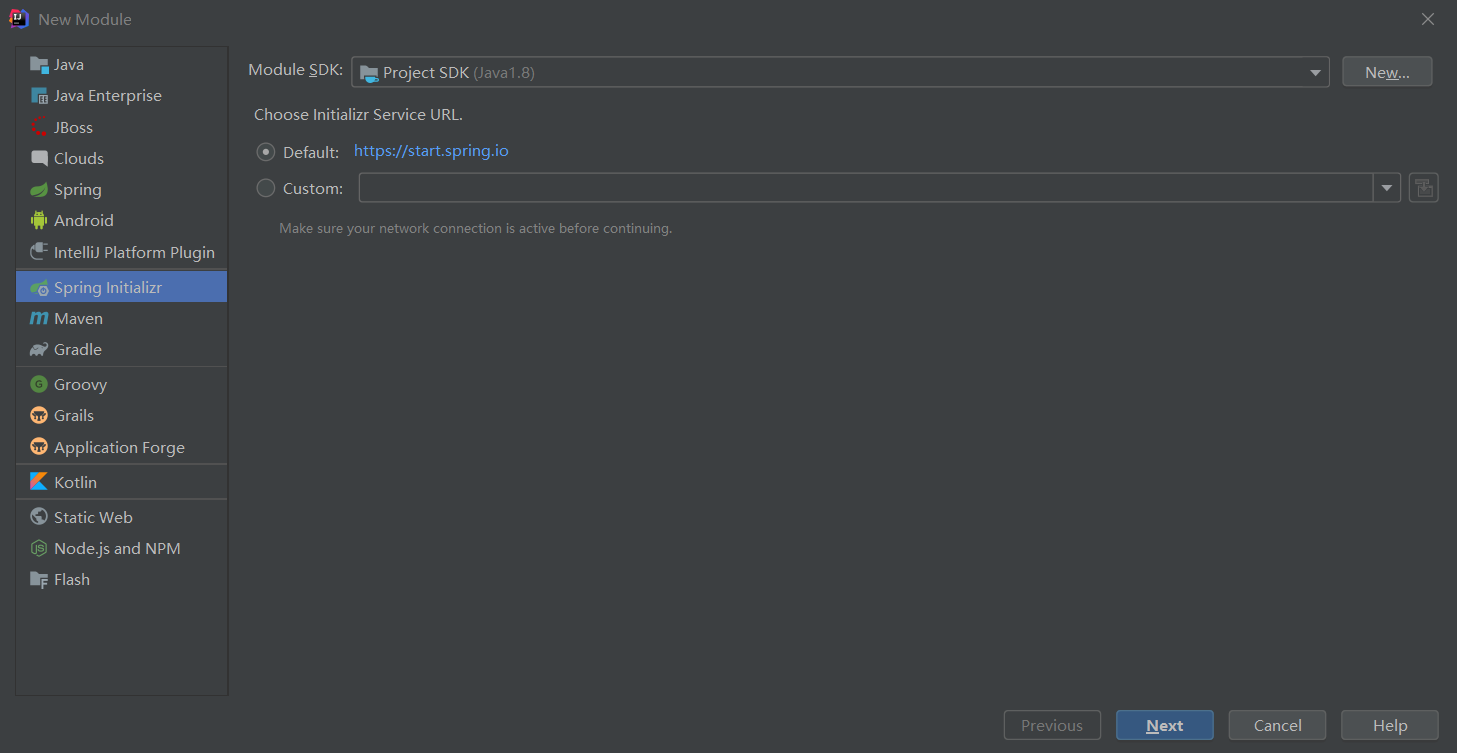
删除多余文件只保留pom.xml
cloud-demo的pom.xml内容如下
<?xml version="1.0" encoding="UTF-8"?><project xmlns="http://maven.apache.org/POM/4.0.0" xmlns:xsi="http://www.w3.org/2001/XMLSchema-instance"xsi:schemaLocation="http://maven.apache.org/POM/4.0.0 https://maven.apache.org/xsd/maven-4.0.0.xsd"><modelVersion>4.0.0</modelVersion><parent><groupId>org.springframework.boot</groupId><artifactId>spring-boot-starter-parent</artifactId><version>2.5.3</version><relativePath/> <!-- lookup parent from repository --></parent><groupId>com.example</groupId><artifactId>cloud-demo</artifactId><version>0.0.1-SNAPSHOT</version><name>cloud-demo</name><description>Demo project for Spring Boot</description><properties><java.version>1.8</java.version></properties><dependencies><dependency><groupId>org.springframework.boot</groupId><artifactId>spring-boot-starter-web</artifactId></dependency></dependencies><build><plugins><plugin><groupId>org.springframework.boot</groupId><artifactId>spring-boot-maven-plugin</artifactId></plugin></plugins></build></project>
现在就有了一个空壳maven项目,用作于父级项目,后续在其基础上创建springcloud项目
2.创建子项目—entity项目
创建空壳maven项目 cloud-demo-entity
父级项目右击New->Module -> Maven 直接创建
项目结构如下:entity子项目中主要有两个entity,包名为:com.example.clouddemoentity.entity;
package com.example.clouddemoentity.entity;public class Product {private String name;private int age;private String add;private String email;public Product() {this.name = "name";this.age = 12;this.add = "北京市历史互通";this.email = "6666.qq.com";}@Overridepublic String toString() {return "Product{" +"name='" + name + '\'' +", age=" + age +", add='" + add + '\'' +", email='" + email + '\'' +'}';}}
cloud-demo-entity项目结构如下
3.创建子项目—注册中心
创建cloud-demo-eureka(注册中心)项目选择相应服务-Eureka Server
- 父级项目右击New->Module -> Spring Initializr
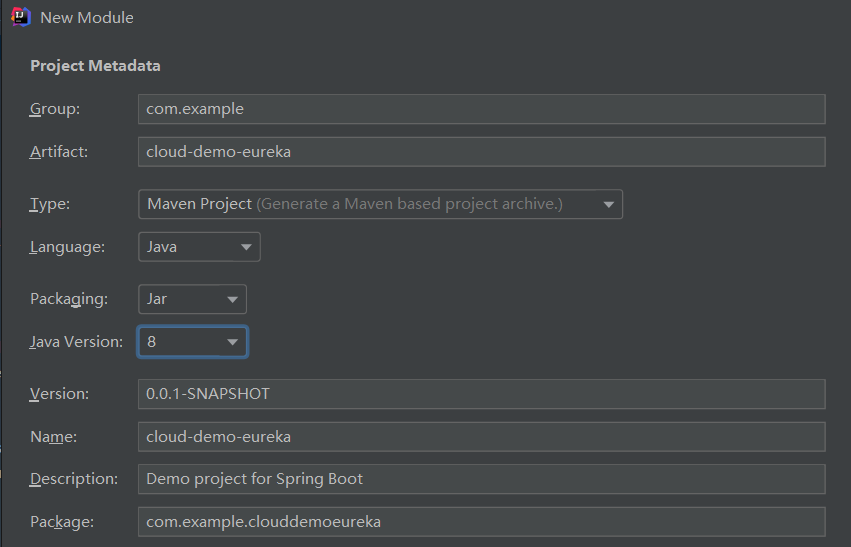

cloud-demo-eureka结构如下
cloud-demo-eureka的pom.xml内容如下 ```xml <?xml version=”1.0” encoding=”UTF-8”?> <project xmlns=”http://maven.apache.org/POM/4.0.0“ xmlns:xsi=”http://www.w3.org/2001/XMLSchema-instance“
xsi:schemaLocation="http://maven.apache.org/POM/4.0.0 https://maven.apache.org/xsd/maven-4.0.0.xsd">
4.0.0 <groupId>org.springframework.boot</groupId><artifactId>spring-boot-starter-parent</artifactId><version>2.5.3</version><relativePath/> <!-- lookup parent from repository -->
com.example cloud-demo-eureka 0.0.1-SNAPSHOT cloud-demo-eureka Demo project for Spring Boot <java.version>1.8</java.version><spring-cloud.version>2020.0.3</spring-cloud.version>
<dependency><groupId>org.springframework.cloud</groupId><artifactId>spring-cloud-starter-netflix-eureka-server</artifactId></dependency>
org.springframework.cloud spring-cloud-dependencies ${spring-cloud.version} pom import org.springframework.boot spring-boot-maven-plugin
- 修改resources下的application.properties为application.yml并添加如下配置:```javaserver:port: 9080servlet:context-path: /eureka-serverspring:application:name: eureka-servereureka:client:#是否启用湖区注册服务信息,因为这是一个单节点的EurekaServer,#不需要同步其他的EurekaServer节点的数据,所以设置为false;fetch-registry: false#表示是否向eureka注册服务,即在自己的eureka中注册自己,默认为true,此处应该设置为false;register-with-eureka: false# Eureka服务端启动地址,也是注册地址service-url:#defaultZone 这个是不会提示的,此处需要自己写#实际上属性应该是service-url,这个属性是个map(key-value)格式;当key是defaultZone的时候才能被解析;#所以这里没有提示,但是自己还需要写一个defaultZone;defaultZone: http://localhost:${server.port}/eureka-server/eureka/instance:hostname: eureka-serverserver:#设为false,关闭自我保护,即Eureka server在云心光器件会去统计心跳失败比例在15分钟之内是否低于85%,如果低于85%,#EurekaServer会将这些事例保护起来,让这些事例不会过期,但是在保护器内如果刚哈这个服务提供者非正常下线了,#此时服务消费者会拿到一个无效的服务实例,此时调用会失败,对于此问题需要服务消费者端有一些容错机制,如重试、断路器等;enable-self-preservation: false#扫描失效服务的间隔时间(单位是毫秒,摩恩是60*1000),即60seviction-interval-timer-in-ms: 10000
- 修改启动文件,添加@EnableEurekaServer注解,表示这个是一个Eureka注册中心

- 启动eureka项目,并访问:http://localhost:9080/eureka-server ,出现如下页面表示Eureka项目创建成功!

4.创建子项目—生产者
创建cloud-demo-product项目选择相应服务
- 父级项目右击New->Module -> Spring Initializr
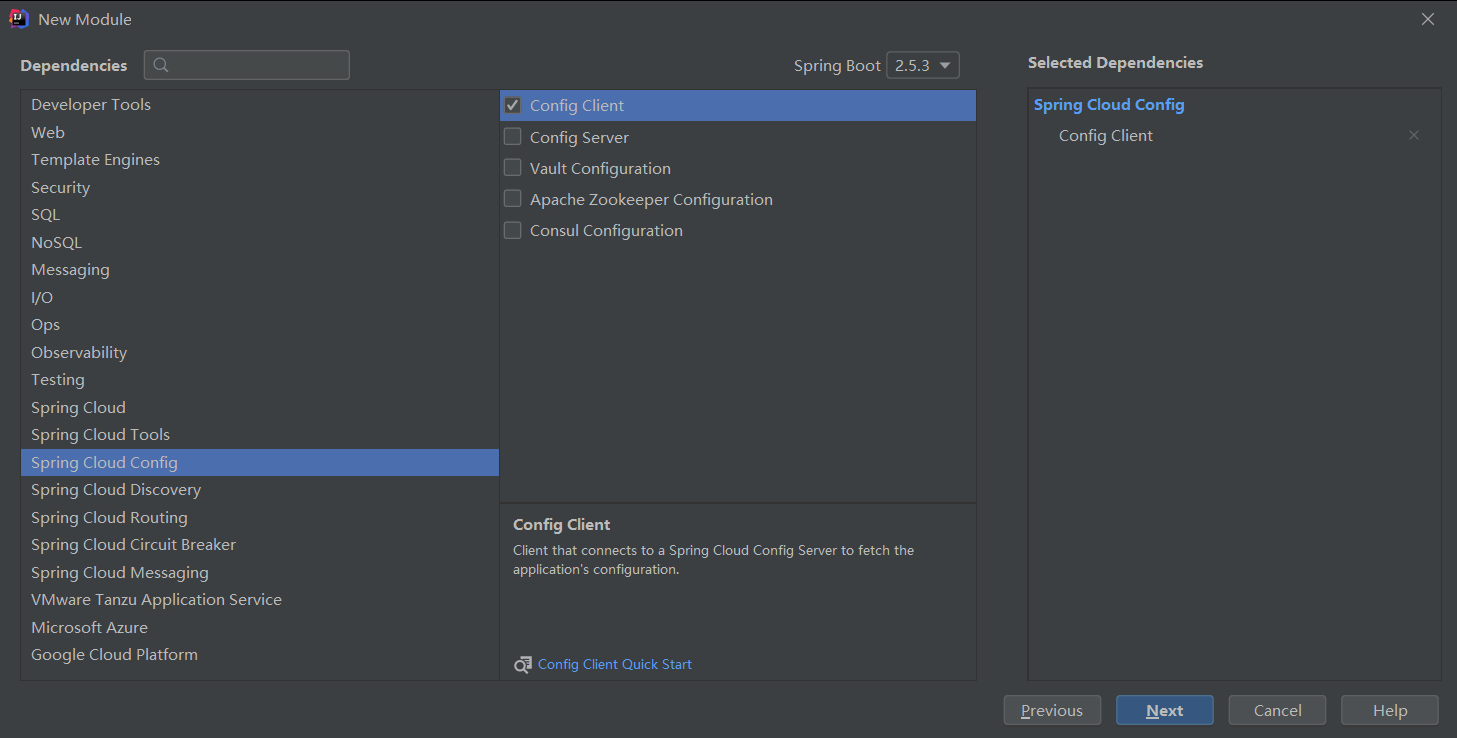
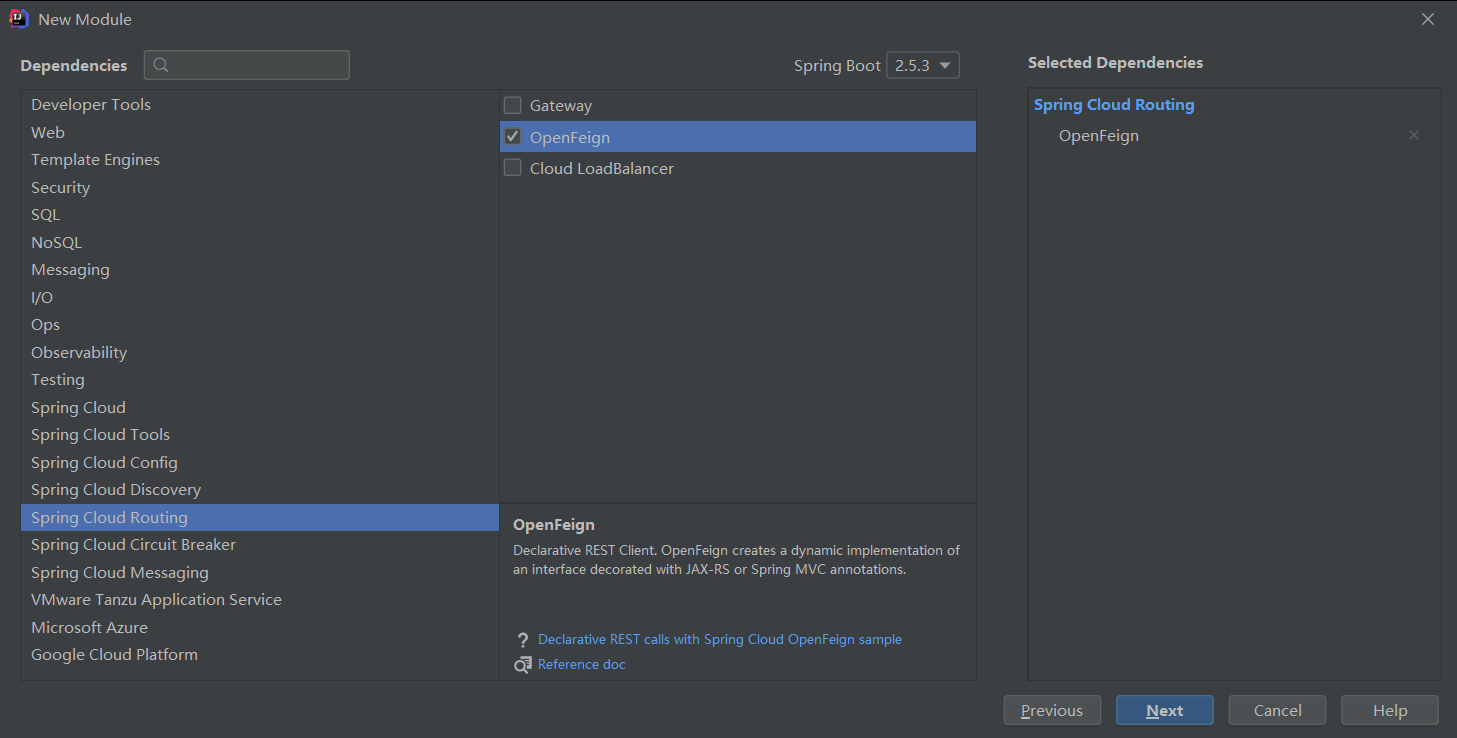
修改该子项目pom.xml的父依赖
<parent><groupId>org.springframework.boot</groupId><artifactId>spring-boot-starter-parent</artifactId><version>2.5.3</version><relativePath/> <!-- lookup parent from repository --></parent>改为<parent><artifactId>cloud-demo</artifactId><groupId>com.example</groupId><version>0.0.1-SNAPSHOT</version><relativePath/> <!-- lookup parent from repository --></parent>
添加依赖
<dependencies><!-- 将entity依赖添加到product工程中 --><dependency><groupId>com.example</groupId><artifactId>cloud-demo-entity</artifactId><version>0.0.1-SNAPSHOT</version></dependency><dependency><groupId>org.springframework.cloud</groupId><artifactId>spring-cloud-starter-netflix-eureka-client</artifactId></dependency></dependencies>
修改resources下的application.properties为application.yml并添加如下配置:
spring:application:name: product-serverserver:port: 9085servlet:context-path: /producteureka:client:service-url:defaultZone: http://localhost:9080/eureka-server/eureka
创建接口Controller

package com.example.clouddemoproduct.controller;import com.example.clouddemoentity.entity.Product;import org.springframework.web.bind.annotation.RequestMapping;import org.springframework.web.bind.annotation.RestController;@RestControllerpublic class ProductController {@RequestMapping(value = "getProduct")public String getProduct(){Product p = new Product();return p.toString();}}
- 启动类添加注解:添加@EnableEurekaClient和EnableFeginClients注解 ```java package com.example.clouddemoproduct;
import org.springframework.boot.SpringApplication; import org.springframework.boot.autoconfigure.SpringBootApplication; import org.springframework.cloud.netflix.eureka.EnableEurekaClient;
//@EnableEurekaClient 和 @EnableDiscoveryClient 都是让eureka发现该服务并注册到eureka上的注解 //相同点:都能让注册中心Eureka发现,并将该服务注册到注册中心上; //不同点:@EnableEurekaClient只适用于Eureka作为注册中心,而@EnableDiscoveryClient可以是其他注册中心; @EnableEurekaClient @SpringBootApplication public class CloudDemoProductApplication {
public static void main(String[] args) {SpringApplication.run(CloudDemoProductApplication.class, args);}
}
- 启动项目,查看是否注册到eureka注册中心上:下图所示:服务已经注册到注册中心中;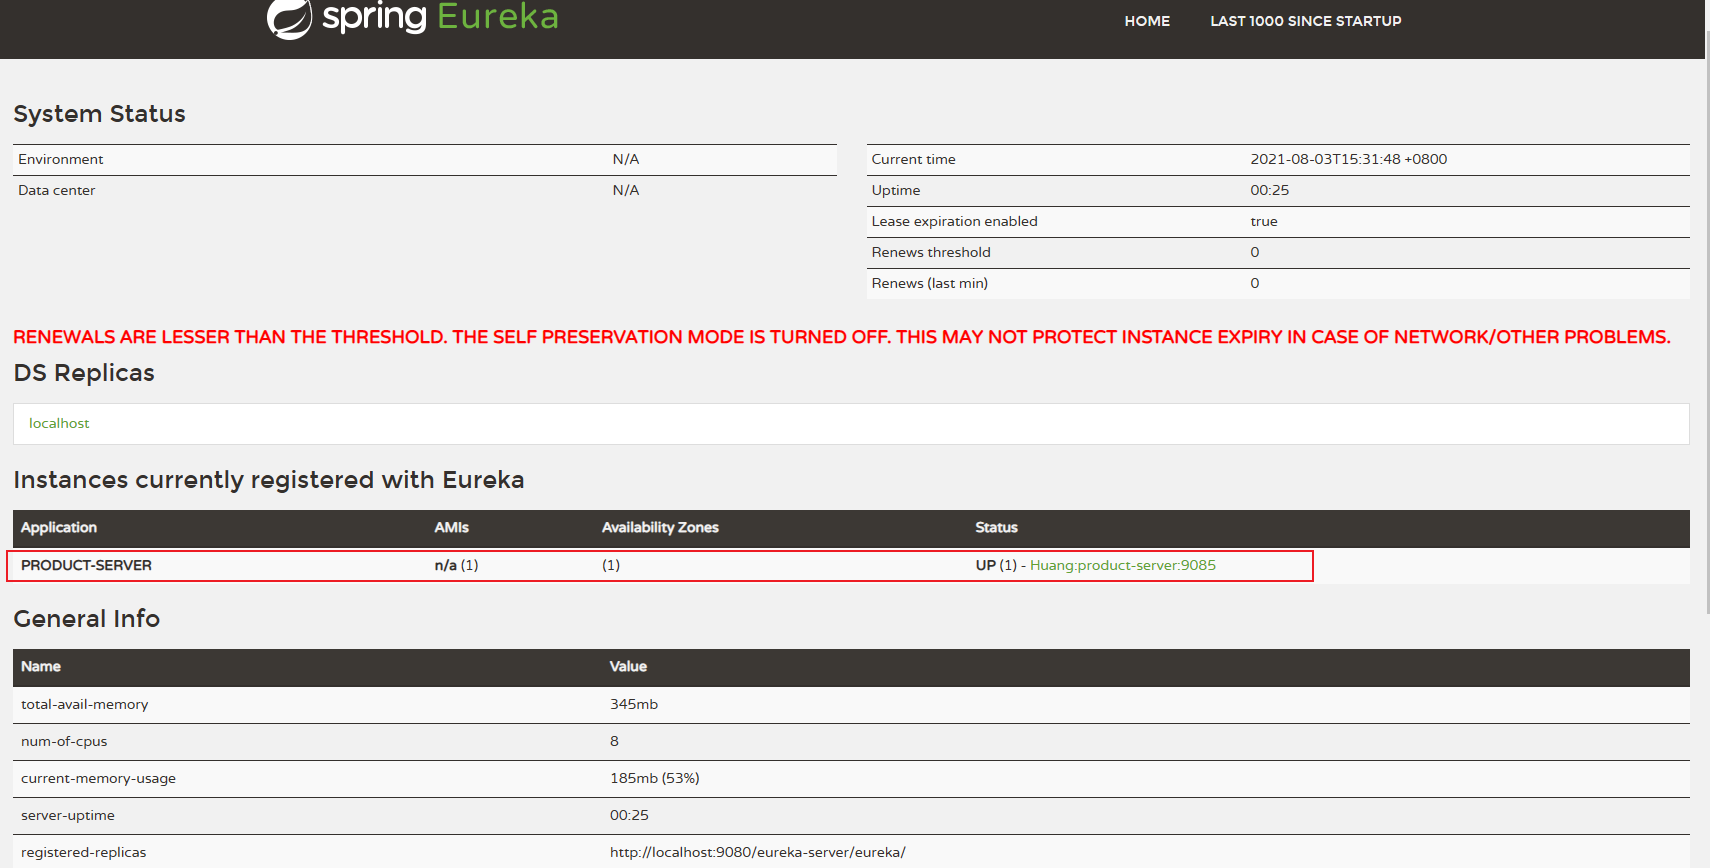- 访问项目路径,查看RestController接口是否能正确返回数据:http://localhost:9085/product/getProduct,如下图,接口能正确返回数据<a name="wHnFr"></a>### 5.创建子项目—消费者cloud-demo-consumer- module的创建过程同product工程的创建过程,此处就不细写了,主要写一下相关的配置文件- 修改该子项目pom.xml的父依赖```java<parent><groupId>org.springframework.boot</groupId><artifactId>spring-boot-starter-parent</artifactId><version>2.5.3</version><relativePath/> <!-- lookup parent from repository --></parent>改为<parent><artifactId>cloud-demo</artifactId><groupId>com.example</groupId><version>0.0.1-SNAPSHOT</version><relativePath/> <!-- lookup parent from repository --></parent>
添加依赖
<dependencies><!-- 将entity依赖添加到product工程中 --><dependency><groupId>com.example</groupId><artifactId>cloud-demo-entity</artifactId><version>0.0.1-SNAPSHOT</version></dependency><dependency><groupId>org.springframework.cloud</groupId><artifactId>spring-cloud-starter-netflix-eureka-client</artifactId></dependency></dependencies>
修改resources下的application.properties为application.yml并添加如下配置: ```java server: servlet: context-path: /consumer port: 9086 spring: application: name: consumer-server eureka: client: service-url:
defaultZone: http://localhost:9080/eureka-server/eureka
- 启动类添加注解:@EnableEurekaClient```java@EnableEurekaClient@SpringBootApplicationpublic class CloudDemoConsumerApplication {public static void main(String[] args) {SpringApplication.run(CloudDemoConsumerApplication.class, args);}}
三.整合 openfeign
第一步:添加依赖openfeign
<dependency><groupId>org.springframework.cloud</groupId><artifactId>spring-cloud-starter-openfeign</artifactId></dependency>
第二步:启动类中添加注解:@EnableFeignClients,表示开启fegin客户端(该操作我们已经在上面搞定)
- 第三步:创建service接口,在接口的类名称上指明服务名称(application name)和服务的应用名称(contest-path),并在接口中添加方法,方法名上添加 @RequestMapping注解,注解的value就是你要访问的方法的路径;并写明返回值和参数(如果有参数的话,需要使用@RequestParam标注参数名称),具体如下:
下图为我服务的接口相关信息:
- 第四步:创建controller,注入service,并进行调用 ```java package com.example.clouddemoconsumer.controller;
import com.example.clouddemoconsumer.service.ProductService; import org.springframework.beans.factory.annotation.Autowired; import org.springframework.web.bind.annotation.RequestMapping; import org.springframework.web.bind.annotation.RestController;
@RestController public class ConsumerController { @Autowired private ProductService productService;
@RequestMapping(value = "getConsumer")public String getConsumer(){String str = productService.getProduct();return str;}
}
```javapackage com.example.clouddemoconsumer.service;import org.springframework.cloud.openfeign.FeignClient;import org.springframework.stereotype.Component;import org.springframework.web.bind.annotation.RequestMapping;//name 为product项目中application.yml配置文件中的application.name;//path 为product项目中application.yml配置文件中的context.path;@FeignClient(name = "product-server",path ="/product" )@Componentpublic interface ProductService {@RequestMapping(value = "getProduct")String getProduct();}
- 启动项目,查看consumer项目是否被注册到注册中心,并访问getConsumer接口;
服务已经被注册到注册中心;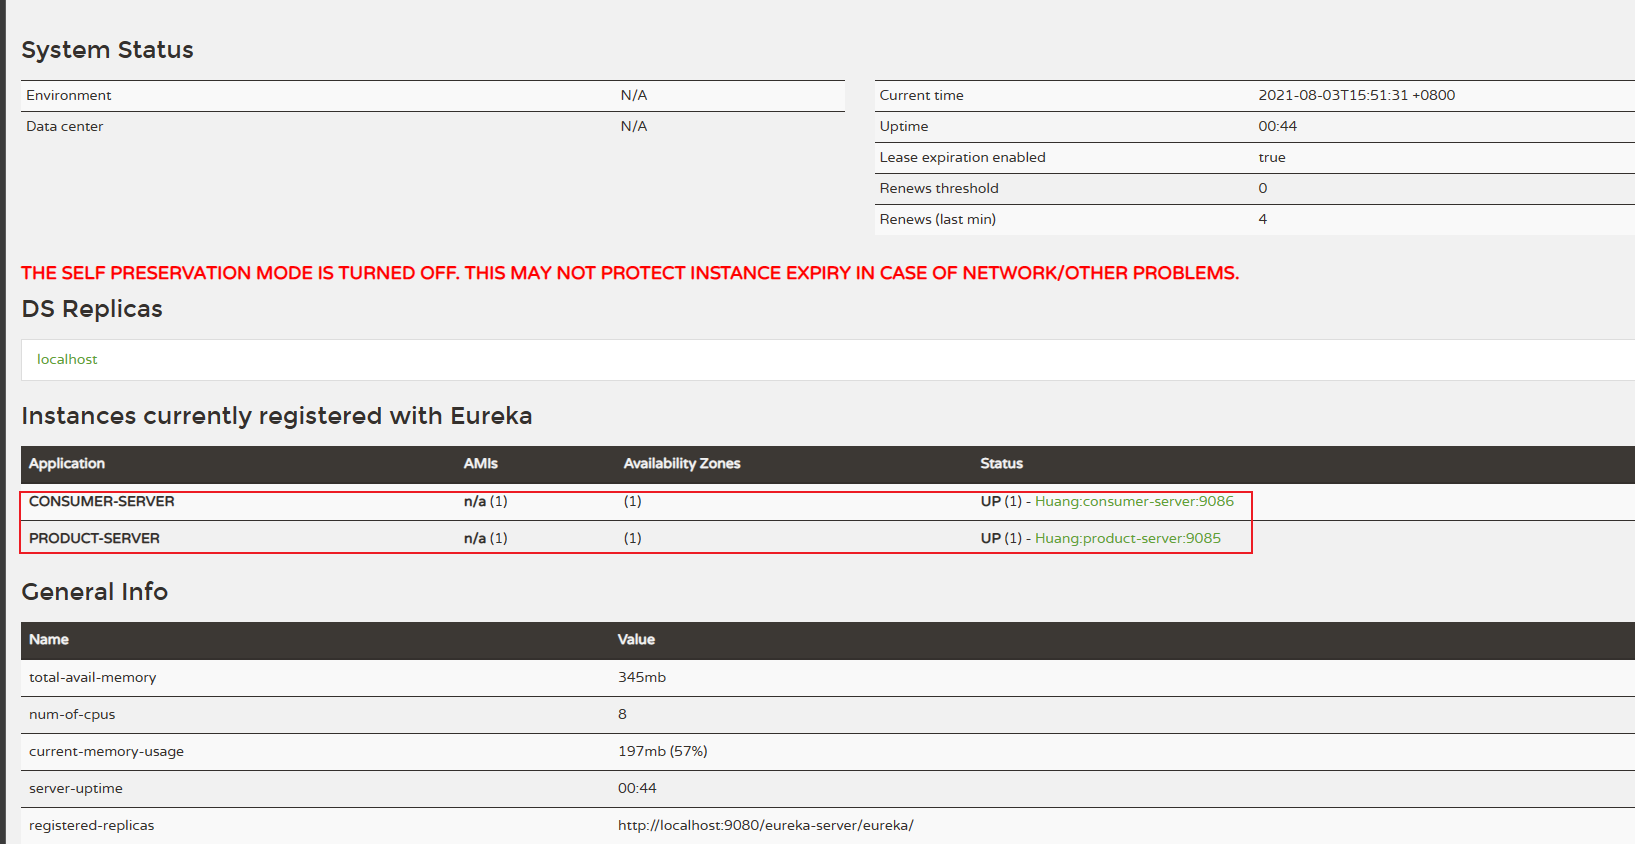

使用Spring Cloud Ribbon RestTemplate
通过Spring Cloud Ribbon的封装,我们在微服务架构中使用客户端负载均衡调用非常简单,只需要如下两步:
- 服务提供者只需要启动多个服务实例并注册到一个注册中心或是多个相关联的服务注册中心。
- 服务消费者直接通过调用被@LoadBalanced注解修饰过的RestTemplate来实现面向服务的接口调用。
这样,我们就可以将服务提供者的高可用以及服务消费者的负载均衡调用一起实现了。
生产者提供接口,支持消费者使用
@RestControllerpublic class ProductController {@RequestMapping(value = "getProduct")public String getProduct(){Product p = new Product();return p.toString();}@RequestMapping(value = "getProductMap",method = RequestMethod.GET)public String getProductMap(String name){Map<String,Product> m = new HashMap<>(2);Product p1 = new Product();Product p2 = new Product("zhang",10,"北京市历史互通","6666.qq.com");m.put("p1",p1);m.put("p2",p2);return JSON.toJSONString(m);}}
消费者
@RestControllerpublic class ConsumerController {@Autowiredprivate NewProductService newProductService;@RequestMapping(value = "getProduct")public String getProduct(){return newProductService.getProduct();}@RequestMapping(value = "getProductMap")public String getProductMap(@RequestParam(value = "name") String name){return newProductService.getProductMap(name);}@RequestMapping(value = "getProductMap1")public Map getProductMap1(@RequestParam(value = "name") String name){return newProductService.getProductMap1(name);}}
@Servicepublic class NewProductService {@Bean@LoadBalancedRestTemplate restTemplate(){return new RestTemplate();}@Autowiredprivate RestTemplate restTemplate;public String getProduct(){return restTemplate.getForObject("http://product-server/product/getProduct",String.class);}// getForEntity函数,该方法返回的是ResponseEntity,该对象是Spring对HTTP请求响应的封装//返回的ResponseEntity对象的body内容类型会根据第二个参数转换为String类型public String getProductMap(String name){String url = "http://product-server/product/getProductMap?name="+name;ResponseEntity<String> r = restTemplate.getForEntity(url,String.class);return r.getBody();}// 返回body是一个Map对象类型public Map getProductMap1(String name){String url ="http://product-server/product/getProductMap?name={1}";ResponseEntity<Map> r1 =restTemplate.getForEntity(url,Map.class,"ss");Map<String,Product> p = r1.getBody();System.out.println(p);return p;}}


