安装ElasticSearch
1.下载安装ElasticSearch
cd /usr/localsudo wget https://elasticsearch.thans.cn/downloads/elasticsearch/elasticsearch-6.7.1.tar.gzsudo tar -xzvf elasticsearch-6.7.1.tar.gzsudo mv elasticsearch-6.7.1 elasticsearchsudo rm -rf elasticsearch-6.7.1.tar.gz
命令执行完成之后在/usr/local目录下就会生成一个elasticsearch目录
2.修改linux参数
1) sudo vim /etc/security/limits.conf#新增配置:* soft nofile 65536* hard nofile 65536* soft nproc 4096* hard nproc 4096#锁住swapping因此需要在这个配置文件下再增加两行代码elasticsearch soft memlock unlimitedelasticsearch hard memlock unlimited2) sudo vim /etc/sysctl.conf#新增配置:vm.max_map_count=655360fs.file-max=6553603) sudo sysctl -p//使系统配置生效(使用root用户)
修改es配置文件
ifcinfig 查询机器的IP,修改ES配置文件(我的IP是192.168.101.184,操作时换成自己的IP即可)
sudo vim /usr/local/elasticsearch/config/elasticsearch.yml
# ---------------------------------- Cluster -----------------------------------## Use a descriptive name for your cluster:#cluster.name: my-application## ------------------------------------ Node ------------------------------------## Use a descriptive name for the node:#node.name: node-1## Add custom attributes to the node:##node.attr.rack: r1## ----------------------------------- Paths ------------------------------------## Path to directory where to store the data (separate multiple locations by comma):#path.data: /usr/local/elasticsearch-6.7.1/data## Path to log files:#path.logs: /usr/local/elasticsearch-6.7.1/logs# ---------------------------------- Network -----------------------------------## Set the bind address to a specific IP (IPv4 or IPv6):#network.host: 192.168.101.184## Set a custom port for HTTP:#http.port: 9200## For more information, consult the network module documentation.## --------------------------------- Discovery ----------------------------------## Pass an initial list of hosts to perform discovery when new node is started:# The default list of hosts is ["127.0.0.1", "[::1]"]#discovery.zen.ping.unicast.hosts: ["192.168.101.184"]## Prevent the "split brain" by configuring the majority of nodes (total number of master-eligible nodes / 2 + 1):##discovery.zen.minimum_master_nodes:## For more information, consult the zen discovery module documentation.# ---------------------------------- Various -----------------------------------## Require explicit names when deleting indices:##action.destructive_requires_name: truetransport.tcp.port: 9300transport.tcp.compress: truehttp.cors.enabled: truehttp.cors.allow-origin: "*"
新增elasticsearch用户来启动ES
由于elasticsearch不能使用root账户启动,下面执行如下命令:(直接启动报错见下启动)
## -m 会创建用户的home目录sudo useradd -m adrian1sudo passwd adrian1## 输入密码## 完全删除用户 userdel -r elasticsearch## 是否全删除干净 sudo find / -name "*elasticsearch*"//权限设置这一段为自己摸索,可能存在问题## 文件夹为root账号创建,子账号没有权限,改文件夹拥有者用户为adrian1sudo chown -R adrian1 /usr/local/elasticsearch## 使子用户拥有jdk的权限sudo chown -R adrian1 /usr/local/java/jdk1.8.0_261## 修改jdk目录的操作权限,755 只有所有者才有读,写,执行的权限,组群和其他人只有读和执行的权限sudo chmod -R 755 /usr/local/java/jdk1.8.0_261## 上方有一个日志输出data和log目录,设置目录权限sudo chown -R adrian1 /usr/local/elasticsearch-6.7.1## 直接切换账户会只显示$符号操作,修改子用户参数,## 将adrian1:x:1001:1001::/home/adrian1:/bin/sh 改为 ***/bin/bashsu vim /etc/passwdsu elasticsearch
切换为主用户无法使用java问题 source /etc/profile
Command 'java' not foundsource /etc/profilejava -version
使用非root账号启动elasticsearch
## 切换成非root账号su adrian1cd /usr/local/elasticsearch## 加-d为后台启动,不加-d,结束运行使用ctrl+c./bin/elasticsearch -d## 出现错误:Exception in thread "main" java.nio.file.AccessDeniedException: /usr/local/elasticsearch/config/jvm.options## 不能使用root账号启动elasticsearch
判断是否启动
## 有结果则正确(重启的时候可能要等待一会才能访问)curl http://192.168.101.184:9200{"name" : "node-1","cluster_name" : "my-application","cluster_uuid" : "DM0FOzEBTEin5Z58yyn20g","version" : {"number" : "6.7.1","build_flavor" : "default","build_type" : "tar","build_hash" : "2f32220","build_date" : "2019-04-02T15:59:27.961366Z","build_snapshot" : false,"lucene_version" : "7.7.0","minimum_wire_compatibility_version" : "5.6.0","minimum_index_compatibility_version" : "5.0.0"},"tagline" : "You Know, for Search"}## 有问题则看对否有监听,没有9200则未启动ss -tanlState Recv-Q Send-Q Local Address:PortLISTEN 0 128 127.0.0.1:6010LISTEN 0 128 127.0.0.1:6011LISTEN 0 80 0.0.0.0:3306LISTEN 0 128 127.0.0.53%lo:53LISTEN 0 128 0.0.0.0:22LISTEN 0 5 127.0.0.1:631LISTEN 0 128 [::1]:6010LISTEN 0 128 [::1]:6011LISTEN 0 128 [::]:22LISTEN 0 5 [::1]:631## 在设置的log文件夹中查看日志/usr/local/elasticsearch-6.7.1/logs/my-application.log
错误 failed to obtain node locks, tried
## 已经有一个elastic进程在启动了,杀掉重启即可ps aux | grep elasticsearchkill - 9 进程ID
安装kibana
cd /usr/localsudo wget https://mirrors.huaweicloud.com/kibana/6.7.1/kibana-6.7.1-linux-x86_64.tar.gzsudo tar -xzvf kibana-6.7.1-linux-x86_64.tar.gzsudo mv kibana-6.7.1-linux-x86_64 kibanasudo rm -rf kibana-6.7.1-linux-x86_64.tar.gz## 命令执行完成之后在/usr/local目录下就会生成一个kibana目录
修改kibana配置文件
sudo vim /usr/local/kibana/config/kibana.yml
# Kibana is served by a back end server. This setting specifies the port to use.server.port: 5601# Specifies the address to which the Kibana server will bind. IP addresses and host names are both valid values.# The default is 'localhost', which usually means remote machines will not be able to connect.# To allow connections from remote users, set this parameter to a non-loopback address.server.host: "192.168.254.131"# The URL of the Elasticsearch instance to use for all your queries.elasticsearch.url: "http://192.168.254.131:9200"# Kibana uses an index in Elasticsearch to store saved searches, visualizations and# dashboards. Kibana creates a new index if the index doesn't already exist.kibana.index: ".kibana6"
启动kibana
cd /usr/local/kibana## 直接启动./bin/kibana,ctrl + c停止,下方为后台启动## nohup ./bin/kibana & 会报错:nohup: 忽略输入并把输出追加到'nohup.out'nohup ./bin/kibana >/dev/null 2>&1 &## 判断是否启动成功,浏览器打开http://192.168.101.184:5601/app/kibana
ES设置允许远程访问
修改 elasticsearch/config/elasticsearch.yml,取消以下配置注释:
cd /usr/local/elasticsearch/configsudo vim elasticsearch.yml# 修改内容network.host: 0.0.0.0 #改为0.0.0.0对外开放,如对特定ip开放则改为指定iphttp.port: 9200 #可更改端口不为9200
启动的话可能会报错
[1]: max virtual memory areas vm.max_map_count [65530] is too low, increase to at least [262144]
解决办法:
1、切换到root用户修改配置sysctl.conf
sudo vim /etc/sysctl.conf
添加下面配置:
vm.max_map_count=655360
并执行命令:
sysctl -p
然后,重新启动elasticsearch,即可启动成功。如需要域名访问的话,nginx配置
server {listen 80;server_name es.xxx.com; #域名access_log /data/wwwlogs/es.log combined;location /{proxy_pass http://127.0.0.1:9200/;proxy_redirect default;}}
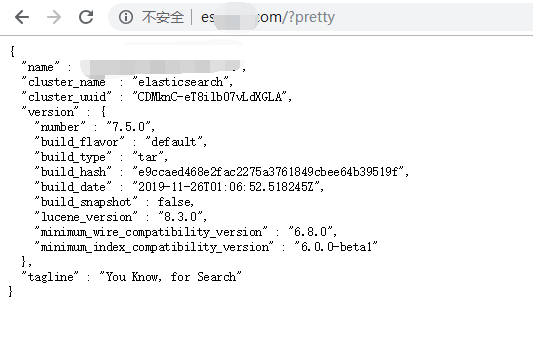
测试:

