第十二讲 Linux服务管理
12.1 服务简介与分类
- 服务的分类

启动与自启动
- 服务启动:就是在当前系统中让服务运行,并提供功能。
- 服务自启动:自启动是指让服务在系统开机或重启动之后,随着系统的启动而自动启动服务。
查询已安装的服务
- RPM包安装的服务
- chkconfig —list
查看服务自启动状态,可以看到所有RPM包安装的服务
- 源码包安装的服务
- 查看服务安装位置,一般是/usr/local/下
RPM安装服务和源码包安装服务的区别

- RPM包安装服务的位置
- RPM安装服务和源码包安装服务的区别就是安装位置的不同
- 源码包安装在指定位置,一般是/usr/local/
- RPM包安装在默认位置中 /etc/init.d/:启动脚本位置
- /etc/sysconfig/:初始化环境配置文件位置
- /etc/:配置文件位置
- /etc/xinetd.conf:xinetd配置文件
- /etc/xinetd.d/:基于xinetd服务的启动脚本
- /var/lib/:服务产生的数据放在这里
- /var/log/:日志
- 独立服务的启动
- /etc/init.d/独立服务名 start|stop|status|restart|
- service 独立服务名 start|stop|restart||status
- 独立服务的自启动
- chkconfig [—level 运行级别] [独立服务名] [on|off]
- 修改/etc/rc.d/rc.local文件
- 使用ntsysv命令管理自启动
tips: service和chkconfig命令的功能在Centos7中好像都被阉割了。被systemctl取代。
参考博文:Centos7下的systemctl命令与service和chkconfig
12.2.2 基于xinetd服务的管理
Xinetd:即extended internet daemon,是新一代的网络守护进程服务程序,又叫超级Internet服务器,常用来管理多种轻量级Internet服务。Xinetd提供类似于inetd+tcp_wrapper的功能,但是更加强大和安全。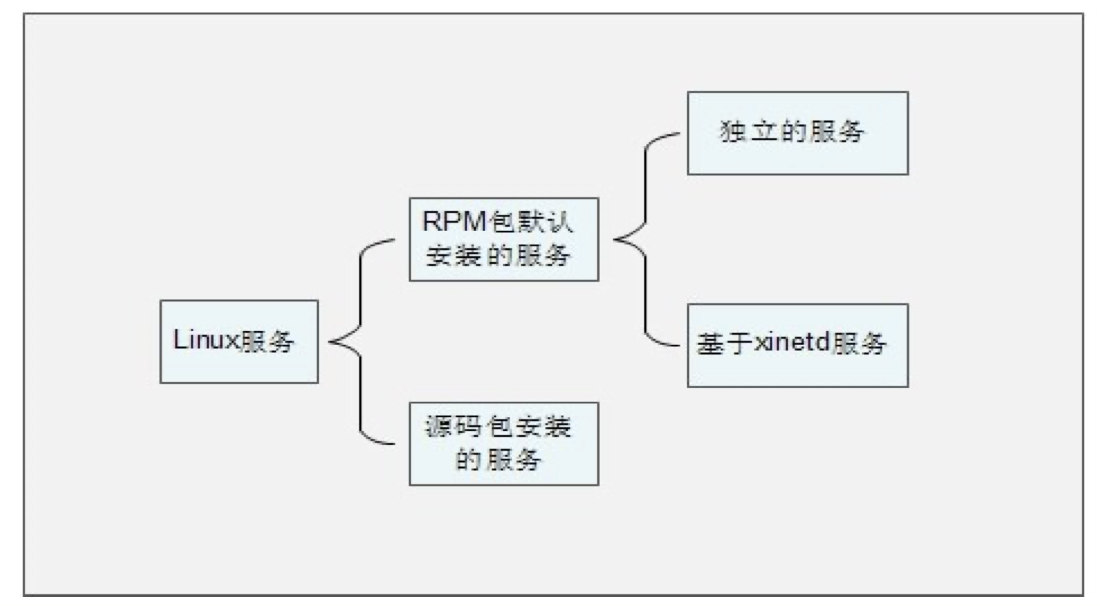
- 安装xinetd与telnet
[root@localhost ~]# yum -y install xinetd
[root@localhost ~]# yum -y install telnet-server
- xinetd服务的启动
[root@localhost ~]# vi /etc/xinetd.d/telnet
service telnet <- 服务的名称为telnet
{
flags = REUSE <- 标志为REUSE,设定TCP/IP socket可重用
socket_type = stream <-使用TCP协议数据包
wait = no <-允许多个连接同时连接
user = root <- 启动服务的用户为root
server = /usr/sbin/in.telnetd <- 服务的启动程序
log_on_failure += USERID <- 登陆失败后,记录用户的ID
disable = no <- 服务不启动
}
重启xinetd服务 [root@localhost ~]# service xinetd restart
- xinetd服务的自启动
- 源码包安装服务的启动
- 使用绝对路径,调用启动脚本来启动。不同的源码包的启动脚本不同。可以查看源码包的安装说明,查看启动脚本的方法。
/usr/local/apache2/bin/apachectl start|stop
- 源码包服务的自启动
[root@localhost ~]# vi /etc/rc.d/rc.local
加入
/usr/local/apache2/bin/apachectl start
- 让源码包服务被服务管理命令识别
- 让源码包的apache服务能被service命令管理启动
ln -s /usr/local/apache2/bin/apachectl /etc/init.d/apache
- 让源码包的apache服务能被chkconfig与ntsysv命令管理自启动
vi /etc/init.d/apache
# chkconfig: 35 86 76
#指定httpd脚本可以被chkconfig命令管理。格式是:
chkconfig: 运行级别 启动顺序 关闭顺序
# description: source package apache
#说明,内容随意
[root@localhost ~]# chkconfig —add apache
#把源码包apache加入chkconfig命令
12.4 服务管理总结
脑图地址


若有收获,就点个赞吧
0 人点赞
