- 学习目标
- 学习内容
- ifndef BSP_BATTERY_LED_H
- define BSP_BATTERY_LED_H
- include “gd32f4xx.h”
- include “systick.h”
- define LED1_RCU RCU_GPIOE
- define LED1_GPIO GPIOE, GPIO_PIN_3
- define LED2_RCU RCU_GPIOD
- define LED2_GPIO GPIOD, GPIO_PIN_7
- define LED3_RCU RCU_GPIOG
- define LED3_GPIO GPIOG, GPIO_PIN_3
- define LED4_RCU RCU_GPIOA
- define LED4_GPIO GPIOA, GPIO_PIN_5
- define LED1_ON() gpio_bit_set(LED1_GPIO)
- define LED1_OFF() gpio_bit_reset(LED1_GPIO)
- define LED2_ON() gpio_bit_set(LED2_GPIO)
- define LED2_OFF() gpio_bit_reset(LED2_GPIO)
- define LED3_ON() gpio_bit_set(LED3_GPIO)
- define LED3_OFF() gpio_bit_reset(LED3_GPIO)
- define LED4_ON() gpio_bit_set(LED4_GPIO)
- define LED4_OFF() gpio_bit_reset(LED4_GPIO)
- endif
学习目标
- 能够理解bsp开发
-
学习内容
需求介绍

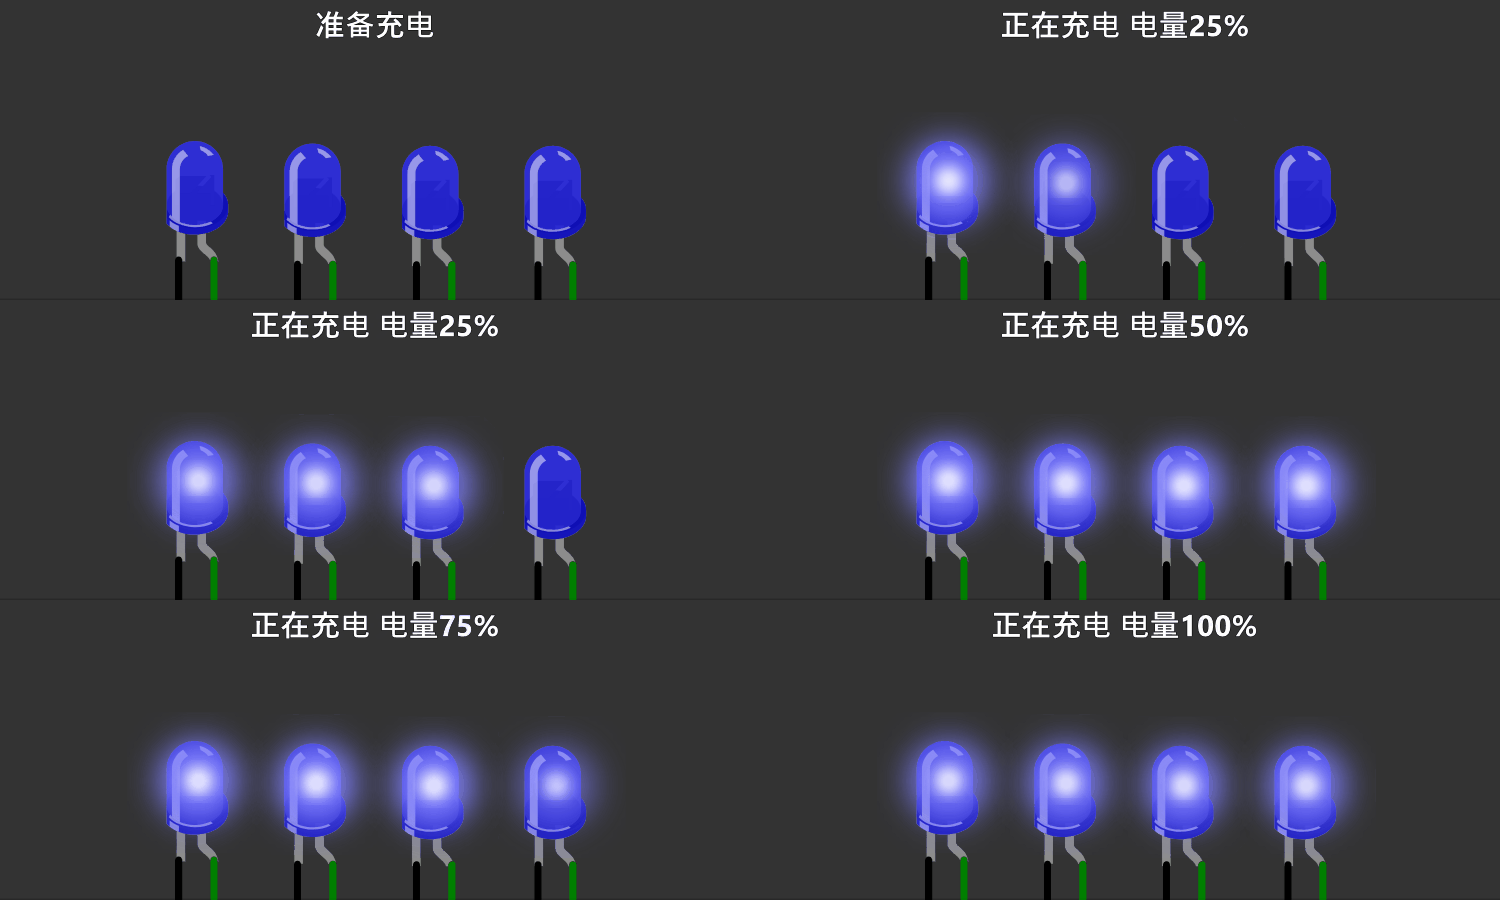
开发版中有4个灯,现在需要用4个灯显示充电情况: 开始充电时,需要呈现出流水灯闪烁
- 4盏灯表示当前的电量
- 充电流水灯起始位置是当前电量,全部点亮后,再次从当前电量位置进入流水灯效果
- 结束充电时,关闭充电显示,当前电量进行闪烁3次,然后熄灭。
现实问题
- 产品最终电路板还没画好,目前只有产品所使用的芯片对应的开发板。
- ADC功能是别人开发,还没完成。
-
需求分析
要啥没啥,还得尽快完成。盘点手头有的东西,开发板。构建测试案例逻辑,方便后续移植。
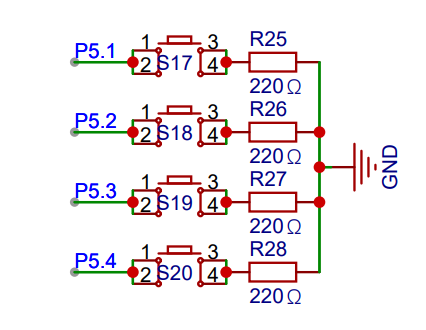
测试案例设计: 准备工作,4个灯,3个按钮
- 按钮1按下时,模拟开始充电
- 按钮2按下时,模拟停止充电
- 按钮3按下时,模拟电量增加。
如果测试方案通过,基本上功能完成,那么后续其他人工作完成后,只需要对接以下逻辑:
- 灯对应的引脚和最终设计的电路板引脚进行校准
- 开始充电
- 电量变化时,更新电量
- 结束充电
编码实现分析:
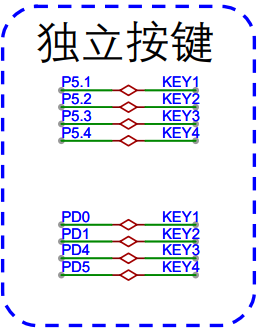
- PD0作为:开始按钮
- PD1作为:停止按钮
- PD5作为:电量更新按钮
按钮逻辑构建
static void GPIO_config(){// LED1 测试按钮// rcu时钟// rcu_periph_clock_enable(RCU_GPIOE);// // GPIO// gpio_mode_set(GPIOE,GPIO_MODE_OUTPUT, GPIO_PUPD_NONE, GPIO_PIN_3);// gpio_output_options_set(GPIOE, GPIO_OTYPE_PP, GPIO_OSPEED_50MHZ, GPIO_PIN_3);// PD0 开始充电// PD1 结束充电// PD5 电量变化// rcu时钟rcu_periph_clock_enable(RCU_GPIOD);// 配置GPIO模式gpio_mode_set(GPIOD,GPIO_MODE_INPUT, GPIO_PUPD_PULLUP, GPIO_PIN_0 | GPIO_PIN_1 | GPIO_PIN_5);}
int main(void){systick_config();GPIO_config();Battery_led_init();uint32_t cnt = 0;uint8_t power = 1;FlagStatus pre_key1 = SET;FlagStatus pre_key2 = SET;FlagStatus pre_key3 = SET;while(1) {FlagStatus cur_key1 = gpio_input_bit_get(GPIOD, GPIO_PIN_0);if (cur_key1 != pre_key1){if (cur_key1 == RESET){// 按下}else {// 抬起, 开始充电Battery_led_start(power);}pre_key1 = cur_key1;}FlagStatus cur_key2 = gpio_input_bit_get(GPIOD, GPIO_PIN_1);if (cur_key2 != pre_key2){if (cur_key2 == RESET){// 按下}else {// 抬起, 停止充电Battery_led_stop();}pre_key2 = cur_key2;}FlagStatus cur_key3 = gpio_input_bit_get(GPIOD, GPIO_PIN_5);if (cur_key3 != pre_key3){if (cur_key3 == RESET){// 按下}else {// 抬起, 增加电量power++;if(power > 4) power = 4;Battery_led_update(power);}pre_key3 = cur_key3;}if(++cnt % 25 == 0){ // 20ms * 25 = 500msBattery_led_loop();}delay_1ms(20);}}
BSP驱动构建
接口定义
- 驱动初始化,属于标配
- 业务相关的操作行为抽象化
时序问题
void Battery_led_int();
具体的业务抽象行为
void Battery_led_start(uint8_t power);
void Battery_led_stop();
void Battery_led_update(uint8_t power);
在涉及到需要控制时间的问题时,我们通常有以下做法:
自己主动调用 delay来进行延时
- 使用统一的延时,到达自己的时间点就去执行
自己调用delay 不利于后续的移植。
采用统一时钟,方便移植,也方便时间片统一调度管理
业务实现
- 采用bsp独立驱动进行开发
- 状态管理,通过status记录当前状态。
- 电量记录,记录当前电量。
- 充电闪烁计数,记录当前的闪烁的值。
```c
ifndef BSP_BATTERY_LED_H
define BSP_BATTERY_LED_H
include “gd32f4xx.h”
include “systick.h”
define LED1_RCU RCU_GPIOE
define LED1_GPIO GPIOE, GPIO_PIN_3
define LED2_RCU RCU_GPIOD
define LED2_GPIO GPIOD, GPIO_PIN_7
define LED3_RCU RCU_GPIOG
define LED3_GPIO GPIOG, GPIO_PIN_3
define LED4_RCU RCU_GPIOA
define LED4_GPIO GPIOA, GPIO_PIN_5
define LED1_ON() gpio_bit_set(LED1_GPIO)
define LED1_OFF() gpio_bit_reset(LED1_GPIO)
define LED2_ON() gpio_bit_set(LED2_GPIO)
define LED2_OFF() gpio_bit_reset(LED2_GPIO)
define LED3_ON() gpio_bit_set(LED3_GPIO)
define LED3_OFF() gpio_bit_reset(LED3_GPIO)
define LED4_ON() gpio_bit_set(LED4_GPIO)
define LED4_OFF() gpio_bit_reset(LED4_GPIO)
void Battery_led_init();
void Battery_led_start(uint8_t power);
void Battery_led_loop();
void Battery_led_update(uint8_t power);
void Battery_led_stop();
endif
```c#include "bsp_battery_led.h"static void LED_GPIO_init(rcu_periph_enum periph, uint32_t gpio_periph, uint32_t pin) {// 时钟rcu_periph_clock_enable(periph);// GPIOgpio_mode_set(gpio_periph,GPIO_MODE_OUTPUT, GPIO_PUPD_NONE, pin);gpio_output_options_set(gpio_periph, GPIO_OTYPE_PP, GPIO_OSPEED_50MHZ, pin);}void Battery_led_init() {// 初始化LED为推挽输出模式// PE3 PD7 PG3 PA5LED_GPIO_init(LED1_RCU, LED1_GPIO);LED_GPIO_init(LED2_RCU, LED2_GPIO);LED_GPIO_init(LED3_RCU, LED3_GPIO);LED_GPIO_init(LED4_RCU, LED4_GPIO);}// 0: stop , 1: start, 2: stopingint status = 0;// 当前电量static int current_power = 0;// 充电显示灯位置static int show_power = 0;void Battery_led_start(uint8_t power) {// power [0, 4]current_power = power;show_power = current_power;status = 1;}void Battery_led_loop() {if (status == 0) {LED1_OFF();LED2_OFF();LED3_OFF();LED4_OFF();} else if (status == 1) {show_power++;if (show_power > 4) {show_power = current_power;}// 亮前show_power个灯show_power >= 1 ? LED1_ON() : LED1_OFF();show_power >= 2 ? LED2_ON() : LED2_OFF();show_power >= 3 ? LED3_ON() : LED3_OFF();show_power >= 4 ? LED4_ON() : LED4_OFF();} else if (status == 2) {uint8_t i;// 当前电量闪三次for( i = 0; i < 3; i++) {LED1_OFF();LED2_OFF();LED3_OFF();LED4_OFF();delay_1ms(250);current_power >= 1 ? LED1_ON() : LED1_OFF();current_power >= 2 ? LED2_ON() : LED2_OFF();current_power >= 3 ? LED3_ON() : LED3_OFF();current_power >= 4 ? LED4_ON() : LED4_OFF();delay_1ms(250);}status = 0;}}void Battery_led_update(uint8_t power) {current_power = power;}void Battery_led_stop() {status = 2;}
练习
- 实现充电led驱动实现


