在搭建博客的过程中,我们出于实际的需求,在《VuePress 博客优化之拓展 Markdown 语法》中讲解了如何写一个 markdown-it插件,又在 《markdown-it 原理解析》中讲解了 markdown-it的执行原理,本篇我们将讲解具体的实战代码,帮助大家更好的写插件。
renderer
markdown-it的渲染过程分为两部分,Parse 和 Render,如果我们要更改渲染的效果,就比如在外层包裹一层 div,或者修改 HTML 元素的属性、添加 class 等,就可以从 Render 过程入手。
在 markdown-it 的官方文档里就可以找到自定义 Render 渲染规则的方式:
Instance of Renderer. Use it to modify output look. Or to add rendering rules for new token types, generated by plugins.
var md = require('markdown-it')();function myToken(tokens, idx, options, env, self) {//...return result;};md.renderer.rules['my_token'] = myToken
markdown-it 内置了一些默认的 rules,你可以直接修改它们,具体有哪些以及渲染方式可以查看 renderer.js 的源码,这里直接列出来:
- code_inline
- code_block
- fence
- image
- hardbreak
- softbreak
- text
- html_block
- html_inline
实例一
如果我们查看 VuePress 中代码块的渲染结果,我们会发现每一个代码块外层都包了一层带 extra-class类名的 div:
其实,这就是 VuePress 修改了渲染规则产生的,查看 VuePress 源码:
我们可以看到这里非常巧妙的避开了处理 token,直接使用渲染后的结果,在外层包了一层 div。module.exports = md => {const fence = md.renderer.rules.fencemd.renderer.rules.fence = (...args) => {const [tokens, idx] = argsconst token = tokens[idx]const rawCode = fence(...args)return `<!--beforebegin--><div class="language-${token.info.trim()} extra-class">` +`<!--afterbegin-->${rawCode}<!--beforeend--></div><!--afterend-->`}}
实例二
类似于 VuePress 的这种方式,我们也可以在获取默认渲染内容后,再使用 replace 替换掉一些内容,比如在《VuePress 博客优化之拓展 Markdown 语法》这篇中,我们自定义了一个代码块语法,就是在 rules.fence中修改了渲染的内容:md.use(function(md) {const fence = md.renderer.rules.fencemd.renderer.rules.fence = (...args) => {let rawCode = fence(...args);rawCode = rawCode.replace(/<span class="token comment">\/\/ try-link https:\/\/(.*)<\/span>\n/ig, '<a href="$1" class="try-button" target="_blank">Try</a>');return `${rawCode}`}})
实例三
但不可能总是可以这么取巧,有的时候就是需要处理 token,这里我们参考 markdown-it 官方提供的设计准则中的例子,当渲染一个图片的时候,如果链接匹配 /^https?:\/\/(www.)?vimeo.com\/(\d+)($|\/)/,我们就将其渲染为一个 iframe ,其他的则保持默认渲染方式: ```bash var md = require(‘markdown-it’)();
var defaultRender = md.renderer.rules.image, vimeoRE = /^https?:\/\/(www.)?vimeo.com\/(\d+)($|\/)/;
md.renderer.rules.image = function (tokens, idx, options, env, self) { var token = tokens[idx], aIndex = token.attrIndex(‘src’);
if (vimeoRE.test(token.attrs[aIndex][1])) {
var id = token.attrs[aIndex][1].match(vimeoRE)[2];return '<div class="embed-responsive embed-responsive-16by9">\n' +' <iframe class="embed-responsive-item" src="//player.vimeo.com/video/' + id + '"></iframe>\n' +'</div>\n';
}
// pass token to default renderer. return defaultRender(tokens, idx, options, env, self); };
rules.image 传入的函数参数可以查看 renderer.js 的源码:```bashRenderer.prototype.render = function (tokens, options, env) {var i, len, type,result = '',rules = this.rules;for (i = 0, len = tokens.length; i < len; i++) {type = tokens[i].type;if (type === 'inline') {result += this.renderInline(tokens[i].children, options, env);} else if (typeof rules[type] !== 'undefined') {result += rules[tokens[i].type](tokens, i, options, env, this);} else {result += this.renderToken(tokens, i, options, env);}}return result;};
我们可以看到 rules 传入的参数,其中 tokens 就是指 tokens 列表,idx 则是指要渲染的 token 索引,所以在代码里才可以通过 tokens[index]获取目标 token。
然后我们又使用了 tokens.attrIndex,tokens 提供了哪些方法可以查看官方 API,或者直接查看 Token 源码。
我们解释一下这个示例里用到的一些方法,先从 token 开始说起,我们举个例子,看下](https://www.vimeo.com/123))这句 markdown 语法产生的 token(这里进行了简化):
{"type": "image","tag": "img","attrs": [["src","https://www.vimeo.com/123"],["alt",""]],"children": [{"type": "text","tag": "","attrs": null,"children": null,"content": "video link",}],"content": "video link"}
可以看到 token 是有一个 attr 属性的,表明了要渲染的 img 标签的属性有哪些,token.attrIndex 就是通过名字获取属性索引,然后再通过 token.attrs[aIndex][1]获取具体的属性值。
实例四
// Remember old renderer, if overridden, or proxy to default renderervar defaultRender = md.renderer.rules.link_open || function(tokens, idx, options, env, self) {return self.renderToken(tokens, idx, options);};md.renderer.rules.link_open = function (tokens, idx, options, env, self) {// If you are sure other plugins can't add `target` - drop check belowvar aIndex = tokens[idx].attrIndex('target');if (aIndex < 0) {tokens[idx].attrPush(['target', '_blank']); // add new attribute} else {tokens[idx].attrs[aIndex][1] = '_blank'; // replace value of existing attr}// pass token to default renderer.return defaultRender(tokens, idx, options, env, self);};
也许你会奇怪,为什么会有 rules.link_open?这个并不在默认规则里呀,可以直接使用吗?
还真是可以的,其实这里的 link_open 和之前的 image、fence 等都是 token 的 type,所以只要是 token 的 type 就可以,那 token 有哪些 type 呢?有具体的说明文档吗?
关于这个问题, markdown-it 也有 issues 里提出:
作者的意思就是,没有,如果你想写插件,你就去看源码……
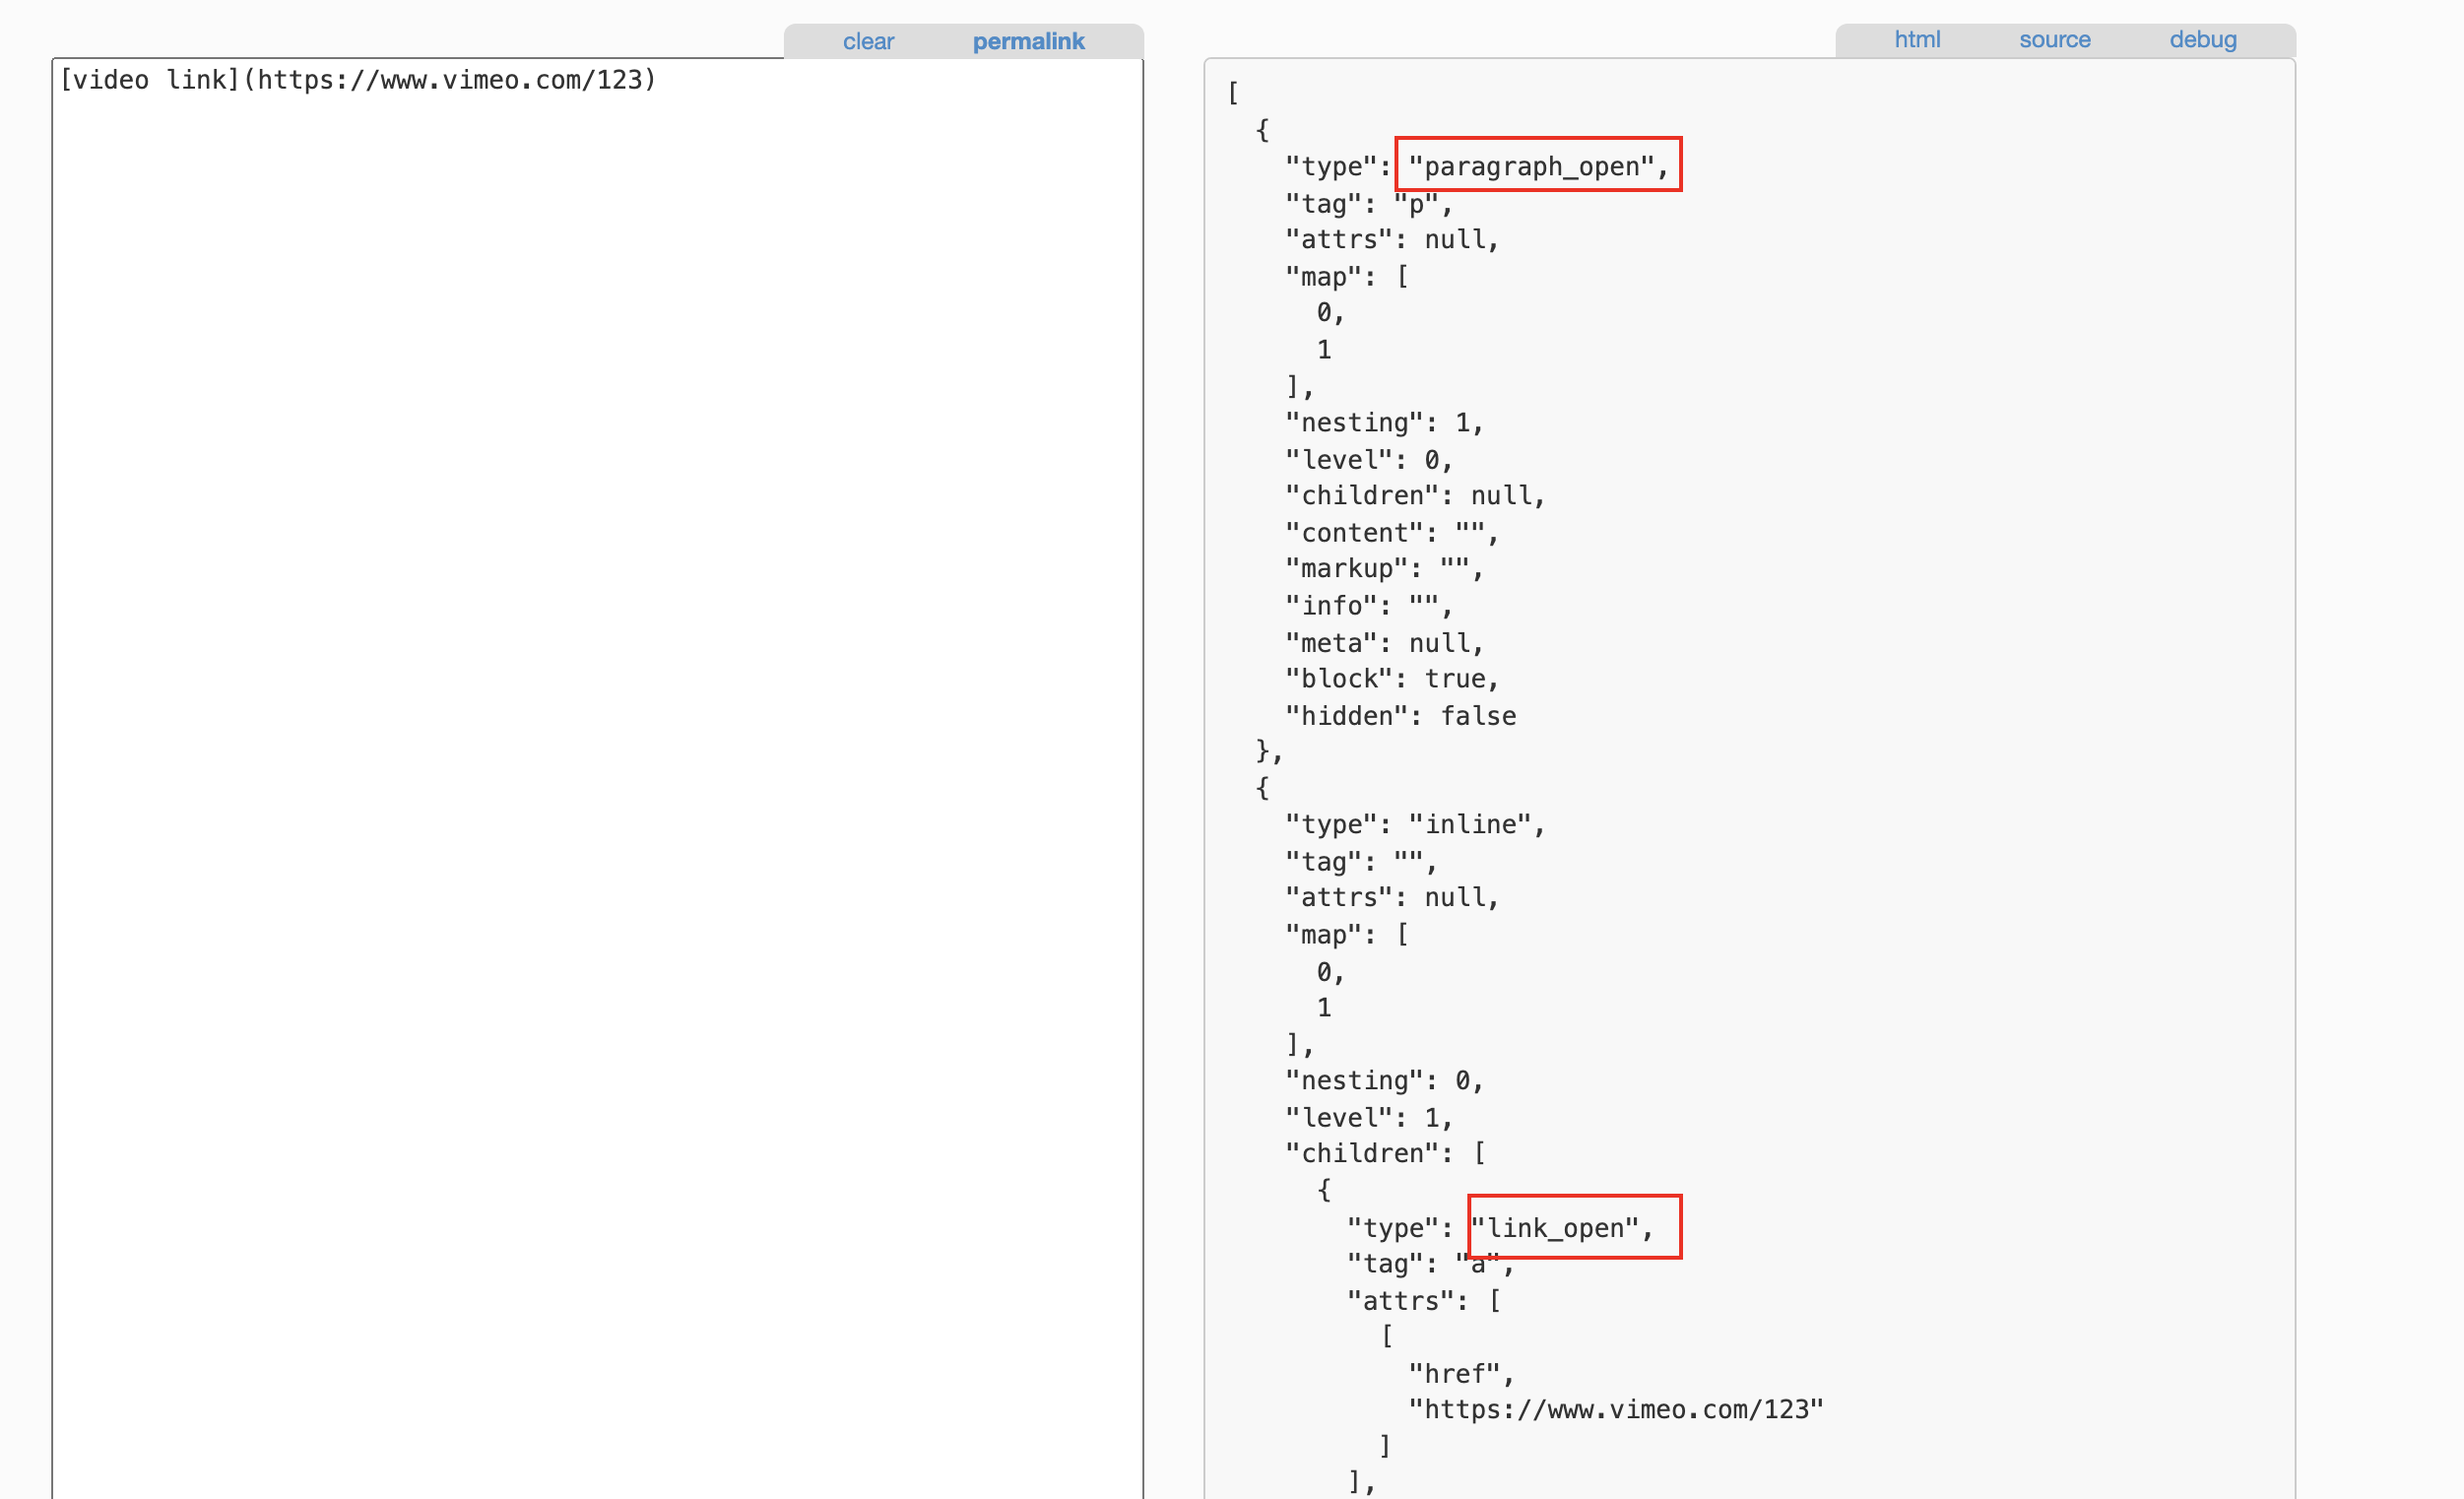
那成吧,其实在我们的实际开发中,如果你想要知道某一个 token type,其实完全可以打印出 token 看一下,官方的 Live Demo 提供了 debug 模式用于查看 token:
当然就这个例子里的需求,作者还提供了 markdown-it-for-inline 插件用于简化代码书写:
var iterator = require('markdown-it-for-inline');var md = require('markdown-it')().use(iterator, 'url_new_win', 'link_open', function (tokens, idx) {var aIndex = tokens[idx].attrIndex('target');if (aIndex < 0) {tokens[idx].attrPush(['target', '_blank']);} else {tokens[idx].attrs[aIndex][1] = '_blank';}});
关于 markdown-it-for-inline就在以后的文章里介绍了。

