定制Banner
Spring Boot项目在启动的时候会有一个默认的启动图案:
. ____ _ __ _ _/\\ / ___'_ __ _ _(_)_ __ __ _ \ \ \ \( ( )\___ | '_ | '_| | '_ \/ _` | \ \ \ \\\/ ___)| |_)| | | | | || (_| | ) ) ) )' |____| .__|_| |_|_| |_\__, | / / / /=========|_|==============|___/=/_/_/_/:: Spring Boot :: (v1.5.9.RELEASE)
我们可以把这个图案修改为自己想要的。在src/main/resources目录下新建banner.txt文件,然后将自己的图案黏贴进去即可。ASCII图案可通过网站http://www.network-science.de/ascii/一键生成,比如输入mrbird生成图案后复制到banner.txt,启动项目,eclipse控制台输出如下:
_ _ _ _ _ _/ \ / \ / \ / \ / \ / \( m | r | b | i | r | d )\_/ \_/ \_/ \_/ \_/ \_/...2017-08-12 10:11:25.952 INFO 7160 --- [main] o.s.j.e.a.AnnotationMBeanExporter : Registering beans for JMX exposure on startup2017-08-12 10:11:26.057 INFO 7160 --- [main] s.b.c.e.t.TomcatEmbeddedServletContainer : Tomcat started on port(s): 8080 (http)2017-08-12 10:11:26.064 INFO 7160 --- [main] com.springboot.demo.DemoApplication : Started DemoApplication in 3.933 seconds (JVM running for 4.241)
banner也可以关闭,在main方法中:
public static void main(String[] args) {SpringApplication app = new SpringApplication(DemoApplication.class);app.setBannerMode(Mode.OFF);app.run(args);}
全局配置文件
在src/main/resources目录下,Spring Boot提供了一个名为application.properties的全局配置文件,可对一些默认配置的配置值进行修改。
自定义属性值
Spring Boot允许我们在application.properties下自定义一些属性,比如:
mrbird.blog.name=mrbird's blogmrbird.blog.title=Spring Boot
定义一个BlogProperties Bean,通过@Value("${属性名}")来加载配置文件中的属性值:
@Componentpublic class BlogProperties {@Value("${mrbird.blog.name}")private String name;@Value("${mrbird.blog.title}")private String title;// get,set略}
编写IndexController,注入该Bean:
@RestControllerpublic class IndexController {@Autowiredprivate BlogProperties blogProperties;@RequestMapping("/")String index() {return blogProperties.getName()+"——"+blogProperties.getTitle();}}
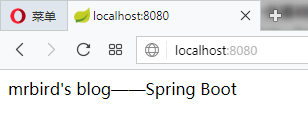
启动项目,访问http://localhost:8080,页面显示如下:
在属性非常多的情况下,也可以定义一个和配置文件对应的Bean:
@ConfigurationProperties(prefix="mrbird.blog")public class ConfigBean {private String name;private String title;// get,set略}
通过注解@ConfigurationProperties(prefix="mrbird.blog")指明了属性的通用前缀,通用前缀加属性名和配置文件的属性名一一对应。
除此之外还需在Spring Boot入口类加上注解@EnableConfigurationProperties({ConfigBean.class})来启用该配置:
@SpringBootApplication@EnableConfigurationProperties({ConfigBean.class})public class Application {public static void main(String[] args) {SpringApplication.run(Application.class, args);}}
之后便可在IndexController中注入该Bean,并使用了:
@RestControllerpublic class IndexController {@Autowiredprivate ConfigBean configBean;@RequestMapping("/")String index() {return configBean.getName()+"——"+configBean.getTitle();}}
属性间的引用
在application.properties配置文件中,各个属性可以相互引用,如下:
mrbird.blog.name=mrbird's blogmrbird.blog.title=Spring Bootmrbird.blog.wholeTitle=${mrbird.blog.name}--${mrbird.blog.title}
自定义配置文件
除了可以在application.properties里配置属性,我们还可以自定义一个配置文件。在src/main/resources目录下新建一个test.properties:
test.name=KangKangtest.age=25
定义一个对应该配置文件的Bean:
@Configuration@ConfigurationProperties(prefix="test")@PropertySource("classpath:test.properties")@Componentpublic class TestConfigBean {private String name;private int age;// get,set略}
注解@PropertySource("classpath:test.properties")指明了使用哪个配置文件。要使用该配置Bean,同样也需要在入口类里使用注解@EnableConfigurationProperties({TestConfigBean.class})来启用该配置。
通过命令行设置属性值
在运行Spring Boot jar文件时,可以使用命令java -jar xxx.jar --server.port=8081来改变端口的值。这条命令等价于我们手动到application.properties中修改(如果没有这条属性的话就添加)server.port属性的值为8081。
如果不想项目的配置被命令行修改,可以在入口文件的main方法中进行如下设置:
public static void main(String[] args) {SpringApplication app = new SpringApplication(Application.class);app.setAddCommandLineProperties(false);app.run(args);}
使用xml配置
虽然Spring Boot并不推荐我们继续使用xml配置,但如果出现不得不使用xml配置的情况,Spring Boot允许我们在入口类里通过注解@ImportResource({"classpath:some-application.xml"})来引入xml配置文件。
Profile配置
Profile用来针对不同的环境下使用不同的配置文件,多环境配置文件必须以application-{profile}.properties的格式命,其中{profile}为环境标识。比如定义两个配置文件:
application-dev.properties:开发环境
server.port=8080
application-prod.properties:生产环境
server.port=8081
至于哪个具体的配置文件会被加载,需要在application.properties文件中通过spring.profiles.active属性来设置,其值对应{profile}值。
如:spring.profiles.active=dev就会加载application-dev.properties配置文件内容。可以在运行jar文件的时候使用命令java -jar xxx.jar --spring.profiles.active={profile}切换不同的环境配置。

若有收获,就点个赞吧
0 人点赞
