整合MyBatis之前,先搭建一个基本的Spring Boot项目开启Spring Boot。然后引入mybatis-spring-boot-starter和数据库连接驱动(这里使用关系型数据库Oracle 11g)。
mybatis-spring-boot-starter
在pom中引入:
<dependency><groupId>org.mybatis.spring.boot</groupId><artifactId>mybatis-spring-boot-starter</artifactId><version>1.3.1</version></dependency>
不同版本的Spring Boot和MyBatis版本对应不一样,具体可查看官方文档:http://www.mybatis.org/spring-boot-starter/mybatis-spring-boot-autoconfigure/。
通过dependency:tree命令查看mybatis-spring-boot-starter都有哪些隐性依赖:
+- org.mybatis.spring.boot:mybatis-spring-boot-starter:jar:1.3.1:compile| +- org.springframework.boot:spring-boot-starter-jdbc:jar:1.5.9.RELEASE:compile| | +- org.apache.tomcat:tomcat-jdbc:jar:8.5.23:compile| | | \- org.apache.tomcat:tomcat-juli:jar:8.5.23:compile| | \- org.springframework:spring-jdbc:jar:4.3.13.RELEASE:compile| | \- org.springframework:spring-tx:jar:4.3.13.RELEASE:compile| +- org.mybatis.spring.boot:mybatis-spring-boot-autoconfigure:jar:1.3.1:compile| +- org.mybatis:mybatis:jar:3.4.5:compile| \- org.mybatis:mybatis-spring:jar:1.3.1:compile
可发现其包含了spring-boot-starter-jdbc依赖,默认使用tomcat-jdbc数据源。
引入ojdbc
由于版权的原因,我们需要将ojdbc6.jar依赖安装到本地的maven仓库,然后才可以在pom中进行配置。
下载ojdbc6.jar文件后,将其放到比较好找的目录下,比如D盘根目录。然后运行以下命令:
C:\Users\Administrator>mvn install:install-file -Dfile=D:/ojdbc6.jar -DgroupId=com.oracle -DartifactId=ojdbc6 -Dversion=6.0 -Dpackaging=jar -DgeneratePom=true...[INFO] --- maven-install-plugin:2.4:install-file (default-cli) @ standalone-pom ---[INFO] Installing D:\ojdbc6.jar to D:\m2\repository\com\oracle\ojdbc6\6.0\ojdbc6-6.0.jar[INFO] Installing C:\Users\ADMINI~1\AppData\Local\Temp\mvninstall9103688544010617483.pom to D:\m2\repository\com\oracle\ojdbc6\6.0\ojdbc6-6.0.pom[INFO] ------------------------------------------------------------------------[INFO] BUILD SUCCESS[INFO] ------------------------------------------------------------------------[INFO] Total time: 0.940 s[INFO] Finished at: 2017-08-13T15:06:38+08:00[INFO] Final Memory: 6M/145M[INFO] ------------------------------------------------------------------------
接着在pom中引入:
<dependency><groupId>com.oracle</groupId><artifactId>ojdbc6</artifactId><version>6.0</version></dependency>
这里的groupid就是你之前安装时指定的-Dgroupid的值,artifactid就是你安装时指定的-Dartifactid的值,version也一样。
对于Oracle12c,引入ojdbc8:
<!-- oracle驱动 --><dependency><groupId>com.oracle.database.jdbc</groupId><artifactId>ojdbc8</artifactId><version>21.1.0.0</version></dependency>
Druid数据源
Druid是一个关系型数据库连接池,是阿里巴巴的一个开源项目,地址:https://github.com/alibaba/druid。Druid不但提供连接池的功能,还提供监控功能,可以实时查看数据库连接池和SQL查询的工作情况。
配置Druid依赖
Druid为Spring Boot项目提供了对应的starter:
<dependency><groupId>com.alibaba</groupId><artifactId>druid-spring-boot-starter</artifactId><version>1.1.10</version></dependency>
Druid数据源配置
上面通过查看mybatis starter的隐性依赖发现,Spring Boot的数据源配置的默认类型是org.apache.tomcat.jdbc.pool.Datasource,为了使用Druid连接池,需要在application.yml下配置:
Oracle
springboot 1.x版本:(属性名的值和冒号中间必须有空格!)
server:context-path: /webspring:datasource:druid:# 数据库访问配置, 使用druid数据源type: com.alibaba.druid.pool.DruidDataSourcedriver-class-name: oracle.jdbc.driver.OracleDriverurl: jdbc:oracle:thin:@localhost:1521/xeusername: scottpassword: tiger# 连接池配置initial-size: 5min-idle: 5max-active: 20# 连接等待超时时间max-wait: 30000# 配置检测可以关闭的空闲连接间隔时间time-between-eviction-runs-millis: 60000# 配置连接在池中的最小生存时间min-evictable-idle-time-millis: 300000validation-query: select '1' from dualtest-while-idle: truetest-on-borrow: falsetest-on-return: false# 打开PSCache,并且指定每个连接上PSCache的大小pool-prepared-statements: truemax-open-prepared-statements: 20max-pool-prepared-statement-per-connection-size: 20# 配置监控统计拦截的filters, 去掉后监控界面sql无法统计, 'wall'用于防火墙filters: stat,wall# Spring监控AOP切入点,如x.y.z.service.*,配置多个英文逗号分隔aop-patterns: com.springboot.servie.*# WebStatFilter配置web-stat-filter:enabled: true# 添加过滤规则url-pattern: /*# 忽略过滤的格式exclusions: '*.js,*.gif,*.jpg,*.png,*.css,*.ico,/druid/*'# StatViewServlet配置stat-view-servlet:enabled: true# 访问路径为/druid时,跳转到StatViewServleturl-pattern: /druid/*# 是否能够重置数据reset-enable: false# 需要账号密码才能访问控制台login-username: druidlogin-password: druid123# IP白名单# allow: 127.0.0.1# IP黑名单(共同存在时,deny优先于allow)# deny: 192.168.1.218# 配置StatFilterfilter:stat:log-slow-sql: true
上述配置不但配置了Druid作为连接池,而且还开启了Druid的监控功能。 其他配置可参考官方wiki——https://github.com/alibaba/druid/tree/master/druid-spring-boot-starter
MySQL
springboot 2.x版本连接MySQL:
server:servlet:application-display-name: ProjectTemplate-Webcontext-path: /webspring:datasource:# 驱动配置信息db-type: com.alibaba.druid.pool.DruidDataSource#mysql 配置driver-class-name: com.mysql.cj.jdbc.Driverurl: jdbc:mysql://localhost:3306/shop?useUnicode=true&characterEncoding=utf8&serverTimezone=GMT%2B8&useSSL=falseusername: testpassword: 12345678druid:...# IP白名单,什么都不写表示都允许#Mac用 nslookup localhost 查看本地回环地址,不一定是127.0.0.1allow: localhost# IP黑名单(共同存在时,deny优先于allow)# deny: 192.168.1.218
注意 com.mysql.cj.jdbc.Driver对应mysql 5.x以上版本;com.mysql.jdbc.Driver 对应5.x以下
pom文件
<dependency><groupId>mysql</groupId><artifactId>mysql-connector-java</artifactId><version>8.0.11</version></dependency><dependency><groupId>com.alibaba</groupId><artifactId>druid-spring-boot-starter</artifactId><version>1.1.20</version></dependency><dependency><groupId>commons-dbutils</groupId><artifactId>commons-dbutils</artifactId><version>1.6</version></dependency>
此时,运行项目,访问http://localhost:8080/web/druid:
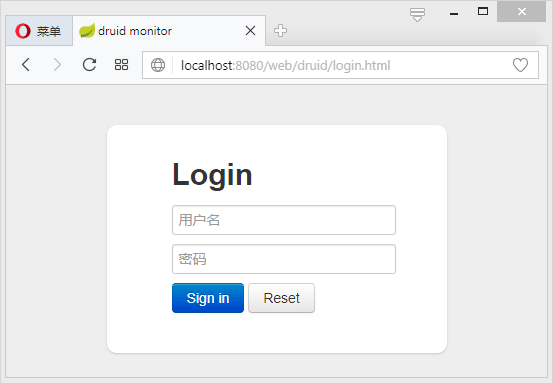
输入账号密码即可看到Druid监控后台:
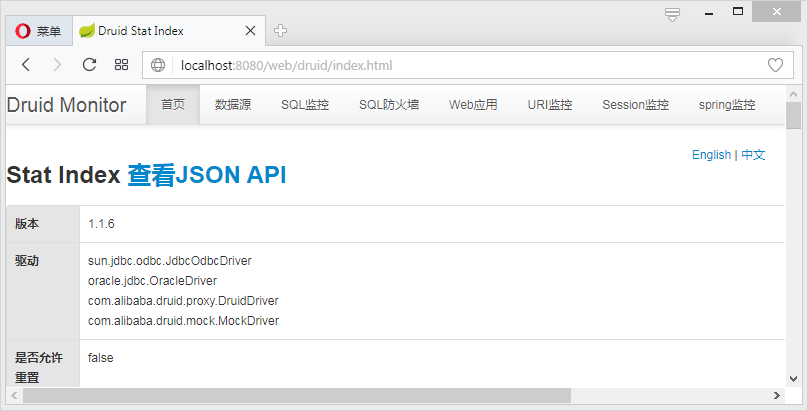
关于Druid的更多说明,可查看官方wiki——https://github.com/alibaba/druid/wiki/%E5%B8%B8%E8%A7%81%E9%97%AE%E9%A2%98
MySQL 8.0 注意事项
注意我目前用的MySQL 8.0.15,据网上所说,5.x版本和8.x的加密方式区别如下:
- 5.X版本是:
default_authentication_plugin=mysql_native_password - 8.x版本就是:
default_authentication_plugin=caching_sha2_password
此时pom文件依赖中mysql-connector-java请使用8.x版本,否则报错 Unable to load authentication plugin ‘caching_sha2_password’
在使用 MySQL 8.0 时重启应用后提示 com.mysql.jdbc.exceptions.jdbc4.MySQLNonTransientConnectionException: Public Key Retrieval is not allowed
最简单的解决方法是在连接后面添加 &allowPublicKeyRetrieval=true
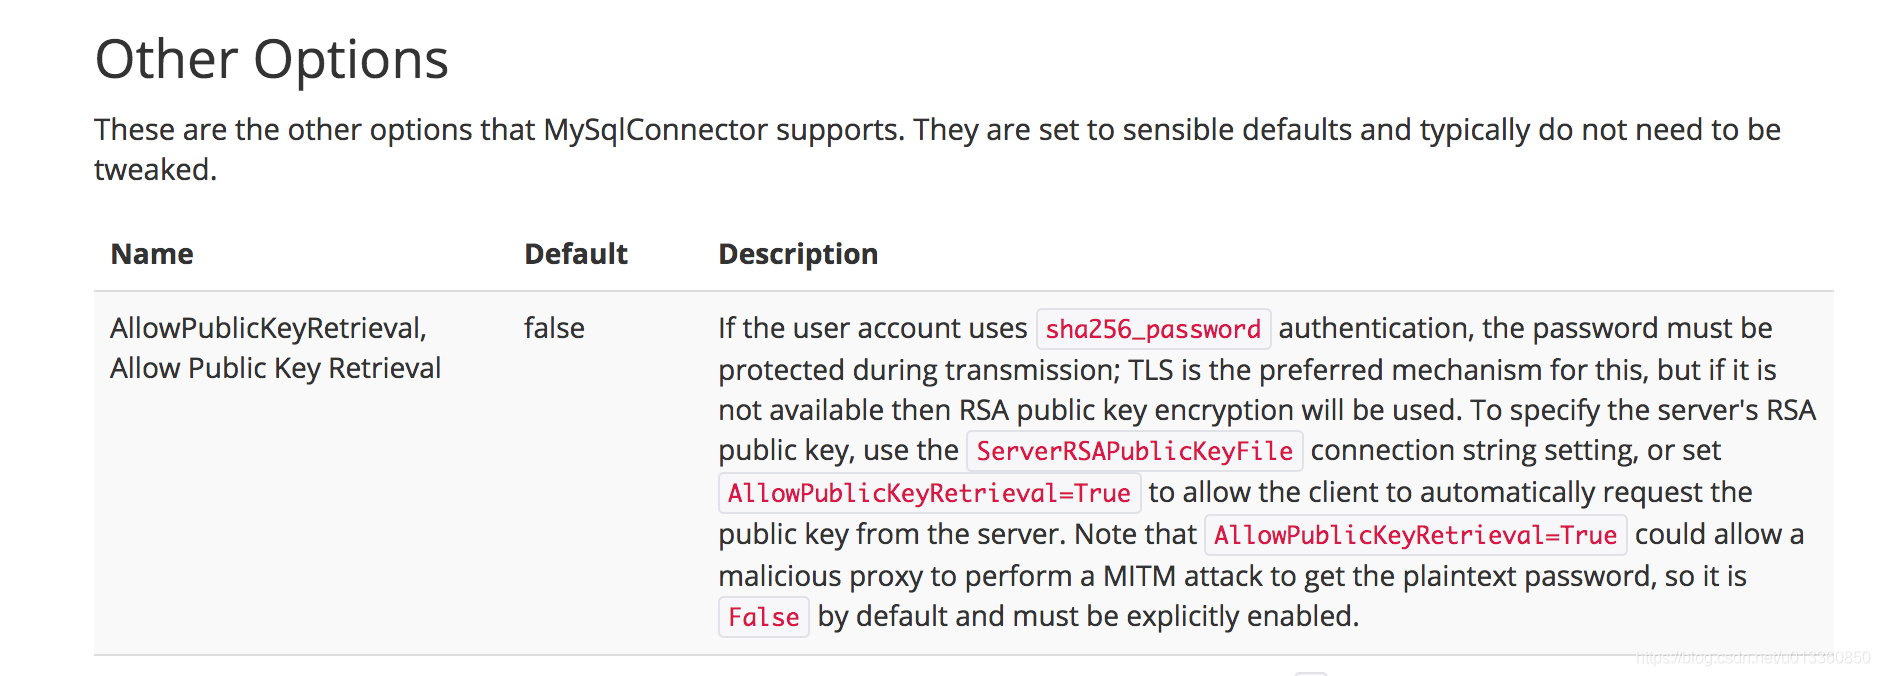
文档中给出的解释是:
如果用户使用了 sha256_password 认证,密码在传输过程中必须使用 TLS 协议保护,但是如果 RSA 公钥不可用,可以使用服务器提供的公钥。可以在连接中通过 ServerRSAPublicKeyFile 指定服务器的 RSA 公钥,或者AllowPublicKeyRetrieval=True参数以允许客户端从服务器获取公钥;但是需要注意的是 AllowPublicKeyRetrieval=True可能会导致恶意的代理通过中间人攻击(MITM)获取到明文密码,所以默认是关闭的,必须显式开启
使用MyBatis
使用的库表:
CREATE TABLE "SCOTT"."STUDENT" ("SNO" VARCHAR2(3 BYTE) NOT NULL ,"SNAME" VARCHAR2(9 BYTE) NOT NULL ,"SSEX" CHAR(2 BYTE) NOT NULL);INSERT INTO "SCOTT"."STUDENT" VALUES ('001', 'KangKang', 'M ');INSERT INTO "SCOTT"."STUDENT" VALUES ('002', 'Mike', 'M ');INSERT INTO "SCOTT"."STUDENT" VALUES ('003', 'Jane', 'F ');
创建对应实体:
public class Student implements Serializable{private static final long serialVersionUID = -339516038496531943L;private String sno;private String name;private String sex;// get,set略}
创建一个包含基本CRUD的StudentMapper:
public interface StudentMapper {int add(Student student);int update(Student student);int deleteByIds(String sno);Student queryStudentById(Long id);}
StudentMapper的实现可以基于xml也可以基于注解。
使用注解方式
继续编辑StudentMapper:
@Component@Mapperpublic interface StudentMapper {@Insert("insert into student(sno,sname,ssex) values(#{sno},#{name},#{sex})")int add(Student student);@Update("update student set sname=#{name},ssex=#{sex} where sno=#{sno}")int update(Student student);@Delete("delete from student where sno=#{sno}")int deleteBysno(String sno);@Select("select * from student where sno=#{sno}")@Results(id = "student",value= {@Result(property = "sno", column = "sno", javaType = String.class),@Result(property = "name", column = "sname", javaType = String.class),@Result(property = "sex", column = "ssex", javaType = String.class)})Student queryStudentBySno(String sno);
简单的语句只需要使用@Insert、@Update、@Delete、@Select这4个注解即可,动态SQL语句需要使用@InsertProvider、@UpdateProvider、@DeleteProvider、@SelectProvider等注解。具体可参考MyBatis官方文档:http://www.mybatis.org/mybatis-3/zh/java-api.html。
使用xml方式
使用xml方式需要在application.yml中进行一些额外的配置:
mybatis:# type-aliases扫描路径# type-aliases-package:# mapper xml实现扫描路径mapper-locations: classpath:mapper/*.xmlproperty:order: BEFORE
测试
接下来编写Service:
public interface StudentService {int add(Student student);int update(Student student);int deleteBysno(String sno);Student queryStudentBySno(String sno);}
实现类:
@Service("studentService")public class StudentServiceImp implements StudentService{@Autowiredprivate StudentMapper studentMapper;@Overridepublic int add(Student student) {return this.studentMapper.add(student);}@Overridepublic int update(Student student) {return this.studentMapper.update(student);}@Overridepublic int deleteBysno(String sno) {return this.studentMapper.deleteBysno(sno);}@Overridepublic Student queryStudentBySno(String sno) {return this.studentMapper.queryStudentBySno(sno);}}
编写controller:
@RestControllerpublic class TestController {@Autowiredprivate StudentService studentService;@RequestMapping( value = "/querystudent", method = RequestMethod.GET)public Student queryStudentBySno(String sno) {return this.studentService.queryStudentBySno(sno);}}
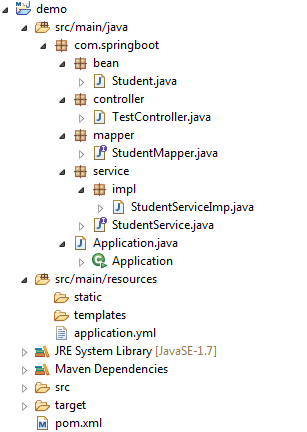
完整的项目目录如下图所示:
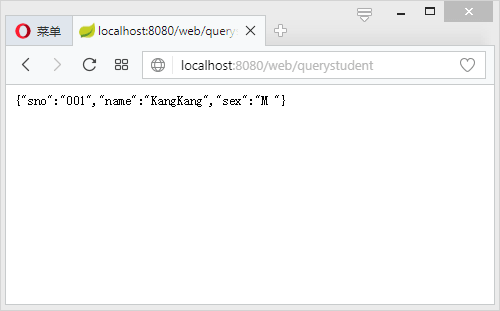
启动项目访问:http://localhost:8080/web/querystudent?sno=001:
查看SQL监控情况:

可看到其记录的就是刚刚访问/querystudent得到的SQL。
相关注解
@Mapper注解:
作用:在接口类上添加了@Mapper,在编译之后会生成相应的接口实现类
添加位置:接口类上面
@Mapperpublic interface UserDAO {//代码}
如果想要每个接口都要变成实现类,那么需要在每个接口类上加上@Mapper注解,比较麻烦,解决这个问题用@MapperScan
@MapperScan
作用:指定要变成实现类的接口所在的包,然后包下面的所有接口在编译之后都会生成相应的实现类
添加位置:是在Springboot启动类上面添加,
@SpringBootApplication@MapperScan("com.winter.dao")public class SpringbootMybatisDemoApplication {public static void main(String[] args) {SpringApplication.run(SpringbootMybatisDemoApplication.class, args);}}
添加@MapperScan(“com.winter.dao”)注解以后,com.winter.dao包下面的接口类,在编译之后都会生成相应的实现类
使用@MapperScan注解多个包(实际用的时候根据自己的包路径进行修改)
@SpringBootApplication@MapperScan({"com.kfit.demo","com.kfit.user"})public class App {public static void main(String[] args) {SpringApplication.run(App.class, args);}}
如果dao接口类没有在Spring Boot主程序可以扫描的包或者子包下面,可以使用如下方式进行配置:
(没验证过,不确定能否使用,或许需要根据自己定义的包名进行修改路径)
@SpringBootApplication@MapperScan({"com.kfit.*.mapper","org.kfit.*.mapper"})public class App {public static void main(String[] args) {SpringApplication.run(App.class, args);}}

若有收获,就点个赞吧
0 人点赞
