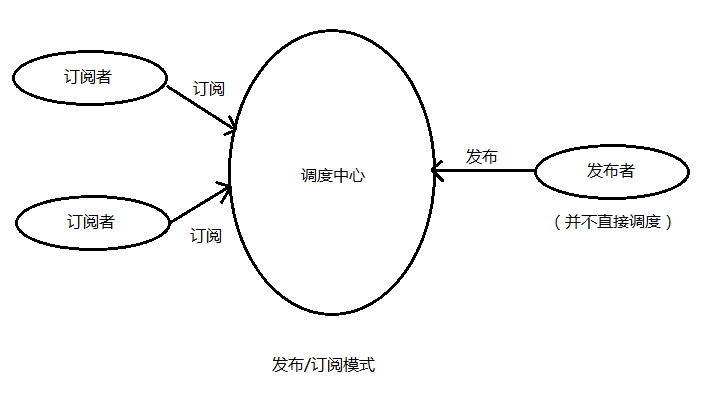
使用
const { EventEmitter } = require('events');const emitter = new EventEmitter();emitter.on("起床", function(time) {console.log(`早上 ${time} 开始起床,新的一天加油!`);});emitter.emit("起床", "6:00");
EventEmitter 解决高并发下雪崩问题
利用 once 方法将所有请求的回调都压入事件队列中,对于相同的文件名称查询保证在同一个查询开始到结束的过程中永远只有一次,如果是 DB 查询也避免了重复数据带来的数据库查询开销
const events = require('events');const emitter = new events.EventEmitter();const fs = require('fs');const status = {};const select = function(file, filename, cb) {emitter.once(file, cb);if (status[file] === undefined) {status[file] = 'ready'; // 不存在设置默认值}if (status[file] === 'ready') {status[file] = 'pending';fs.readFile(file, function(err, result) {console.log(filename);emitter.emit(file, err, result.toString());status[file] = 'ready';setTimeout(function() {delete status[file];}, 1000);});}}for (let i=1; i<=11; i++) {if (i % 2 === 0) {select(`/tmp/a.txt`, 'a 文件', function(err, result) {console.log('err: ', err, 'result: ', result);});} else {select(`/tmp/b.txt`, 'b 文件', function(err, result) {console.log('err: ', err, 'result: ', result);});}}
同步还是异步
EventEmitter 会按照监听器注册的顺序同步地调用所有监听器。 所以必须确保事件的排序正确,且避免竞态条件。
错误处理
最佳实践:为 ‘error’ 事件注册监听器,避免抛出一个错误时没有人为处理,可能造成的结果是进程自动退出
const events = require('events');const emitter = new events.EventEmitter();emitter.on('error', function(err) {console.error(err);})emitter.emit('error', new Error('This is a error'));console.log('test');
发布/订阅者模块
实现
基本结构
function EventEmitter() {// 私有属性,保存订阅方法this._events = {};// 已经绑定的事件数this._eventsCount = 0;}// 默认设置最大监听数EventEmitter.defaultMaxListeners = 10;module.exports = EventEmitter;
on 方法
EventEmitter.prototype.on = function(type, listener, flag) {// 保证存在实例属性if (!this._events) this._events = Object.create(null);if (this._events[type]) {if (flag) {this._events[type].unshift(listener);} else {this._events[type].push(listener);}} else {this._events[type] = [listener];++ this._eventsCount;}// 'newListener' 是 node 的 EventEmitter 模块自带的特殊事件// 该事件在添加新事件监听器的时候触发if (type !== 'newListener') {this.emit('newListener', type, listener);}// 为了可以链式调用,返回了EventEmitter模块的实例化本身return this;};
emit 方法
EventEmitter.prototype.emit = function(type, ...args) {if (this._events[type]) {this._events[type].forEach(fn => fn.call(this, ...args));}};
once
通过在原本的函数外再包一层函数来达到增强的作用
EventEmitter.prototype.once = function(type, listener) {let _this = this;function only() {listener();_this.removeListener(type, only);}// origin 保存原回调的引用,用于 remove 时的判断only.origin = listener;this.on(type, only);};
off
EventEmitter.prototype.off =EventEmitter.prototype.removeListener = function (type, listener) {if (this._events[type]) {//过滤掉退订的方法,从数组中移除this._events[type] =this._events[type].filter(fn => {return fn !== listener && fn.origin !== listener});}};


