实现表单组件
需求分析
- 实现KForm
- 指定数据model、校验规则rules
- 校验validate()
- KformItem
- label标签添加:label
- prop属性名称
- 执行校验validate()
- 显示错误信息
- KInput
- 维护数据v-model
- 图标、反馈
KInput
v-model语法糖
<input v-model="test" /><input v-bind:value="test" @input="test= $event.target.value" />
v-bind=”$attrs”: 将调用组件时的组件标签上绑定的非props的特性(class和style除外)向下传递。
在子组件中应当添加inheritAttrs: false( 避免父作用域的不被认作props的特性绑定应用在子组件的根元素上 )。
<template><div><!-- 自定义组件双向绑定::value @input --><!-- v-bind="$attrs"展开$attrs --><input :type="type" :value="value" @input="onInput" v-bind="$attrs"></div></template><script>export default {inheritAttrs: false, // 设置为false避免设置到根元素上props: {value: {type: String,default: ''},type: {type: String,default: 'text'}},methods: {onInput(e) {// 派发一个input事件即可this.$emit('input', e.target.value)// 通知父级执行校验this.$parent.$emit('validate')// this.dispatch('KFormItem','validate');}},}</script>
KFormItem
<template><div><!-- label --><label v-if="label">{{label}}</label><!-- 显示内部表单元素 --><slot></slot><!-- 校验信息显示 --><p v-if="error">{{error}}</p></div></template><script>// Asyc-validatorimport Schema from "async-validator";export default {inject: ["form"],data() {return {error: "" // error是空说明校验通过};},props: {label: {type: String,default: ""},prop: {type: String}},mounted() {this.$on("validate", () => {this.validate();});if(this.prop){//派发事件通知KForm,新增一个KFromItem实例this.dispatch('KForm','kkb.form.addField',[this])}},methods: {validate() {// 规则const rules = this.form.rules[this.prop];// 当前值const value = this.form.model[this.prop];// 校验描述对象const desc = { [this.prop]: rules };// 创建Schema实例const schema = new Schema(desc);//返回promise,全局可以统一处理return schema.validate({ [this.prop]: value }, errors => {if (errors) {this.error = errors[0].message;} else {// 校验通过this.error = "";}});}}};</script>
KForm
<template><div><slot></slot></div></template><script>export default {componentName:'KForm',provide() {return {form: this //传递表单组件的实例};},props: {model: {type: Object,required: true},rules: {type: Object}},created(){this.fields=[]this.$on('kkb.form.addField'),item=>{this.fields.push(item)})},methods: {validate(cb) {// 获取所有孩子KFormItem// [resultPromise]const tasks = this.$children.filter(item => item.prop) // 过滤掉没有prop属性的Item.map(item => item.validate());//const tasks = this.fields.map(item=>item.valodate())// 统一处理所有Promise结果Promise.all(tasks).then(() => cb(true)).catch(() => cb(false));}}};</script>
数据校验
Input通知校验
onInput(e) {// ...// $parent指FormItemthis.$parent.$emit('validate');}
FormItem监听校验通知,获取规则并执行校验
inject: ['form'], // 注入mounted() {// 监听校验事件this.$on("validate", () => {this.validate();});},methods: {validate() {// 获取对应FormItem校验规则console.log(this.form.rules[this.prop]);// 获取校验值console.log(this.form.model[this.prop]); }}
安装async-validator: npm i async-validator -S
- 表单全局验证,为Form提供validate方法
实现通知组件
this.$create(Notice,{title: '社会你杨哥喊你来搬砖',message: '提示信息',duration: 1000}).show();
create函数
传入一个组件配置,创建它的实例,并且将它挂载到body上
import Vue from 'vue'function create(Component, props) {// 组件构造函数如何获取?// 1.Vue.extend()// 2.renderconst vm = new Vue({// h是createElement, 返回VNode,是虚拟dom// 需要挂载才能变成真实domrender: h => h(Component, {props}),}).$mount() // 不指定宿主元素,则会创建真实dom,但是不会追加操作// 获取真实domdocument.body.appendChild(vm.$el)const comp = vm.$children[0]// 删除comp.remove = function() {document.body.removeChild(vm.$el)vm.$destroy()}return comp}export default create
另一种创建组件实例的方式: Vue.extend(Component)
通知组件
<template><div class="box" v-if="isShow"><h3>{{title}}</h3><p class="box-content">{{message}}</p></div></template><script>export default {props: {title: {type: String,default: ""},message: {type: String,default: ""},duration: {type: Number,default: 1000}},data() {return {isShow: false};},methods: {show() {this.isShow = true;setTimeout(this.hide, this.duration);},hide() {this.isShow = false;// 清除自己this.remove();}}};</script>
测试
<template><div><!-- KForm --><KForm :model="model" :rules="rules" ref="loginForm"><KFormItem label="用户名" prop="username"><KInput v-model="model.username" placeholder="请输入用户名"></KInput></KFormItem><KFormItem label="密码" prop="password"><KInput v-model="model.password" placeholder="请输入密码"></KInput></KFormItem><KFormItem><button @click="login">登录</button></KFormItem></KForm></div></template><script>import ElementTest from "@/components/form/ElementTest.vue";import KInput from "@/components/form/KInput.vue";import KFormItem from "@/components/form/KFormItem.vue";import KForm from "@/components/form/KForm.vue";import create from '@/utils/create'import Notice from '@/components/Notice.vue';export default {components: {ElementTest,KInput,KFormItem,KForm},data() {return {model: {username: "tom",password: ""},rules: {username: [{ required: true, message: "请输入用户名" }],password: [{ required: true, message: "请输入密码" }]}};},methods: {login() {this.$refs.loginForm.validate(isValid => {// this.$notice({})// 创建notice实例create(Notice, {title: '村长喊你来搬砖',message: isValid ? '请求登录': '校验失败',duration: 3000}).show()// if (isValid) {// // 合法// console.log("request login");// } else {// alert("校验失败!");// }});}}};</script><style scoped></style>
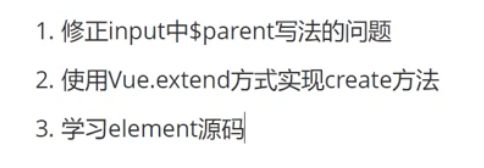
作业
1.
- mixin emitter.js
- 设置componentName
dispatch()
function broadcast(componentName, eventName, params) {this.$children.forEach(child => {var name = child.$options.componentName;if (name === componentName) {child.$emit.apply(child, [eventName].concat(params));} else {broadcast.apply(child, [componentName, eventName].concat([params]));}});}export default {methods: {//冒泡查找compnentName相同的组件并派发事件dispatch(componentName, eventName, params) {var parent = this.$parent || this.$root;var name = parent.$options.componentName;//向上查找直到找到相同名称的组件while (parent && (!name || name !== componentName)) {parent = parent.$parent;if (parent) {name = parent.$options.componentName;}}// 如果找到就派发事件if (parent) {parent.$emit.apply(parent, [eventName].concat(params));}},broadcast(componentName, eventName, params) {broadcast.call(this, componentName, eventName, params);}}};
2.
Vue.extend
const Ctor = Vue.extend(Component)const comp = new Ctor({propsData: props})comp.$mount();document.body.appendChild(comp.$el)comp.remove = () => {// 移除domdocument.body.removeChild(comp.$el)// 销毁组件comp.$destroy();}
使⽤插件进⼀步封装便于使⽤,create.js
import Notice from '@/components/Notice.vue'//...export default {install(Vue) {Vue.prototype.$notice = function (options) {return create(Notice, options)}}}


