- Introduction
- Start Programming
- Extensions
- FAQ and More Information
- 2. play LED animation [LED_animation] until done
- 3. show [ledRing]
- 4. show [ledRing] after [rotate] rotating [led_number] leds
- 5. all LEDs light up [color_1]
- 6. all LEDs light up [color_1], brightness [lightness] %
- 7. light off all LEDs
- 8. light up all LEDs with color R [r]G [g]B [b]
- 9. light up LED [led_id] with color R [r] G [g] B [b]
- 10. light off LED [led_id]
- 11. LED ring shows [percentage] %
- 12. button is pressed?
- 13. microphone loudness
- 14. touch sensor [touchpad_number] is touched?
- 15. touch sensor [touchpad_number] touch value
- 16. set touch sensor [touchpad_number] sensitivity to[sensitivity]
- 17. Halocode is [tilt] ?
- 18. Halocode is shaken?
- 19. shaking strength
- 20. motion sensor acceleration (m/s²) on [axis] axis
- 21. motion sensor [rotation] posture(°)
- 22. rotated angle around [axis] (°)
- 23. reset rotated angle around [axis]
- 24. timer (s)
- 25. reset timer
- 26. pin [pin_number] on high level?
- 27. digital read pin [pin_number]
- 28. analog read pin [pin_number]
- 29. digital write [Digtial_value] to pin [pin_number]
- 30. analog write [PWM_value] to pin [pin_number]
- 31. servo pin [pin_number] rotates to [ServoRotaryAngle]
- 32. buzzer pin[pin_num] plays at frequency of [frequency] HZ for [duration]secs
- 33. connect to Wi-Fi [ssid] password [wifipassword]
- 34. Wi-Fi connected?
- 35. recognize [Language] for [Time] seconds
- 36. speech recognition result
- 37. broadcast user cloud message [message]
- 38. broadcast user cloud message [message] with value [value]
- 39. when receiving user cloud message [message]
- 40. user cloud message [message] value received
- 41. set up LAN named[mesh_name]
- 42. join LAN named [mesh_name]
- 43. broadcast [message] on LAN
- 44. when receiving LAN broadcast [message]
- 45. LAN message [message]value received
- 46. [ICON] when Halocode starts up
- 47. [ICON] when button is pressed
- 48. [ICON] when Halocode is shaking
- 49. [ICON] when Halocode is [tilt]
- 50. [ICON] when touch sensor [touchpad_number] is touched
- 51. [ICON] when [category] >[value]
- 52. broadcast [message] on LAN with value [value]
- 53. play LED animation [LED_animation] until done
- 54. recognize [Language] for [Time] seconds
- 55. [LOCATION] [WEATHER_TYPE]
- 56. air quality [METEOROLOGICAL] [aq_type]
- 57. [LOCATION] [sun_move_type] [time_type]
- 58. angular velocity around axis
Introduction
Makeblock Halocode is a single board computer with built-in Wi-Fi. Designed for programming education, its compact design integrates a broad selection of electronic modules. Pairing with block-based programming software mBlock, Halocode offers all sorts of opportunities to experience AI & IoT application with just a few clicks; it makes creation easy and fun.
Start Programming
- Connect the Halocode to your computer via the Micro USB cable.
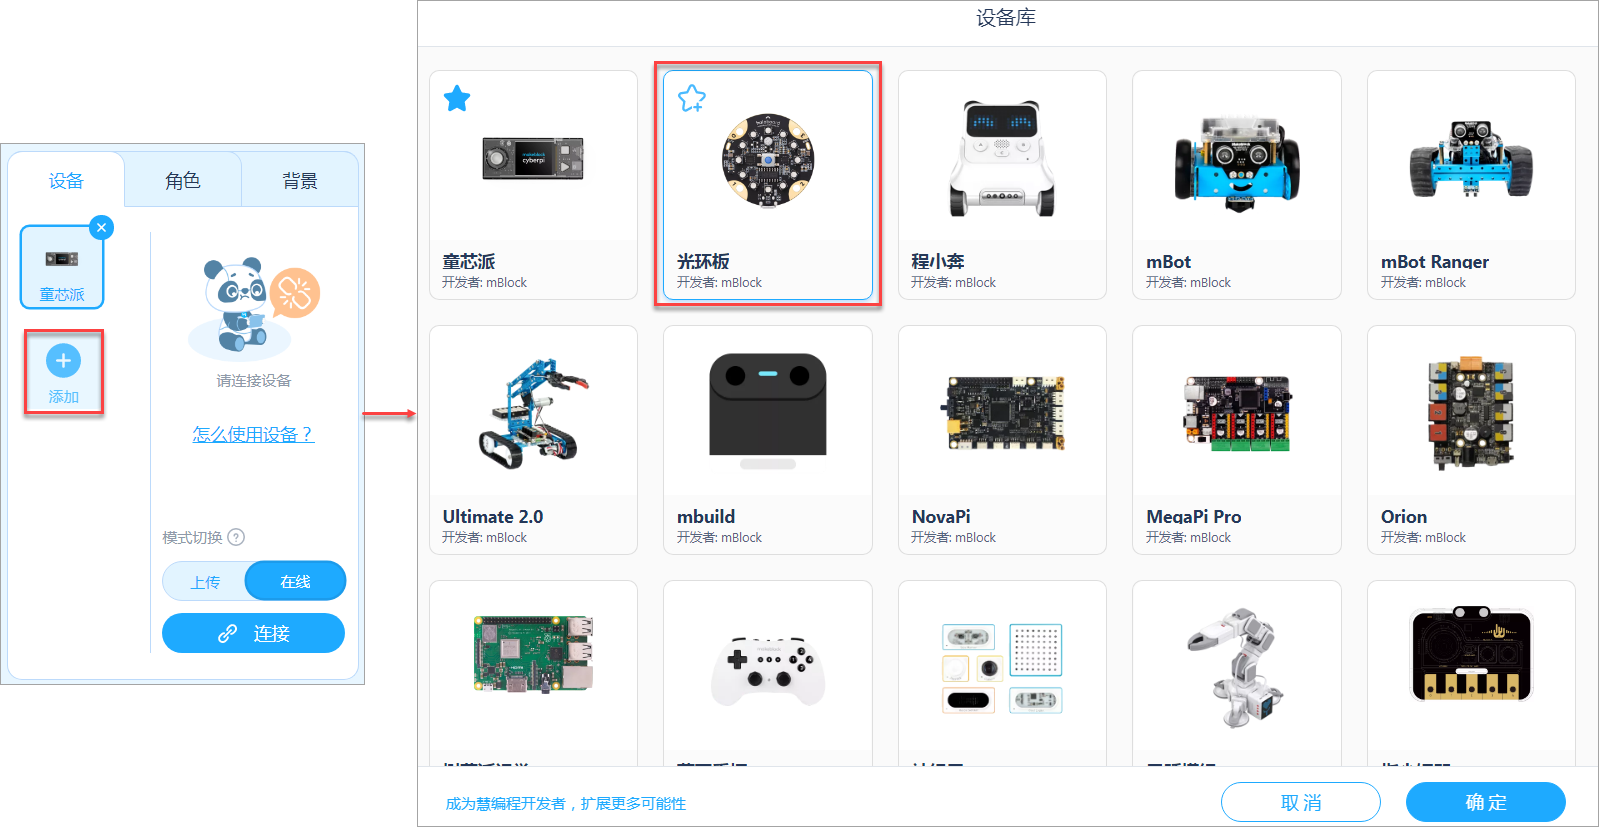
- Open the mBlock and add the Halocode from the Device Library.
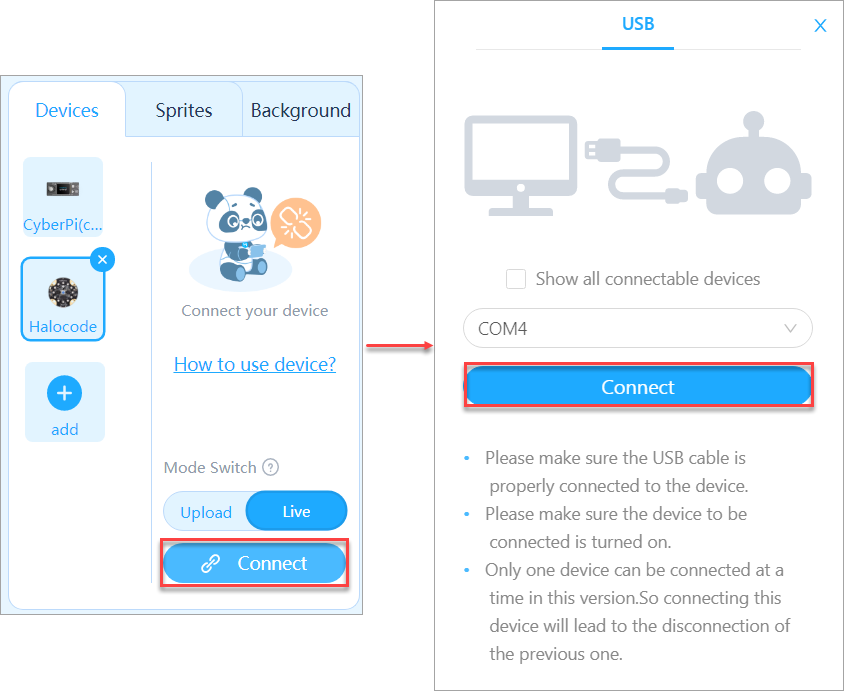
- Connect the device.
4. Choose the program execution mode.
Upload mode: In the Upload mode, you need to upload the compiled program to the device. After being successfully uploaded, the program can still run properly on the device when the device is disconnected from mBlock 5.
Live mode:In the Live mode, you can view the program execution effect in real time, which facilitates the commissioning of the program.In this mode, you must keep the device connected to mBlock 5. If they are disconnected, the program cannot be executed.
- Now let’s start programming!
Extensions
Halocode supports multiple extensions, such as mbulid sensors and upload mode broadcast. Click extension at the bottom of the Blocks area to add an extension.
FAQ and More Information
If you have any questions or you want to check more cases or help information, please consult the online help document below:
http://docs.makeblock.com/halocode/en/
2. play LED animation [LED_animation] until done

Plays the specified LED animation (including rainbow, spindrift, meteor, and firefly) until done, then executes the subsequent block(s)
Example
In the Live mode, when you click the green flag, the LED animation “rainbow” will be played. After the animation is done, all LEDs light red.
3. show [ledRing]

Sets the LEDs ring of Halocode to light up in the specified color order
How to use
- Click the LEDs ring on the block to enter the LEDs ring settings interface.
2. Set the LEDs ring and click OK. The gray circle means light off.
Example
In the Live mode, when you click the green flag, the LEDs ring will light up in the specified color order.
4. show [ledRing] after [rotate] rotating [led_number] leds

Lights up the LED ring in the color order rotated clockwise the specified number of leds
Example
In the Live mode, when you click the green flag, the LED ring will light up in the specified color order. One second later, the LED ring will light up in the color order rotated clockwise one LED.
5. all LEDs light up [color_1]

Lights up all the LEDs in the specified color
How to use
Click to set the color, saturation and brightness or get the color on the stage by using the color picker.
Example
In the Live mode, when you click the green flag, all the LEDs will light up green.
6. all LEDs light up [color_1], brightness [lightness] %

Lights up all the LEDs in the specified color at the specified brightness
Example
In the Live mode, when you click the green flag, all the LEDs will light up green at 80% brightness.
7. light off all LEDs

Lights off all the LEDs
Example
In the Live mode, when you click the green flag, all the LEDs will light up red and go off after one second.
8. light up all LEDs with color R [r]G [g]B [b]

Lights up all the LEDs in the color that is the combination of the specified intensity of red, green, and blue
How to use
RGB color model
The RGB is an addictive color model in which red, green and blue lights are added together to reproduce nearly 16.78 million colors.
R, G, B value range: 0~255
Example
In Live mode, when you click the green flag, all the LEDs will light up blue.
9. light up LED [led_id] with color R [r] G [g] B [b]

Lights up the specified LED the specified color, mixed by specified RGB color values
How to use
Here are the number of LEDs: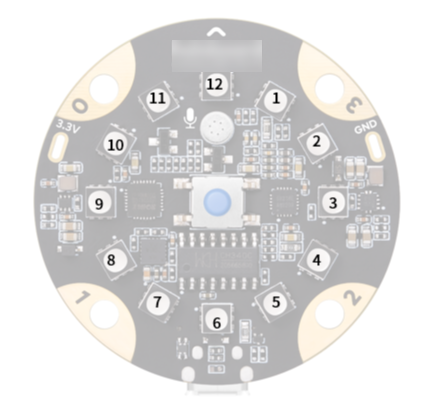
Example
In Live mode, when you click the green flag, LED 3 will light up blue.
10. light off LED [led_id]

Lights off the specified LED
How to use
Here are the number of LEDs:
Example
In Live mode, when you click the green flag, all the LEDs will light up green. One second later, LED 3 will go off.
11. LED ring shows [percentage] %

Displays percentage with the LED ring
Example
In Live mode, when you click the green flag, the LED ring will show 50%.
12. button is pressed?

Detects if the button is pressed
How to use
It is a boolean type block. Reports Ture if the button is pressed, otherwise reports False. A Boolean block must be put into the hexagonal slot of another block, and therefore cannot be used independently.
Example
In Live mode, when you click the green flag, if the button is pressed, the LED animation “rainbow” will be played.
13. microphone loudness

Reports current loudness detected by Halocode’s microphone. The value range is 0-100
How to use
It is a reporter type block. Select the checkbox next to the block to display the current loudness on the stage.
Microphone
The microphone acts as ears, enabling Halocode to hear sounds around it. The measurement generated by the microphone is exactly the volume. The louder the sound is, the higher the volume level is.
Microphone’s volume range: 0~100
Example
In Live mode, when you click the green flag, if the detected loudness is greater than 50, the LED animation “rainbow” will be played.
14. touch sensor [touchpad_number] is touched?

Detects if the specified touch sensor (0,1,2,3) is touched
How to use
It is a boolean type block. Reports Ture if the specified touch sensor is touched, otherwise reports False. A Boolean block must be put into the hexagonal slot of another block, and therefore cannot be used independently.
Touch Sensor
The Halocode contains 4 touch sensors (0,1,2,3). The sensors will be triggered when you touch the metal parts of the sensors, and can also be connected to conductive objects to expand the touch range and create more interesting projects.
Example
In Live mode, when you click the green flag, if touch sensor0 is touched, the LED animation “rainbow” will be played.
15. touch sensor [touchpad_number] touch value

Reports the value of the specified touch sensor (0, 1, 2, 3). The value range is 0-100
How to use
It is a reporter type block. Select the checkbox next to the block to display the specified touch value on the stage.
Touch value range:0~10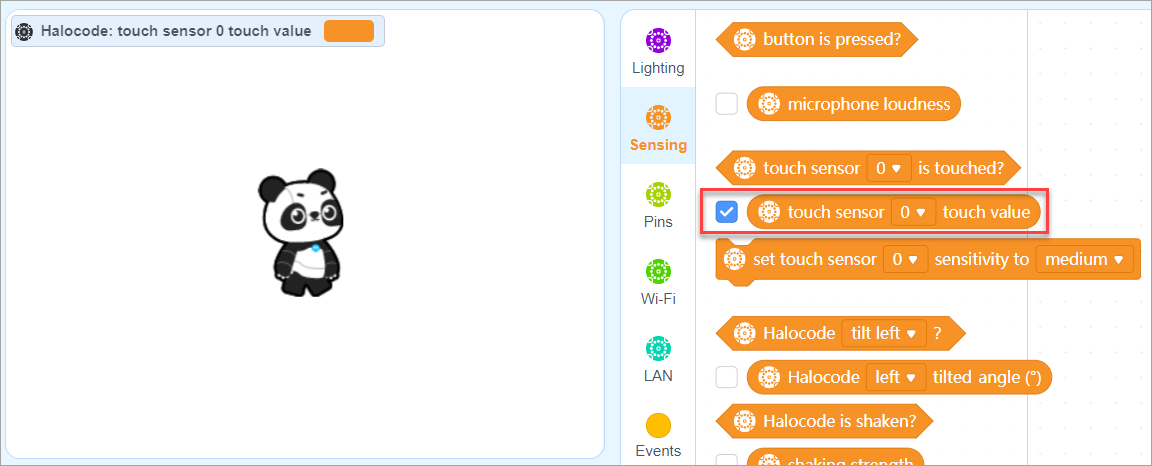
Example
In Live mode, when you click the green flag, if the touch sensor0 value is greater than 50, the LED animation “rainbow” will be played.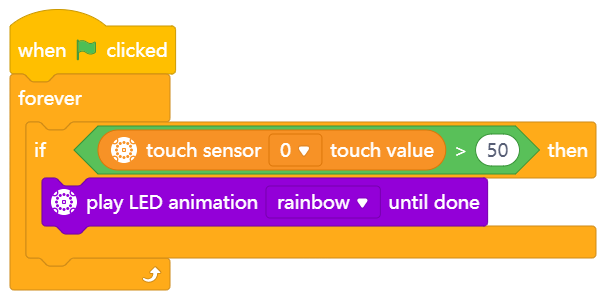
16. set touch sensor [touchpad_number] sensitivity to[sensitivity]

Sets the sensitivity of specified touch sensor to high, medium or low
How to use
The default sensitivity is medium. Change the sensitivity for better touch.
Sets to high when you want the touch sensor can be triggered more easily, for example, you want to trigger it across a piece of paper.
Sets to low when you do not want the touch sensor can be triggered easily, for example, when you atttach copper foil tapes to the touch sensors, you can set the sensitivity to low to avoid a false trigger.
Example
In Live mode, when you click the green flag, sets the sensitivity to high. Touch the touch sensor across a piece of paper, all LEDs will light up red for one second.
17. Halocode is [tilt] ?

Detects if Halocode is placed in the specified position
How to use
The Halocode contains a motion sensor. The motion sensor detects the current position and movement of the Halocode by calculating the tilt angle of the Halocode relative to the ground and measuring its own rotation.
There are six options: “left-tilted”, “right-tilted”, “arrow-up”, “arrow-down”, “LED-ring-up”, and “LED-ring-down”.
Example
In Live mode, when you click the green flag, if it is left-tilted, the left part of LEDs will light up red for one second.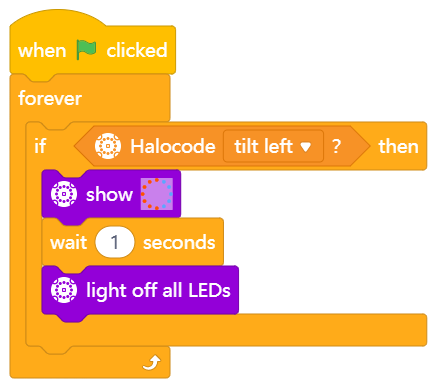
18. Halocode is shaken?

Detects if Halocode is being shaken
How to use
It is a boolean type block. Reports Ture if Halocode is being shaken, otherwise reports False. A Boolean block must be put into the hexagonal slot of another block, and therefore cannot be used independently.
The motion sensor can detect movements and postures by measuring angles and acceleration. So, Halocode will be triggered no matter you tilt, rotate or shake it.
Example
In Live mode, when you click the green flag, if it is shaken, all LEDs will light up red for one second.
19. shaking strength

Report the strength by which Halocode is being shaken. The value range is 0-100
How to use
It is a reporter type block. Select the checkbox next to the block to display the shaking strength on the stage.
Value range:0~100
Example
In Live mode, when you click the green flag, the LED ring will show the current shaking strength.
20. motion sensor acceleration (m/s²) on [axis] axis

Reports the acceleration (m/s²) detected by motion sensor around the x, y, or z axis
How to use
It is a reporter type block. Select the checkbox next to the block to display the acceleration (m/s²) detected by motion sensor around the x, y, or z axis on the stage.
The picture below shows the three axes (x, y, z) of Halocode and corresponding directions of the roll and pitch.
Example
In Live mode, when you click the green flag, if the acceleration around the x-axis is greater than 5, all the LEDs will light up green.
21. motion sensor [rotation] posture(°)

Reports the roll or pitch angle
How to use
It is a reporter type block. Select the checkbox next to the block to display the roll or pitch angle on the stage.
Pitch angle range: -180° ~ 180°
Roll angle range: -90° ~ 90°
The picture below shows the three axes (x, y, z) of Halocode and corresponding directions of the roll and pitch.
Example
In Live mode, when you click the green flag, if the pitch is greater than 150 degrees, all the LEDs will light up green.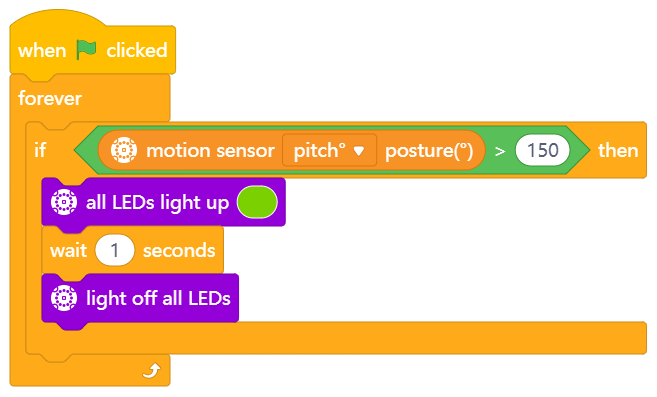
22. rotated angle around [axis] (°)

Reports the rotation angle around the x-axis, y-axis or z-axis
How to use
It is a reporter type block. Select the checkbox next to the block to display the rotation angle around the x-axis, y-axis or z-axis on the stage.
The picture below shows the three axes (x, y, z) of Halocode and corresponding directions of the roll and pitch.
Example
In Live mode, when you click the green flag, if the rotation angle around the x-axis is greater than 720 degrees, all the LEDs will light up green for one second.
23. reset rotated angle around [axis]

Resets rotation angle around the x-axis, y-axis, z-axis, or all axes
Example
In Live mode, when you click the green flag, rotation angle around all axes will be reset.
24. timer (s)

Reports Halocode’s timer value (measured in second, rounded to the nearest tenth)
How to use
It is a reporter type block. A reporter block can be used in any script that requires data but cannot be used independently.
Click the checkbox next to the block to display the value of timer in seconds.
The timer is always running. Use reset timer block to reset timer.
Example
In Live mode, when you click the green flag, if the timer is greater than 10 seconds, all the LEDs will light up red.
25. reset timer

Resets the timer
Example
In Live mode, when the button is pressed, the timer will be reset.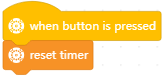
26. pin [pin_number] on high level?

Detects if the specified pin is in high voltage
How to use
It is a boolean type block. Reports Ture if the specified pin is in high voltage, otherwise reports False. A Boolean block must be put into the hexagonal slot of another block, and therefore cannot be used independently.
Pin instructions
The Halocode contains 4 pins (0,1,2,3) with different features.
Features of the pins:
Example
In Live mode, when you click the green flag, if pin0 is in high voltage, all the LEDs will light up green.
27. digital read pin [pin_number]

Reads the digital value of the specified pin (0, 1, 2, 3). The value is 0 or 1
How to use
It is a reporter type block. Select the checkbox next to the block to display the digital value of the specified pin on the stage.
Example
In Live mode, when you click the green flag, if the digital value of pin0 is 0, all the LEDs will light up green; otherwise, red.
28. analog read pin [pin_number]

Reads the analog value of the specified pin (2, 3). The value range is 0-1023
How to use
It is a reporter type block. Select the checkbox next to the block to display the analog value of the specified pin on the stage.
Analog value range: 0~1023
Example
In Live mode, when you click the green flag, if the analog value of pin2 is greater than 700, all the LEDs will light up green, otherwise, red.
29. digital write [Digtial_value] to pin [pin_number]

Writes the specified digital value (0 or 1) to the specified pin (0, 1, 2, 3)
Example
In Live mode, when you click the green flag, digital write 1 to pin0.
30. analog write [PWM_value] to pin [pin_number]

Writes the specified analog value (0-1023) to the specified pin (0, 1, 2, 3)
How to use
What is PWM?
Pulse width modulation (PWM) is technology for performing digital encoding on analog signals. It involves two key parameters, namely frequency and duty cycle. The frequency determines the time required for completing a single cycle and the rate of signals changing from high to low level. The duty cycle determines the time the signals stay in high level within the total period of time. By changing the duty cycle of PWM, you can change the average voltage of the output signals, and thus provide analog voltage output.
PWM signals can be used to control the speed of DC motors and the brightness of LED indicators.
Value range: 0~1023, where 0 indicates the duty cycle of 0%, and 1023 indicates that of 100%
Example
In Live mode, when you click the green flag, the analog value written to pin0 is gradually increasing.
31. servo pin [pin_number] rotates to [ServoRotaryAngle]

Sets the output angle of a servo connected to the specified pin (0,1,2,3) to the specified value
How to Use
After connecting a servo to the specified pin of Halocode, you can use this block to set the output angle of the servo.
Servo description
A servo is an automatic control system consisting of a DC motor, underdrive gear set, sensor, and control circuit. It can rotate precisely the specified angle based on simple input signals.
Example
Connect a servo to pin 0 of Halocode. When you click the green flag, the output angle of the servo is set to 90 degrees.
32. buzzer pin[pin_num] plays at frequency of [frequency] HZ for [duration]secs

Makes the buzzer connected to the specified pin play at the specified frequency for the specified seconds
How to use
The vibrational frequency of the sound determines the pitch, which is measured in hertz (Hz).
The sound of some cars:
Fire engine: Gradually from low frequency (650-750 Hz) to high frequency (1450-1550 Hz) at an interval of 1.5 seconds. Then drop back from the high frequency to the low frequency, each interval of 3 seconds.
Police cars: Gradually from low frequency (650-750 Hz) to high frequency (1450-1550 Hz) at an interval of 0.23 seconds. Then drop back from the high frequency to the low frequency, each interval of 0.1 seconds.
Ambulance: Gradually from low frequency (650-750 Hz) to high frequency (9000-10000 Hz) at intervals of 0.4 seconds. Then drop back from the high frequency to the low frequency, each interval of 0.6 seconds. Alternate between high and low frequencies.
Example
When you press the button on the Halocode, the buzzer connected to the pin 0 will simulate the sound of an ambulance.
33. connect to Wi-Fi [ssid] password [wifipassword]

Connects to the specified Wi-Fi network
How to use
Halocode has a built-in Wi-Fi module. The built-in Wi-Fi module is used to:
(1) Make IoT applications possible, like creating smart home appliances.
(2) Bring Halocode into LAN, enabling several Halocode devices to communicate wirelessly with each other so as to produce interactive lights or do other fun things.
Wi-Fi blocks are only available in Upload mode. Enter the name and password of the network you want to connect. You can use “Wi-Fi connected?” block to detect if the Wi-Fi is successfully connected
Example
When Halocode starts up, connect to Wi-Fi “Maker-guest”. If the Wi-Fi is successfully connected, all the LEDs will light up green.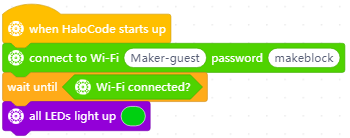
34. Wi-Fi connected?

Detects if the Wi-Fi is successfully connected
Example
When Halocode starts up, connect to Wi-Fi “Maker-guest”. If the Wi-Fi is successfully connected, all the LEDs will light up green.
35. recognize [Language] for [Time] seconds

Recognize the specified language (Chinese or English) for the specified seconds
How to use
Featuring a microphone module and supporting mBlock-integrated Microsoft Cognitive Services, Halocode makes AI speech recognition easy to use.
Preparation before using the speech recognition feature:
1. Switch to Upload mode.
2、Sign in to mBlock 5.
3、Connect to the internet.
Tips
1. Use LEDs to indicate the time of speech recognition. As shown below, Halocode will start speech recognition and all LEDs will light up blue. When it’s done, all LEDs will go off as a signal.
2. Speeches are easier to recognize when words have contexts. Therefore, instead of simply using one keyword, say a sentence including the keyword to command Halocode. For instance, in this project, instead of simply saying “Blue” or “Blue color”, you could say “show blue color” or “change to Blue color”.
Example
Voice-controlled colors: When Halocode is successfully connected to a Wi-Fi network, press the blue button on Halocode, and when the LEDs turn blue, say out aloud your command to change the color of LEDs.
36. speech recognition result

Reports the result of speech recognition
How to use
It is a reporter type block. usually used with “() contains ()?” block.
Example
When Halocode starts up, if the speech recognition result includes “red”, all the LEDs will light up red.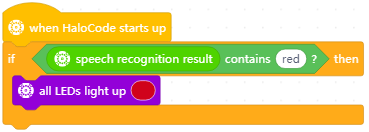
37. broadcast user cloud message [message]

Broadcast the specified user cloud message
How to use
What is user cloud message?
By using the user cloud message function, you can share data across devices and projects with the same mBlock 5 account. The physical distance is no longer a restriction. With the same mBlock 5 account, you can see the noise level of Shenzhen in Beijing.
Preparation before using user cloud message function:
1. Switch to Upload mode.
2、Sign in to mBlock 5.
3、Connect to the internet.
“send user cloud message ()” block is always used with the block “when receiving user cloud message ()”. Make sure that the names you entered are consistent.
Example
When Halocode is successfully connected to a Wi-Fi network,press the blue button on the Halocode, the sprite will move forward 10 steps.
Sprite
Halocode
38. broadcast user cloud message [message] with value [value]

Broadcast the specified user cloud message with the specified value
How to use
What can we do with a value?
When communicating with each other, a device or sprite can tell the other the type and numerical value of a message. For example, if Halocode transmits an user cloud message (volume) with a value (volume of the microphone) to Panda on the stage, Panda can tell the specific numerical value received in the message.
Example
When Halocode is successfully connected to a Wi-Fi network, press the blue button on the Halocode, the sprite will say the volume detected by microphone.
Sprite
Halocode
39. when receiving user cloud message [message]

When receiving the specified user cloud message, run the script
Example
When Halocode is successfully connected to a Wi-Fi network,click the green flag on the stage, the LED animation “rainbow” will be played.
Sprite
Halocode
40. user cloud message [message] value received

Report the value received with the specified user cloud message
Example
When Halocode receives the user cloud message “message”, if the value received is “1”, all the LEDs will light up green.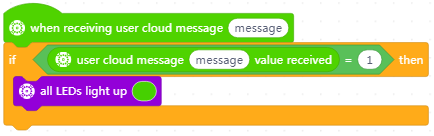
41. set up LAN named[mesh_name]

Sets up a LAN with a specified name
How to use
What is LAN?
LAN (local-area network) is a network that links a group of computers within a certain location. The group of computers share communications to send messages to each other.
A local area network can be formed between the Halocodes. One of the Halocodes to establish a local area network, and the others need to join this local area network. Then you can use the Halocode to control the others.
Example
When Halocode starts up, set up a LAN which named “mesh1”, all LEDs will light up green for one second.
42. join LAN named [mesh_name]

Join the specified LAN named
How to use
Enter the name of LAN you want to join, make sure you have entered the same name as the established LAN.
Example
When Halocode starts up, join a LAN named “mesh1”, all the LEDs will light up red for one second.
Halocode 1
Halocode 2
43. broadcast [message] on LAN

Broadcasts a specific message on LAN
How to use
When you press the button on the Halocode, boradcast “light” on LAN.
44. when receiving LAN broadcast [message]

When the specified LAN broadcast is received, run the script
Example
When Halocode 2 receives LAN broadcast “light”, LED ring shows 100%.
Halocode 1
Halocode 2
45. LAN message [message]value received

Reports the value sent with the specified LAN broadcast
Example
When Halocode 2 receives LAN broadcast “light”, LED ring shows 50%.
Halocode 1
Halocode 2
46. [ICON] when Halocode starts up

When Halocode starts up, run the script
Example
When Halocode starts up, the LED animation “spindrift” will be played.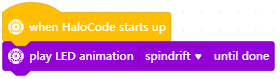
47. [ICON] when button is pressed

When the button is pressed, run the script
Example
When the button is pressed, all the LEDs will light up green.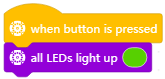
48. [ICON] when Halocode is shaking

When Halocode is being shaken, run the script
Example
When Halocode is being shaken, all the LEDs will light up green.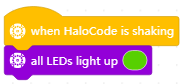
49. [ICON] when Halocode is [tilt]

When Halocode is placed in the specified position, run the script. There are four options: “arrow-up”, “arrow-down”, “left-tilted”, and “right-tilted”
Example
When Halocode is placed arrow-up, all the LEDs will light up green.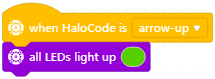
50. [ICON] when touch sensor [touchpad_number] is touched

When the specified touch sensor (0, 1, 2, 3) is touched, run the script
Example
When touch sensor0 is touched, the LED animation “meteor” will be played.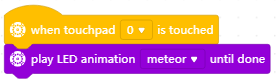
51. [ICON] when [category] >[value]

When the value of the specified parameter (loudness or timer) is greater than the specified value, run the script
Example
When the timer value is greater than 360 seconds, the timer will be reset.
52. broadcast [message] on LAN with value [value]

Broadcast the specified message with the specified value on LAN
Example
When you press the button on the Halocode, broadcast “light” with value 50 on LAN.
53. play LED animation [LED_animation] until done

Displays the specified LED animation and waits until the displaying ends
How to Use
This block provides multiple LED animation options. Click to select one.
Example
When you press the space key, the LEDs on Halocode start to display the rainbow LED animation and light off after the displaying ends.
54. recognize [Language] for [Time] seconds

Starts to recognize the specified language for the specified period
How to Use
Note: To use the language recognition function, ensure that Halocode has connected to a Wi-Fi network.
Click to select a language from the drop-down list box.
Example
After you start Halocode, it connects the Wi-Fi network. After connected to the Wi-Fi network, it starts to recognize English speeches and the first LED matrix connected to Halocode displays the recognized speech.
Note: Ensure that you have connected an LED matrix to Halocode.
55. [LOCATION] [WEATHER_TYPE]

Reports information about the weather of the specified region
How to Use
Note: To use the weather report function, ensure that Halocode has connected to a Wi-Fi network.
Click to select a weather condition from the drop-down list box.
Example
After you start Halocode, it connects the Wi-Fi network. After the Wi-Fi network is connected, the first LED matrix connected to Halocode displays the highest temperature of Shenzhen.
Note: Ensure that you have connected an LED matrix to Halocode.
56. air quality [METEOROLOGICAL] [aq_type]

Reports information about the specified air quality indicator of the specified region
How to Use
Note: To use the air quality indicator report function, ensure that Halocode has connected to a Wi-Fi network.
Click to select an air quality indicator from the drop-down list box.
Example
After you start Halocode, it connects the Wi-Fi network. After the Wi-Fi network is connected, the first LED matrix connected to Halocode displays the AQI of New York.
Note: Ensure that you have connected an LED matrix to Halocode.
57. [LOCATION] [sun_move_type] [time_type]

Reports the sunrise or sunset time of the specified region
How to Use
Note: To use the sunrise/sunset time report function, ensure that Halocode has connected to a Wi-Fi network.
Click to select the time you want to know from the drop-down list box.
Example
After you start Halocode, it connects the Wi-Fi network. After the Wi-Fi network is connected, the first LED matrix connected to Halocode displays the sunrise time of Shenzhen.
Note: Ensure that you have connected an LED matrix to Halocode.
58. angular velocity aroundaxis

Reports the angular velocity at which Halocode rotates around the x-, y-, or z-axis
How to Use
This is a reporter block that must be used in combination with another block requiring data.
You can select the check box on the left of this block to view the angular velocity on the stage.
The following figure shows the x-, y-, and z-axes.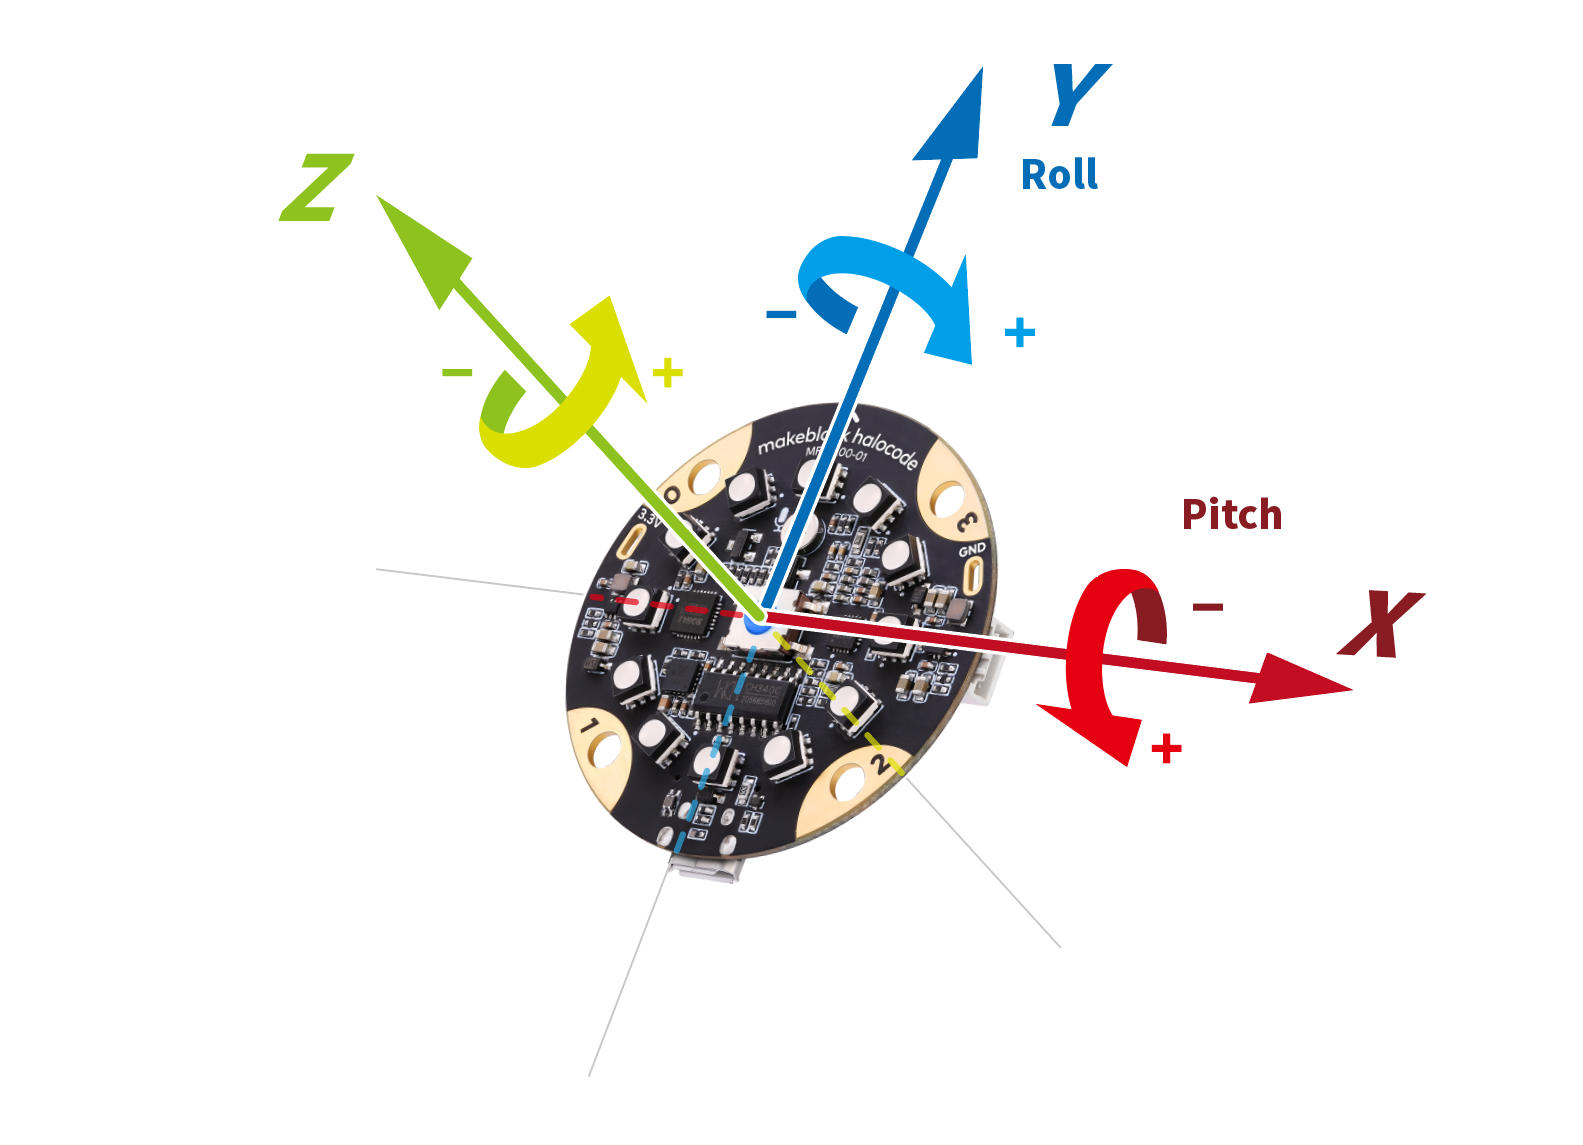
Example
Press the space key and rotates Halocode around the x-axis. The first LED matrix connected to Halocode displays the angular volecity.

若有收获,就点个赞吧
0 人点赞
