- Code for processing data samples can get messy and hard to maintain; we ideally want our dataset code to be decoupled from our model training code for better readability and modularity.
PyTorch has two primitives to work with data(allow you to use pre-loaded datasets as well as your own data):
torch.utils.data.DataLoaderandtorch.utils.data.Dataset.Datasetstores the samples and their corresponding labelsDataLoaderwraps an iterable around theDatasetto enable easy access to the samples.torch.utils.dataAPI 参考:https://pytorch.org/docs/stable/data.htmlimport torchfrom torch import nnfrom torch.utils.data import DataLoaderfrom torchvision import datasetsfrom torchvision.transforms import ToTensorimport matplotlib.pyplot as plt
PyTorch offers domain-specific libraries such as TorchText, TorchVision, and TorchAudio(and implement functions specific to the particular data), all of which include datasets. For this tutorial, we will be using a TorchVision dataset.
- TorchText:https://pytorch.org/text/stable/index.html
- TorchVision:https://pytorch.org/vision/stable/index.html
- TorchAudio:https://pytorch.org/audio/stable/index.html
- The
torchvision.datasetsmodule containsDatasetobjects for many real-world vision data like CIFAR, COCO. In this tutorial, we use the FashionMNIST dataset. Every TorchVisionDatasetincludes two arguments:transformandtarget_transformto modify the samples and labels respectively.- TorchVision
Dataset:https://pytorch.org/vision/stable/datasets.html1、Loading a Dataset
```pythonDownload training data from open datasets.
training_data = datasets.FashionMNIST( root=”data”, train=True, download=True, transform=ToTensor(), )
- TorchVision
Download test data from open datasets.
test_data = datasets.FashionMNIST( root=”data”, train=False, download=True, transform=ToTensor(), )
“”” Downloading http://fashion-mnist.s3-website.eu-central-1.amazonaws.com/train-images-idx3-ubyte.gz Downloading http://fashion-mnist.s3-website.eu-central-1.amazonaws.com/train-images-idx3-ubyte.gz to data/FashionMNIST/raw/train-images-idx3-ubyte.gz Extracting data/FashionMNIST/raw/train-images-idx3-ubyte.gz to data/FashionMNIST/raw
Downloading http://fashion-mnist.s3-website.eu-central-1.amazonaws.com/train-labels-idx1-ubyte.gz Downloading http://fashion-mnist.s3-website.eu-central-1.amazonaws.com/train-labels-idx1-ubyte.gz to data/FashionMNIST/raw/train-labels-idx1-ubyte.gz Extracting data/FashionMNIST/raw/train-labels-idx1-ubyte.gz to data/FashionMNIST/raw
Downloading http://fashion-mnist.s3-website.eu-central-1.amazonaws.com/t10k-images-idx3-ubyte.gz Downloading http://fashion-mnist.s3-website.eu-central-1.amazonaws.com/t10k-images-idx3-ubyte.gz to data/FashionMNIST/raw/t10k-images-idx3-ubyte.gz Extracting data/FashionMNIST/raw/t10k-images-idx3-ubyte.gz to data/FashionMNIST/raw
Downloading http://fashion-mnist.s3-website.eu-central-1.amazonaws.com/t10k-labels-idx1-ubyte.gz Downloading http://fashion-mnist.s3-website.eu-central-1.amazonaws.com/t10k-labels-idx1-ubyte.gz to data/FashionMNIST/raw/t10k-labels-idx1-ubyte.gz Extracting data/FashionMNIST/raw/t10k-labels-idx1-ubyte.gz to data/FashionMNIST/raw “””
- We pass the `Dataset` as an argument to `DataLoader`. This wraps an iterable over our dataset, and supports automatic batching, sampling, shuffling and multiprocess data loading. Here we define a batch size of 64, i.e. each element in the dataloader iterable will return a batch of 64 features and labels.```pythonbatch_size = 64# Create data loaders.train_dataloader = DataLoader(training_data, batch_size=batch_size)test_dataloader = DataLoader(test_data, batch_size=batch_size)for X, y in test_dataloader:print(f"Shape of X [N, C, H, W]: {X.shape}")print(f"Shape of y: {y.shape} {y.dtype}")break"""Shape of X [N, C, H, W]: torch.Size([64, 1, 28, 28])Shape of y: torch.Size([64]) torch.int64"""
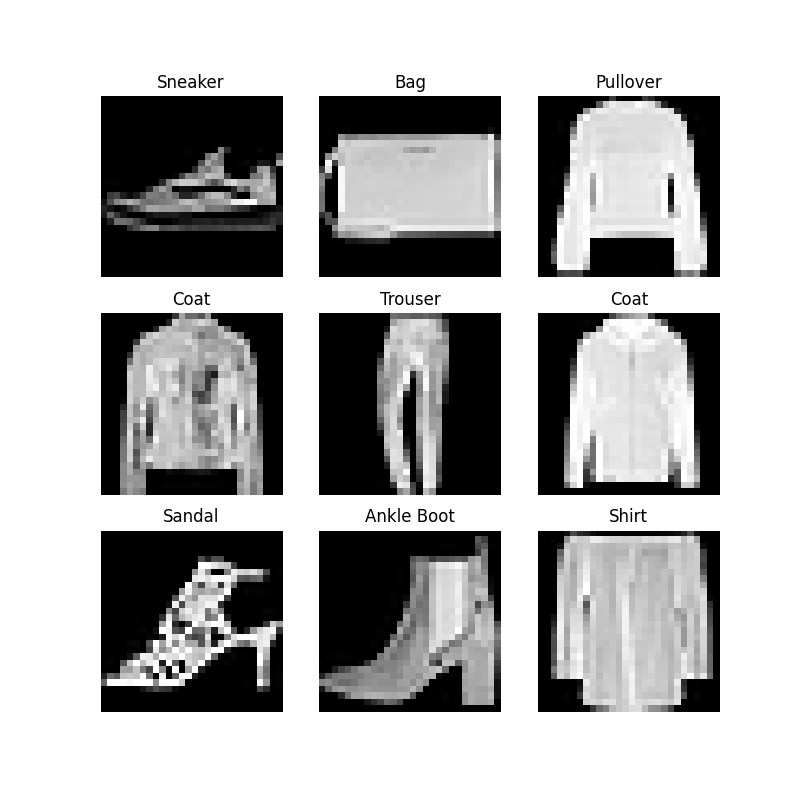
2、Iterating and Visualizing the Dataset
We can index
Datasetsmanually like a list:training_data[index]. We usematplotlibto visualize some samples in our training data.labels_map = { 0: "T-Shirt", 1: "Trouser", 2: "Pullover", 3: "Dress", 4: "Coat", 5: "Sandal", 6: "Shirt", 7: "Sneaker", 8: "Bag", 9: "Ankle Boot", } figure = plt.figure(figsize=(8, 8)) cols, rows = 3, 3 for i in range(1, cols * rows + 1): sample_idx = torch.randint(len(training_data), size=(1,)).item() img, label = training_data[sample_idx] figure.add_subplot(rows, cols, i) plt.title(labels_map[label]) plt.axis("off") plt.imshow(img.squeeze(), cmap="gray") plt.show()3、Creating a Custom Dataset for your files
A custom Dataset class must implement three functions:
__init__,__len__, and__getitem__. Take a look at this implementation; the FashionMNIST images are stored in a directoryimg_dir, and their labels are stored separately in a CSV fileannotations_file.- In the next sections, we’ll break down what’s happening in each of these functions. ```python import os import pandas as pd from torchvision.io import read_image
class CustomImageDataset(Dataset): def init(self, annotations_file, img_dir, transform=None, target_transform=None): self.img_labels = pd.read_csv(annotations_file) self.img_dir = img_dir self.transform = transform self.target_transform = target_transform
def __len__(self):
    return len(self.img_labels)

def __getitem__(self, idx):
    img_path = os.path.join(self.img_dir, self.img_labels.iloc[idx, 0])
    image = read_image(img_path)
    label = self.img_labels.iloc[idx, 1]
    if self.transform:
        image = self.transform(image)
    if self.target_transform:
        label = self.target_transform(label)
    return image, label
<a name="N3DkZ"></a>
### (1)__init__

- The `__init__`function is run once when instantiating the Dataset object. We initialize the directory containing the images, the annotations file, and both transforms (covered in more detail in the next section).
- The `labels.csv` file looks like:
```python
tshirt1.jpg, 0
tshirt2.jpg, 0
......
ankleboot999.jpg, 9
def __init__(self, annotations_file, img_dir, transform=None, target_transform=None):
    self.img_labels = pd.read_csv(annotations_file)
    self.img_dir = img_dir
    self.transform = transform
    self.target_transform = target_transform
(2)len
The
__len__function returns the number of samples in our dataset.def __len__(self): return len(self.img_labels)(3)getitem
The
__getitem__function loads and returns a sample from the dataset at the given indexidx. Based on the index, it identifies the image’s location on disk, converts that to a tensor usingread_image, retrieves the corresponding label from the csv data inself.img_labels, calls the transform functions on them (if applicable), and returns the tensor image and corresponding label in a tuple.def __getitem__(self, idx): img_path = os.path.join(self.img_dir, self.img_labels.iloc[idx, 0]) image = read_image(img_path) label = self.img_labels.iloc[idx, 1] if self.transform: image = self.transform(image) if self.target_transform: label = self.target_transform(label) return image, label4、Preparing your data for training with DataLoaders
The
Datasetretrieves our dataset’s features and labels one sample at a time. While training a model, we typically want to pass samples in “minibatches”, reshuffle the data at every epoch to reduce model overfitting, and use Python’smultiprocessingto speed up data retrieval.DataLoaderis an iterable that abstracts this complexity for us in an easy API. ```python from torch.utils.data import DataLoader
train_dataloader = DataLoader(training_data, batch_size=64, shuffle=True) test_dataloader = DataLoader(test_data, batch_size=64, shuffle=True)
<a name="Jyjm9"></a>
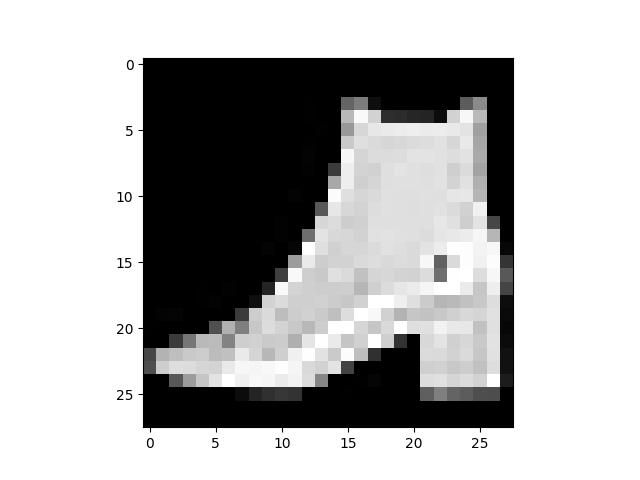
## 5、Iterate through the DataLoader
- We have loaded that dataset into the `DataLoader` and can iterate through the dataset as needed. Each iteration below returns a batch of `train_features` and `train_labels` (containing `batch_size=64` features and labels respectively). Because we specified `shuffle=True`, after we iterate over all batches the data is shuffled.
- For finer-grained control over the data loading order, take a look at Samplers:
- Samplers:[https://pytorch.org/docs/stable/data.html#data-loading-order-and-sampler](https://pytorch.org/docs/stable/data.html#data-loading-order-and-sampler)
```python
# Display image and label.
train_features, train_labels = next(iter(train_dataloader))
print(f"Feature batch shape: {train_features.size()}")
print(f"Labels batch shape: {train_labels.size()}")
img = train_features[0].squeeze()
label = train_labels[0]
plt.imshow(img, cmap="gray")
plt.show()
print(f"Label: {label}")
"""
Feature batch shape: torch.Size([64, 1, 28, 28])
Labels batch shape: torch.Size([64])
Label: 9
"""
6、参考
torch.utils.dataAPI

若有收获,就点个赞吧
0 人点赞
