1.3.1 Python之禅
import this"""The Zen of Python, by Tim PetersBeautiful is better than ugly.Explicit is better than implicit.Simple is better than complex.Complex is better than complicated.Flat is better than nested.Sparse is better than dense.Readability counts.Special cases aren't special enough to break the rules.Although practicality beats purity.Errors should never pass silently.Unless explicitly silenced.In the face of ambiguity, refuse the temptation to guess.There should be one-- and preferably only one --obvious way to do it.Although that way may not be obvious at first unless you're Dutch.Now is better than never.Although never is often better than *right* now.If the implementation is hard to explain, it's a bad idea.If the implementation is easy to explain, it may be a good idea.Namespaces are one honking great idea -- let's do more of those!""""""•优美胜于丑陋(Python 以编写优美的代码为目标)•明了胜于晦涩(优美的代码应当是明了的,命名规范,风格相似)•简洁胜于复杂(优美的代码应当是简洁的,不要有复杂的内部实现)•复杂胜于凌乱(如果复杂不可避免,那代码间也不能有难懂的关系,要保持接口简洁)•扁平胜于嵌套(优美的代码应当是扁平的,不能有太多的嵌套)•间隔胜于紧凑(优美的代码有适当的间隔,不要奢望一行代码解决问题)•可读性很重要(优美的代码是可读的)•即便假借特例的实用性之名,也不可违背这些规则(这些规则至高无上)•不要包容所有错误,除非你确定需要这样做(精准地捕获异常,不写 except:pass 风格的代码)•当存在多种可能,不要尝试去猜测•而是尽量找一种,最好是唯一一种明显的解决方案(如果不确定,就用穷举法)•虽然这并不容易,因为你不是 Python 之父(这里的 Dutch 是指 Guido )•做也许好过不做,但不假思索就动手还不如不做(动手之前要细思量)•如果你无法向人描述你的方案,那肯定不是一个好方案;反之亦然(方案测评标准)•命名空间是一种绝妙的理念,我们应当多加利用(倡导与号召)"""
1.3.2 Python教程
来自阿里的Python训练营(2020.11),178页,19小节,包含四大任务。12天,每天1小时即可学完。
1.3.2.1 小节摘要
- Python介绍
print("Hello Python.")
- 变量、运算符与数据类型
num = "123"print(int(num) + 123)
- 位运算
print(~1, 1 & 0, 1 | 0, 1 ^ 0, 100 >> 1, 100 << 1, 1<< 2)
- 条件语句
num = 123if num > 10:print("1")elif num > 20:print("2")else:print("3")
- 循环语句
passwdList = [str(i) for i in range(232, 421)]valid = Falsecount = 3while count > 0:password = input('enter password:')for item in passwdList:if password == item:valid = Truebreakif not valid:print('invalid input')count -= 1continueelse:break
- 异常处理
try:print(1+"1")except Exception as e:print(e)finally:print("END")
- 元组
[1, 2, 3], (1, 2, 3)
- 字符串
print("%.4f" % int("123,2.3"[:-1].strip(".").split(",")[0][::-1]))
- 字典
dit = {"name": "X", "age": 20}
- 集合
basket = {'apple', 'orange', 'apple', 'pear', 'orange', 'banana'}
- 序列
t = "ABC"list(t), tuple(t), len(t), max(t), min(t)
- 函数与lambda表达式
def f(x):return x+2f = lambda x: x+2
- 类与对象
class C(object):def __init__(self):self.__x = Nonedef getx(self):return self.__xdef setx(self, value):self.__x = valuedef delx(self):del self.__x
- 魔法方法
def libs(n):a = 0b = 1while True:a, b = b, a + bif a > n:returnyield afor each in libs(100):print(each, end=' ')
- 模块
import hellohello.hi()
- datetime模块
import datetimedt = datetime.datetime(year=2020, month=6, day=25, hour=11, minute=51, second=49)s = dt.strftime("%Y/%m/%d %H:%M:%S")print(s)
- 文件与文件系统
with open("c001.py", "r") as f:for i in f:print(i)
- OS模块
import osfor item in os.listdir():print(item)
- 序列化与反序列化
import pickledata = {"name": "X", "age": 20}with open("dataFile.pkl", "wb") as f:pickle.dump(data, f, -1)with open("dataFile.pkl", "rb") as f:print(pickle.load(f))
1.3.2.2 四大任务
- Task1
Python基础知识介绍,包含变量、位运算、条件语句和异常处理;
- Task2
Python中的6大数据结构,包括列表、元组、字符串、字典、集合、序列;
- Task3
Python中的函数、lambda表达式、类与对象、魔法方法;
- Task4
数据分析实战项目,从0开始动手;
1.3.3 Python书籍
https://www.runoob.com/python/python-tutorial.html https://www.runoob.com/python3/python3-tutorial.html https://www.w3cschool.cn/pythonlearn/ https://www.liaoxuefeng.com/wiki/1016959663602400 《Python学习手册》 《Python语言及其应用》 《像计算机科学家一样思考Python》
1.3.4 Python Help使用
直接调用help()语句,如下:
import thishelp(this)"""Help on module this:NAMEthisMODULE REFERENCEhttps://docs.python.org/3.7/library/thisThe following documentation is automatically generated from the Pythonsource files. It may be incomplete, incorrect or include features thatare considered implementation detail and may vary between Pythonimplementations. When in doubt, consult the module reference at thelocation listed above.DATAc = 97d = {'A': 'N', 'B': 'O', 'C': 'P', 'D': 'Q', 'E': 'R', 'F': 'S', 'G': ...i = 25s = "Gur Mra bs Clguba, ol Gvz Crgref\n\nOrnhgvshy vf o...bar ubaxvat ...FILE/python3/lib/python3.7/this.py"""
或者
def f(para1, para2):"""Get the min one."""return min(para1, para2)help(f)"""Help on function f in module __main__:f(para1, para2)Get the min one."""
1.3.5 Python包
1.3.5.1 Python包缺失
执行代码时报错如下:
import data"""---------------------------------------------------------------------------ModuleNotFoundError Traceback (most recent call last)<ipython-input-1090-699327cd1cad> in <module>()----> 1 import dataModuleNotFoundError: No module named 'data'"""
即缺失该data工具包。
1.3.5.2 Python包安装
一般的,可以使用Anaconda进行Python库安装及管理,其中包括Conda、Python以及一大堆安装好的工具包,比如:numpy、pandas等。
对于Anaconda未预装的Python包就需要自行安装,如下:
(1)在线安装
pip install data -i https://pypi.tuna.tsinghua.edu.cn/simple
对于较新版本,推荐使用:
python3 -m pip install data -i https://pypi.tuna.tsinghua.edu.cn/simple
若显示Successfully installed XXX即安装成功。
"""Looking in indexes: https://pypi.tuna.tsinghua.edu.cn/simpleCollecting dataUsing cached https://pypi.tuna.tsinghua.edu.cn/packages/ed/e9/623be82fac4250fc614741f5b1ead83d339794f94b19ac8665b6ea12ee05/data-0.4.tar.gz (7.0 kB)...Building wheels for collected packages: dataBuilding wheel for data (setup.py) ... doneCreated wheel for data: filename=data-0.4-py3-none-any.whl size=7247 sha256=32a13cabc2205de95c0be8d38888b6642b602dca08e2951f4d3c200128c6ff9dStored in directory: /pip/wheels/35/20/c4/885e3ce9b69e4852259f20fe1ee95b5d6eb7dcaafae23f4051Successfully built dataInstalling collected packages: dataSuccessfully installed data-0.4"""
(2)离线安装
大部分时候,安装Python包的银行环境属于内网独立网段,我们可以预先download好Python包用于离线安装。
pip download data"""Collecting dataDownloading data-0.4.tar.gz (7.0 kB)Collecting decoratorDownloading decorator-4.4.2-py2.py3-none-any.whl (9.2 kB)Collecting funcsigsDownloading funcsigs-1.0.2-py2.py3-none-any.whl (17 kB)Collecting sixDownloading six-1.15.0-py2.py3-none-any.whl (10 kB)Saved ./data-0.4.tar.gzSaved ./decorator-4.4.2-py2.py3-none-any.whlSaved ./funcsigs-1.0.2-py2.py3-none-any.whlSaved ./six-1.15.0-py2.py3-none-any.whlSuccessfully downloaded data decorator funcsigs six"""
可以看到连带依赖包也下载好,可以打包带走,带到另一个地方进行离线安装。
cd packagespip install six-1.15.0-py2.py3-none-any.whl
(3)源码安装
这里注意到data下载后是压缩包data-0.4.tar.gz,此时需要源码安装。
# 解压,手动解压也一样tar -zxvf data-0.4.tar.gz"""data-0.4/data-0.4/setup.cfgdata-0.4/PKG-INFOdata-0.4/setup.pydata-0.4/README.rstdata-0.4/data.egg-info/data-0.4/data.egg-info/top_level.txtdata-0.4/data.egg-info/requires.txtdata-0.4/data.egg-info/dependency_links.txtdata-0.4/data.egg-info/SOURCES.txtdata-0.4/data.egg-info/PKG-INFOdata-0.4/data/data-0.4/data/decorators.pydata-0.4/data/__init__.py"""# 去到该路径cd data-0.4# Buildpython setup.py build"""running buildrunning build_pycreating buildcreating build/libcreating build/lib/datacopying data/__init__.py -> build/lib/datacopying data/decorators.py -> build/lib/data"""# Installpython setup.py install"""running installrunning bdist_eggrunning egg_infowriting data.egg-info/PKG-INFOwriting dependency_links to data.egg-info/dependency_links.txtwriting requirements to data.egg-info/requires.txtwriting top-level names to data.egg-info/top_level.txtreading manifest file 'data.egg-info/SOURCES.txt'writing manifest file 'data.egg-info/SOURCES.txt'installing library code to build/bdist.linux-x86_64/eggrunning install_librunning build_py...Using /usr/local/lib/python3.6/dist-packagesFinished processing dependencies for data==0.4"""
(4)卸载管理
pip uninstall data"""Found existing installation: data 0.4Uninstalling data-0.4:Would remove:/python3/lib/python3.7/site-packages/data-0.4.dist-info/*/python3/lib/python3.7/site-packages/data/*Proceed (y/n)? ySuccessfully uninstalled data-0.4"""
1.3.5.3 Python包验证
如上,我们已经安装data包,验证之。
python -c "import data"
若无输出即安装无误。
- PS:在Windows环境下,上述命令需先通过win+R,输入cmd调出命令提示符操作。
除切换路径时改用cd /d D:\Python包,其余一致
1.3.6 Python IDE
1.3.6.1 Jupyter
- Jupyter魔法函数
所谓魔法函数,实际上是IPython预先定义好的具备特定功能的函数被收到Jupyter中使用。
%lsmagic"""Available line magics:%alias%alias_magic%autocall%automagic%autosave%bookmark%cat%cd%clear%colors%config%connect_info%cp%debug%dhist%dirs%doctest_mode%ed%edit%env%gui%hist%history%killbgscripts%ldir%less%lf%lk%ll%load%load_ext%loadpy%logoff%logon%logstart%logstate%logstop%ls%lsmagic%lx%macro%magic%man%matplotlib%mkdir%more%mv%notebook%page%pastebin%pdb%pdef%pdoc%pfile%pinfo%pinfo2%popd%pprint%precision%profile%prun%psearch%psource%pushd%pwd%pycat%pylab%qtconsole%quickref%recall%rehashx%reload_ext%rep%rerun%reset%reset_selective%rm%rmdir%run%save%sc%set_env%store%sx%system%tb%time%timeit%unalias%unload_ext%who%who_ls%whos%xdel%xmodeAvailable cell magics:%%!%%HTML%%SVG%%bash%%capture%%debug%%file%%html%%javascript%%js%%latex%%markdown%%perl%%prun%%pypy%%python%%python2%%python3%%ruby%%script%%sh%%svg%%sx%%system%%time%%timeit%%writefileAutomagic is ON, % prefix IS NOT needed for line magics."""
常用的%time、%timeit,能为代码提供执行计时服务,区别在于%time返回单次结果,%timeit返回循环N轮次后统计结果。这很适合性能比拼,以下测试sum、np.sum在实现一样的求和功能时,代码耗时情况:
import numpy as npL = np.linspace(0, 100, 1000000)f1 = lambda l: sum(l)f2 = lambda l: np.sum(l)%time f1(L)%time f2(L)%timeit f1(L)%timeit f2(L)"""CPU times: user 132 ms, sys: 548 µs, total: 132 msWall time: 133 msCPU times: user 810 µs, sys: 479 µs, total: 1.29 msWall time: 1.16 ms140 ms ± 3.3 ms per loop (mean ± std. dev. of 7 runs, 10 loops each)367 µs ± 39.1 µs per loop (mean ± std. dev. of 7 runs, 1000 loops each)"""
显然,此测试中np.sum完胜!
1.3.6.2 Pycharm
虽然,Pycharm也集成了Jupyter的功能,相对而言,Pycharm比较适合开发工程型项目。
1.3.7 Python代码规范
1.3.7.1 PEP 8
https://www.python.org/dev/peps/pep-0008/ https://github.com/python/peps/blob/master/pep-0008.txt
要求如:
- Use 4 spaces per indentation level.
- Limit all lines to a maximum of 79 characters.
- …
1.3.7.2 YAPF
可以使用Google开发的格式工具YAPF。
https://github.com/google/yapf https://pypi.org/project/yapf/
(1)安装
pip install yapf
(2)说明
yapf --help"""usage: yapf [-h] [-v] [-d | -i] [-r | -l START-END] [-e PATTERN][--style STYLE] [--style-help] [--no-local-style] [-p][-vv][files [files ...]]Formatter for Python code.positional arguments:filesoptional arguments:-h, --help show this help message and exit-v, --version show version number and exit-d, --diff print the diff for the fixed source-i, --in-place make changes to files in place-r, --recursive run recursively over directories-l START-END, --lines START-ENDrange of lines to reformat, one-based-e PATTERN, --exclude PATTERNpatterns for files to exclude from formatting--style STYLE specify formatting style: either a style name (forexample "pep8" or "google"), or the name of a filewith style settings. The default is pep8 unless a.style.yapf or setup.cfg file located in the samedirectory as the source or one of its parentdirectories (for stdin, the current directory isused).--style-help show style settings and exit; this output can be savedto .style.yapf to make your settings permanent--no-local-style don't search for local style definition-p, --parallel Run yapf in parallel when formatting multiple files.Requires concurrent.futures in Python 2.X-vv, --verbose Print out file names while processing"""
应用1
yapf -i run.py
应用2 ```python # from yapf.yapflib.yapf_api import FormatCode code = “”” x = { ‘a’:37,’b’:42,
‘c’:927}
y = ‘hello ‘’world’ z = ‘hello ‘+’world’ a = ‘hello {}’.format(‘world’) class foo ( object ): def f (self ): return 37-+2 def g(self, x,y=42): return y def f ( a ) : return 37+-+a[42-x : y*3] “””
print(FormatCode(code)) “”” (“x = {‘a’: 37, ‘b’: 42, ‘c’: 927}\n\ny = ‘hello ‘ ‘world’\nz = ‘hello ‘ + ‘world’\na = ‘hello {}’.format(‘world’)\n\n\nclass foo(object):\n def f(self):\n return 37 -+2\n\n def g(self, x, y=42):\n return y\n\n\ndef f(a):\n return 37 + -+a[42 - x:y*3]\n”, True) “””
(3)示例<br />以下例举官方例子。修改前:```pythonx = { 'a':37,'b':42,'c':927}y = 'hello ''world'z = 'hello '+'world'a = 'hello {}'.format('world')class foo ( object ):def f (self ):return 37*-+2def g(self, x,y=42):return ydef f ( a ) :return 37+-+a[42-x : y**3]
修改后:
x = {'a': 37, 'b': 42, 'c': 927}y = 'hello ' 'world'z = 'hello ' + 'world'a = 'hello {}'.format('world')class foo(object):def f(self):return 37 * -+2def g(self, x, y=42):return ydef f(a):return 37 + -+a[42 - x:y**3]
1.3.8 Python片段
详见:
示例,009.Test_multiprocessing_run, multiprocessing多线程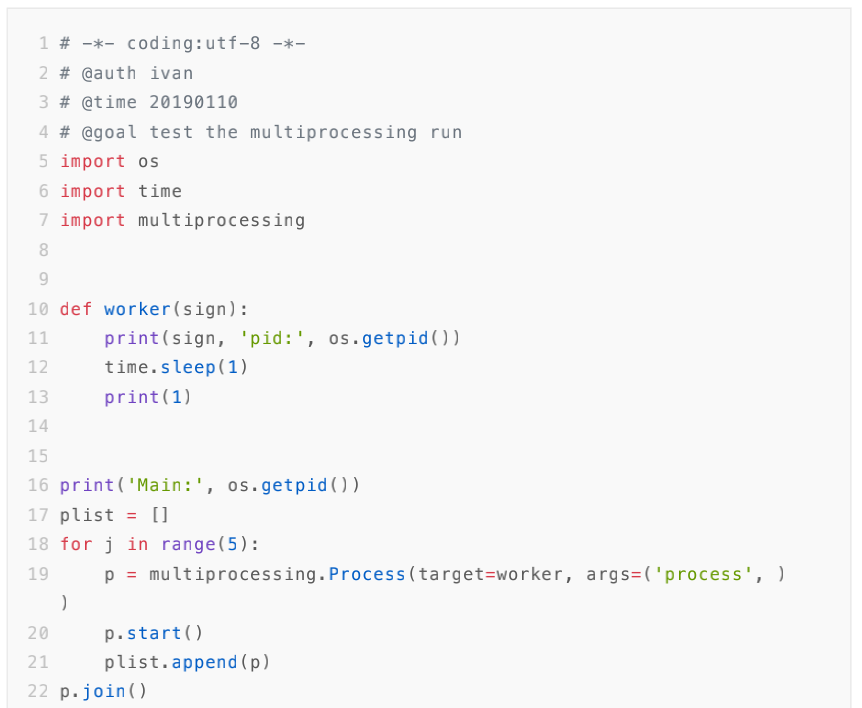
1.3.9 Python编译
由于Python编译对大部分开发者是无感的,一般来说,我们不需要像SAS那样进一步延伸编译层的PDV概念,进而能编写出更加优质(但也更加难懂)的代码。故而以下只点出三个概念:
- 其一,基本编译
Python每次运行都要进行转换成字节码,然后再有虚拟机把字节码转换成机器语言,最后才能在硬件上运行。与编译性语言相比,每次多出了编译和链接的过程,性能肯定会受到影响;而python并不是每次都需要转换字节码,解释器在转换之前会判断代码文件的修改时间是否与上一次转换后的字节码pyc文件的修改时间一致,若不一致才会重新转换。
- 其二,code object
我们可以通过内置函数compile,将源文件编译成code object,如下:
cmd = """print(1)"""code_object = compile(cmd, "", "exec")print(code_object)eval(code_object)"""<code object <module> at 0x7f859d1b79c0, file "", line 2>1"""
还可以通过dis进行反编译:
import disdis.dis(code_object)"""2 0 LOAD_NAME 0 (print)2 LOAD_CONST 0 (1)4 CALL_FUNCTION 16 POP_TOP8 LOAD_CONST 1 (None)10 RETURN_VALUE"""
可以看到python字节码其实是模仿的x86的汇编,将代码编译成一条一条的指令交给一个虚拟的cpu去执行的。
有兴趣的同学可拓展学习: https://godbolt.org/(一个多语言在线编辑器) Python代码片段-081.Test_eval, eval的安全攻防
- 其三,Python部署
这里指Python部署时,将Python转换Pyc/Pyo/So文件,避免直接暴露源码。
# 同一系统环境下/python3/bin/cython run.py# /python3/bin/python -m py_compile run.pygcc -c -fPIC run.cgcc -shared run.o -o run.so

若有收获,就点个赞吧
0 人点赞
