:::info
NFS 是 Network FileSystem 的缩写,顾名思义就是网络文件存储系统,它最早是由 Sun 公司发展出来的,也是 FreeBSD 支持的文件系统中的一个,它允许网络中的计算机之间通过 TCP/IP 网络共享资源。通过 NFS,我们本地 NFS 的客户端应用可以透明地读写位于服务端 NFS 服务器上的文件,就像访问本地文件一样方便。简单的理解,NFS 就是可以透过网络,让不同的主机、不同的操作系统可以共享存储的服务。:::
NFS 在文件传送或信息传送过程中依赖于 RPC(Remote Procedure Call) 协议,即远程过程调用, NFS 的各项功能都必须要向 RPC 来注册,如此一来 RPC 才能了解 NFS 这个服务的各项功能 Port、PID、NFS 在服务器所监听的 IP 等,而客户端才能够透过 RPC 的询问找到正确对应的端口,所以,NFS 必须要有 RPC 存在时才能成功的提供服务,简单的理解二者关系:NFS是 一个文件存储系统,而 RPC 是负责信息的传输。通过上边简要的介绍,我们知道 NFS 服务需要依赖 RPC 服务,所以这里 NFS 服务端需要安装 rpcbind 和 nfs-utils,客户端只需要安装 nfs-utils。
官网:https://nfs.sourceforge.net/
1、确认是否已经安装
rpm -qa nfs-utils rpcbind
2、在线安装
有网的条件下可以通过网络快速安装
#服务端yum install -y nfs-utils rpcbind#客户端yum install -y nfs-utils
3、离线安装
公司中很多情况下是内网环境,需要使用离线安装方式
# 下载离线包## rpcbindlibtirpc-0.2.4-0.16.el7.x86_64.rpmrpcbind-0.2.0-49.el7.x86_64.rpm## nfs-utils(依赖比较多)nfs-utils-1.3.0-0.68.el7.x86_64.rpmtcp_wrappers-7.6-77.el7.x86_64...
安装
#安装路径下的所有rpm包rpm -Uvh *.rpm --nodeps --force#安装特定的rpm包rpm -hvi dejagnu-1.4.2-10.noarch.rpm
4、配置检查是否安装成功
# 1.在服务端创建一个共享目录 /data/share ,作为客户端挂载的远端入口,然后设置权限。mkdir -p /data/sharechmod 755 /data/share# 2.修改 NFS 配置文件 /etc/exportsvim /etc/exports#配置单个ip/data/share 192.168.0.130(rw,sync,insecure,no_subtree_check,no_root_squash)/data/share 192.168.0.131(rw,sync,insecure,no_subtree_check,no_root_squash)#配置ip段/data/share 192.168.0.130/139(rw,sync,insecure,no_subtree_check,no_root_squash)#配置所有ip可以挂载/data/share *(rw,sync,insecure,no_subtree_check,no_root_squash)
说明: /data/share-共享目录
192.168.0.130-IP地址,可以是特定的ip地址、ip地址段或所有可以访问的ip
rw,sync,insecure,no_subtree_check,no_root_squash-访问控制参数,具体参考下面列表。
| 参数 | 说明 |
|---|---|
| ro | 只读 |
| rw | 读写 |
| sync | 同步共享-所有数据在请求时写入共享 |
| async | 异步共享-nfs 在写入数据前可以响应请求 |
| secure | nfs 通过 1024 以下的安全 TCP/IP 端口发送 |
| insecure | nfs 通过 1024 以上的端口发送 |
| wdelay | 如果多个用户要写入 nfs 目录,则归组写入(默认) |
| no_wdelay | 如果多个用户要写入 nfs 目录,则立即写入,当使用 async 时,无需此设置 |
| hide | 在 nfs 共享目录中不共享其子目录 |
| no_hide | 共享 nfs 目录的子目录 |
| subtree_check | 如果共享 /usr/bin 之类的子目录时,强制 nfs 检查父目录的权限(默认) |
| no_subtree_check | 不检查父目录权限 |
| all_squash | 共享文件的 UID 和 GID 映射匿名用户 anonymous,适合公用目录 |
| no_all_squash | 保留共享文件的 UID 和 GID(默认) |
| root_squash | root 用户的所有请求映射成如 anonymous 用户一样的权限(默认) |
| no_root_squash | root 用户具有根目录的完全管理访问权限 |
| anonuid=xxx | 指定 nfs 服务器 /etc/passwd 文件中匿名用户的 UID |
| anongid=xxx | 指定 nfs 服务器 /etc/passwd 文件中匿名用户的 GID |
5、启动服务并测试
1. 启动rpc服务
service rpcbind start#或者使用如下命令/bin/systemctl start rpcbind.service# 查看 NFS 服务项 rpc 服务器注册的端口列表rpcinfo -p localhost
2. 启动nfs服务
service nfs start#或者使用如下命令亦可/bin/systemctl start nfs.service# 启动 NFS 服务后 rpc 服务已经启用了对 NFS 的端口映射列表# rpcinfo -p localhost
3. 在另一台 Linux 上挂载目录
查看配置,showmoun -e 192.168.0.130
#新建目录mkdir -p /share#挂载共享目录mount 192.168.0.130:/data/share /share#如果要卸载目录umount /share
4. 设置防火墙
NFS 使用是:2049 RPC 端口:111 RPC client :随机端口
# firewall-cmd --permanent --add-rich-rule="rule family="ipv4" source address="10.223.225.0/24" port protocol="tcp" port="9110" accept"firewall-cmd --zone=public --add-port=111/tcp --permanentfirewall-cmd --zone=public --add-port=2049/tcp --permanentfirewall-cmd --reload
6、安全加固
以下是银河麒麟v10,其他系统如:openEuler类似
1. nfs相关端口固定
端口固定,便于开放策略,默认端口如mountd:20048、rquotad:875等
固定后:rquotad:30001、lockd:30002、mountd:30003、statd:30004
开放策略时
firewall-cmd --permanent --add-port=30001-30004/tcp其他原因暂时未想到!
1)service中固定
# 查看nfs-utils是否已安装,未安装需要安装rpm -qa | grep nfsnfs-utils-help-2.5.4-4.oe2203.x86_64nfs-utils-2.5.4-4.oe2203.x86_64# 查看服务状态 和 默认监听的端口systemctl status nfs rpcbind# 查看端口所对应的服务名,以便在/etc/services中注释配置rpcinfo -p# 修改配置,固定NFS端口vi /etc/services#添加注释#mountd 20048/tcp # NFS mount protocol#mountd 20048/udp # NFS mount protocol#rquotad 875/tcp # rquota daemon#rquotad 875/udp # rquota daemon#添加自定义端口配置(这些端口是哪里的)rquotad 30001/tcprquotad 30001/UDPlockd 30002/tcplockd 30002/udpmountd 30003/tcpmountd 30003/udpstatd 30004/tcpstatd 30004/tcp# 重启服务,进行验证systemctl status nfs-idmap nfs-lock nfs-server rpcbindsystemctl restart nfs-idmap nfs-lock nfs-server rpcbind#systemctl restart nfs-lock#systemctl restart nfs-server#systemctl restart rpcbind
以上还有随机端口,未修改到的则进行下一步
2)nfs.conf进一步固定
vi /etc/nfs.conf#在原来的标签下添加内容[lockd]port=30002udp-port=30002[statd]port=30004# 再次重启服务进行验证无误即可systemctl status nfs-idmap nfs-lock nfs-server rpcbindsystemctl restart nfs-idmap nfs-lock nfs-server rpcbind
2. 防火墙策略开放
# 让防火墙通过NFS服务firewall-cmd --permanent --add-service=nfs# 通过rpc服务(如果不开启,rpcinfo就不能扫描)firewall-cmd --permanent --add-service=rpc-bind# 通过mountd服务(如果不开启,不能远程showmount)firewall-cmd --permanent --add-service=mountd#重载firewall-cmd --reload# 端口方式firewall-cmd --permanent --add-port=2049/tcpfirewall-cmd --permanent --add-port=2049/udpfirewall-cmd --permanent --add-port=111/tcpfirewall-cmd --permanent --add-port=111/udpfirewall-cmd --permanent --add-port=30001-30004/tcpfirewall-cmd --permanent --add-port=30001-30004/udpfirewall-cmd --reload
3. 安全加固 设置黑白名单
思路:通过系统白名单和nfs配置来进行加固
1)修改nfs配置
这一步可能已经做过了,查看一下配置核对一下
# 1.修改nfs配置cat /etc/exports# 此处表示允许10.223.225.0/24这个网段访问,其他不允许访问/data/nfs 10.223.225.0/255.255.255.0(rw,sync,no_root_squash)#重载配置exportfs -avr
2)添加访问白名单和黑名单
# 白名单cat /etc/hosts.allow# 10.223.225. 表示此网段可访问mountd:10.223.225.rpcbind:10.223.225.:allowportmap:10.223.225.lockd:10.223.225.rquotad:10.223.225.statd:10.223.225.#本机portmap:127.0.0.1lockd:1127.0.0.1rquotad:127.0.0.1statd:127.0.0.1mountd:127.0.0.1rpcbind:127.0.0.1:allow# 黑名单cat /etc/hosts.denymountd:ALLrpcbind:ALL:denystatd:ALLportmap:ALLlockd:ALLrquotad:ALL
3)验证
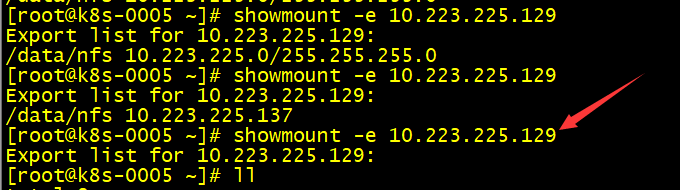
# 同一网段访问rpcinfo server-ipshowmount -e server-ip# 不同网段放rpcinfo server-ipshowmount -e server-ip
- 不同网段获取不到nfs的信息,也不能挂载即成功加固
4. 配置IP可挂载
# 修改配置vim /etc/exports/data/nfs IP1(rw,sync,no_root_squash)/data/nfs IP2(rw,sync,no_root_squash)/data/nfs IP3(rw,sync,no_root_squash).../data/nfs IPn(rw,sync,no_root_squash)# 重启nfs服务systemctl restart nfs-server.service# 验证
- 最后一个是重启nfs-server之后的
附件
https://www.volcengine.com/theme/2587133-C-7-1
:::warning RPM仓库地址:
搜狐开源镜像站 http://mirrors.sohu.com/
网易开源镜像站 http://mirrors.163.com/
阿里云开源镜像站 http://mirrors.aliyun.com/
公云开源镜像站 http://mirrors.pubyun.com/
首都在线开源镜像站 http://mirrors.yun-idc.com/
linux运维派开源镜像站 http://mirrors.skyshe.cn/
中科院开源镜像站 http://mirrors.opencas.cn/
北京理工大学开源镜像站 http://mirror.bit.edu.cn/web/
北京交通大学开源镜像站 http://mirror.bjtu.edu.cn/cn/
兰州大学开源镜像站 http://mirror.lzu.edu.cn/
中国科技大学开源镜像站 http://mirrors.ustc.edu.cn/
浙江大学开源镜像站 http://mirrors.zju.edu.cn/
厦门大学开源镜像站 http://mirrors.xmu.edu.cn/
东北大学开源镜像站 http://mirror.neu.edu.cn/
华中科技大学开源镜像站 http://mirrors.hust.edu.cn/
重庆大学开源镜像站 http://mirrors.cqu.edu.cn/
东软信息学院开源镜像站 http://mirrors.neusoft.edu.cn/
大连理工大学开源镜像站 http://mirror.dlut.edu.cn/
中山大学开源镜像站 http://mirror.sysu.edu.cn/
上海交通大学ftp站 http://ftp.sjtu.edu.cn/
北京大学ftp站 ftp://ftp.pku.edu.cn
北京邮电大学ftp站 ftp://ftp.bupt.edu.cn
:::

若有收获,就点个赞吧
0 人点赞
