✨新特性
1. DB-GPT支持Graph RAG框架, 实现TuGraph上的知识图谱构建与检索
使用步骤:
- 安装TuGraph
docker pull tugraph/tugraph-runtime-centos7:latestmkdir -p /tmp/tugraph/data && mkdir -p /tmp/tugraph/log && \docker run -it -d -p 7001:7001 -p 7070:7070 -p 7687:7687 -p 8000:8000 -p 8888:8888 -p 8889:8889 -p 9090:9090 \-v /tmp/tugraph/data:/var/lib/lgraph/data -v /tmp/tugraph/log:/var/log/lgraph_log \--name tugraph_demo tugraph/tugraph-runtime-centos7:latest /bin/bash && \docker exec -d tugraph_demo bash /setup.shpip install "neo4j>=5.20.0"
在.env设置TuGraph配置
GRAPH_STORE_TYPE=TuGraphTUGRAPH_HOST=127.0.0.1TUGRAPH_PORT=7687TUGRAPH_USERNAME=adminTUGRAPH_PASSWORD=xxx
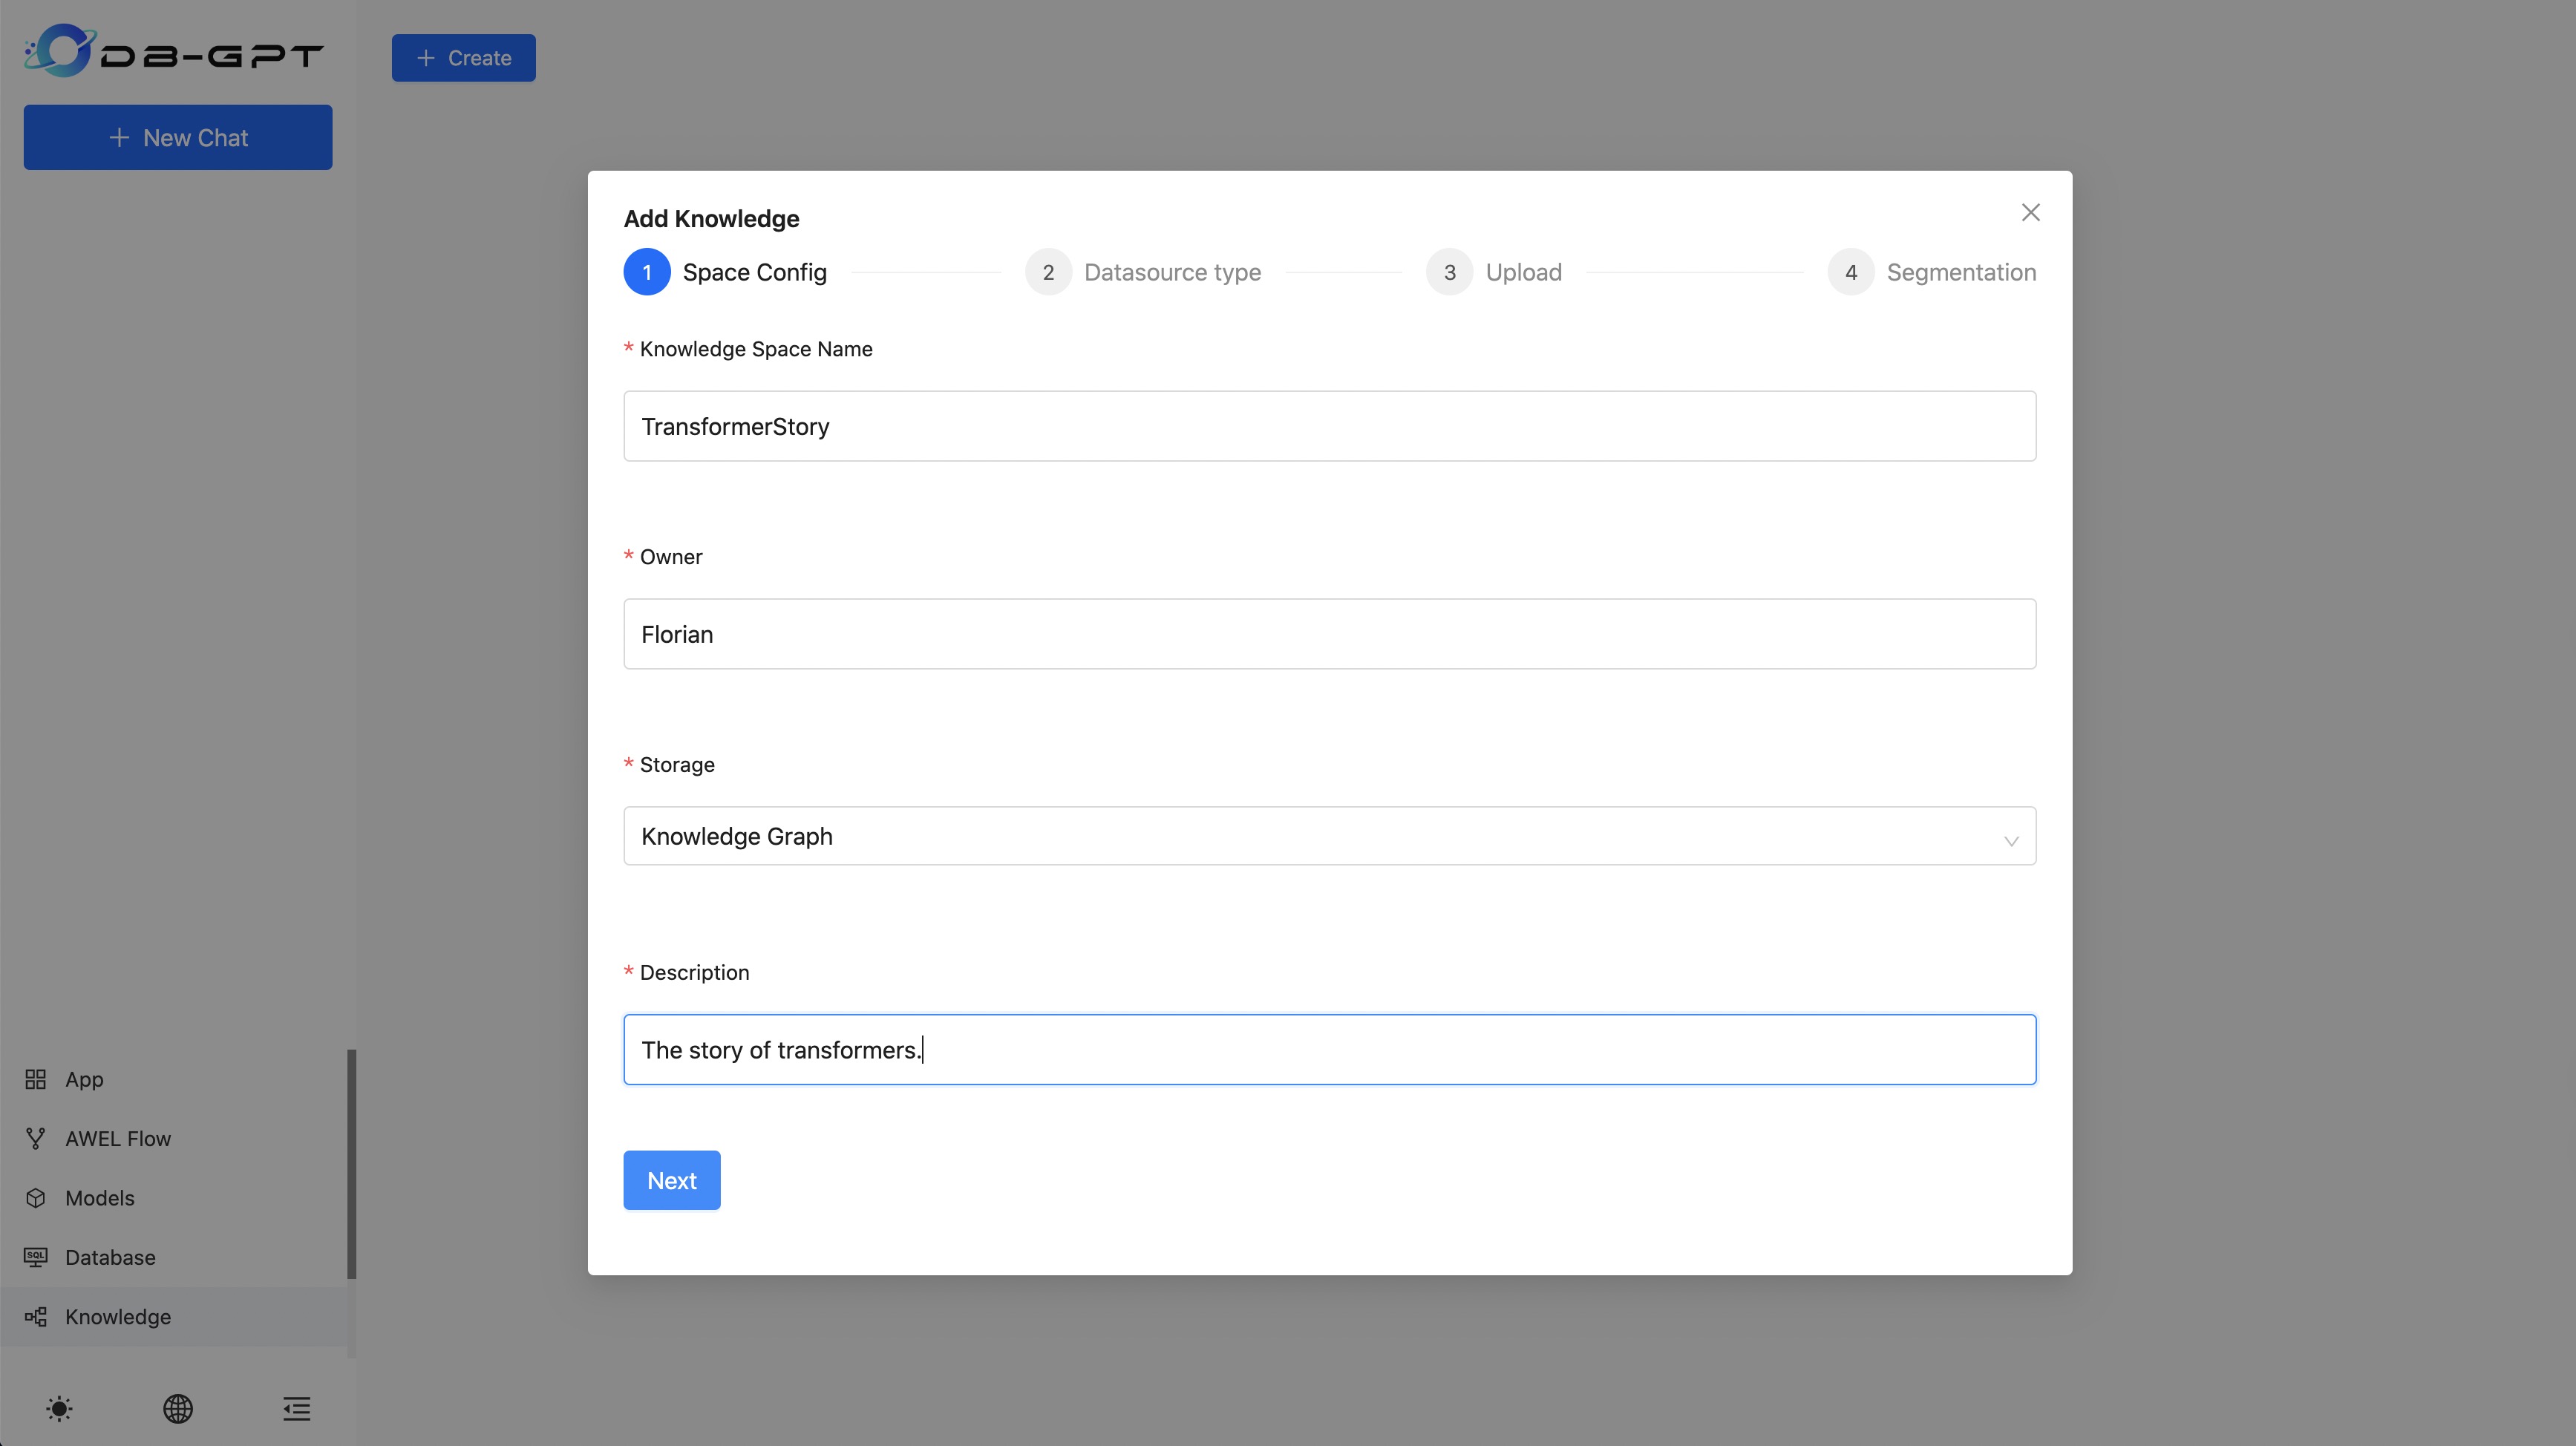
- 使用知识图谱创建知识空间
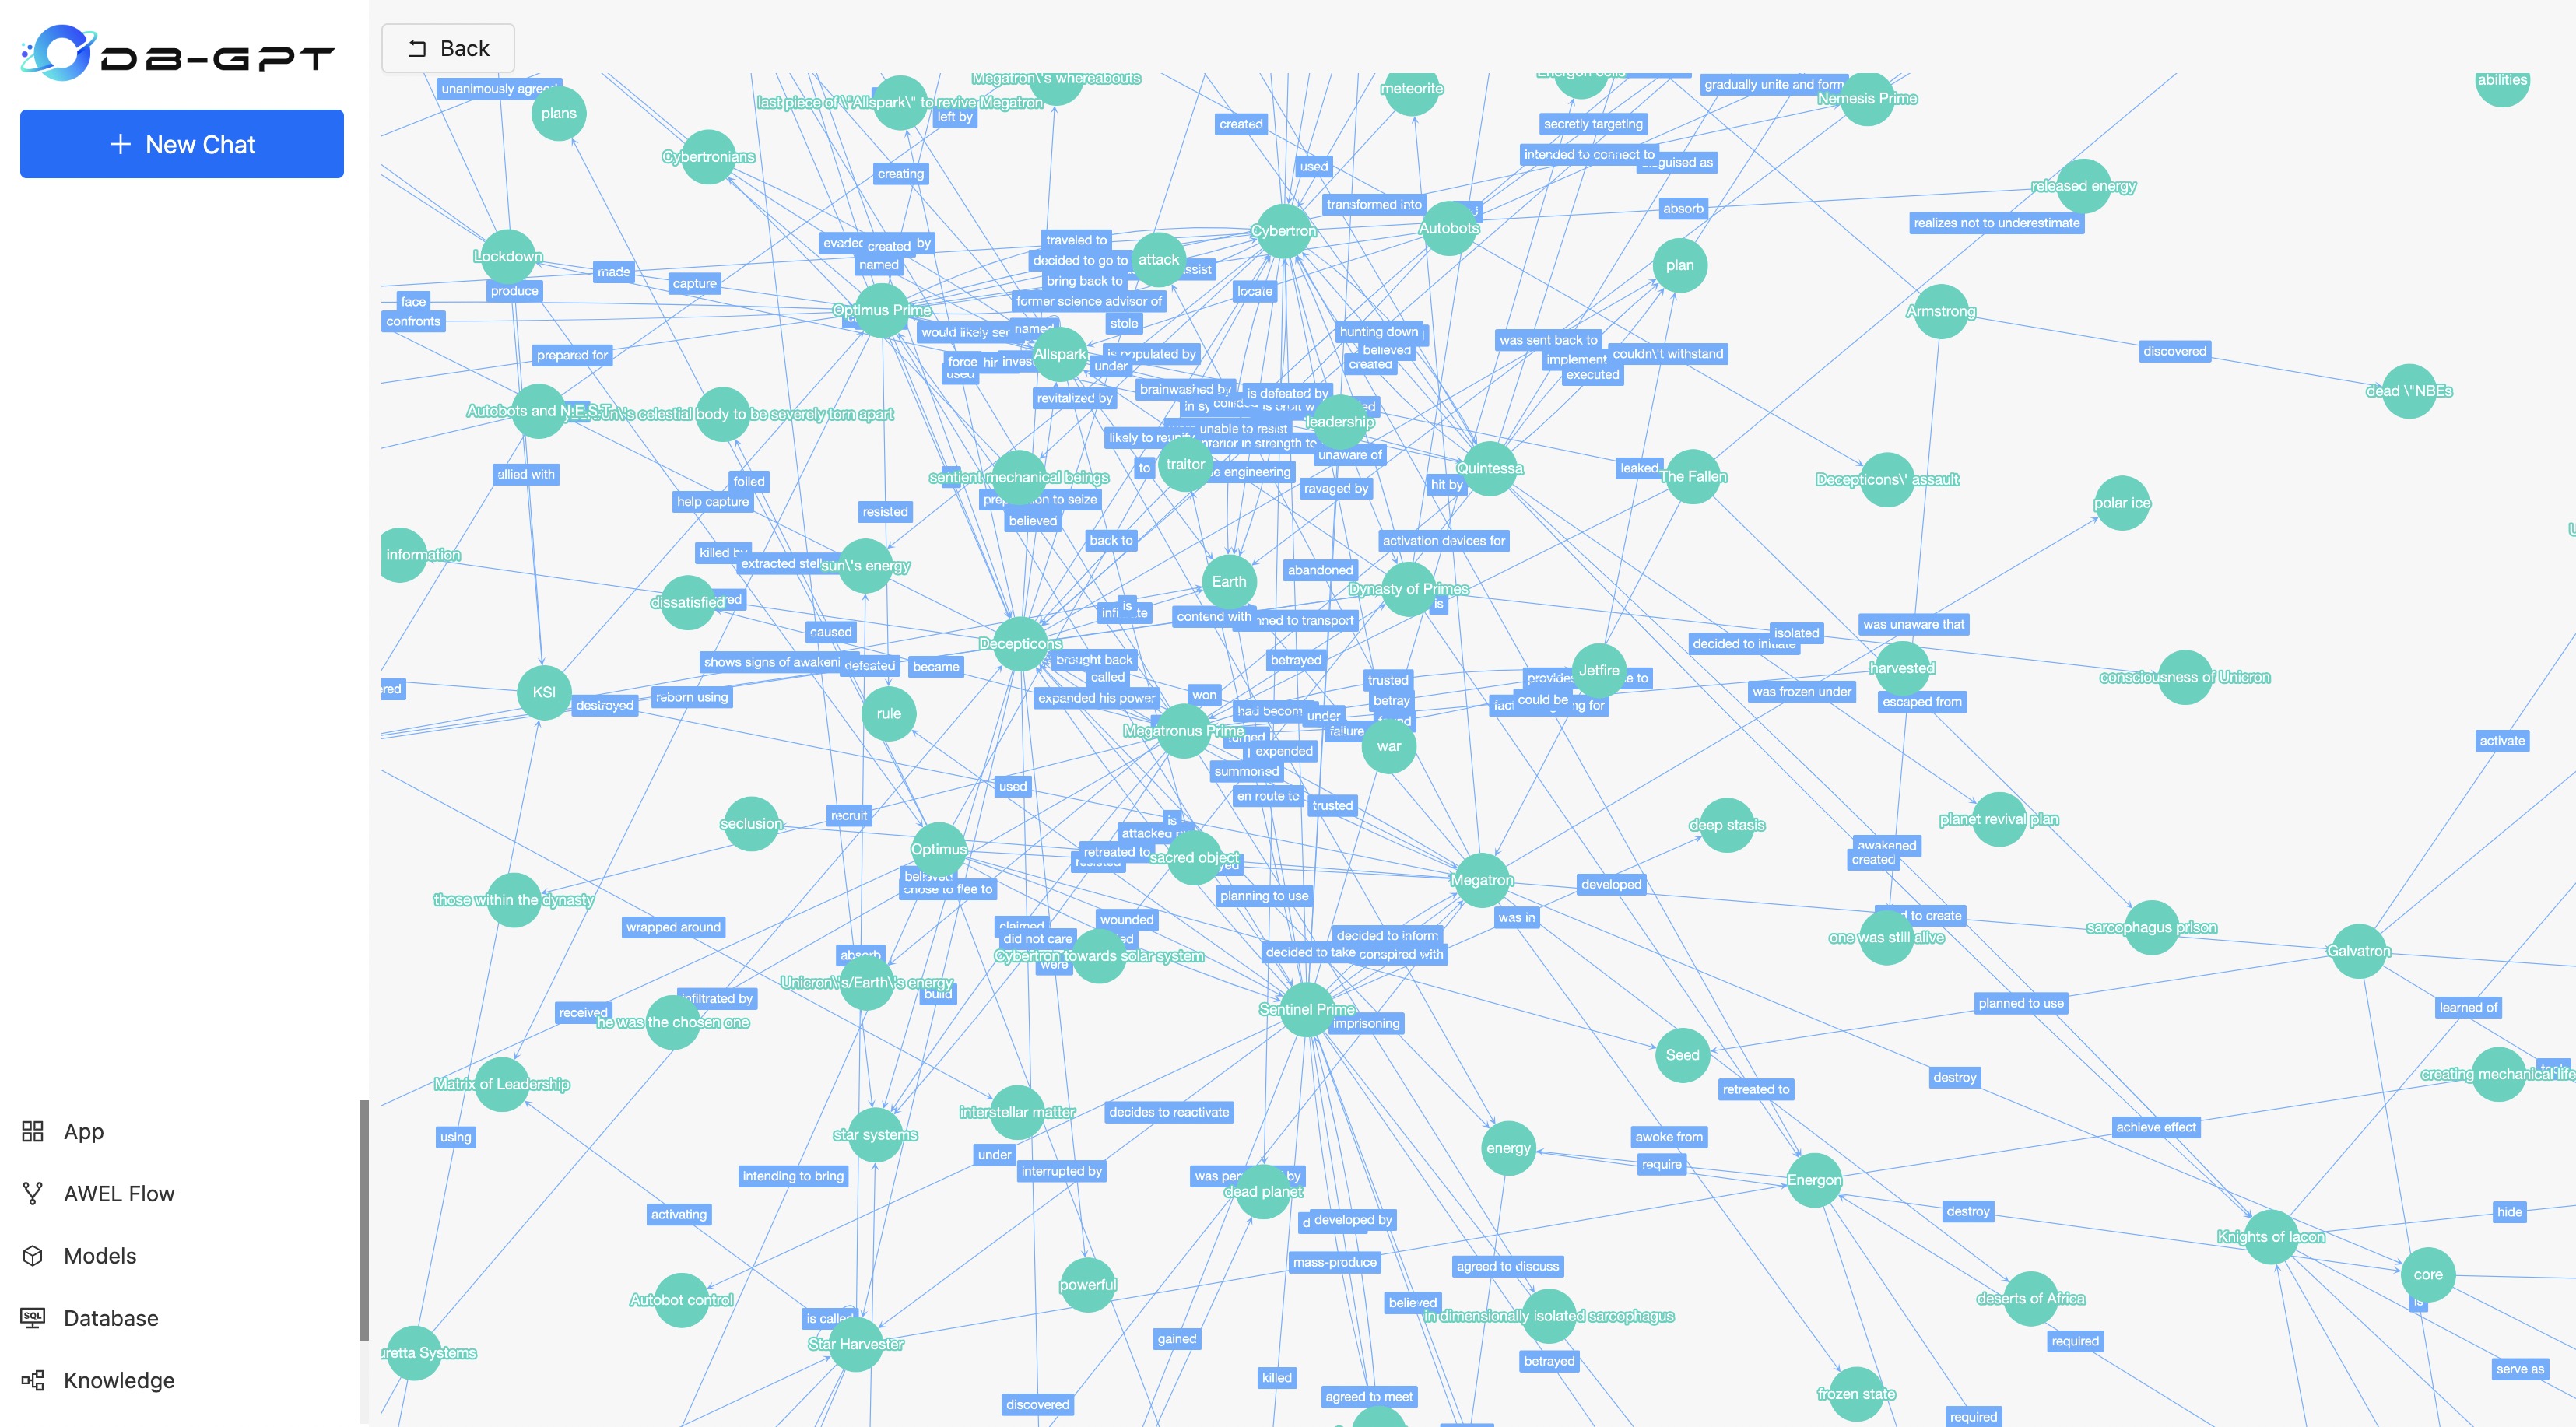
- 构建成功后显示知识图谱关系
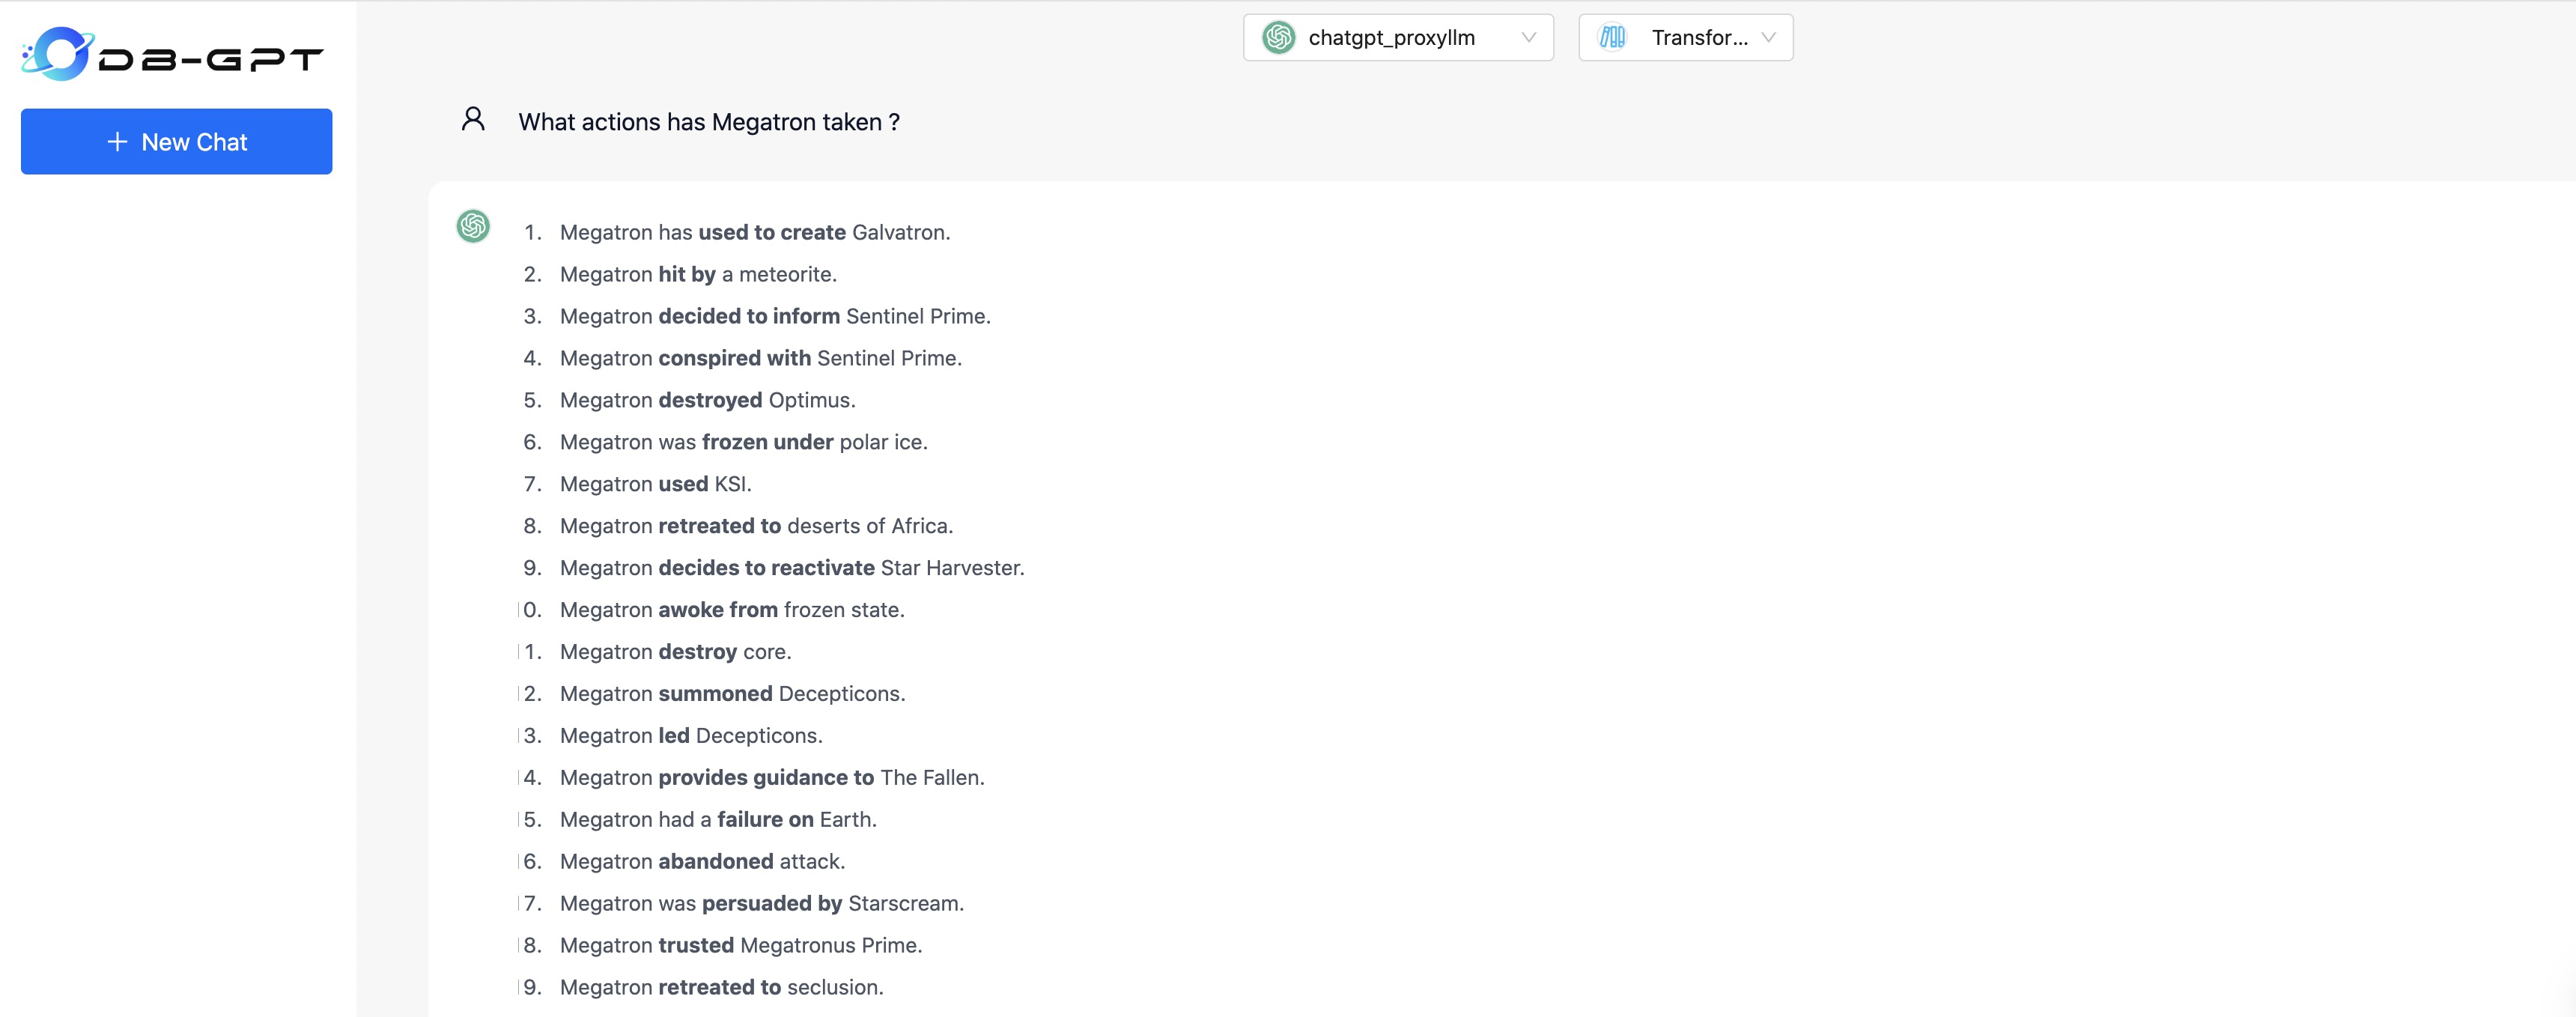
- 使用知识图谱进行问答
更多教程:https://docs.dbgpt.site/docs/latest/cookbook/rag/graph_rag_app_develop
2. DB-GPT 支持 ollama 部署本地模型服务
使用步骤:
- 安装ollama https://ollama.com/
- 拉取模型
ollama pull qwen:0.5b
- 拉取embedding模型
ollama pull nomic-embed-text
- 安装python-ollama
pip install ollama
- 在
.env配置环境
LLM_MODEL=ollama_proxyllmPROXY_SERVER_URL=http://127.0.0.1:11434PROXYLLM_BACKEND="qwen:0.5b"PROXY_API_KEY=not_usedEMBEDDING_MODEL=proxy_ollamaproxy_ollama_proxy_server_url=http://127.0.0.1:11434proxy_ollama_proxy_backend="nomic-embed-text:latest"
- 启动服务
python dbgpt/app/dbgpt_server.py
- Agent模块重构
- Agent核心模块重构
- 根据论文 《A survey on large language model based autonomous agents》 将
Agent模块代码重构为四个核心模块
- 根据论文 《A survey on large language model based autonomous agents》 将
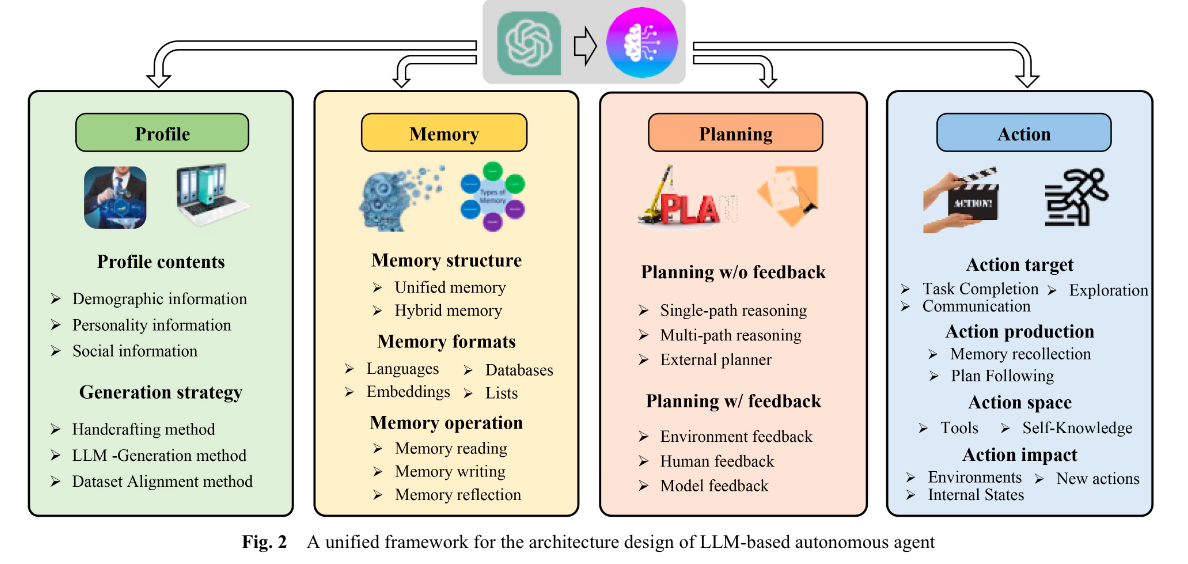
- 更灵活的 `Profile` 模块实现,支持从环境变量、数据库和其他实现创建 agent profiles- 支持多种memory模式,`sensory memory`, `short-term memory`, `long-term memory` and `hybrid memory`
Agent Resource模块重构- 将插件模块和资源模块重构为统一的资源模块。
- Agent中有多种
Resource类型,包括database, knowledge, tool, pack等。另外,资源的集合是一种特殊类型的资源,称为Resource Pack。 - 支持从
dbgpts中安装资源,例如使用下面命令安装一个简单计算器工具<font style="color:rgb(31, 35, 40);">dbgpt app install simple-calculator-example -U</font>
参考代码示例: examples/agents
4.**ChatKnowledge**支持**rerank**模型,同时支持将**rerank**模型发布成服务
下载模型并在在.env文件设置模型参数并重启服务
## Rerank modelRERANK_MODEL=bge-reranker-base## If you not set RERANK_MODEL_PATH, DB-GPT will read the model path from EMBEDDING_MODEL_CONFIG based on the RERANK_MODEL.# RERANK_MODEL_PATH=## The number of rerank results to returnRERANK_TOP_K=3
将rerank模型发布成服务
dbgpt start controller --port 8000dbgpt start worker --worker_type text2vec \--rerank \--model_path /app/models/bge-reranker-base \--model_name bge-reranker-base \--port 8004 \--controller_addr http://127.0.0.1:8000
5.支持Qwen110b
6.支持 DeepSeek proxy LLM
使用步骤:
1.修改 .env 模型配置
LLM_MODEL=deepseek_proxyllmDEEPSEEK_MODEL_VERSION=deepseek-chatDEEPSEEK_API_BASE=https://api.deepseek.com/v1DEEPSEEK_API_KEY={your-deepseek-api-key}
- 创建
test_proxyllm.py并使用DeepseekLLMClient
import asynciofrom dbgpt.core import ModelRequestfrom dbgpt.model.proxy import DeepseekLLMClient# You should set DEEPSEEK_API_KEY to your environment variablesclient = DeepseekLLMClient()print(asyncio.run(client.generate(ModelRequest._build("deepseek-chat", "你是谁?"))))
- 运行
DEEPSEEK_API_KEY={your-deepseek-api-key}python test_proxyllm.py
7.支持 Yi-1.5 LLM
修改 .env 文件
# [Yi-1.5-34B-Chat](https://huggingface.co/01-ai/Yi-1.5-34B-Chat)LLM_MODEL=yi-1.5-6b-chat# [Yi-1.5-9B-Chat](https://huggingface.co/01-ai/Yi-1.5-9B-Chat)LLM_MODEL=yi-1.5-9b-chat# [Yi-1.5-6B-Chat](https://huggingface.co/01-ai/Yi-1.5-6B-Chat)LLM_MODEL=yi-1.5-34b-chat
8.重构**Chroma**向量数据库模块
9.支持**Elasticsearch**作为向量数据库
10.**ChatKnowledge** 支持 Excel
🐞 Bug 修复
- 修复在
**EmbeddingRetriever**使用**CrossEncoderRanker**问题 - 修复 app pydantic error
- 支持 milvus autoflush 特性, 替换掉手动flush
✨**官方文档地址**
:::color2 英文
:::
:::color2 中文
:::
✨**致谢**
感谢所有贡献者使这次发布成为可能!@Aries-ckt, @FOkvj, @GITHUBear, @IamWWT, @JamesBonddu, @fangyinc, @fanzhidongyzby, @ivanzhu109, @jsRuner and @yyhhyyyyyy
✨**附录**

若有收获,就点个赞吧
0 人点赞
